

| Style | Group / Acro Yoga |
| Level | Beginner to Intermediate |
| Duration | 20 to 45 minutes per session |
| Props Needed | 4 yoga mats, flat open floor space |
| Best Time | Morning or early afternoon when everyone is alert |
| Avoid If | Recent wrist, shoulder, or knee injury; balance conditions without medical clearance |
| Disclaimer: This article is for informational and educational purposes only. It does not constitute medical advice. Always consult a qualified healthcare provider before starting a new exercise, nutrition, or wellness program. |
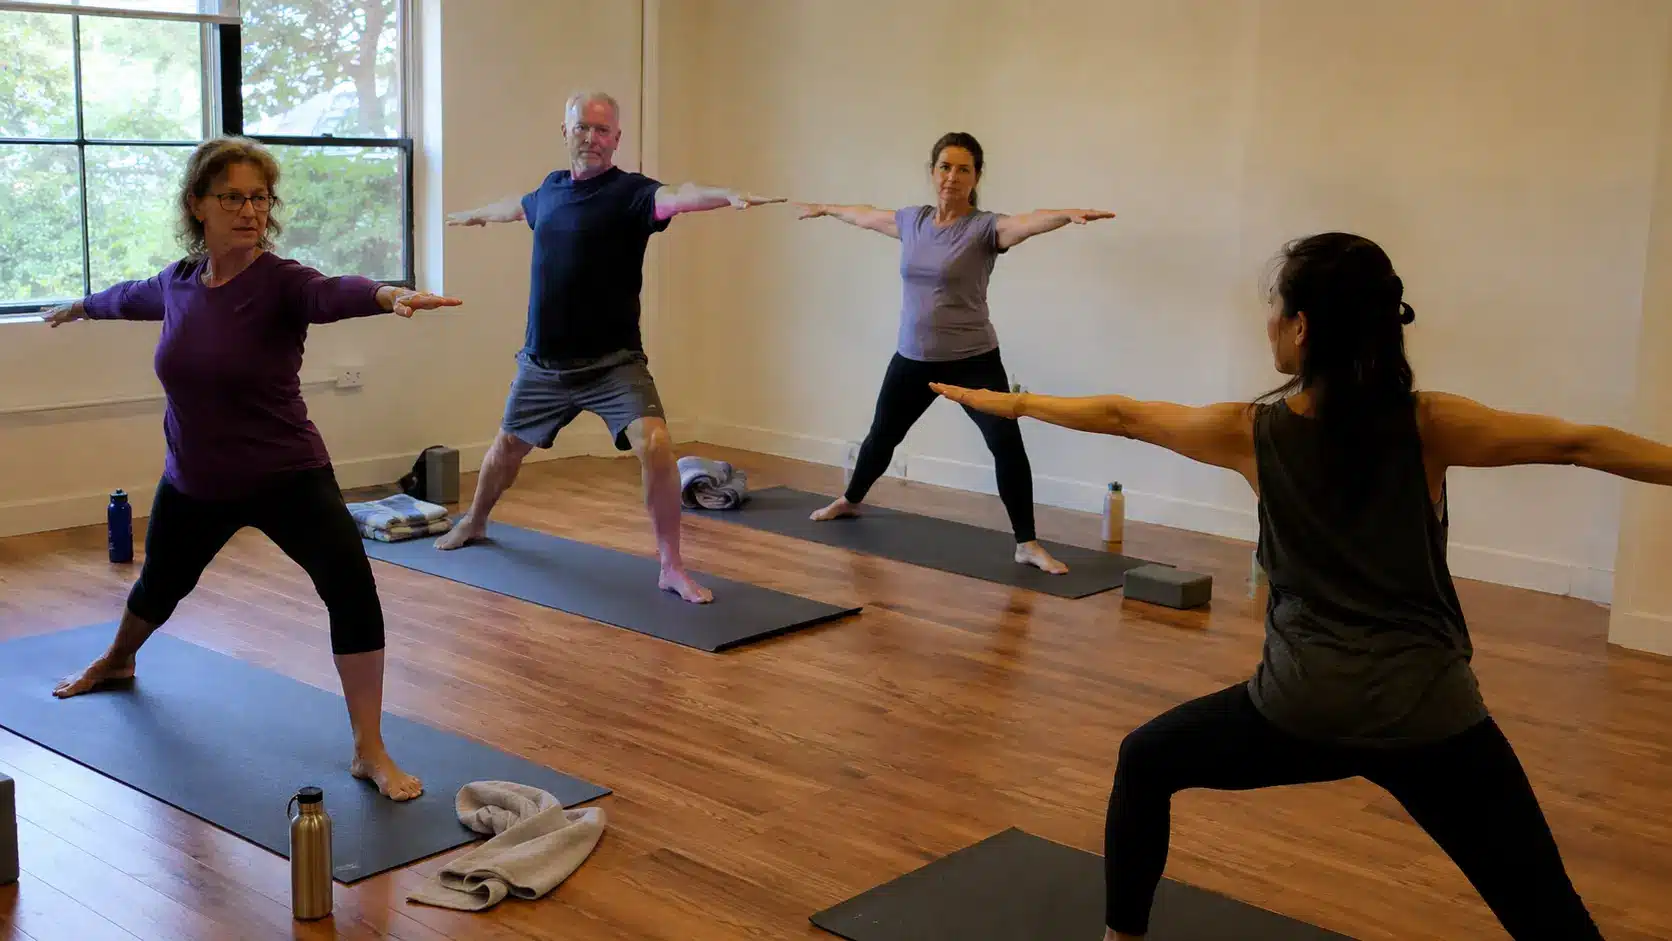
Four person yoga poses work differently from anything you will try on your own mat. I discovered this the first time I brought a small group together at the end of a workshop: the moment four people moved into a shared shape, something shifted.
The room got quieter, more focused, and then completely erupted in laughter when the boat pose tilted sideways on the first try. That mix of focus and playfulness is exactly what makes group yoga worth trying with friends, family, a school group, or a team.
You do not need advanced yoga skills to start. What you need is clear space, a few poses matched to your group’s confidence level, and one person willing to count out loud. These nine 4 person yoga poses move from gentle floor shapes to standing balance work, with a few photo-friendly options along the way.
What Group Yoga Actually Builds
Before getting into the poses, it is worth understanding what changes when four people practice together instead of solo.
The physical benefits are real: shared support in balance poses improves proprioception (the body’s sense of its own position in space) while poses like Plank Box and Chair Train build core and leg endurance through timed holds.
Seated stretches like Flower Fold allow a deeper hip and hamstring opening than most people can reach alone, because light body weight from a neighbour’s proximity encourages the hips to settle further.
The less obvious benefit is what happens to attention. In my classes, students who struggle to hold Tree Pose for ten seconds on their own often hold it for twenty or thirty when a hand connects to a neighbour’s.
Shared focus is a genuine stabilizer. Group yoga also demands a kind of communication most people skip in solo practice: you have to signal when you are ready, say when something feels wrong, and agree on timing before every move.
Groups who want to explore this dynamic on a smaller scale often find that partner yoga poses help build that baseline trust before moving into a four-person setup.
The National Center for Complementary and Integrative Health notes that yoga is generally safe when practiced with proper guidance, but that learning complex movements without instruction raises injury risk. For group poses, that guidance starts with assigning clear roles before each shape.
How to Pick the Right 4 Person Yoga Pose for Your Group
The single most important factor is the least confident person in the group. In group yoga, the pose should fit everyone, not just the most experienced.
If one person is hesitant about balance, choose a floor pose and come back to standing shapes later. If one person has a wrist concern, skip plank variations entirely for that session.
Assign three roles before every session: one person counts, one person watches spacing between bodies, and one person serves as the reset caller, meaning they say “reset” if anything feels unstable and the group stops without question. This keeps the session organized and removes the hesitation that causes most group yoga falls.
Start on the floor. Move to standing only after the group has done at least two seated poses with steady timing. Groups new to this format often benefit from working through three person yoga poses first, since the smaller group size makes timing and spacing easier to manage before scaling to four.
Four Person Yoga Poses to Try
These poses move from beginner floor shapes to moderate standing work to one advanced option. You can run through all nine in a 40-minute session or pick three, one seated, one standing, and one for photos, for a shorter practice.
1. Seated Circle Stretch

This is the first pose I use to open every group session, and for good reason. Everyone stays close to the ground, which removes the stress of balance from the equation entirely.
The group learns to breathe together, feel the spacing between bodies, and develop the shared timing they will need for everything that follows. Hip flexors and inner thighs open gradually without any forcing.
How to do it:
- Sit upright in a circle on your mats with a small gap between each person.
- Open your legs naturally without forcing the stretch.
- Reach one hand toward the center and the other toward the person beside you.
- Keep your spine long and your shoulders relaxed.
- Take five slow breaths together, exhaling on the same count.
- Return your hands to your knees and sit back upright.
This pose works as both a warm-up opener and a reset between harder shapes. Any time the group needs to slow down and reconnect, come back here.
2. Four-Way Boat Pose

Four-Way Boat Pose adds core engagement while keeping the mood light. The shared foot connection in the center acts as a feedback point: if one person’s feet lose contact, everyone notices immediately and adjusts.
That sensory connection is useful before the group attempts standing balance work. Hip flexors and deep abdominals take the load here.
How to do it:
- Sit facing the center with your knees bent.
- Lift your feet slowly toward the middle.
- Touch soles lightly with the others at the center.
- Keep your chest lifted and your back long, not rounded.
- Hold hands only if the group needs extra support.
- Stay for 5 to 10 seconds, then lower your feet slowly together.
| Instructor Tip: In my classes, I cue students to press their feet gently into each other rather than just touching them. That small pressing action activates the core more effectively and gives everyone a clearer sense of where the group’s center is. |
3. Back-to-Back Square

Back-to-Back Square is a posture pose rather than a strength or balance challenge. The light back-to-back contact gives each person a reference point for where upright actually feels like, which is more useful than it sounds.
Most people sit with a slight forward slump until they feel someone else’s spine against their own. Use this between more active poses to let the group settle and reset their breathing.
How to do it:
- Sit back-to-back with the other three people in a square shape.
- Cross your legs or keep them in a relaxed seated position.
- Rest your hands on your knees.
- Lengthen your spine without pressing hard into anyone.
- Relax your shoulders away from your ears.
- Take five slow breaths together, pausing at the top of each inhale.
4. Plank Box

Plank Box is where the session shifts toward real physical work. Each person holds their own plank independently while facing inward toward the group’s center. Wrists, forearms, shoulders, and core all work.
The square formation means each person can see the others, which makes it easier to hold the same timing and notice if someone needs to come down.
How to do it:
- Place four mats in a square, each person facing the center.
- Start on your hands and knees with wrists directly under your shoulders.
- Step one foot back, then the other, into a full plank position.
- Keep your hips level with your body, not raised or dropped.
- Engage your core and keep your neck neutral, eyes toward the center.
- Hold for 5 to 10 seconds, then lower your knees to the mat together on the same count.
Modification for beginners: Lower to your forearms instead of keeping full arm extension. This reduces wrist load significantly while still working the core and shoulders. Anyone with a wrist concern can also refer to carpal tunnel exercises to understand which wrist positions to keep neutral during floor work.
5. Tree Pose Square

Tree Pose Square brings balance work into the group for the first time. The light hand connection between people provides just enough proprioceptive feedback to stabilize the standing leg without doing the work for anyone.
Students who cannot hold solo Tree Pose for more than a few seconds often find they can hold it for a full breath cycle with this connection. The hip abductors and glute medius on the standing side take the primary load.
How to do it:
- Stand in a square or small circle, facing the center of the group.
- Place one foot on your ankle or calf, keeping it away from the knee joint.
- Lightly hold hands or touch shoulders with the people beside you.
- Fix your gaze on a point slightly ahead and below center, not up at the ceiling.
- Hold for three slow breaths, then lower and switch sides.
Note on foot placement: Never place the raised foot directly against the knee joint. The ankle or mid-calf are both safe options. The knee is not.
6. Warrior Circle

Warrior Circle creates a strong visual shape while keeping each person grounded independently. Because everyone faces outward, the back hand of each person reaches toward the center and naturally finds the hand of the person behind them.
The front leg demands the most from the quadriceps and glutes, while the open arms work the chest and shoulders. Those who want to develop more range in this shape on their own time often use yoga mobility routines between group sessions to improve hip and thoracic flexibility.
How to do it:
- Stand in a circle facing outward, equally spaced.
- Step one foot forward into a wide stance.
- Bend your front knee into a Warrior II position, knee tracking over the second toe.
- Stretch both arms wide, parallel to the floor.
- Let your back hand reach toward the center of the circle and lightly meet the hands of those beside you.
- Hold for 10 to 15 seconds, then step back to standing and switch sides.
This is one of the best 4 person yoga poses for photos because the outward-facing shape reads clearly from above and from the side. Take photos after the group has held it once and found their footing, not on the first attempt.
7. Chair Train

Chair Train turns a simple chair pose into a coordination exercise that most groups find unexpectedly hard. The challenge is not the squat itself but synchronizing the descent and rise with three other people while staying in contact.
The person at the front of the line has no hands on their shoulders, so they set the pace. Everyone else follows their timing. Quadriceps and glutes do most of the work; the shoulder touch provides a light stability cue rather than real support.
How to do it:
- Stand in a single-file line, each person facing the same direction.
- Place your hands lightly on the shoulders of the person in front of you.
- Keep your feet hip-width apart.
- The front person counts: “Three, two, one, down.”
- Bend your knees and sit your hips back together, aiming for thighs parallel to the floor.
- Hold for 5 seconds, then rise on the same count.
8. Flower Fold

Flower Fold is the most photogenic pose in this list and also one of the most effective hip and hamstring openers. From directly above, the group creates a four-petal shape that photographs well without requiring any balance skill or strength.
The forward fold allows gravity to do the work over 10 to 20 seconds, giving the hip flexors and hamstrings time to release. It also works well as a cool-down or closing pose. Groups looking for similarly low-effort recovery shapes between harder sessions often incorporate restorative yoga poses into their cool-down rotation.
How to do it:
- Sit in a circle with feet pointing toward the center, legs open in a wide V shape.
- Place your hands on the floor in front of you.
- Fold forward slowly from the hips, not the lower back.
- Keep your neck relaxed and let your head drop naturally.
- Hold for 10 to 20 seconds, breathing slowly.
- Walk your hands back and sit upright together.
If hamstrings are tight, a folded blanket under the hips brings the pelvis into a better tilt and makes the fold more accessible without strain.
9. Low Pyramid

Low Pyramid introduces the idea of shared weight and supported structure that defines true acro yoga, but it keeps everything close to the floor. This is the only pose in this list where two people provide a base and two people place weight on that base.
Because the pose stays low, the consequences of a wobble are minimal. I only introduce this one after a group has worked through several of the poses above and feels genuinely settled. Groups wanting to take this further can progress through dedicated acro yoga beginner poses once the floor pyramid feels controlled.
How to do it:
- Choose two people to kneel side by side as the base on padded mats, hands and knees shoulder-width apart.
- The base partners keep their backs flat and their core lightly engaged, not arched or rounded.
- The other two people position themselves beside or just behind the base partners.
- Place hands lightly on the upper backs of the base partners, distributing weight evenly across both hands.
- Hold for only a few seconds, not more than five on the first attempt.
- Release and come down slowly together before the base partners shift position.
| Safety Note: Weight should never travel toward the neck, lower back, or tailbone of the base partners. If you feel pressure in either of those areas, stop and readjust before continuing. This pose should only be attempted when everyone in the group feels confident and ready to reset at any moment. |
Which Poses Fit Your Group Best
Picking the right starting pose saves time and keeps the group’s confidence high. The table below maps group type to the poses most likely to work on a first session.
| Group Type | Best Starting Poses | Why They Work |
|---|---|---|
| Beginners and mixed ability | Seated Circle Stretch, Back-to-Back Square | Low, calm, and easy to follow from any starting point |
| Friends taking photos | Warrior Circle, Flower Fold | Clean shapes that read well from multiple camera angles |
| Fitness and active groups | Plank Box, Chair Train | Adds genuine strength and coordination demand |
| Team-building sessions | Tree Pose Square, Four-Way Boat Pose | Requires communication, trust, and shared timing |
| Confident and experienced groups | Low Pyramid | Introduces shared weight with a controlled, low-risk setup |
Use this as a starting point, not a fixed rule. Groups often surprise themselves. A team that begins with Seated Circle Stretch may be ready for Tree Pose Square within twenty minutes.
Modifications for Different Ability Levels
One of the things I appreciate most about group yoga is that almost every pose has a quieter version for people who need it and a more demanding version for people who want more challenge. You do not have to run two separate sessions.
- For limited mobility or beginners: Keep all poses on the floor for the entire session. Seated Circle Stretch, Back-to-Back Square, Four-Way Boat Pose, and Flower Fold form a complete 20-minute practice with no standing required. For Plank Box, allow the forearm modification described above.
- For intermediate groups: Extend hold times by five seconds on each pose. In Warrior Circle, deepen the front knee bend toward 90 degrees. In Tree Pose Square, move the raised foot from the ankle to the mid-calf.
- For advanced groups: Add synchronized breathing cues to every pose, inhaling together and exhaling together on a count. This increases the demand on focus and body awareness without adding physical risk.
For Low Pyramid, try a second slow hold with the upper partners leaning their weight forward slightly more than on the first attempt. Groups who want a dedicated kids-appropriate version of group poses will find that the kid yoga group poses page covers safe scaling for younger participants.
How to Build a Short Group Yoga Routine

A 30 to 40 minute group session does not need to be complicated. The structure below works for almost any group type and can be adjusted by swapping in the poses that fit your group’s level.
- Warm-Up (5 to 8 minutes): Seated Circle Stretch and Back-to-Back Square. Let the group settle, breathe together, and get familiar with the spacing between bodies. Do not rush this part.
- Floor Work (8 to 10 minutes): Four-Way Boat Pose, held twice with a short rest between. Then Flower Fold as a hip opener. This builds core awareness and begins the transition toward more active work.
- Standing Poses (10 to 12 minutes): Tree Pose Square on both sides, then Warrior Circle on both sides. One person counts for each hold. Rest between poses, not during them.
- Strength Option (5 to 8 minutes, for active groups): Plank Box and Chair Train. Keep holds short on the first attempt. Two rounds of each is enough.
- Cool-Down and Closing (5 minutes): Return to Seated Circle Stretch. Take five slow breaths together. This mirrors the opening and gives the session a clear sense of beginning and end, which matters more in group practice than in solo yoga.
Groups who want to expand beyond this structure into a longer personal practice will find that yoga challenge programs provide a structured week-by-week framework that complements group sessions well.
Safety Rules for Group Yoga Practice
Group yoga needs more deliberate safety planning than solo practice because one person’s movement affects everyone connected to them. These rules are not optional, especially for groups new to practicing together.
- Warm up wrists, shoulders, hips, and ankles before starting any pose.
- Always begin with floor poses before attempting standing shapes.
- Use mats on a flat, non-slip surface. Never practice on carpet or wet floors.
- Keep first holds short: 5 seconds before trying 10, 10 before trying 20.
- Designate one person to count for each pose, every time.
- Agree on a reset word before the session starts. “Reset” works. Use it without hesitation.
- Stop if anyone feels pain, sudden fear, dizziness, or wrist pressure.
- Never place weight on anyone’s neck, lower back, or tailbone.
- Do not attempt poses seen on social media without first checking whether the group has the prerequisite strength and balance for the base positions involved.
- Choose the pose that fits the least experienced person in the group, not the most experienced.
- Save Low Pyramid for sessions when the group already feels genuinely steady in the standing poses.
- Take photos after the group has found their balance in a pose, not on the first attempt.
Frequently Asked Questions
How much space do you need for group yoga with 4 people?
Four full-size yoga mats arranged in a square, with roughly one foot of clearance around the outside edge, is the minimum space needed. For standing poses like Warrior Circle, the group needs enough room for each person to extend both arms fully without touching anyone else. A 10 by 10 foot clear area is a reliable minimum. Move chairs, bags, and any sharp or hard objects well outside that space before starting.
What is the difference between group yoga and acro yoga?
Group yoga is a broad term for any yoga practice done with two or more people, including seated circles, partner stretches, and shared balance poses. Acro yoga specifically combines yoga postures with acrobatics: one person acts as a grounded base, and another is lifted or supported off the ground. Low Pyramid in this list is the closest to acro yoga, but it stays low to the floor. True acro yoga involves lifts that require specific training and a dedicated spotter, which the beginner acro yoga guide covers in detail.
What should you do if someone loses balance during a group pose?
Stop immediately and reset. No one should grab, pull, or try to force the shape back into position. The person who lost balance steps down, the group pauses, and everyone checks that they feel fine before continuing. If the wobble happened in a standing pose, return to a floor pose before trying the standing shape again. If it happens twice, choose an easier pose for the rest of that session. Balance loss is not a failure; it is a signal that the group needs more time in the progression.
Are 4 person yoga poses good for team building?
Yes, and they work better for team building than most people expect. The reason is that the poses require genuine communication, not just physical proximity. Before each shape, the group has to agree on timing, assign who counts, and establish a clear reset signal. During the hold, everyone has to pay attention to how their movement affects others. After the pose, there is usually a shared moment of either success or laughter. The most effective poses for this purpose are Tree Pose Square, Four-Way Boat Pose, and Chair Train, all of which reward synchronization rather than individual strength. Teams who enjoy structured group movement also tend to do well with group fitness challenge ideas that extend beyond yoga.
How is 4 person yoga different from solo yoga practice?
The most significant difference is that every decision in group yoga affects more than one person. In solo yoga, you can adjust your pose privately, stop without explanation, or hold longer without consequence. In 4 person yoga poses, timing is shared, so one person moving early or holding longer disrupts the whole group. This constraint is also the benefit: it forces a level of attentiveness to others that most people do not practice in solo yoga. For anyone building the individual foundation that group yoga draws on, two person yoga poses offer a useful middle step between solo and four-person practice.
The Bottom Line
Moving through a physical practice with three other people transforms a standard workout into a deeply connected, shared experience.
True success in group yoga comes down to steady communication, clear boundary setting, and a willing progression from the floor up to standing shapes.
By prioritizing the comfort level of your least experienced member and assigning roles beforehand, you eliminate the hesitation that leads to slips.
Practicing these foundational 4 person yoga poses builds incredible core strength, enhances spatial awareness, and fosters a unique sense of mutual trust.
Grab three friends, lay down your mats, and try the Seated Circle Stretch to begin your session. What was your favorite shape? Share your thoughts below!


One Response
testing