| Style | Partner Yoga / Acro Yoga |
| Level | Beginner to Advanced (organized by level) |
| Duration | 20 to 60 minutes per session |
| Props Needed | Two yoga mats, optional folded blanket or yoga strap |
| Best Time | Morning or evening, after a brief warm-up |
| Avoid If | Recent spinal, shoulder, or knee injury; consult a healthcare provider before practicing advanced or acro poses |
| Disclaimer: This article is for informational and educational purposes only. It does not constitute medical advice. Always consult a qualified healthcare provider before starting a new exercise, nutrition, or wellness program. |
Yoga poses for two people work best when both partners are genuinely new to them. I found that out the first time I tried partner yoga with a student who had a very different body and comfort level than I expected.
You wobbled through a seated forward fold, laughed more than we stretched, and left the mat closer than when we walked in. That is the real point of this practice.
This guide covers partner yoga poses organized by level: beginner, intermediate, advanced, acro yoga, and restorative. Each pose includes step-by-step instructions, timing suggestions, and safety notes so you can approach the mat with confidence rather than guesswork.
What is Partner Yoga and Who Is It For?
Partner yoga is a shared movement practice where two people support each other through stretching, balance, and breath. You can practice it with a friend, partner, sibling, parent, or classmate.
The goal is not to replicate the poses in advanced photos online. It is to move safely together, listen clearly, and use your partner’s support in a way that helps both bodies feel steady.
Many yoga poses for two people are simple and grounded, requiring no prior yoga experience. You might sit back-to-back, hold hands through a stretch, or balance side by side.
Harder poses involve lifts or acro shapes, but those should come much later. Start close to the floor, talk often, and stop if anything feels sharp or forced.
Benefits of Yoga Poses for Two People
In my classes, I consistently see partner yoga do something solo practice cannot: it forces people to communicate in real time. You cannot silently power through a pose when someone else is holding you up. That accountability alone shifts the quality of movement.
Beyond the communication piece, two person yoga poses offer:
- Stronger trust: You rely on your partner for support, balance, and steady movement from moment to moment.
- Clearer communication: Simple check-ins help both people know when to pause, adjust, or stop before discomfort becomes pain.
- Better balance feedback: A partner can help you feel your center in standing and seated poses in a way a solo practice rarely does.
- Deeper, safer stretches: Gentle partner support lets you move further into a stretch with more control than you would alone.
- A lighter practice: Wobbling, laughing, and figuring it out together makes yoga feel less like a performance and more like play.
These benefits build most strongly when both partners move slowly and stay focused on each other rather than on how the pose looks. The goal is never to force a deeper shape. It is to create a practice that feels safe, genuinely useful, and enjoyable for both people involved.
How to Communicate Safely During Partner Yoga
Students who struggle most in partner yoga are almost never inflexible. They are uncomfortable asking their partner to stop. Before you begin any session, agree on three things: a word or signal that means “pause or release right now,” how much pressure or contact feels okay, and which poses either partner wants to skip entirely.
During practice, check in at the start of each pose and again after a few breaths. Keep language simple and specific: “a little less pressure,” “I need to come out,” or “ready to switch.” This is not interrupting the flow. It is how partner yoga works safely.
| Instructor Tip: In my classes, I encourage partners to agree on a release word before touching. “Ease” or “space” works well. Simple, calm, and easy to say mid-pose without sounding alarmed. |
Beginner Partner Yoga Poses
Beginner partner yoga poses stay close to the floor or use simple standing support. Start here regardless of your solo yoga experience, because moving with another person introduces a layer of coordination that even experienced practitioners need time to calibrate.
1. Seated Partner Cat-Cow
Difficulty: Easy | Time: 1 to 2 minutes | Rounds: 6 to 8 slow rounds | Best For: Spine warm-up, shoulder mobility
Seated Partner Cat-Cow is the best first pose for two people because both partners stay grounded, stable, and close enough to read each other’s breath and pace. I open almost every partner session with this one.
How to do it:
- Sit cross-legged facing your partner with hips grounded and spine tall before starting.
- Move close enough so your knees are near each other without pressing uncomfortably.
- Hold your partner’s forearms with a soft, steady grip. Keep hands relaxed rather than squeezing.
- Inhale as you gently pull your chest forward and roll your shoulders back. Let the movement open the front of your chest slowly.
- Arch your upper back slightly, keeping your neck long and relaxed. Avoid forcing a deep backbend.
- Exhale as you round your spine and tuck your chin slightly. Let your upper back widen as you move away from your partner.
- Lean back just enough to feel space between your shoulder blades. Keep the movement gentle and controlled.
- Continue moving slowly with each inhale and exhale, matching your pace to your breath rather than rushing.
- Keep the movement smooth and connected to your partner’s breath. Stop if either partner feels strain in the back, shoulders, or neck.
Modification: If sitting cross-legged compresses your lower back, sit on a folded blanket to elevate the hips. For anyone with shoulder tension, shorten the range of movement and keep the forearm grip rather than reaching for the hands.
Avoid if: You have sharp back pain, a recent neck injury, or shoulder pain when holding your partner’s arms.
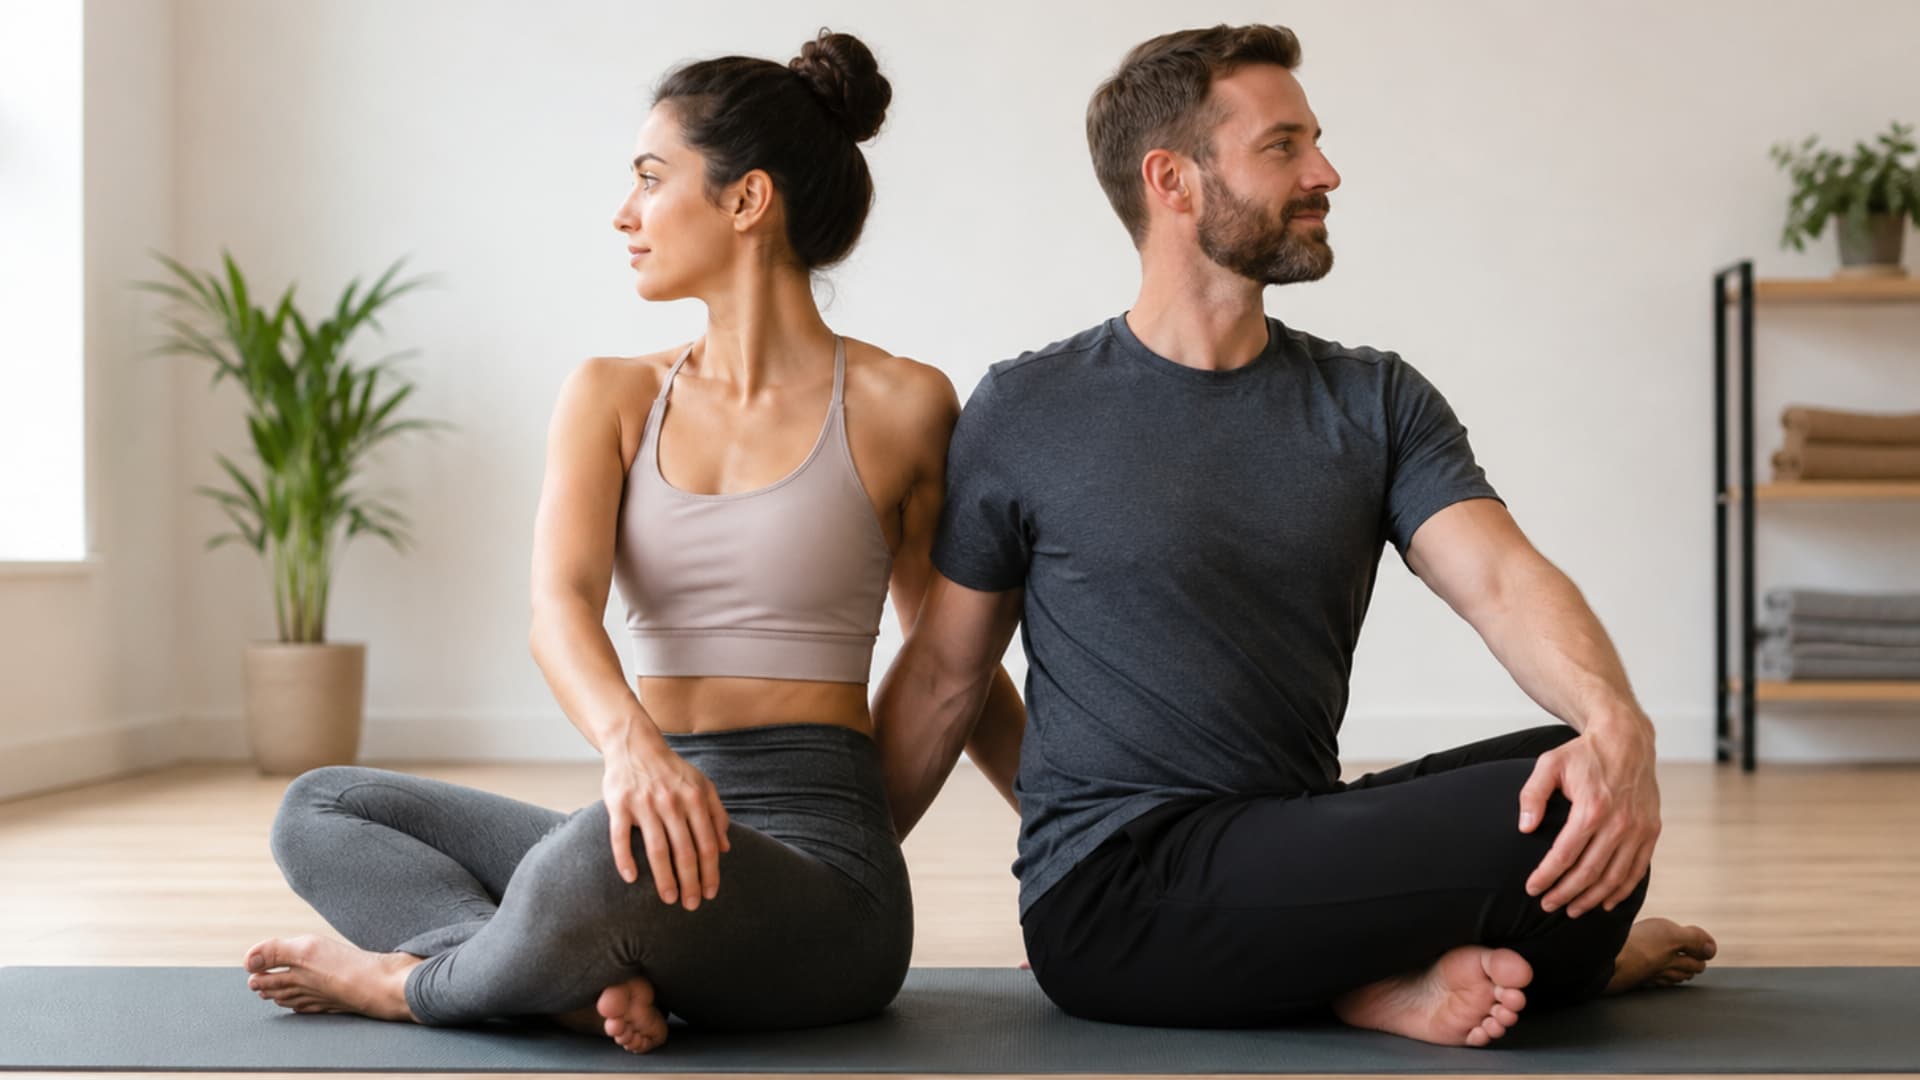
2. Seated Spinal Twist
Difficulty: Easy | Time: 1 to 2 minutes | Rounds: 2 rounds per side | Best For: Spine mobility and gentle warm-up
Seated Spinal Twist is a two person yoga pose that loosens the back without requiring flexibility. Sitting back-to-back also helps both partners keep the spine tall through gentle contact rather than effort alone.
How to do it:
- Sit back-to-back with your partner on a yoga mat. Let your backs touch lightly before you begin, without leaning heavily.
- Cross your legs comfortably or sit on a folded blanket for support. Choose whichever lets your hips and lower back relax.
- Place both hands on your knees. Take a slow breath and notice if both sitting bones feel grounded.
- Exhale slowly and begin twisting to the right, moving from your waist and ribs rather than forcing the neck around.
- Place your right hand on your left knee and your left hand near your partner’s right knee, only if that feels comfortable.
- Stay in the twist for 4 to 5 slow breaths. With each inhale, lengthen the spine. With each exhale, soften gently deeper.
- Return to center on an inhale and repeat on the other side. Keep the pace even and the twist equally gentle on both sides.
Modification: If the cross-legged position causes hip or knee discomfort, extend both legs forward or sit in a chair-height position with knees bent and feet flat on the mat.
Avoid if: You have a recent spinal injury, sharp pain during twists, or have been told to avoid twisting movements.
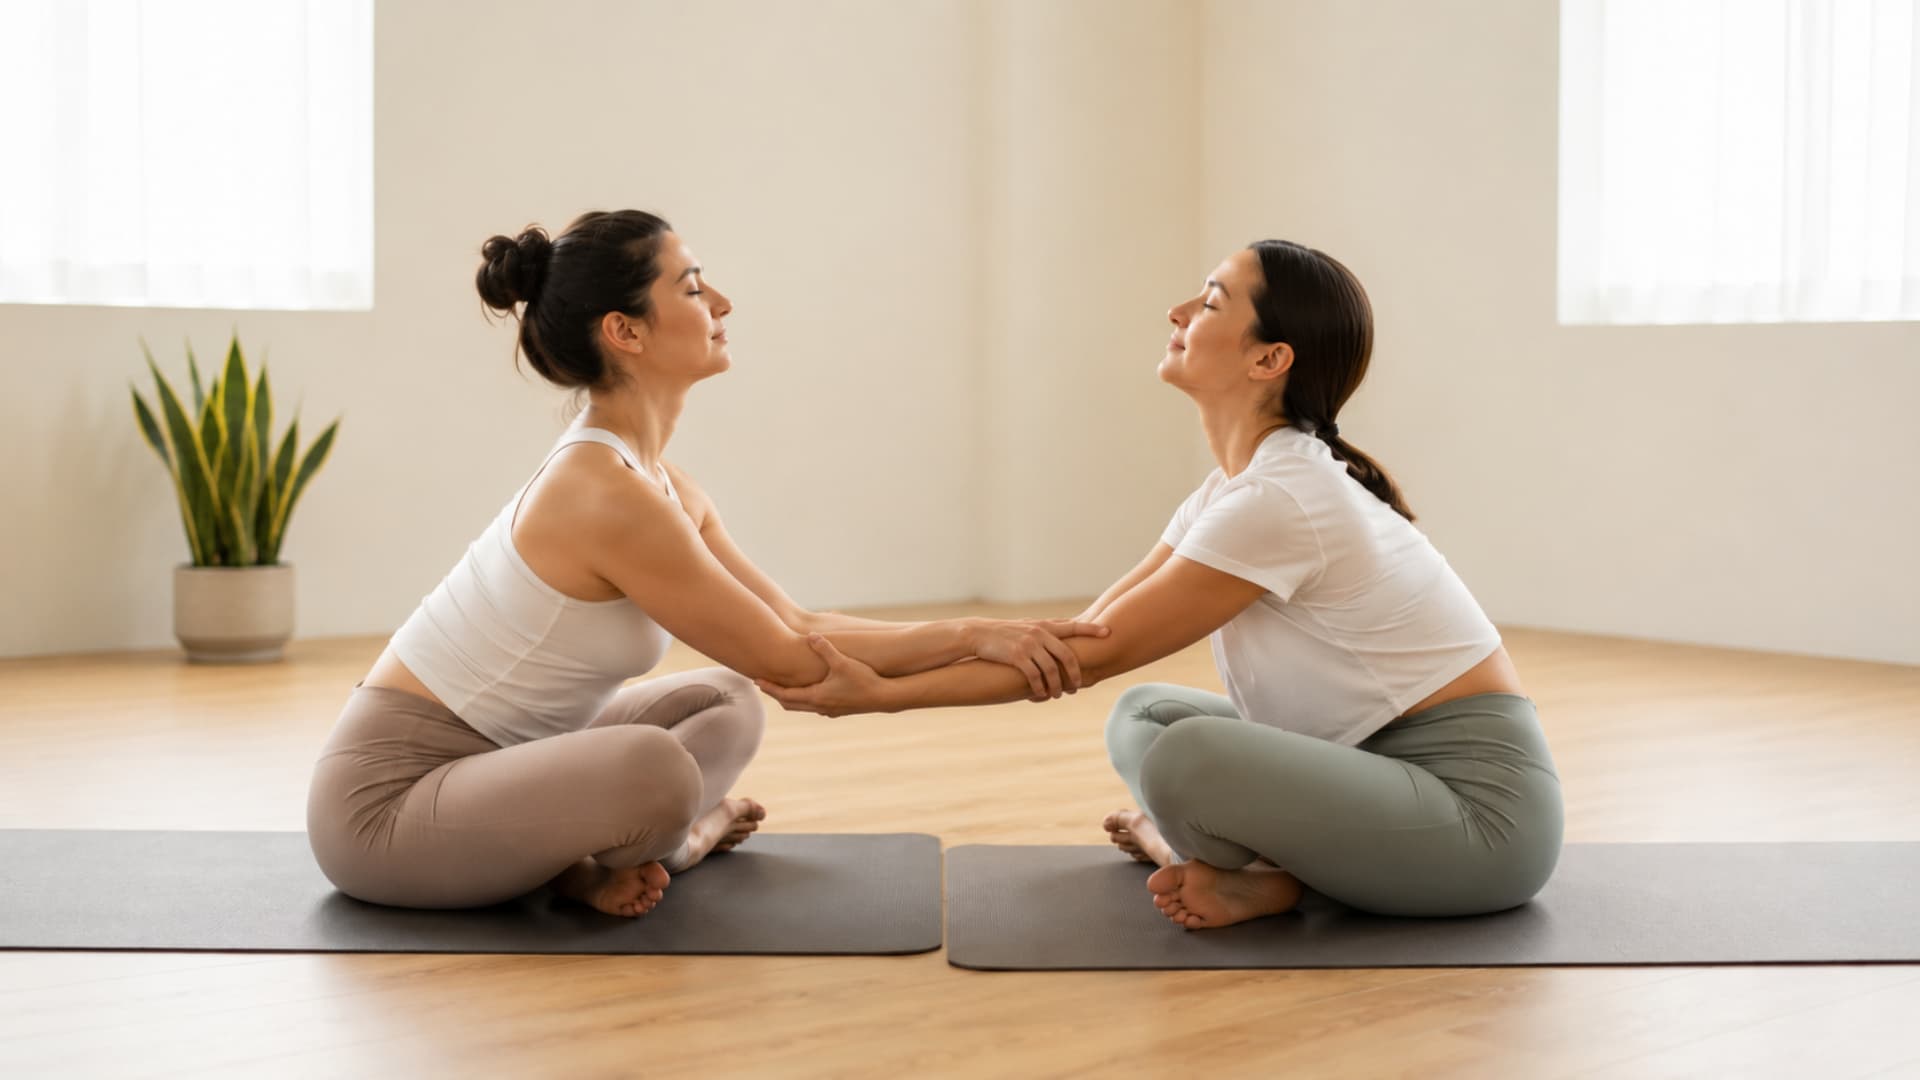
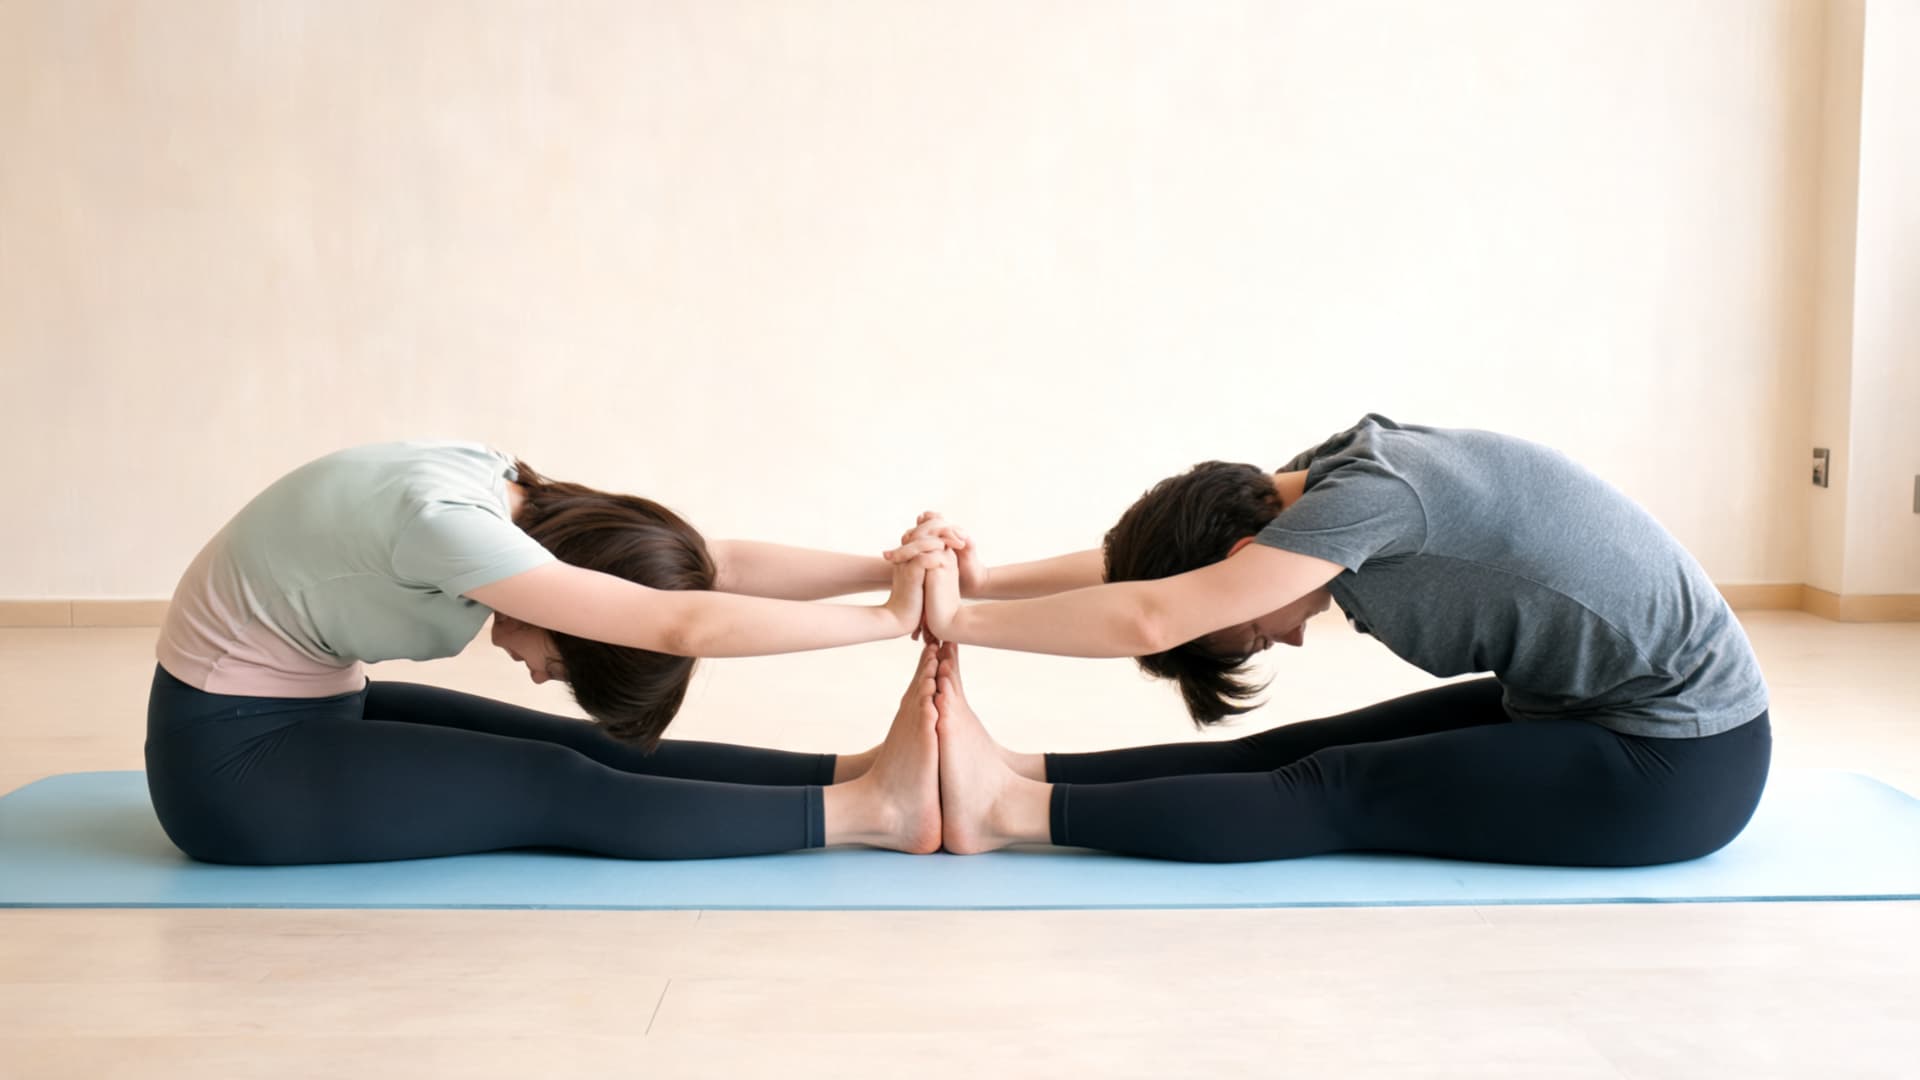
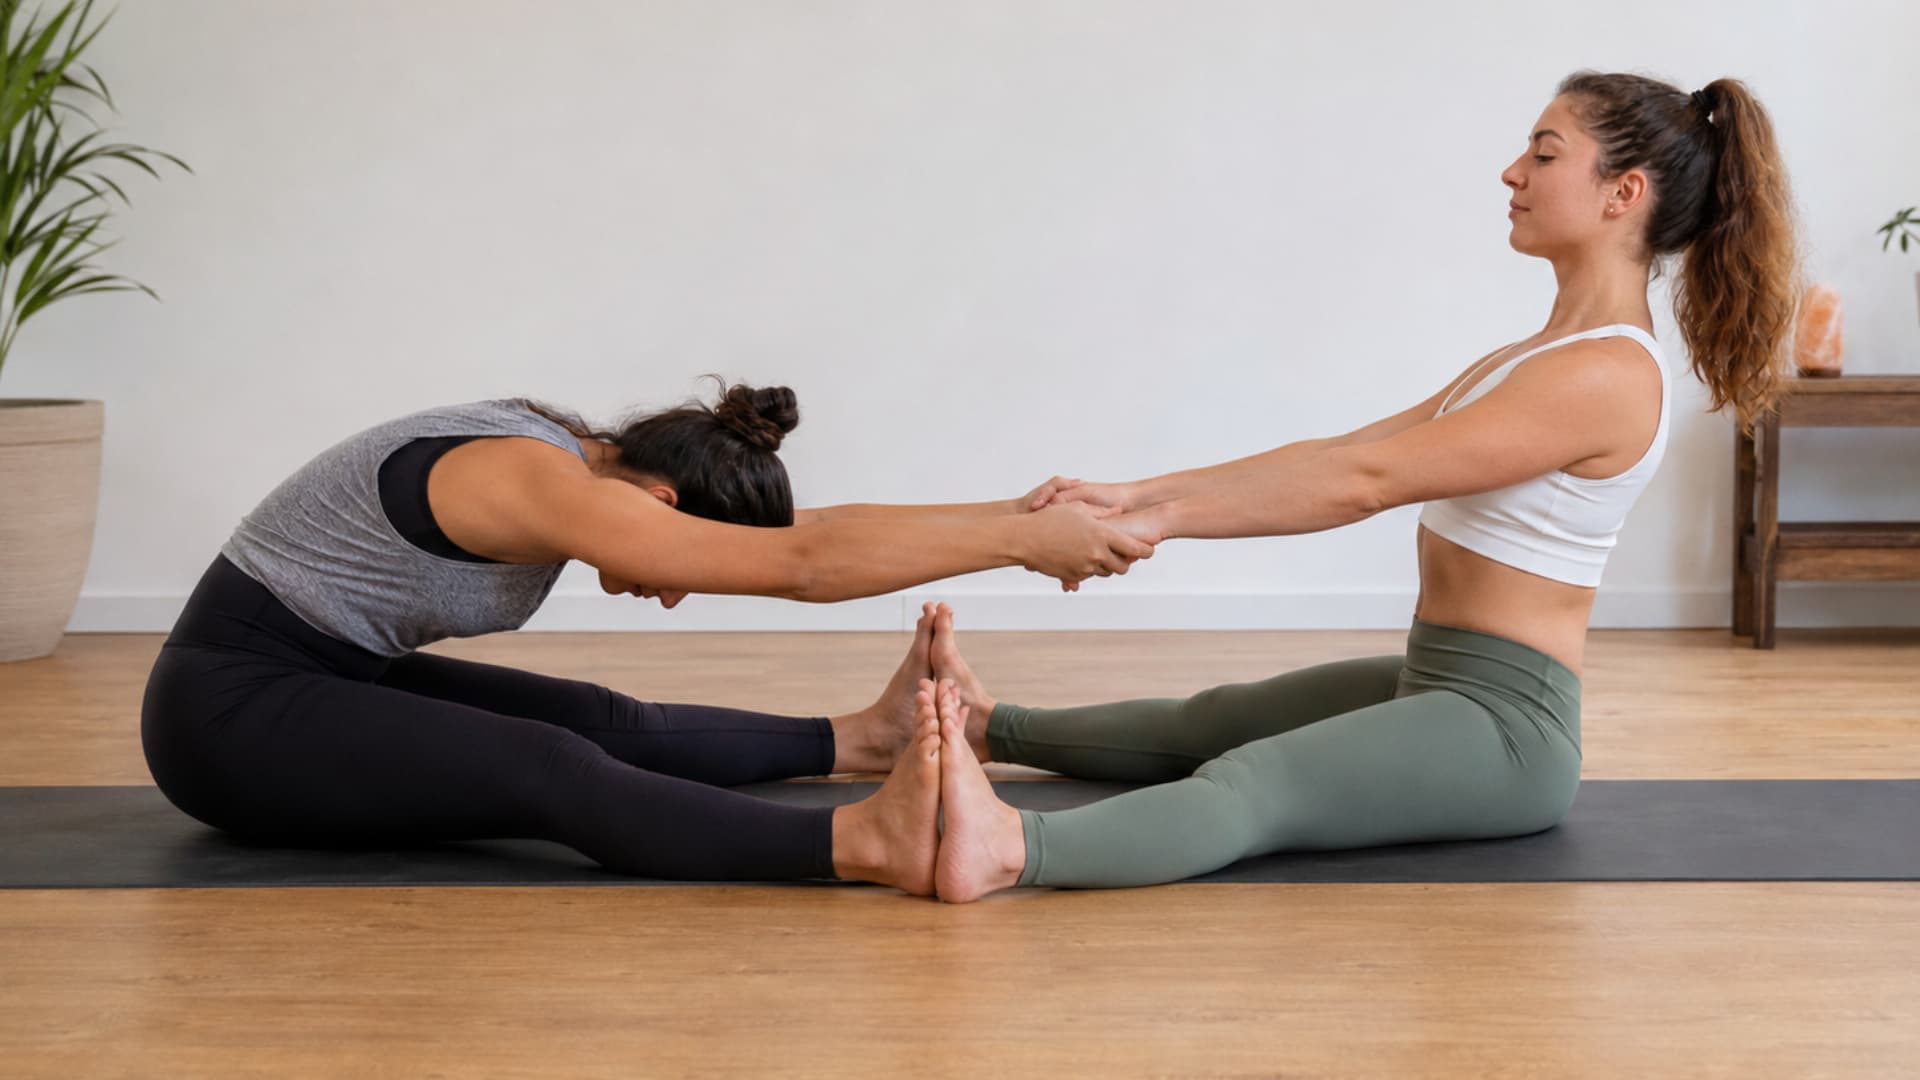
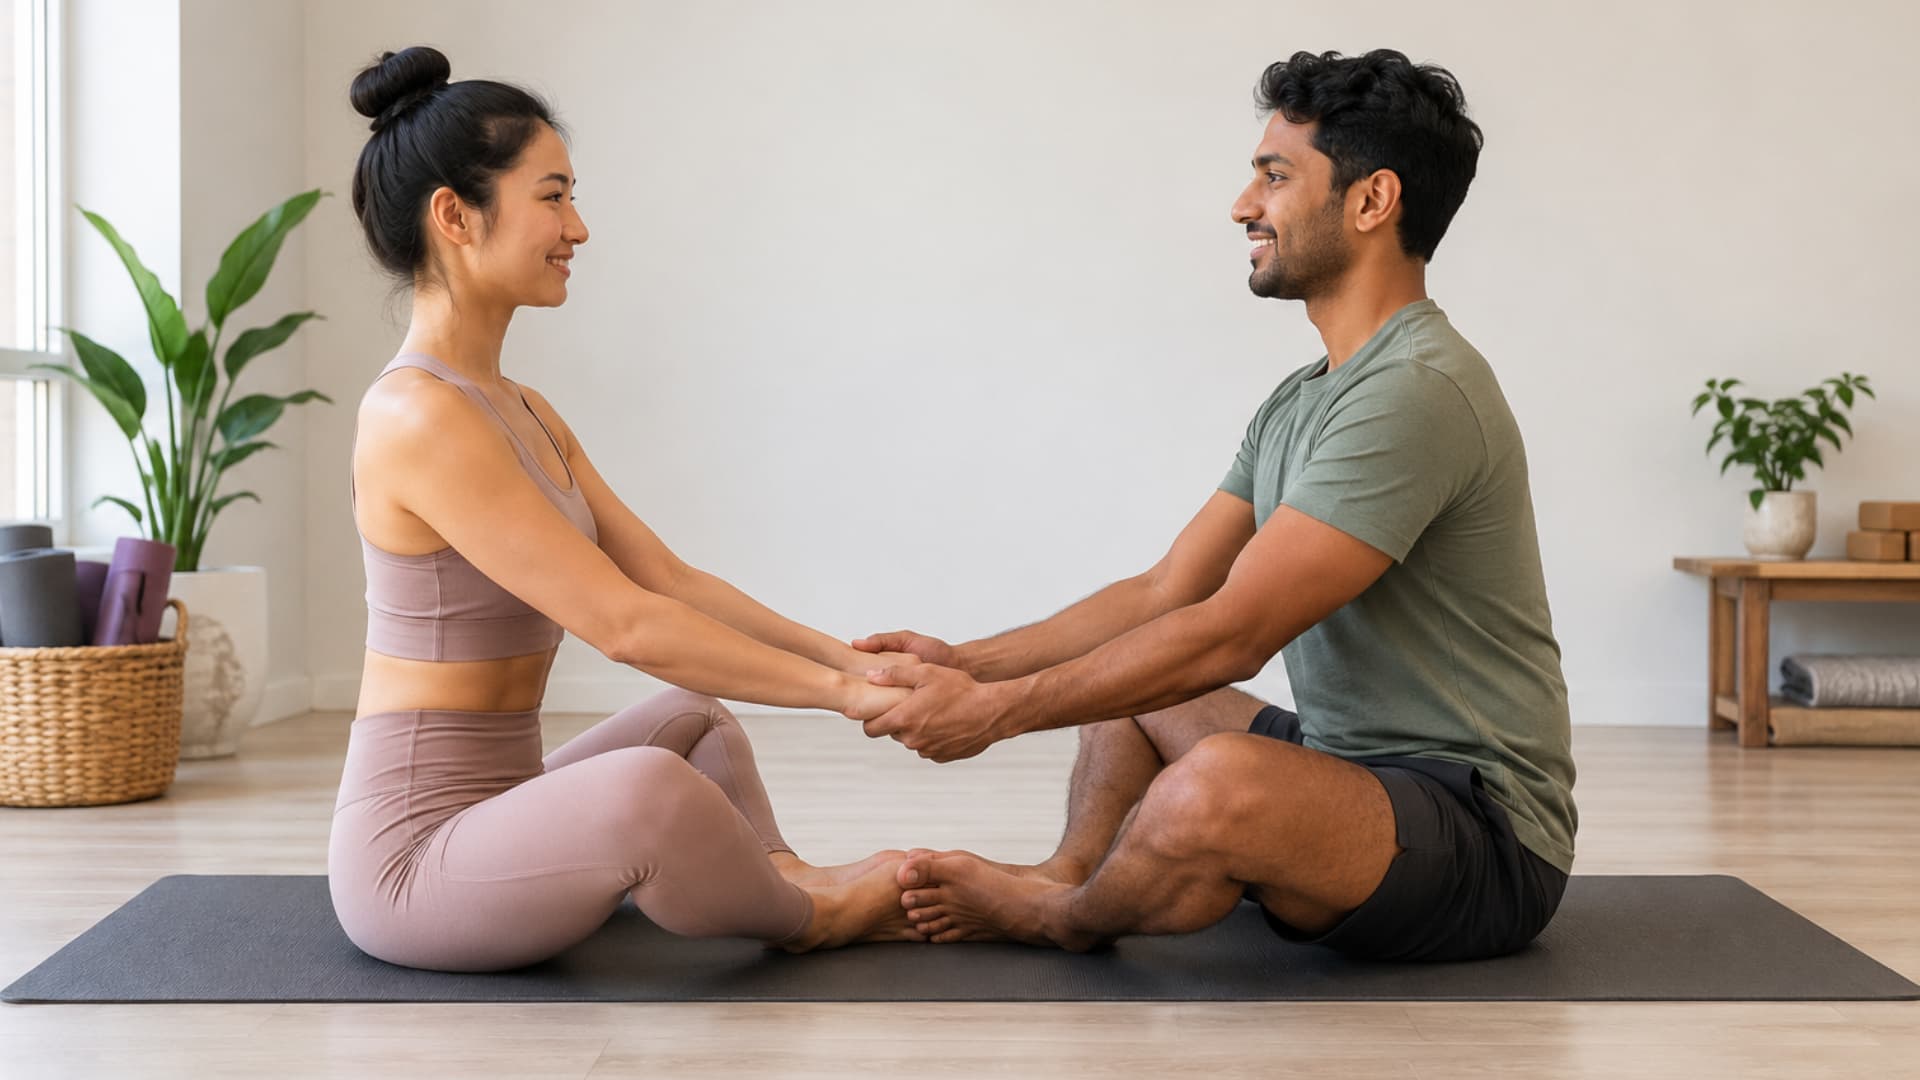
3. Seated Partner Forward Fold
Difficulty: Easy | Time: 2 to 3 minutes | Rounds: 2 rounds per partner | Best For: Hamstrings, lower back, hips
Seated Partner Forward Fold is one of the most common yoga poses for two people because it is clear, adjustable, and immediately useful. One partner folds while the other gives gentle support, making it easier to control the stretch than in a solo forward fold.
How to do it:
- Sit facing your partner with both legs extended forward. Sit on a folded blanket if your lower back feels tight.
- Press the soles of your feet against your partner’s soles, keeping the contact gentle so both partners feel balanced.
- Hold your partner’s hands, wrists, or forearms with a grip that is steady without being forceful.
- Sit tall, lengthen through your spine, and keep your shoulders relaxed before moving.
- Partner A slowly leans back with a straight spine, using body weight gently rather than yanking forward.
- Partner B folds forward from the hips, keeping the chest open and avoiding collapse through the upper back.
- Partner B signals when the stretch feels strong enough so Partner A knows when to stop leaning.
- Hold for 5 to 8 slow breaths. Both partners breathe steadily and soften any unnecessary tension.
- Partner A returns upright with control. Partner B rises slowly. Switch roles and repeat.
Modification: If the hamstrings are very tight, bend the knees slightly so the sit bones stay grounded. The fold does not need to be deep to be effective.
Avoid if: You have a hamstring strain, severe lower-back pain, or nerve-like sensation down the legs.
4. Seated Wide-Legged Forward Fold
Difficulty: Easy to Moderate | Time: 2 to 4 minutes | Rounds: 2 rounds per partner | Best For: Inner thighs, hamstrings, hips, lower back
Seated Wide-Legged Forward Fold is a deeper version of the standard seated fold. The inner thighs and hamstrings can feel intense here, so move slowly and communicate clearly before either partner deepens the stretch.
How to do it:
- Sit facing your partner with legs open in a wide V shape. Keep hips grounded and spine tall before starting.
- Keep the legs only as wide as feels comfortable without straining the inner thighs or knees.
- Press your feet, ankles, or calves against your partner’s. Flex your feet so toes point upward to keep legs active.
- Hold your partner’s hands or forearms with a soft, steady grip.
- Take one breath together while sitting tall, then Partner A slowly leans back with control.
- Partner B folds forward from the hips with chest open, moving only as far as the body allows without forcing.
- Hold for 5 to 8 breaths. Both partners breathe slowly and keep shoulders relaxed.
- Return to center with control and switch roles. Keep the second round gentler if the first felt intense.
Modification: Sit on a folded blanket to ease the lower back. If the wide leg position strains the groin, narrow the stance until both partners feel stable.
Avoid if: You have groin pain, a hamstring injury, or knee discomfort in wide-leg seated positions.
5. Partner Butterfly Pose
Difficulty: Easy | Time: 1 to 3 minutes | Rounds: 1 to 2 rounds | Best For: Hips, inner thighs, posture
Partner Butterfly Pose is a grounded hip opener that works well early in a session. Because both partners stay seated and upright, it is easy to adjust and communicate without disrupting the pose.
How to do it:
- Sit facing your partner with enough space so both can settle comfortably.
- Bend your knees and bring the soles of your feet together. Let the outer edges of your feet rest on the mat.
- Let your knees open gently to the sides without pressing them down or forcing the hips.
- Move close enough to hold your partner’s hands or forearms with a relaxed grip.
- Sit on a folded blanket if your lower back rounds. A small lift can help the spine stay longer.
- Stay still for a few breaths first to settle your posture and connect with your partner’s pace.
- If both partners feel comfortable, gently rock forward and back together with small, shared movement.
- Hold for 6 to 10 breaths. Breathe steadily and keep the hips, knees, and lower back relaxed.
- Release the hands and slowly extend the legs forward, moving carefully so the hips and knees come out with ease.
Modification: For tight hips, place folded blankets or yoga blocks under each knee to reduce the pull on the inner thighs. The feet do not need to be close to the pelvis for this pose to be effective.
Avoid if: You have knee pain, hip impingement, or pain when sitting in the butterfly position.
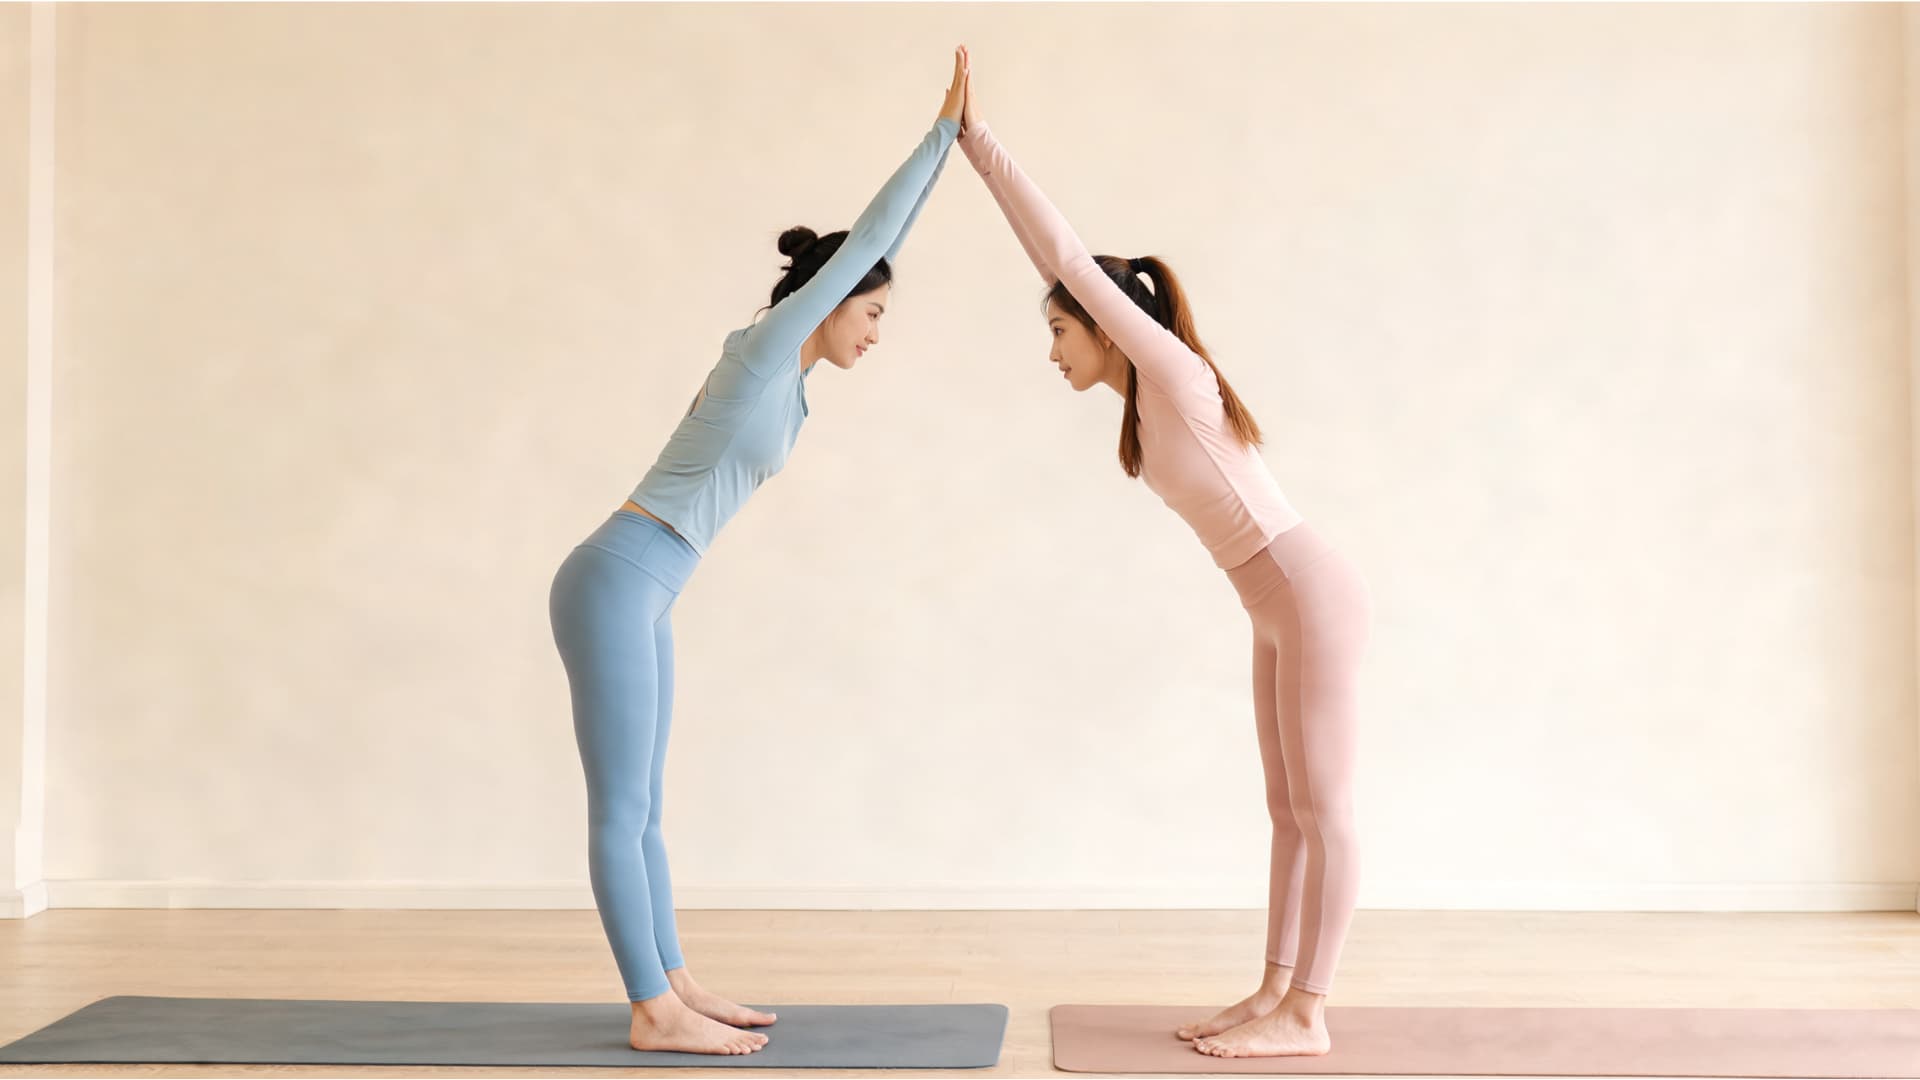
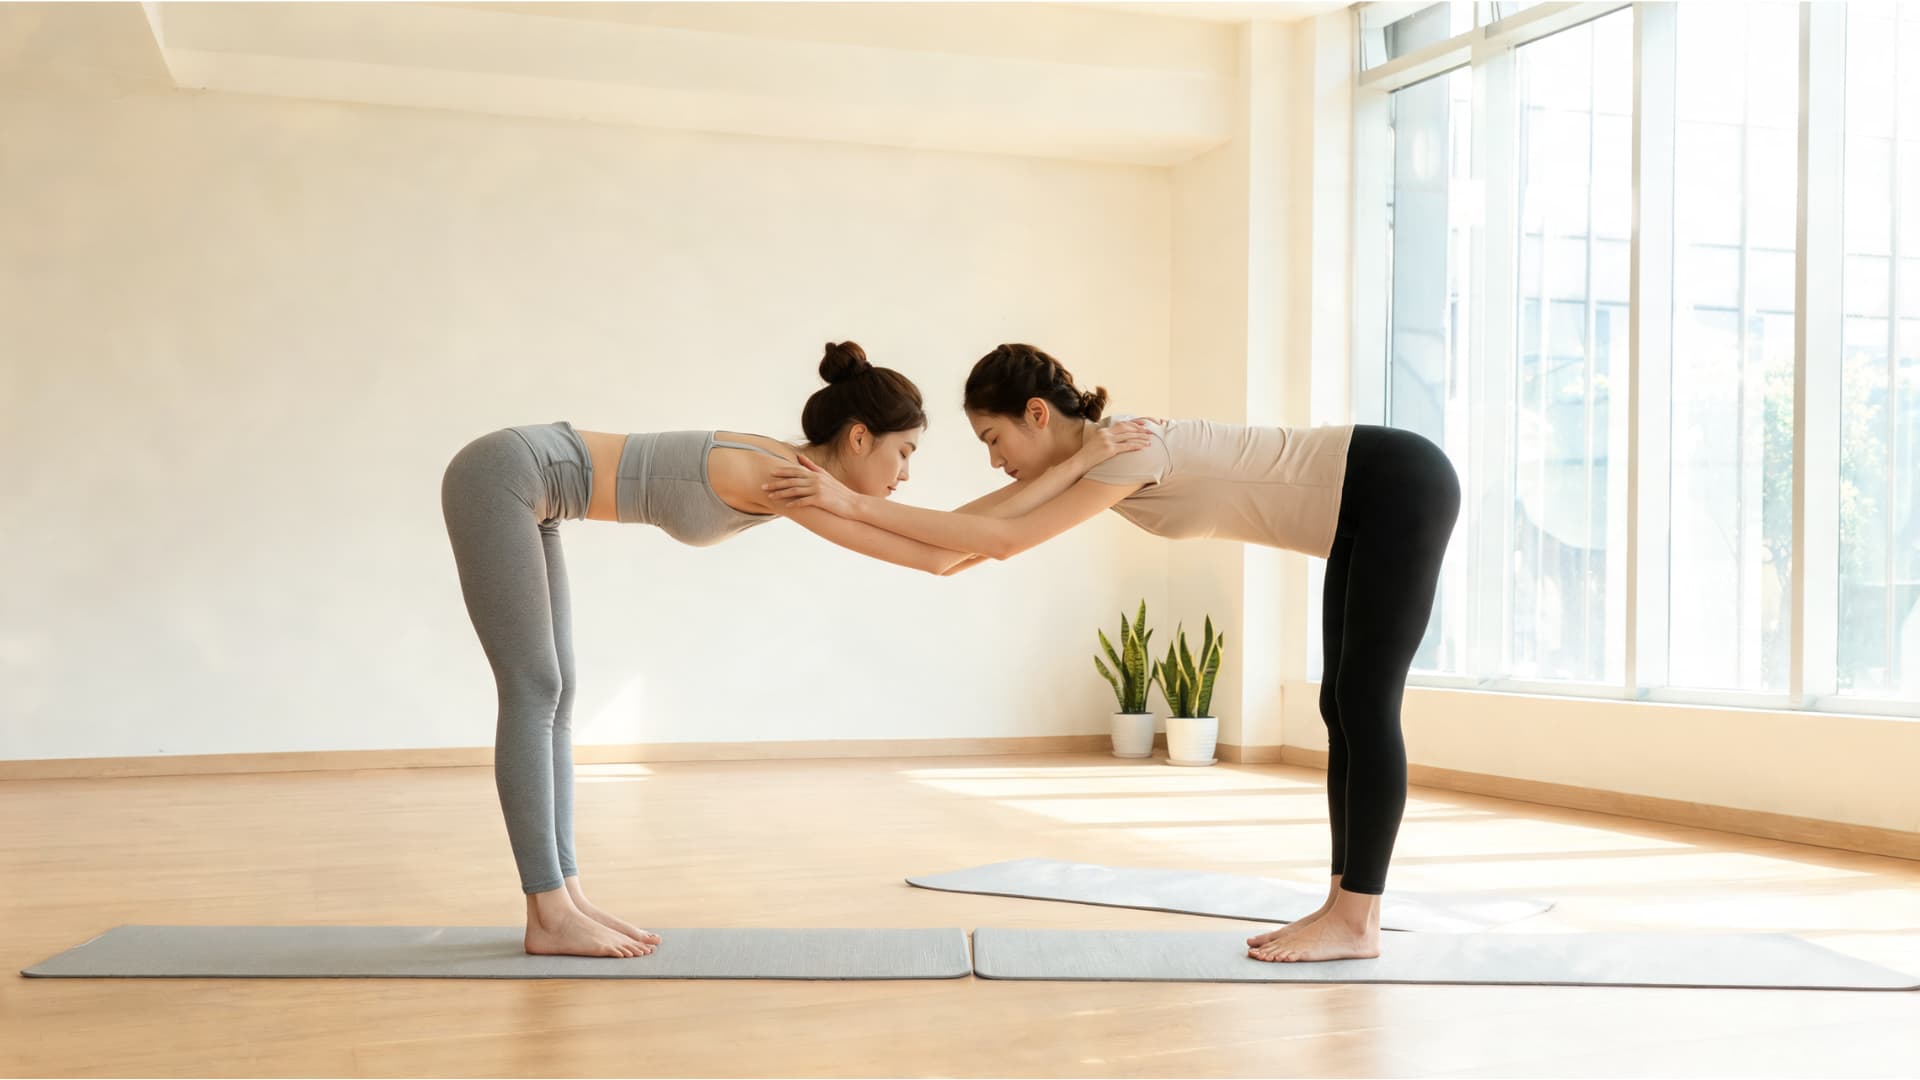
6. Partner Temple Pose
Difficulty: Easy to Moderate | Time: 1 to 2 minutes | Rounds: 2 rounds | Best For: Shoulders, chest, upper back, hamstrings
Partner Temple Pose is a standing stretch that opens the shoulders and chest. I often use it as a transition before arm-supported poses because it warms the exact muscles those poses will need.
How to do it:
- Stand facing your partner with feet hip-width apart and about one arm’s length between you.
- Place your hands on your partner’s shoulders, upper arms, or forearms. Ask your partner to mirror the same position.
- Take a small step back together so both partners’ arms are long but not locked.
- Bend your knees slightly to support the lower back, then hinge forward slowly from the hips.
- Let your chest lower between your arms. Keep the movement gentle and stop when the stretch feels sufficient.
- Keep your back long and your neck relaxed, looking down naturally so the neck does not strain.
- Hold for 5 to 8 breaths. Breathe slowly and keep the shoulders soft.
- Walk your feet back toward your partner slowly. Return upright with control and release the grip.
Modification: If the forward fold causes dizziness, reduce the depth so your chest stays above hip height. Partners with tighter hamstrings can keep a more generous bend in the knees throughout.
Avoid if: You have shoulder pain, dizziness in forward folds, or acute lower-back pain.
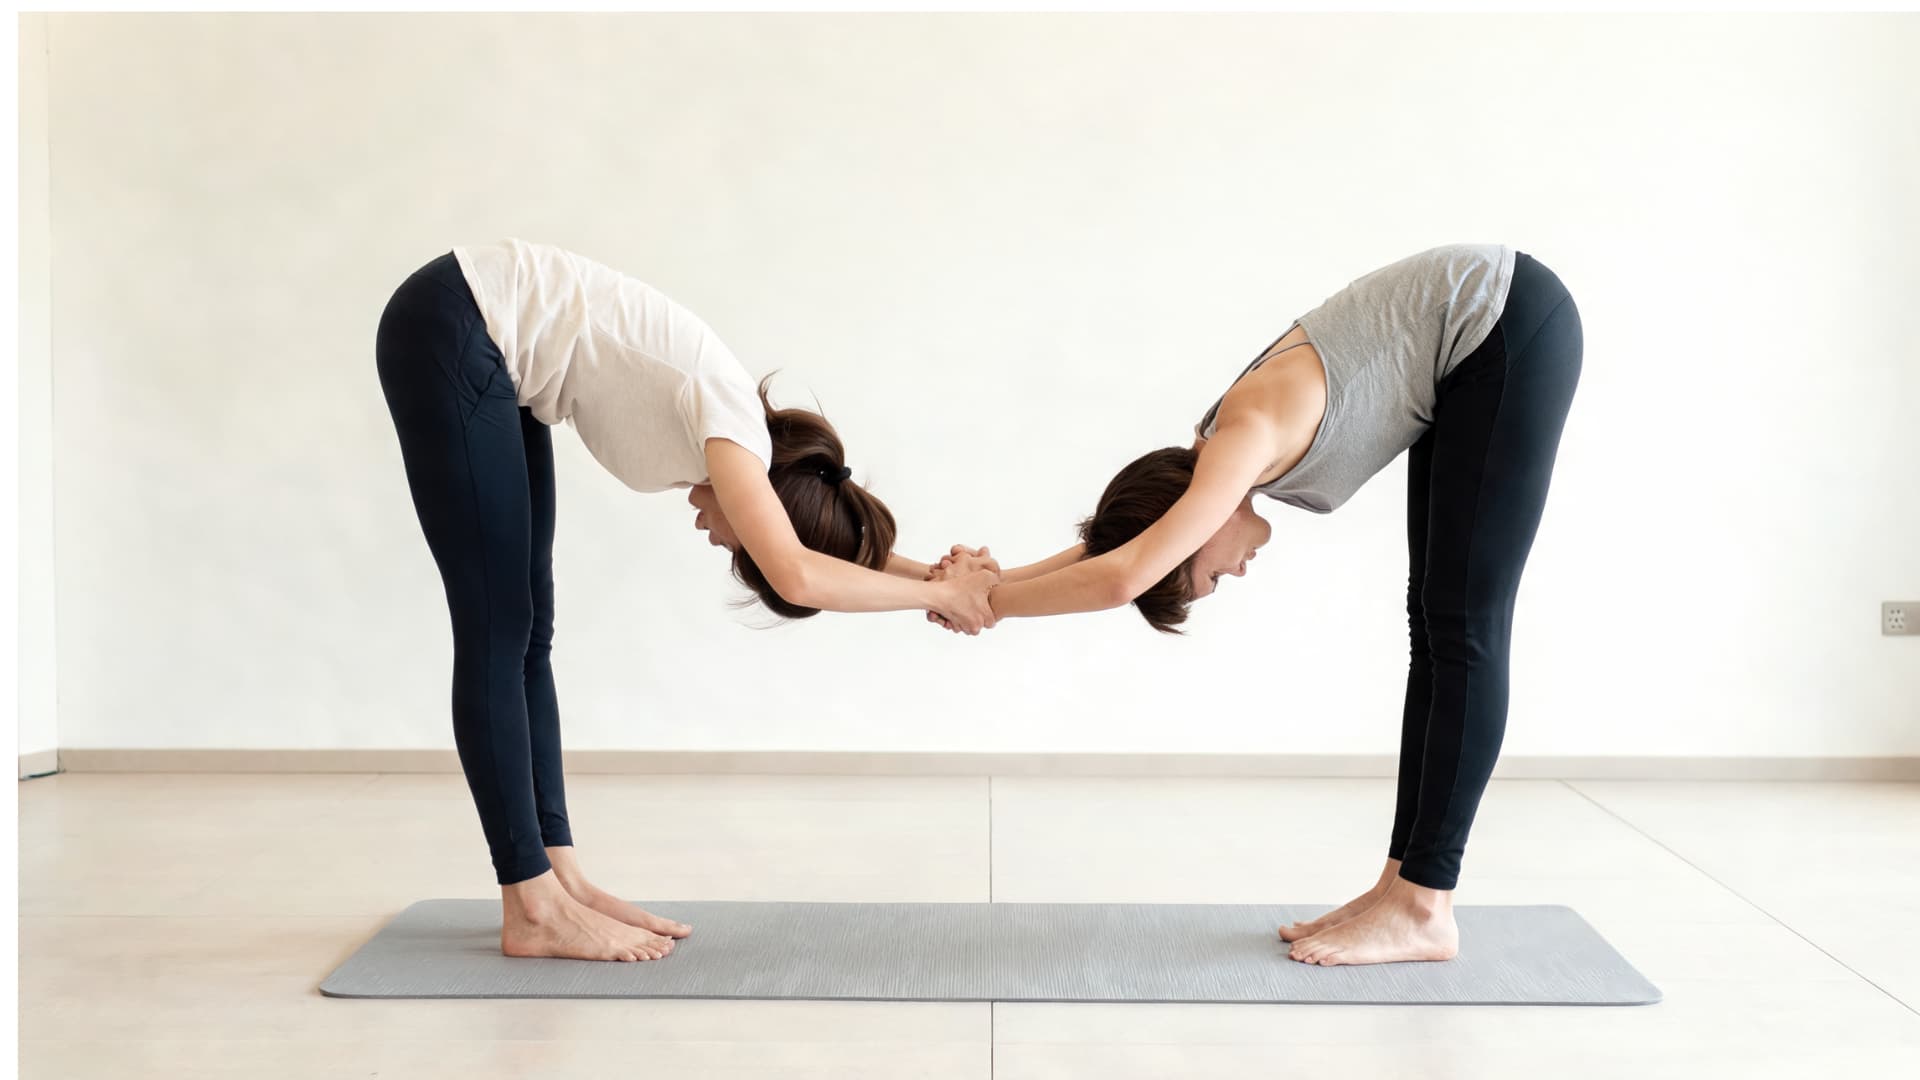
7. Standing Partner Forward Fold
Difficulty: Easy | Time: 1 to 2 minutes | Rounds: 1 to 2 rounds | Best For: Hamstrings, calves, lower back
Standing Partner Forward Fold is a back-to-back stretch that gives both partners a supported release of the back body while staying grounded through the feet. The shared connection makes it easier to stay steady than a solo fold.
How to do it:
- Stand back-to-back with a few inches of space between your heels. Keep feet hip-width apart.
- Bend your knees slightly and hinge forward from your hips, folding slowly rather than dropping suddenly.
- Reach your hands back toward your partner and hold hands, wrists, or forearms with a gentle grip.
- Let the weight of your upper body release toward the floor. Keep your neck relaxed and breathing steady.
- Stay for 5 to 8 breaths. Soften the shoulders and pause if either partner feels dizzy or strained.
- Release hands slowly, then rise with bent knees and a long spine to protect the lower back.
Modification: If connecting hands behind the legs is difficult due to height differences, hold a yoga strap between you rather than gripping directly. Yoga strap stretches use this same principle to extend reach without straining the shoulders or lower back.
Avoid if: You get dizzy in forward folds, have a hamstring strain, or have concerns about blood pressure changes with head-down positions.
8. Double Tree Pose
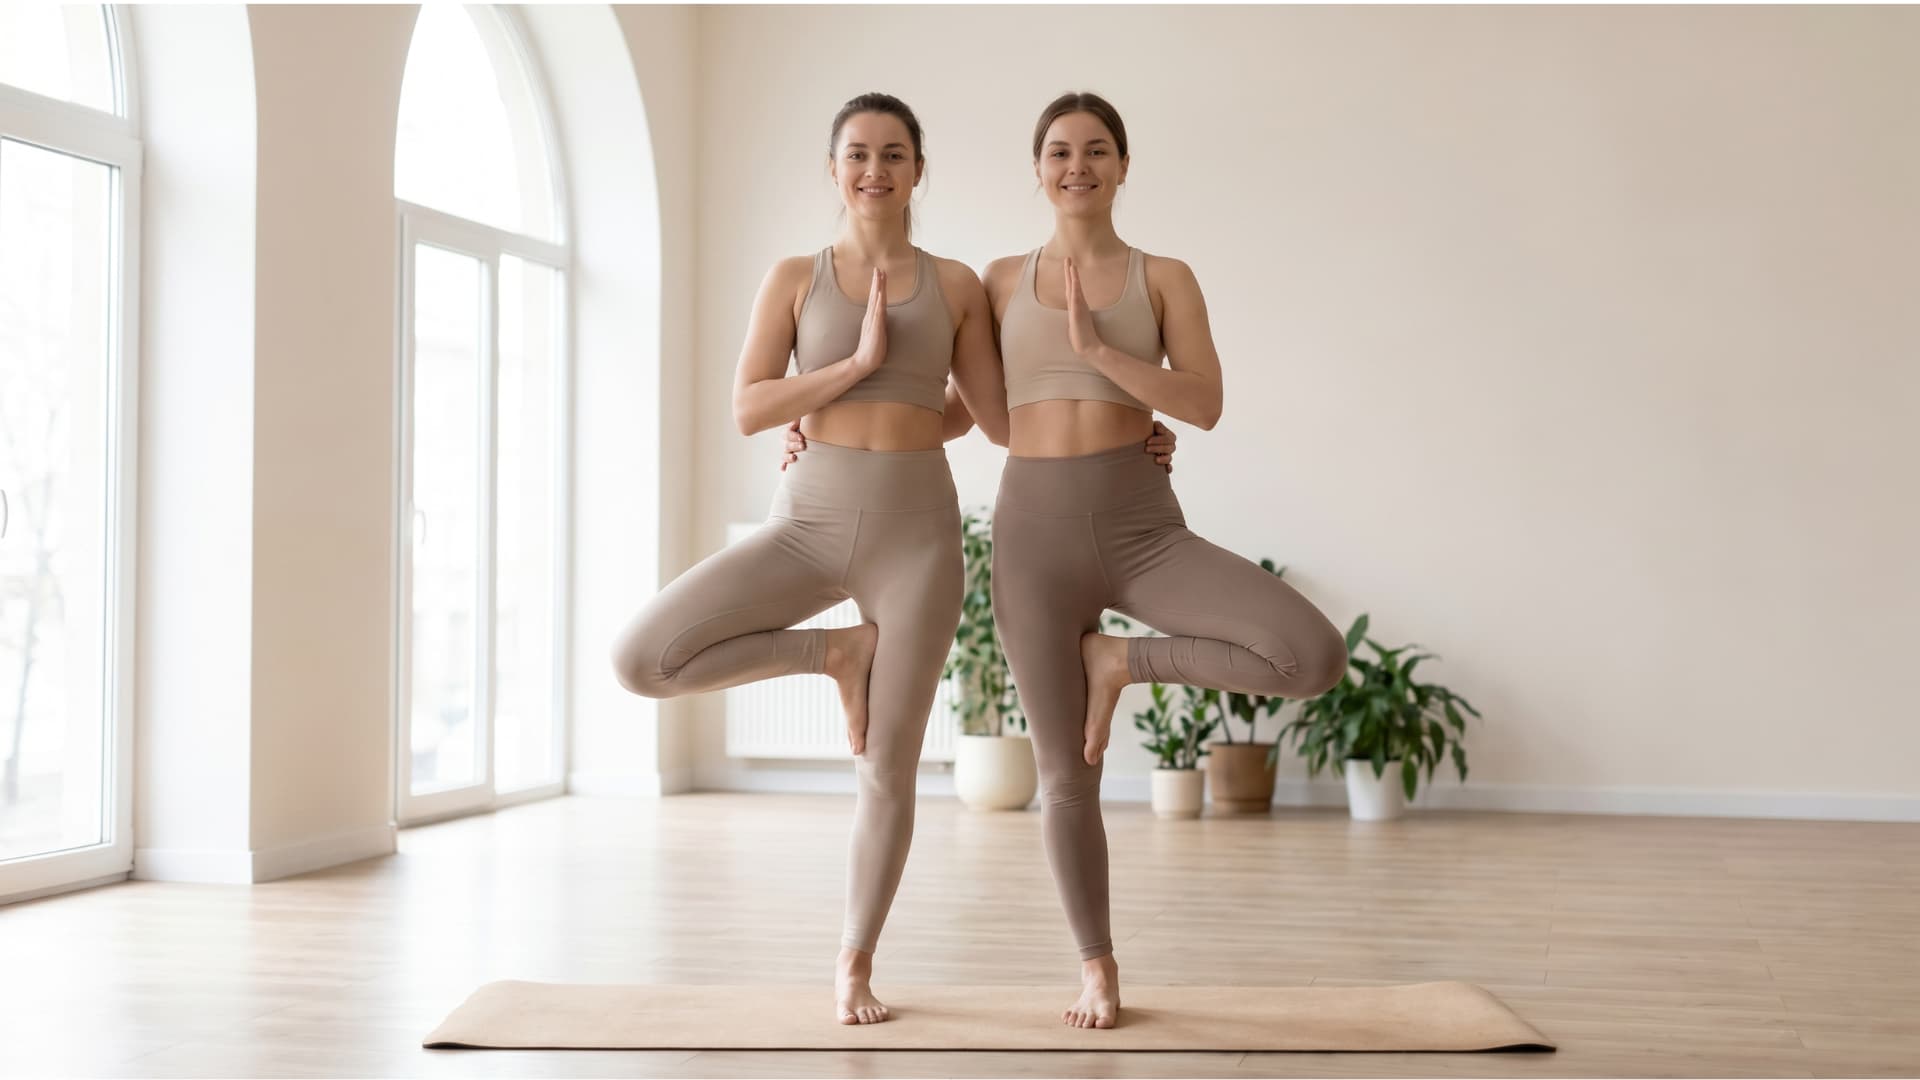
Difficulty: Easy to Moderate | Time: 1 to 2 minutes | Rounds: 2 rounds per side | Best For: Balance, focus, hip opening
Double Tree Pose is the most recognizable of the beginner two person yoga poses. It gives both partners side-by-side support while still asking each person to find their own balance. The shared contact becomes a reference point, not a crutch.
How to do it:
- Stand side by side facing the same direction. Let your inner hips, shoulders, or upper arms lightly touch.
- Press firmly through the standing foot and spread the toes to create a steady base.
- Wrap your inside arm around your partner’s back or press inside palms together overhead, whichever feels more stable.
- Bend your outside knee slowly. Place the lifted foot on the ankle, calf, or inner thigh, keeping it away from the knee joint.
- Find one still point to look at. Keep your gaze soft and steady to support balance.
- Hold for 5 slow breaths, then lower the lifted foot with control. Turn and repeat on the other side.
Modification: Keeping the lifted foot at the ankle rather than the thigh significantly lowers the balance demand. Partners with ankle instability can place the lifted foot on a yoga block instead.
Avoid if: You have ankle instability, knee pain in Tree Pose, or feel unsafe in balance poses.
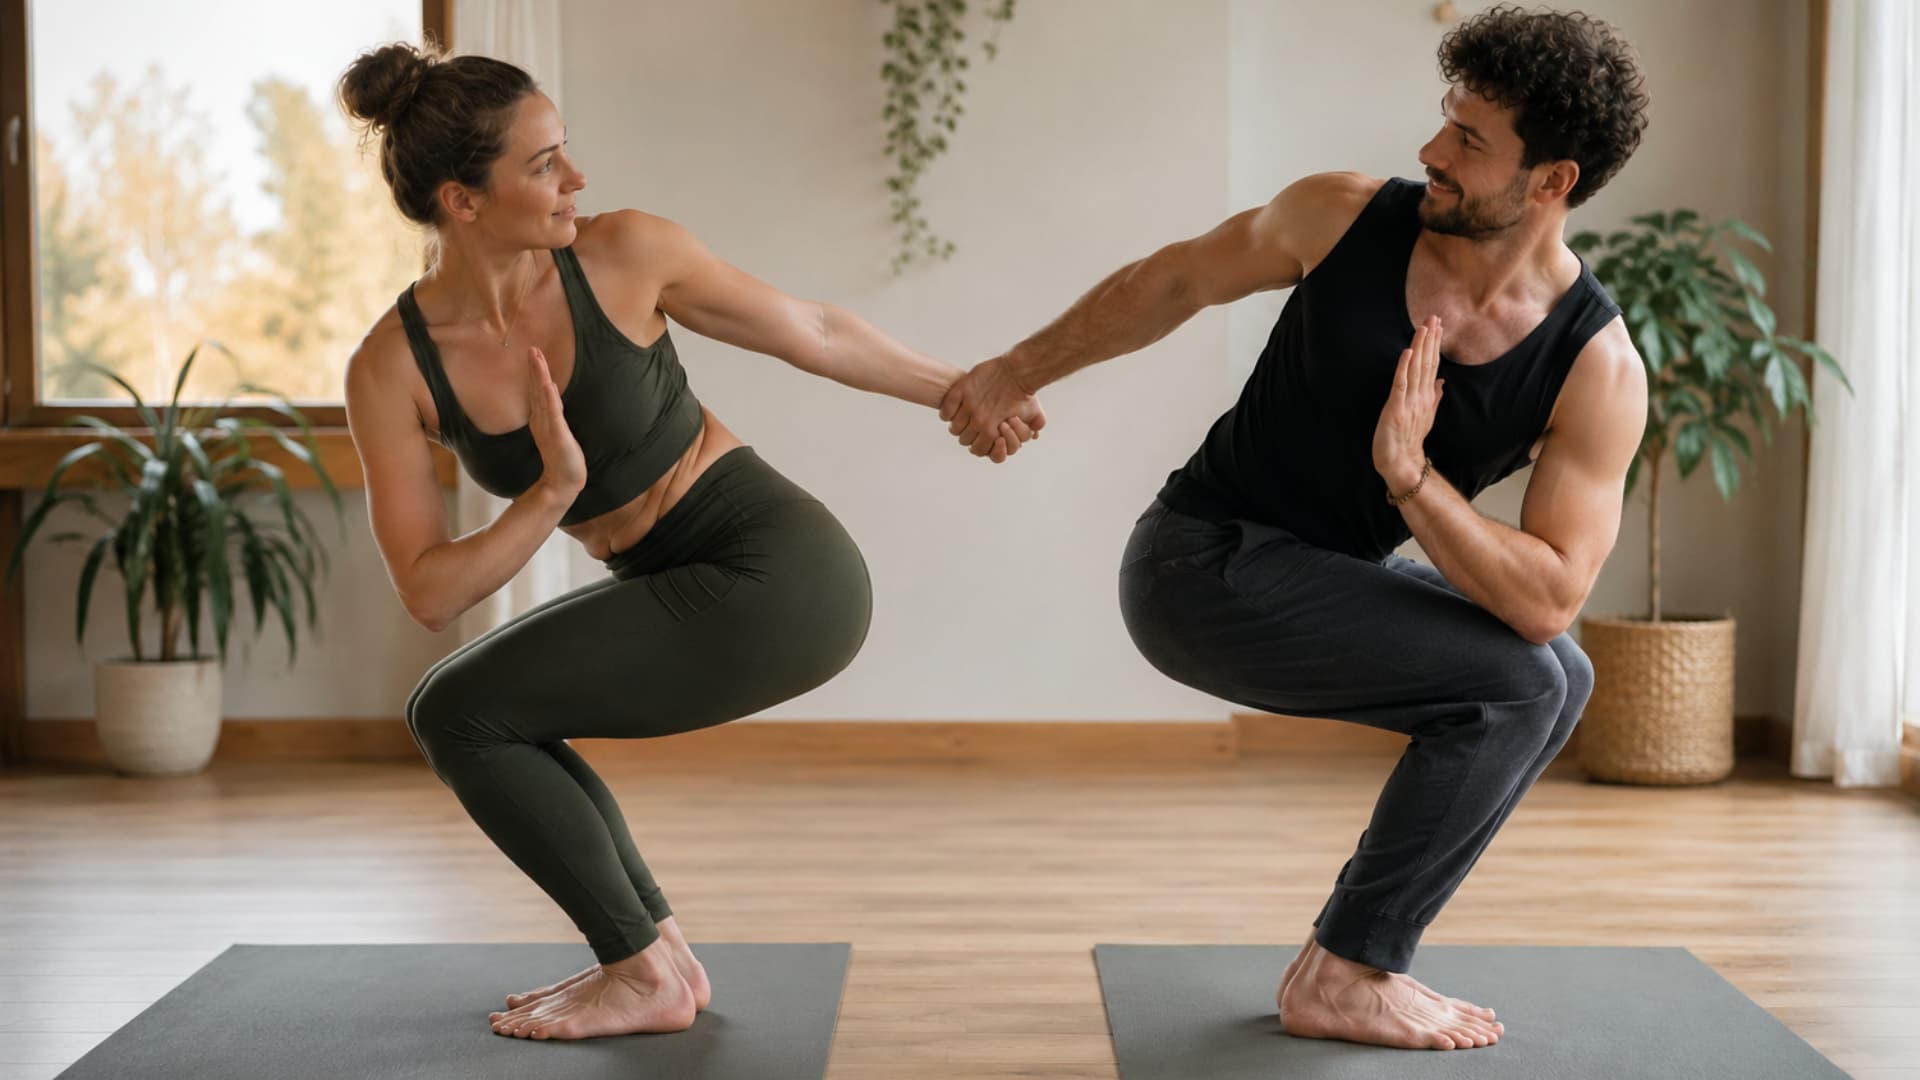
9. Partner Chair Pose
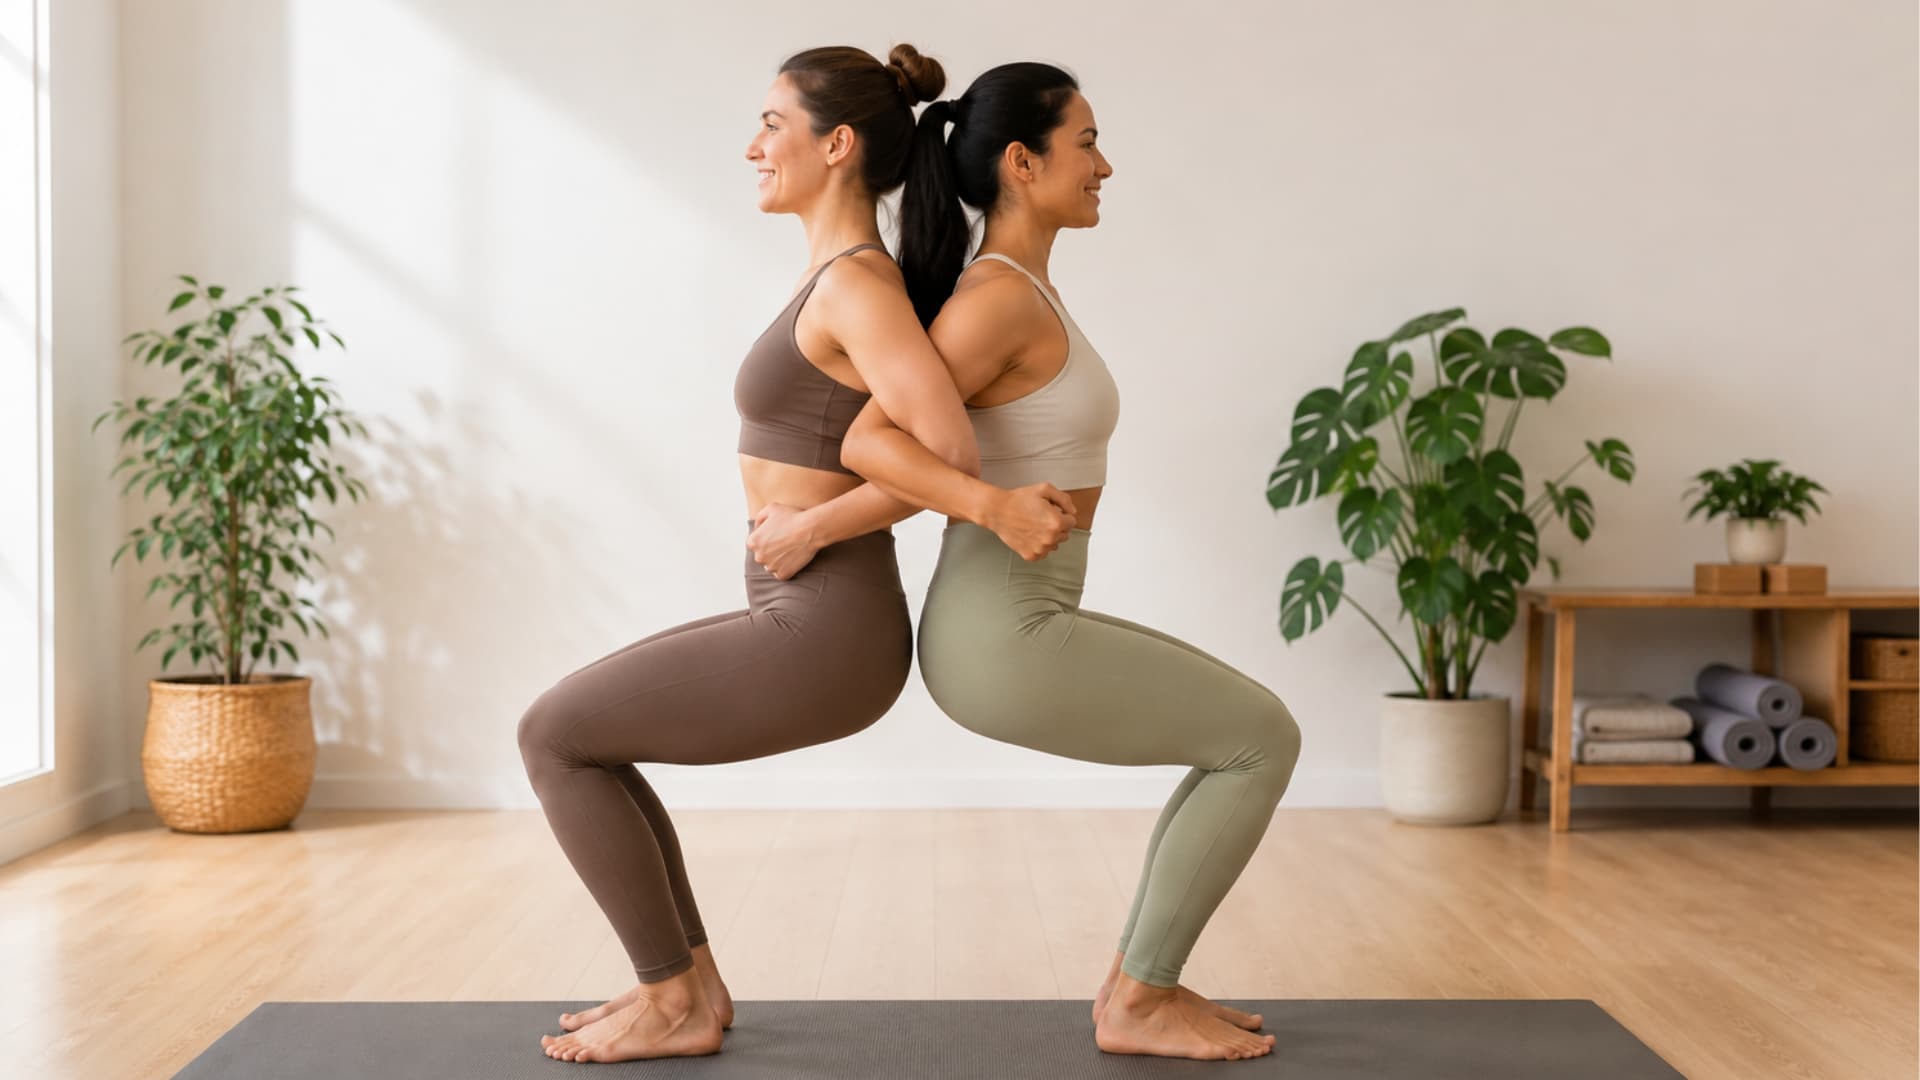
Difficulty: Moderate | Time: 30 to 60 seconds | Rounds: 2 to 3 rounds | Best For: Legs, glutes, core, teamwork
Partner Chair Pose builds strength and trust simultaneously because both partners depend on each other for balance. If one person drops their weight suddenly, both people lose the pose. That interdependence teaches pacing better than any solo squat drill I know.
How to do it:
- Stand back-to-back with backs pressed evenly together. Keep feet hip-width apart.
- Link elbows or rest arms by your sides. Take one breath together before moving.
- Slowly walk your feet forward a few inches together. Bend your knees at the same time with control.
- Keep pressing your back into your partner’s back throughout. This shared pressure helps both partners stay steady.
- Lower until both partners feel stable. Stop before the thighs or knees feel strained. Keep knees stacked over or behind the ankles.
- Hold for 3 to 5 breaths, then press into your partner’s back to rise together slowly.
- Rest for a few breaths before repeating. Shake out the legs if needed.
Modification: Keep the squat shallow if either partner has knee sensitivity. Even a 20-degree bend with strong back-to-back contact delivers the strengthening benefit this pose is after.
Avoid if: You have knee pain, balance issues, or squats aggravate your hips or lower back.
10. Partner Savasana
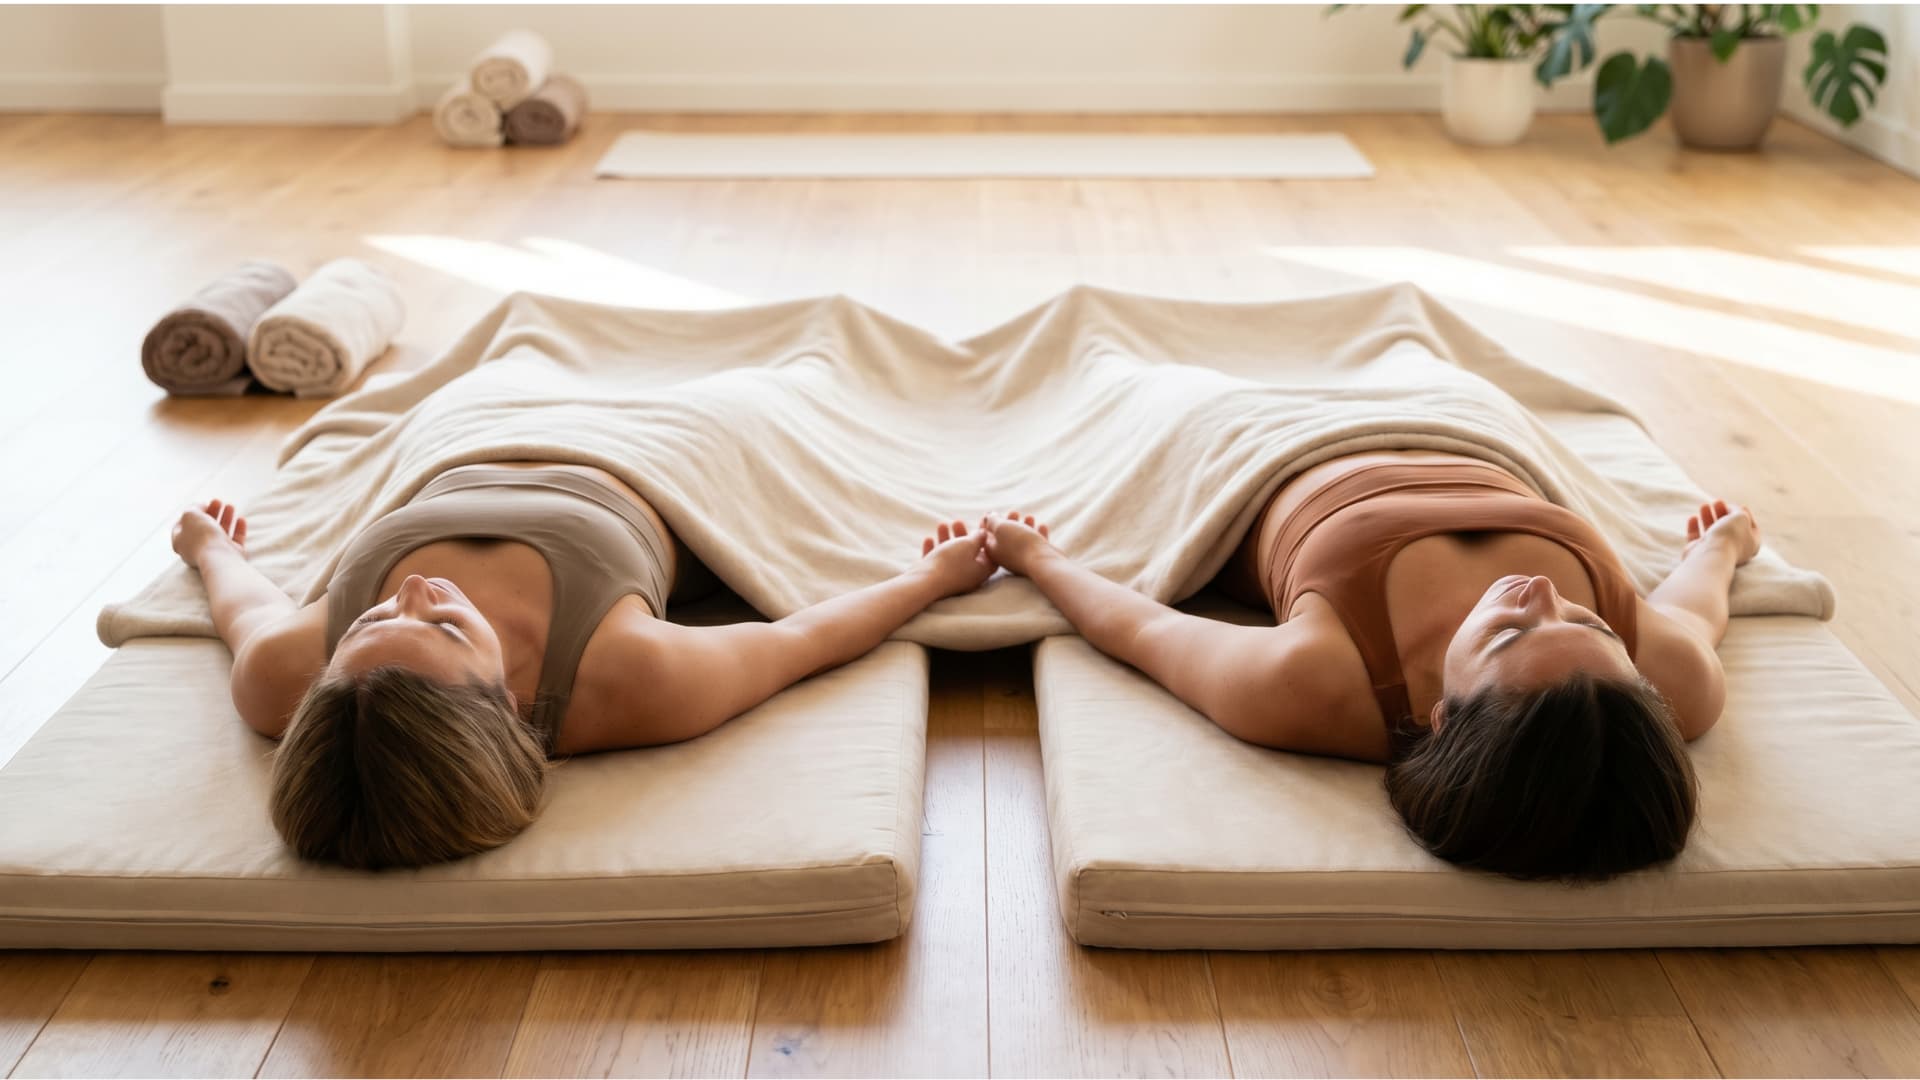
Difficulty: Easy | Time: 3 to 7 minutes | Rounds: 1 round | Best For: Final rest, cooldown, relaxation
Partner Savasana closes a two-person yoga session and gives both bodies time to absorb the work done. If you want to extend your cooldown beyond this, pairing it with solo restorative yoga poses before or after a partner session keeps the nervous system settled without adding physical demand. This is the one pose where doing less is always right.
How to do it:
- Lie on your backs side by side with enough room so both partners can rest without feeling crowded.
- Extend your legs and let your feet fall open naturally. Rest your arms by your sides with palms up or down.
- Hold hands only if both partners want contact. Keep any touch light so both people can fully release.
- Close your eyes or soften your gaze. Relax the jaw, unclench the teeth, and let the shoulders melt away from the ears.
- Stay still for 3 to 7 minutes. Breathe naturally without trying to control the breath.
- To come out, bend your knees, roll to one side, pause, then press slowly up to seated.
Avoid if: Lying flat causes lower back pain. Place a rolled blanket under the knees to ease any lumbar discomfort.
Intermediate Partner Yoga Poses
Intermediate yoga poses for two people add balance, more targeted strength work, and slightly deeper stretches. Go slowly, check in after each transition, and choose the easier variation if either partner feels unstable. These poses reward patience more than effort.
11. Partner Boat Pose
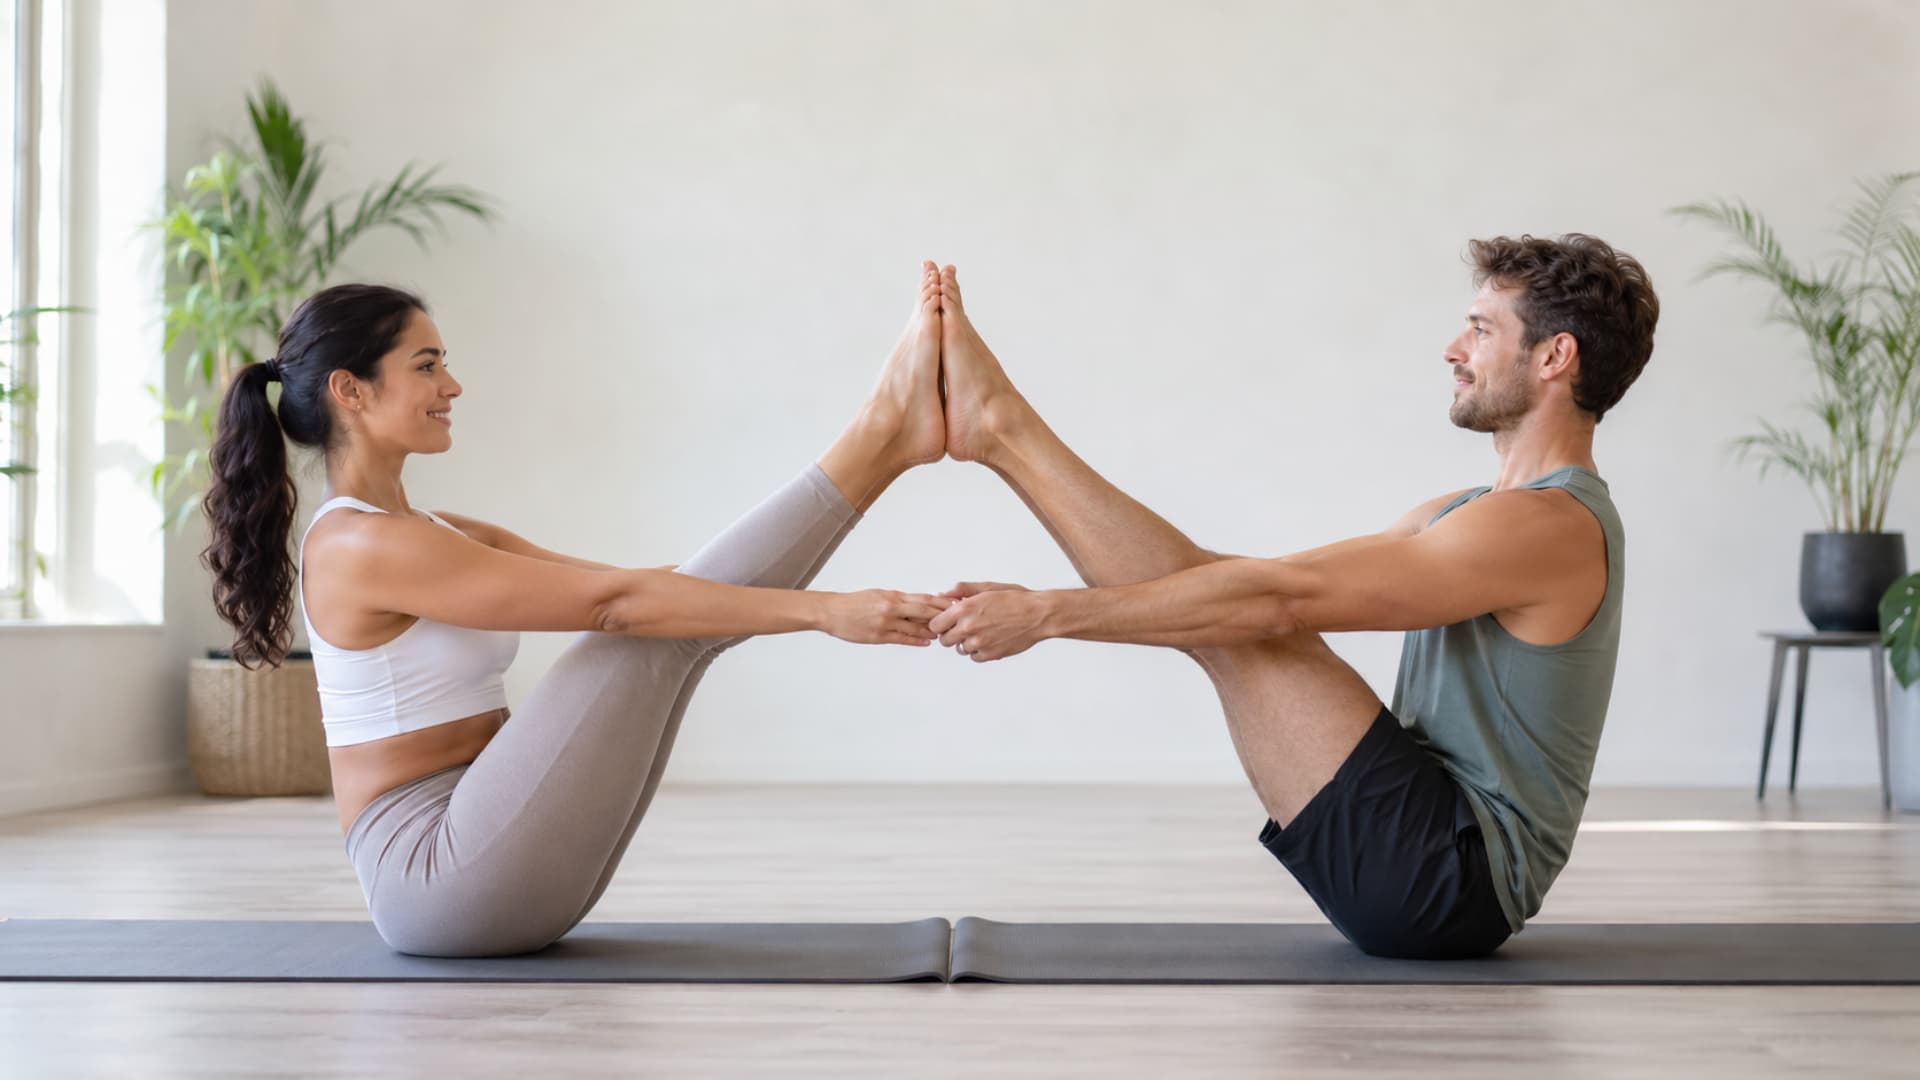
Difficulty: Moderate | Time: 30 to 60 seconds | Rounds: 2 to 3 rounds | Best For: Core, balance, hamstrings
Partner Boat Pose is one of the most commonly photographed two person yoga poses because it is both challenging and visually clear. It strengthens the core while stretching the hamstrings, and the shared foot contact helps both partners stay honest about their alignment.
How to do it:
- Sit facing your partner with knees bent and feet flat, hip-width apart. Hold your partner’s hands or wrists.
- Sit tall, lift your chest, and lean back slightly without rounding your spine. Keep your core gently engaged.
- Lift one foot and press the sole into your partner’s matching foot. Check that both partners feel steady before lifting the second foot.
- Keep knees bent at first. If stable, slowly straighten both legs. Stop before the hamstrings or lower back feel strained.
- Hold for 3 to 5 breaths, then bend the knees again and lower both feet to the mat with control.
Modification: Keep both knees generously bent throughout. A bent-knee version still challenges the core without loading the lower back or straining tight hamstrings.
Avoid if: You have lower back pain, hip flexor strain, or cannot sit upright without rounding heavily.
12. Wide-Legged Boat Pose

Difficulty: Moderate | Time: 20 to 45 seconds | Rounds: 2 rounds | Best For: Core, inner thighs, hamstrings, balance
Wide-Legged Boat Pose builds on Partner Boat Pose by adding an inner-thigh and hip opening component. Both partners need to move simultaneously here, so pace is everything.
How to do it:
- Begin in Partner Boat Pose with both feet lifted and soles connected. Keep holding your partner’s hands.
- Draw your lower belly in to support your lower back. Start with knees slightly bent.
- Slowly open both legs out to the sides with control. Move only as wide as both partners can manage without tipping.
- Keep your chest lifted and shoulders relaxed throughout. Avoid rounding the spine or gripping the arms too tightly.
- Hold for 3 to 5 breaths, then bring the legs back to center slowly. Lower both feet and rest before the second round.
Modification: Keep a significant bend in the knees when opening the legs wide. This reduces the hamstring and inner-thigh demand considerably and makes the balance more manageable.
Avoid if: You have groin pain, hamstring pain, or lower-back strain in Boat Pose.
13. Standing Shoulder Stretch
Difficulty: Easy to Moderate | Time: 1 to 2 minutes | Rounds: 2 rounds | Best For: Shoulders, chest, upper back
Standing Shoulder Stretch is useful before any arm-supported partner pose. It opens the chest and shoulders without requiring advanced flexibility.
How to do it:
- Stand facing your partner with feet hip-width apart, stepped back enough so both can reach comfortably.
- Place your hands on your partner’s shoulders, upper arms, or forearms. Keep feet hip-width apart and knees slightly bent.
- Take one breath while standing tall, then hinge forward from your hips slowly.
- Lower your chest toward the floor with arms long but not locked. Keep your head in line with your spine and neck soft.
- Pause when you feel a comfortable stretch across the shoulders or chest. Hold for 5 to 8 breaths.
- Walk your feet forward gradually to release the stretch. Rise slowly to standing.
Modification: Keep the fold shallow if the shoulder stretch feels sharp. Even a 45-degree hinge with relaxed arms provides an effective chest opener.
Avoid if: You have shoulder impingement, arm numbness, or dizziness in forward folds.
14. Partner Wide-Legged Standing Forward Fold
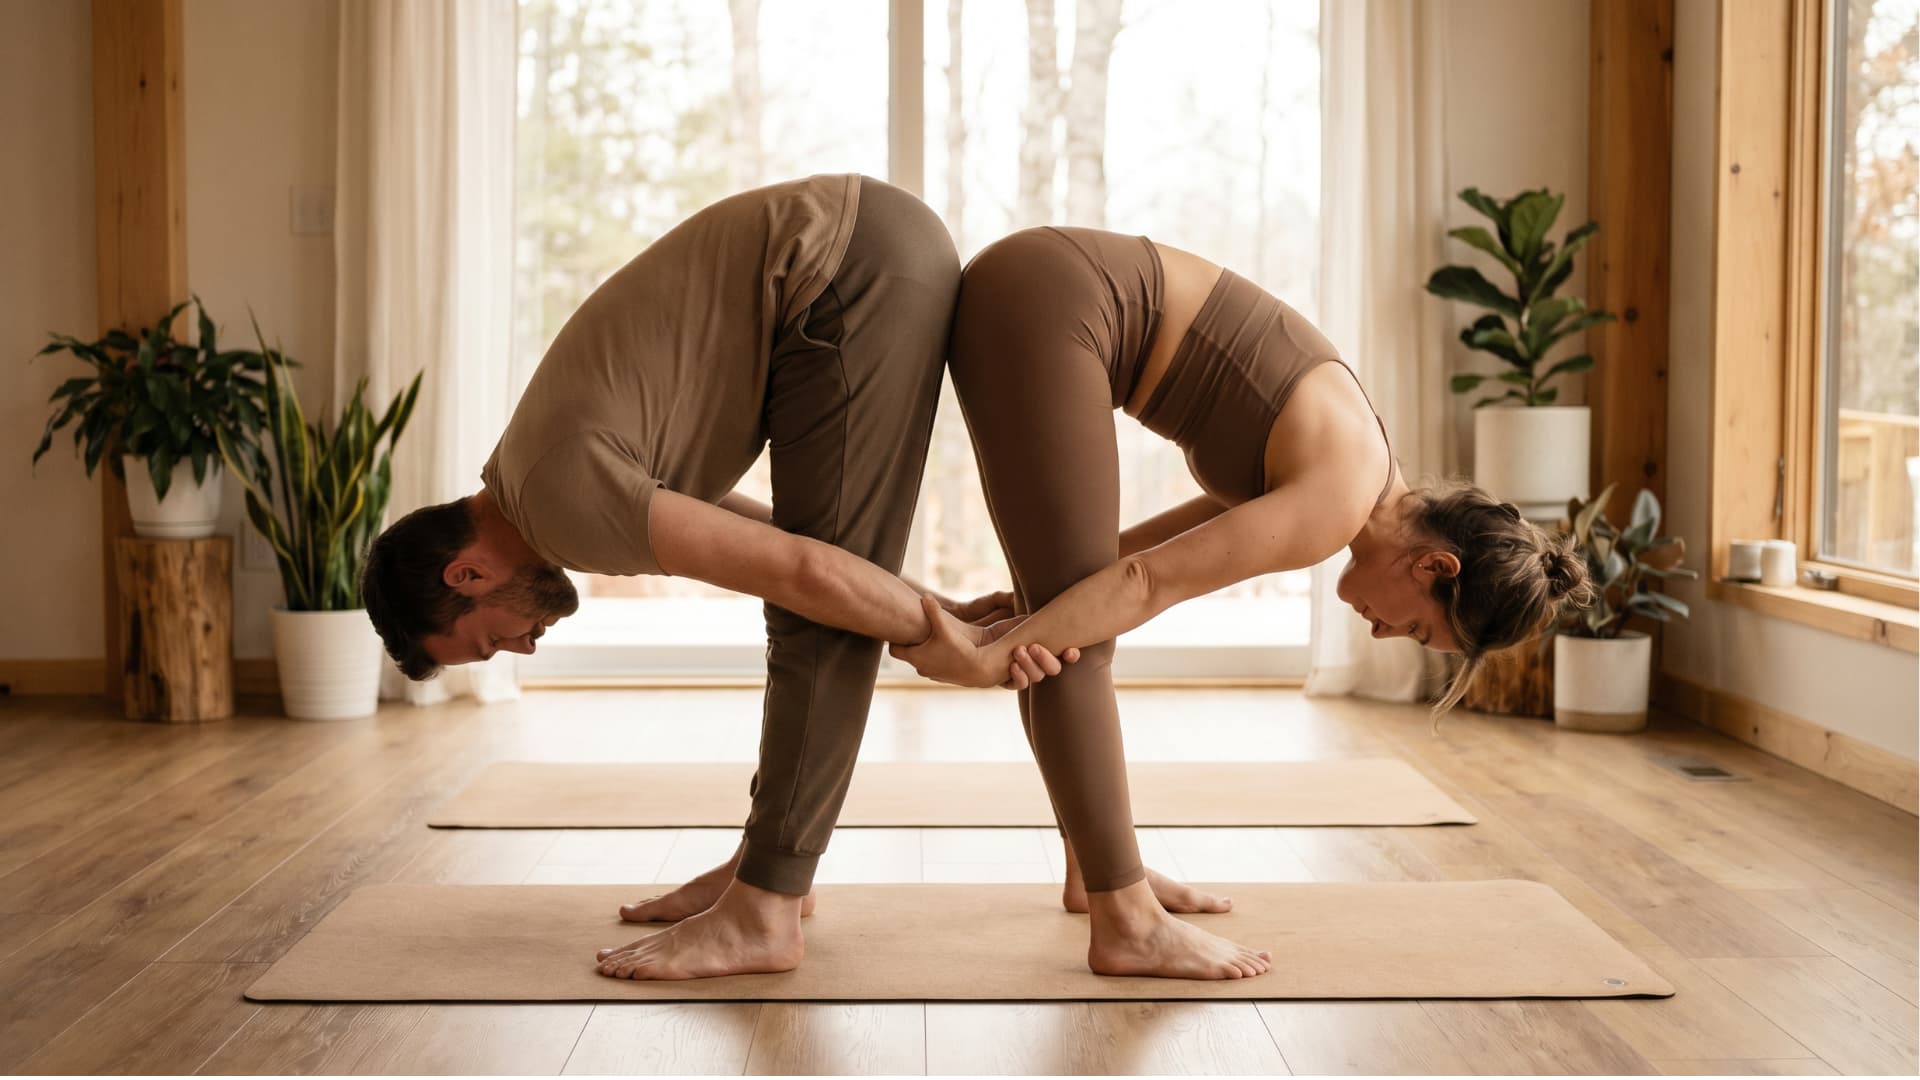
Difficulty: Moderate | Time: 1 to 2 minutes | Rounds: 1 to 2 rounds | Best For: Hamstrings, inner thighs, lower back
Partner Wide-Legged Standing Forward Fold gives a deeper stretch than a regular forward fold and keeps both partners grounded through strong legs. The back-to-back format removes the need to coordinate timing as closely as face-to-face versions.
How to do it:
- Stand back-to-back with feet stepped wide. Choose a distance that feels stable without straining the inner thighs.
- Point your toes forward or slightly inward. Keep a small bend in both knees.
- Take one full breath while standing tall, then fold forward from the hips slowly.
- Let your head relax toward the floor. Reach your hands back between your legs to find your partner’s hands, forearms, or upper arms.
- Hold the grip away from the elbow joints. Let the stretch settle for 5 to 8 breaths without pulling your partner deeper.
- Release gently, bring hands to your thighs, and rise slowly with knees soft and spine long.
Modification: If the back-to-back hand connection is not accessible due to height differences, hold a yoga strap or towel between you.
Avoid if: You have a hamstring injury, groin strain, dizziness, or acute lower-back pain.
15. Partner Warrior III
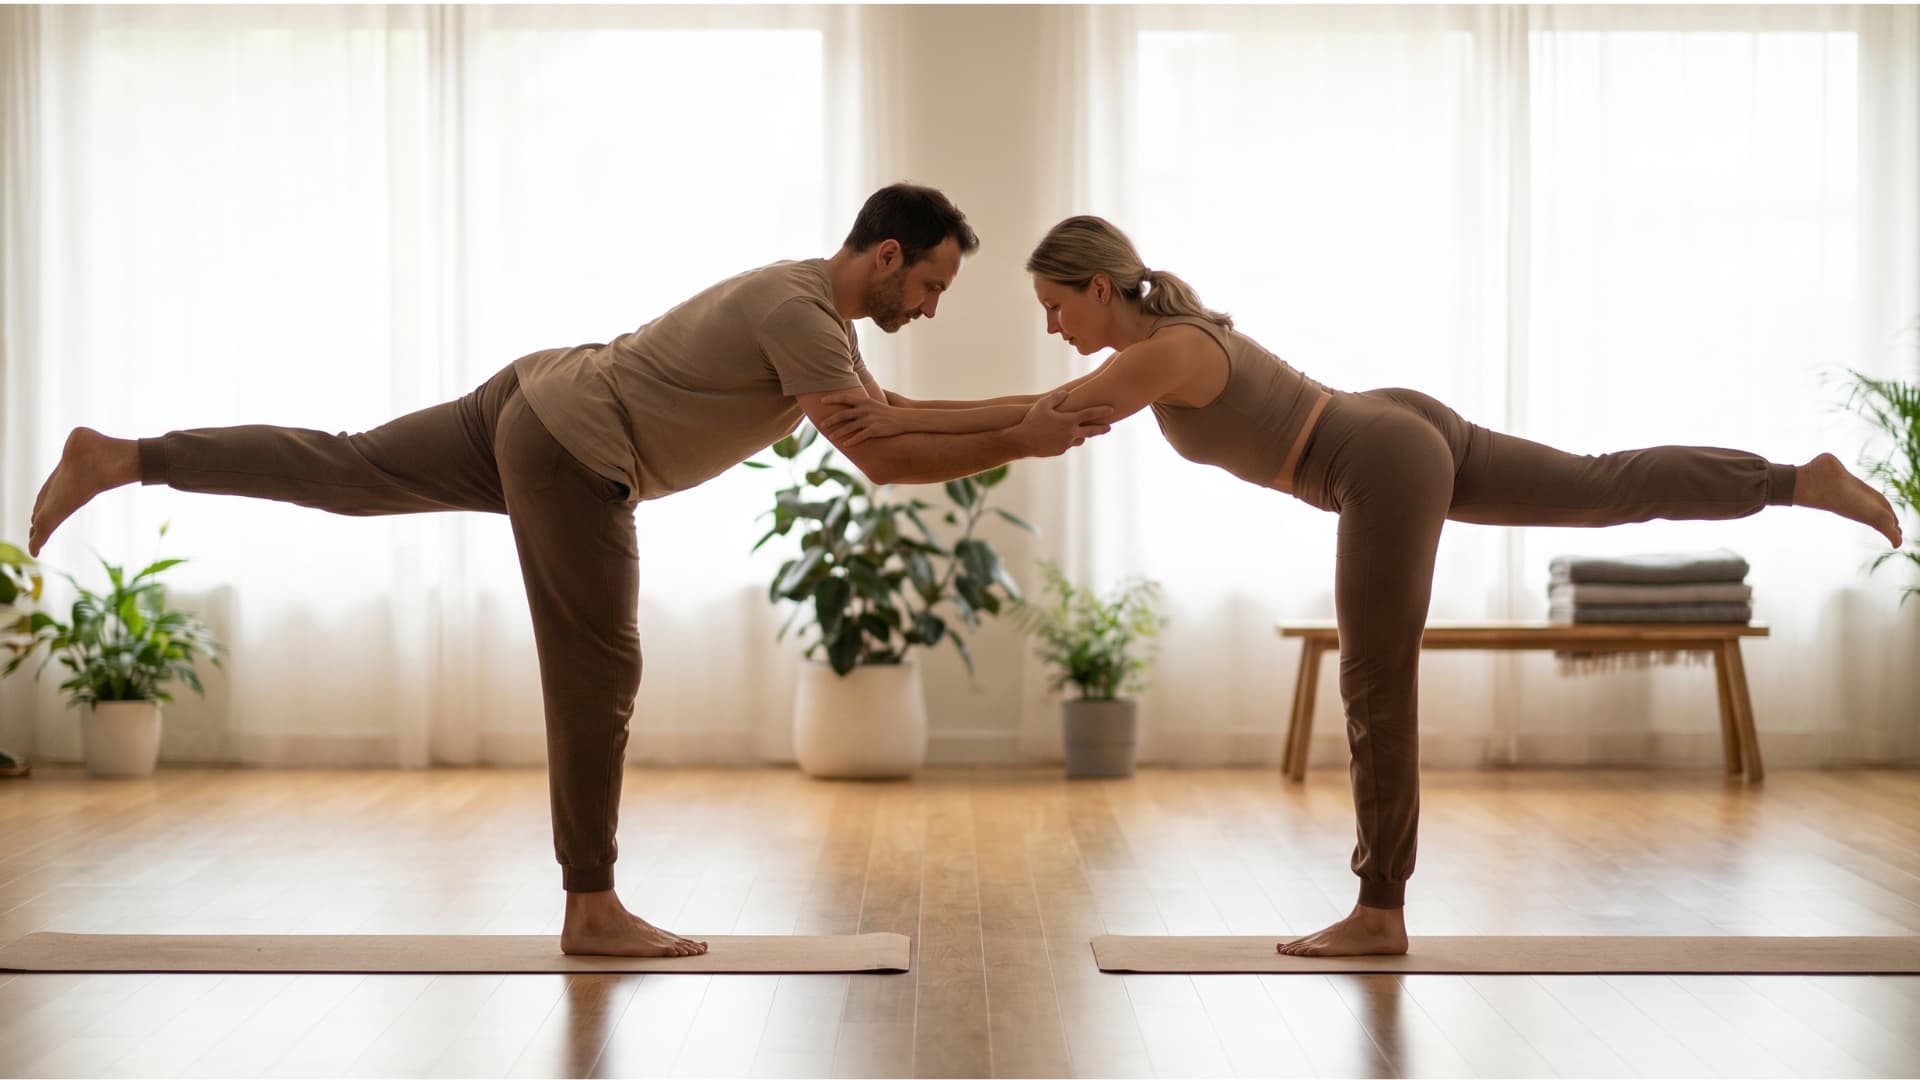
Difficulty: Moderate to Hard | Time: 20 to 40 seconds per side | Rounds: 2 rounds per side | Best For: Balance, glutes, hamstrings, focus
Partner Warrior III uses your partner for light support rather than as a balance prop. The goal is to develop your own steadiness, using the handhold as a reference point rather than a rescue.
How to do it:
- Stand facing your partner with feet grounded. Hold hands or forearms with a steady, soft grip.
- Step back until both partners’ arms are long without locking the elbows.
- Shift your weight into one foot with a small bend in the standing knee.
- Hinge slowly forward from your hips, keeping your spine long as your chest moves toward the floor.
- Lift the opposite leg behind you, raising only as high as you can control without tipping sideways. Keep the lifted leg active and toes pointing down.
- Keep your hips facing the floor and gaze down or slightly forward. Hold for 3 to 5 breaths.
- Lower the leg with control, return to standing, and switch sides.
Modification: Keep the lifted leg lower and the torso more upright if full extension causes wobbling. A 45-degree hinge with a low leg lift is still a strong balance practice.
Avoid if: You have ankle instability, hamstring pain, lower-back pain, or feel unsafe in balance poses.
16. Double Dancer Pose
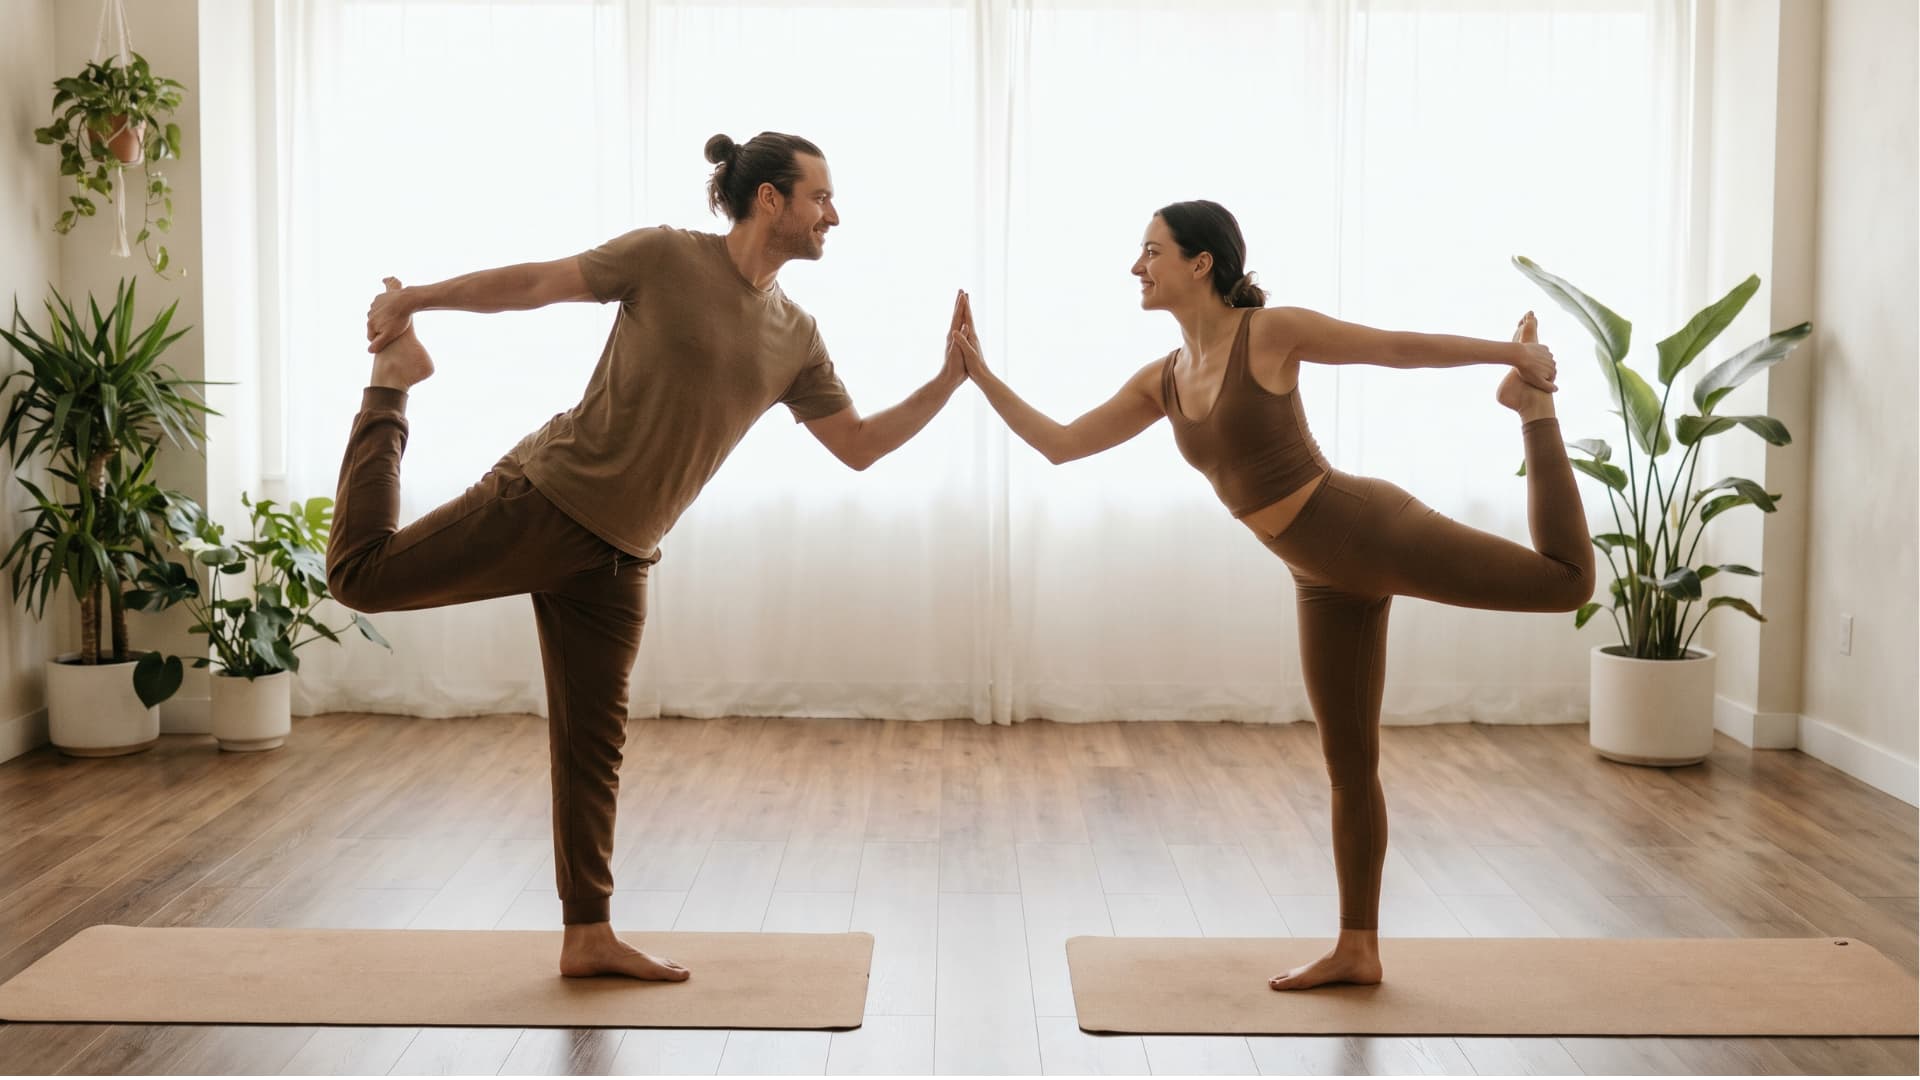
Difficulty: Moderate to Hard | Time: 20 to 40 seconds per side | Rounds: 2 rounds per side | Best For: Balance, hip flexors, chest opening
Double Dancer Pose is visually striking and often shared in couples yoga photos. What those images rarely show is how long it takes both partners to find their individual balance before adding the connection. Patience here is not a virtue, it is the method.
How to do it:
- Stand facing your partner with feet grounded and body tall. Hold one of your partner’s hands lightly for support.
- Shift weight into one foot, lengthening your spine and relaxing your shoulders.
- Bend the opposite knee slowly, reaching back with your free hand. Hold the inside or outside of the back foot, keeping the knee close to the midline.
- Press the foot gently into the hand to open the front of the thigh without forcing. Lift the chest and keep the spine long.
- Lean slightly forward only if steady. Keep your partner’s hand light, using it for balance rather than to pull deeper.
- Hold for 3 to 5 breaths. Release the foot slowly and switch sides with the same gentle approach.
Modification: Use a yoga strap looped around the back foot so the shoulder does not need to rotate as far back. This makes the pose accessible without forcing a grip that strains the shoulder.
Avoid if: You have knee pain, shoulder pain, or cannot hold Solo Dancer Pose safely for at least 3 breaths.
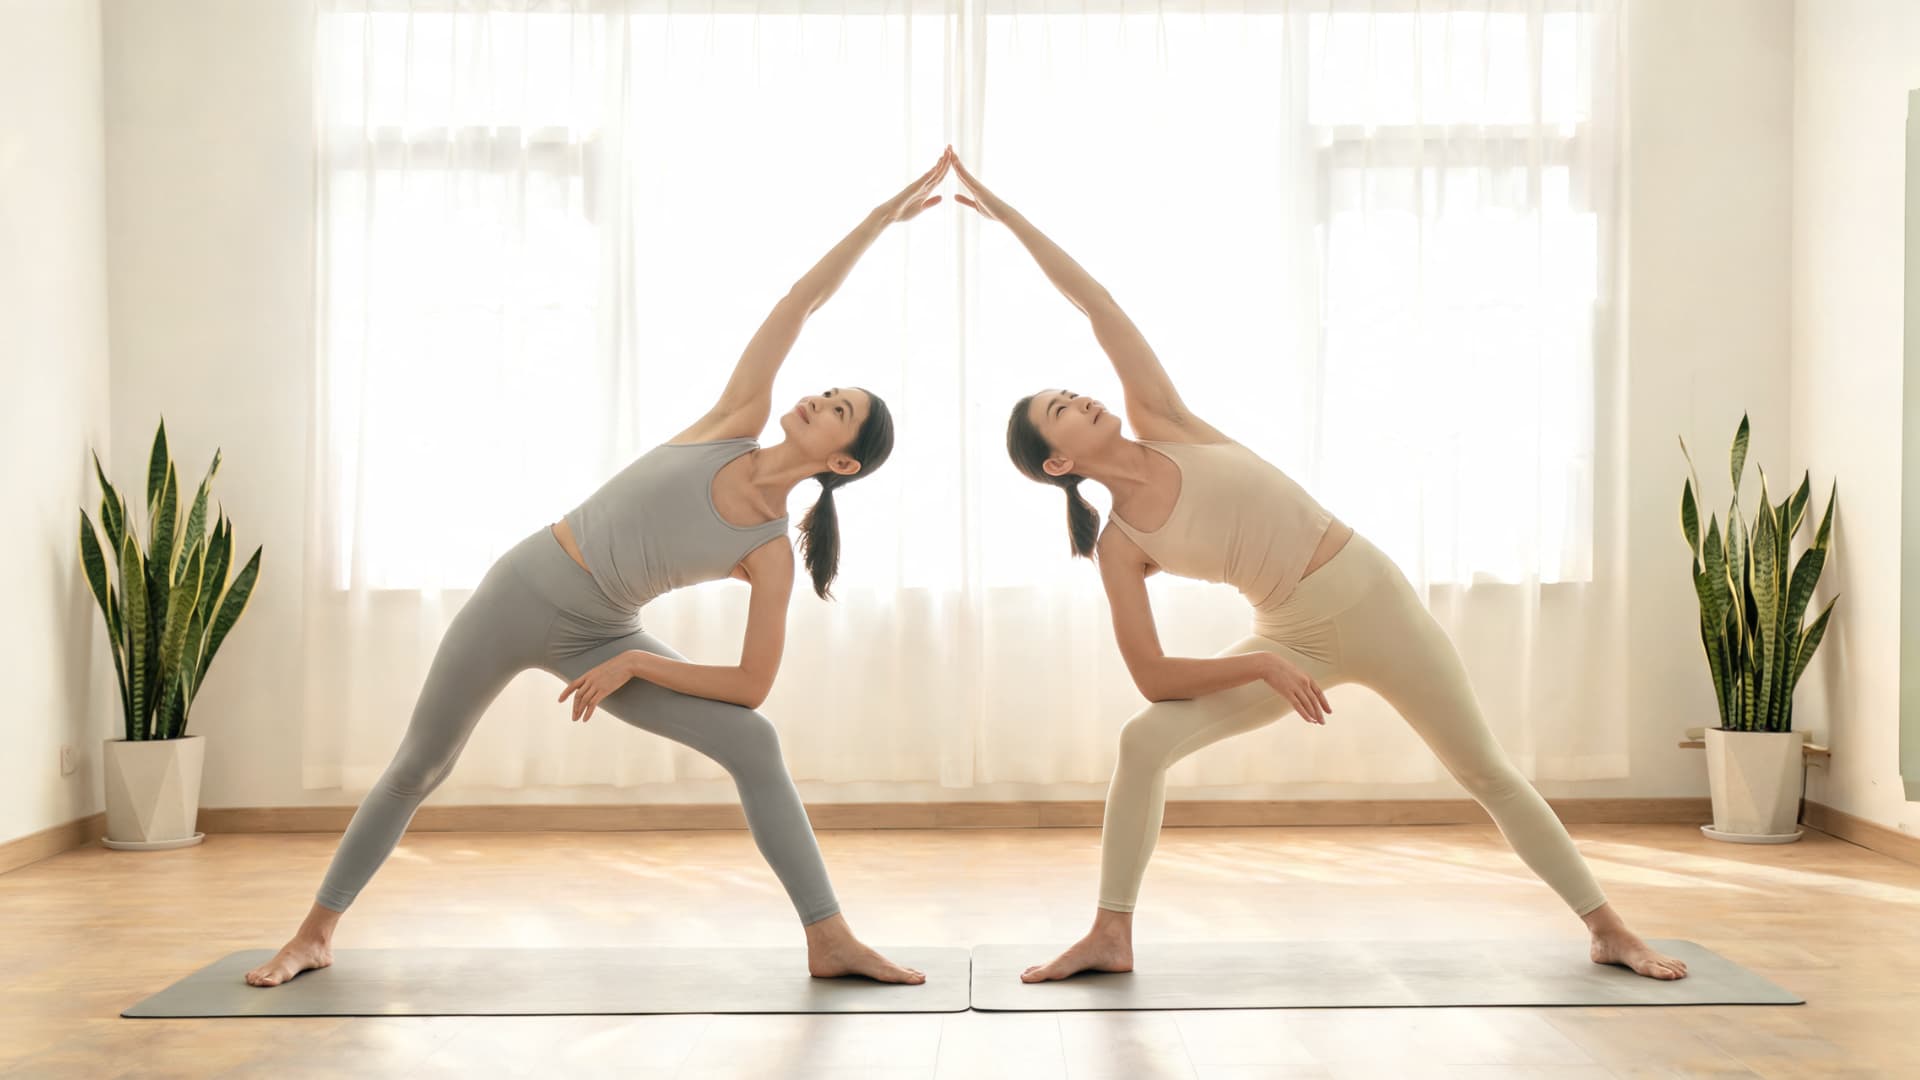
17. Partner Triangle Pose
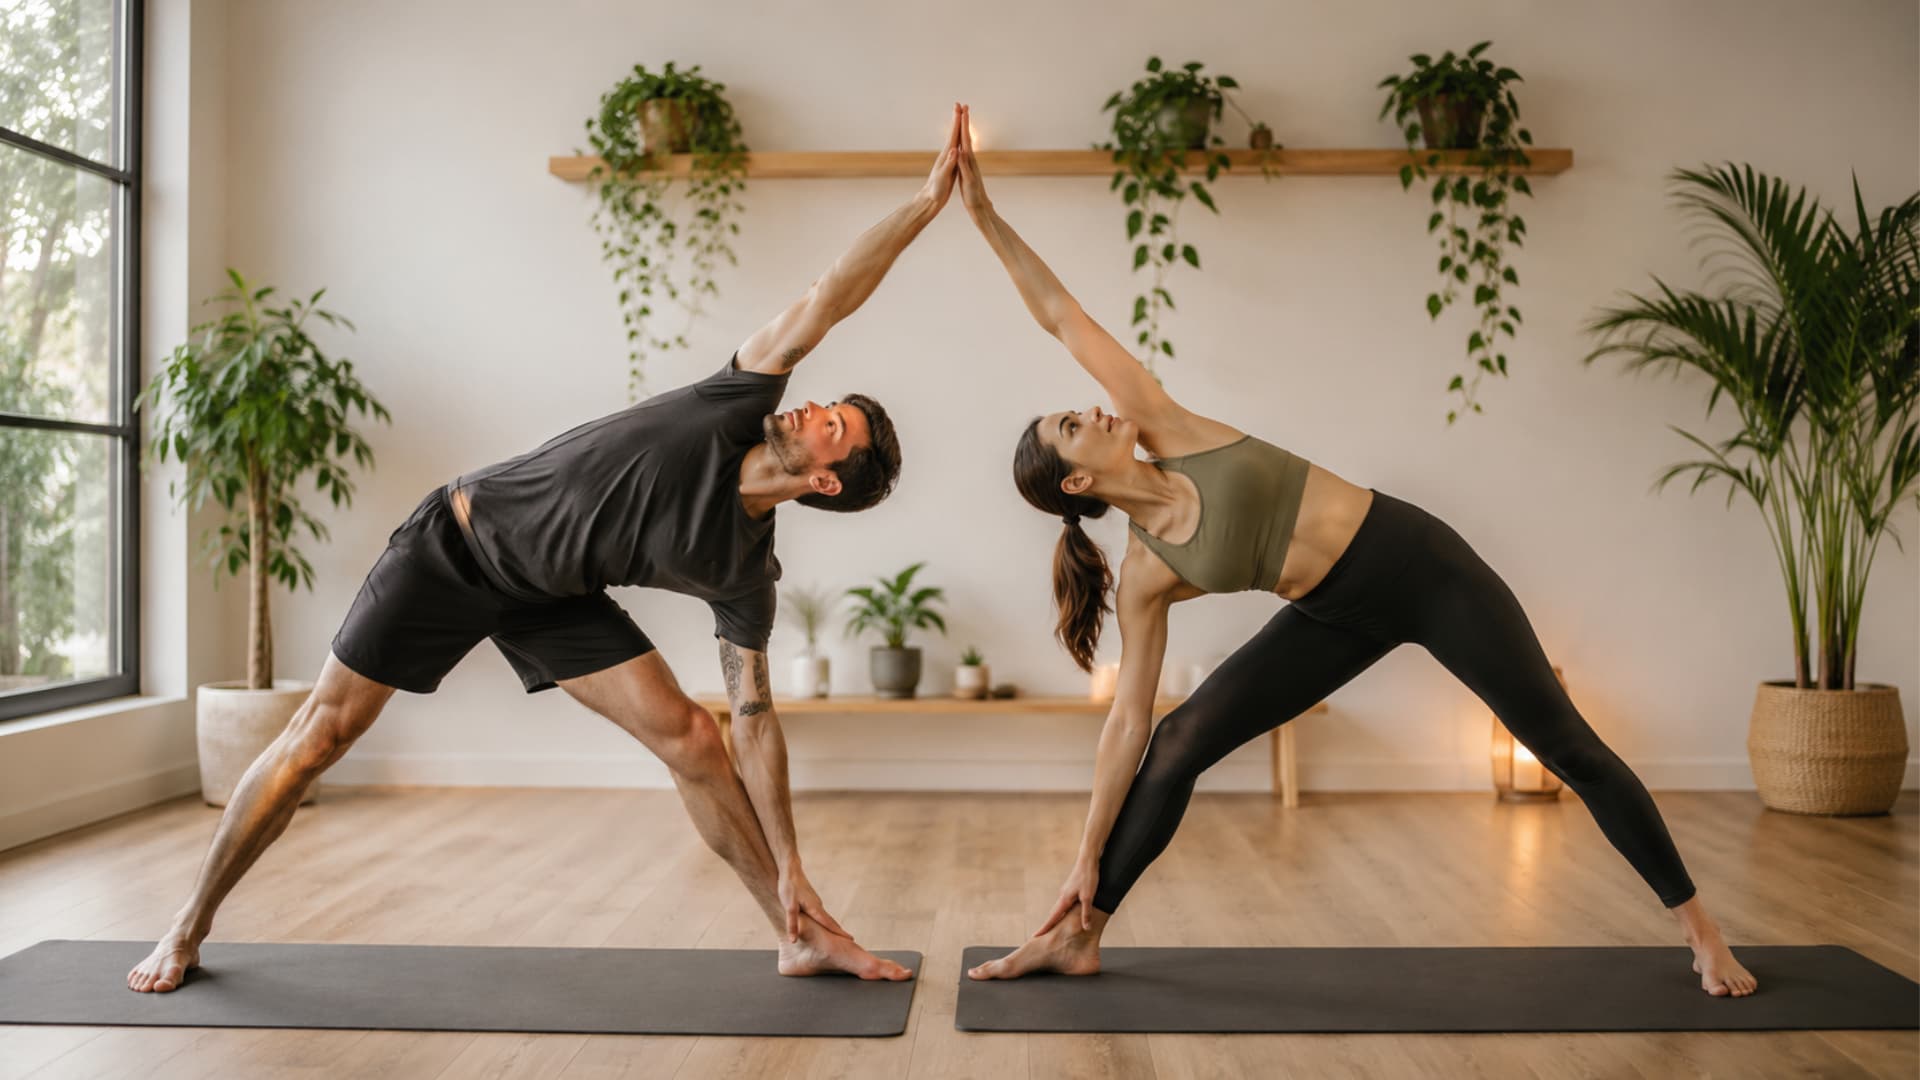
Difficulty: Moderate | Time: 30 to 60 seconds per side | Rounds: 1 to 2 rounds per side | Best For: Side body, hamstrings, hips
Partner Triangle Pose gives light contact in a classic standing pose. The shared top-hand connection helps both partners find length through the side body rather than just holding a static position.
How to do it:
- Stand facing your partner or side by side with enough room to move safely into a wide Triangle Pose stance.
- Front leg straight but soft at the knee. Back foot turned slightly inward for support. Arms extended level with the shoulders.
- Reach forward over your front leg and lower your bottom hand to your shin, a block, or the floor.
- Reach the top arm upward. If facing your partner, lightly connect top hands with a soft touch rather than a grip.
- Keep your chest open, spine long, and neck comfortable. Hold for 5 breaths.
- Press through both feet to rise slowly, then switch sides with the same control and support.
Modification: Use a yoga block under the bottom hand so the spine can stay long rather than collapsing toward the floor.
Avoid if: You have hamstring strain, balance issues, or pain in the front knee or hip.
18. Partner Extended Side Angle
Difficulty: Moderate | Time: 30 to 60 seconds per side | Rounds: 1 to 2 rounds per side | Best For: Legs, hips, side body, chest
Partner Extended Side Angle builds leg strength while stretching the side body. It follows naturally after Triangle or Warrior II because the stance and opening direction are closely related.
How to do it:
- Start in Warrior II with your partner nearby. Bend your front knee over your front ankle, keeping the knee in line with your front toes.
- Keep the back leg strong. Press through the outer edge of the back foot to stay grounded.
- Place your front forearm on your front thigh. Keep your chest open and roll the top shoulder back slightly.
- Reach the top arm overhead. If your partner is facing you, lightly connect hands or forearms with a soft touch.
- Lengthen from the back foot through the top fingertips. Hold for 5 breaths, then press through both feet to rise. Switch sides.
Modification: Rest the forearm on a block placed beside the front foot rather than on the thigh. This allows a deeper side stretch without collapsing the torso.
Avoid if: You have knee pain in lunges, shoulder pain overhead, or feel unstable in Warrior II.
19. Partner Twisted Chair
Difficulty: Moderate | Time: 20 to 40 seconds per side | Rounds: 2 rounds per side | Best For: Legs, core, spinal rotation
Partner Twisted Chair is a strong two person pose for the legs and core. The squat keeps both partners grounded while the twist requires coordination that builds body awareness quickly.
How to do it:
- Stand facing your partner with enough space to bend and twist comfortably. Hold your partner’s opposite hand with a light, steady grip.
- Keep feet hip-width apart and bend both knees into a Chair Pose, sitting the hips slightly back. Keep the chest lifted and knees pointing forward.
- Slowly twist away from your partner, moving from the ribs and upper back rather than the lower back. The connected hand offers light support without pulling your partner deeper.
- Hold for 3 to 5 breaths, then return to center with control. Stand up briefly if needed before repeating on the other side.
Modification: Keep the squat shallow and the twist small. Even a gentle rotation from a near-upright position engages the obliques effectively without straining the lower back.
Avoid if: You have knee pain, lower-back pain during twists, or discomfort in squatting poses.
20. Child’s Pose and Fish Pose
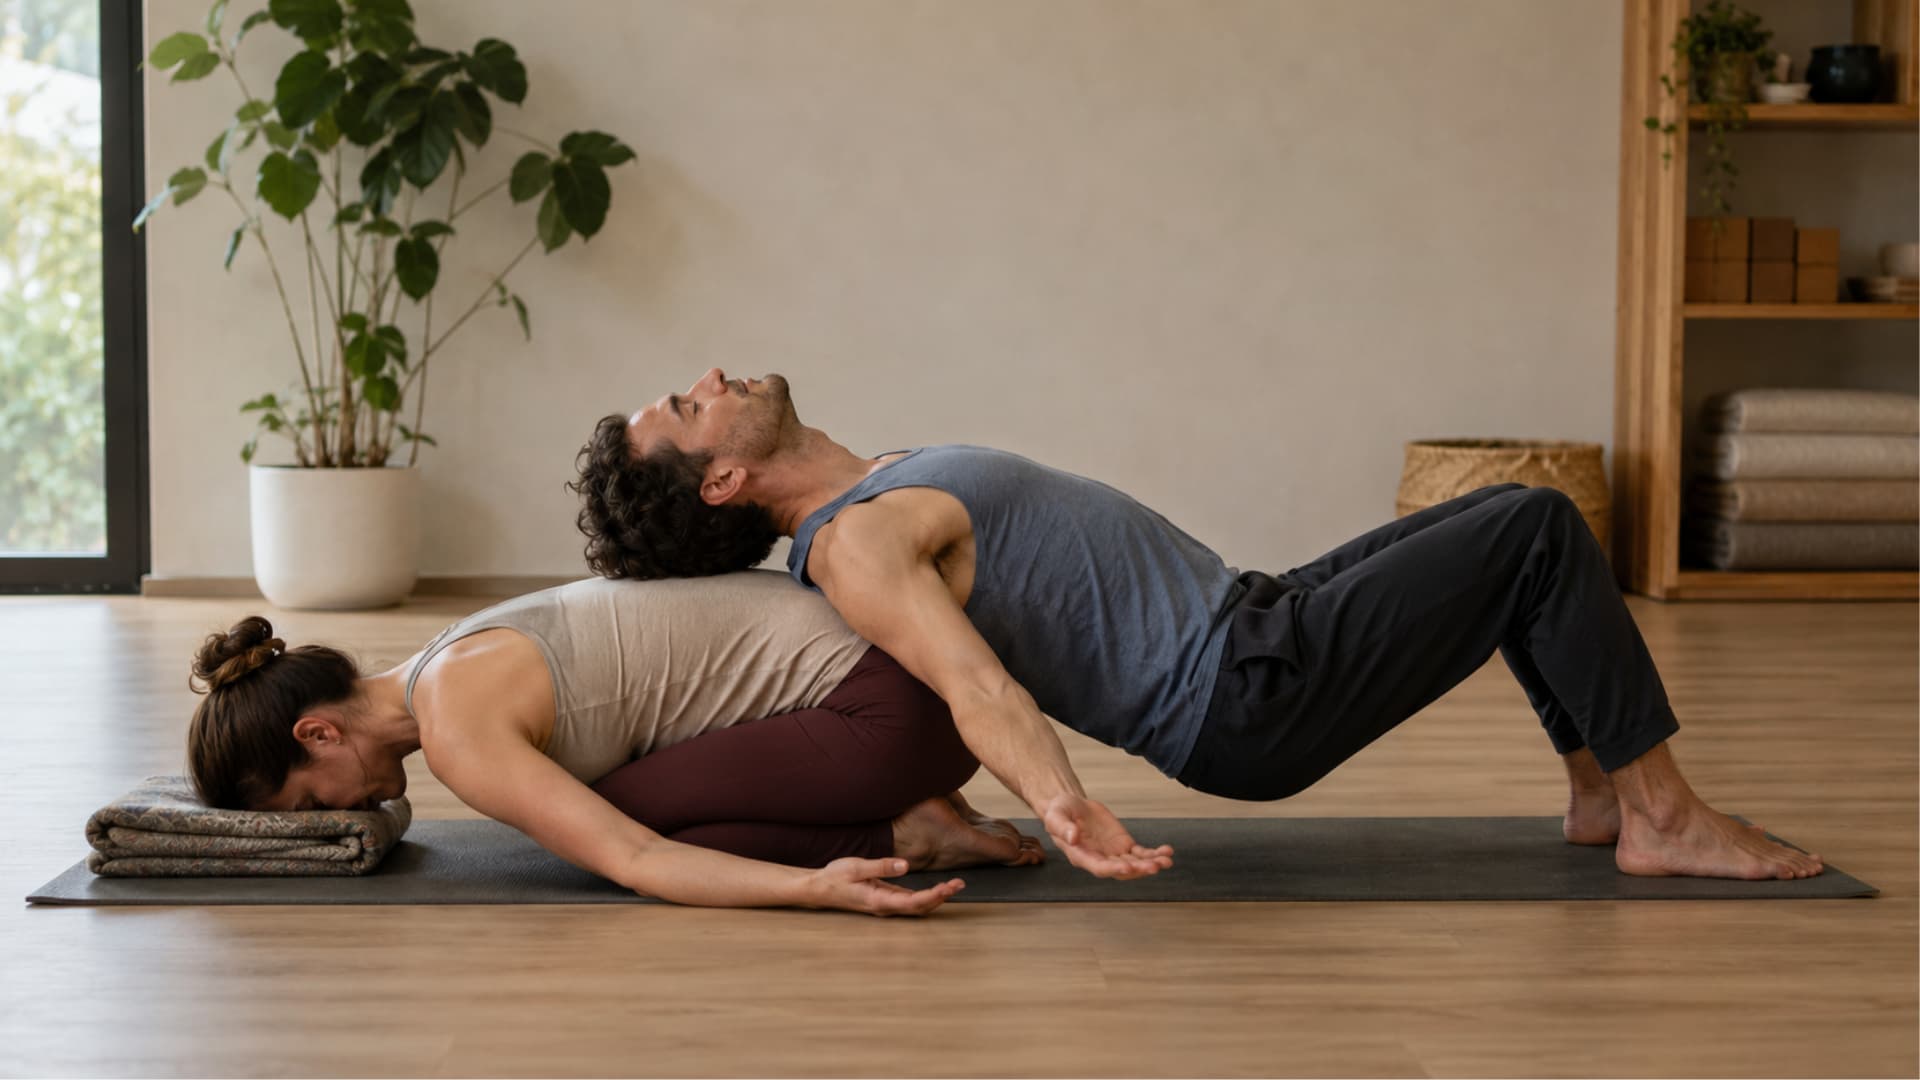
Difficulty: Moderate | Time: 1 to 2 minutes per role | Rounds: 1 round for each role | Best For: Chest opening, back release, relaxation
Child’s Pose and Fish Pose gives one partner a grounded resting shape while the other receives a supported chest opener. It works particularly well near the end of practice when both people are warm but ready to slow down.
How to do it:
- Partner A comes into Child’s Pose with hips back toward the heels. Knees can be together or slightly apart, forehead resting on the mat or a blanket.
- Partner B sits carefully near Partner A’s lower back, facing away. Keep feet grounded to control body weight before lowering.
- Partner B slowly lowers the back onto Partner A’s back, keeping some weight in the feet at first. Open the arms out to the sides and let the chest broaden.
- Both partners check in immediately. Speak up and adjust right away if there is too much pressure.
- Stay for 5 to 8 breaths, then Partner B plants the feet and uses core strength to sit up, avoiding pushing down into Partner A’s back. Switch roles.
Modification: Partner B can keep more weight in the feet throughout the entire hold, making this a supported rather than a full-weight pose. This is the recommended starting point for all first-time attempts.
Avoid if: Either partner has knee pain, back pain, or discomfort with body weight pressure.
Advanced Partner Yoga Poses
Advanced yoga poses for two people require more strength, body control, and a solid foundation in earlier levels. These poses may include stacked shapes, deeper backbends, or demanding balance work. Only attempt them after both partners feel consistently steady in beginner and intermediate poses, and stop immediately if either partner feels pain or sharp pressure.
21. Double Plank
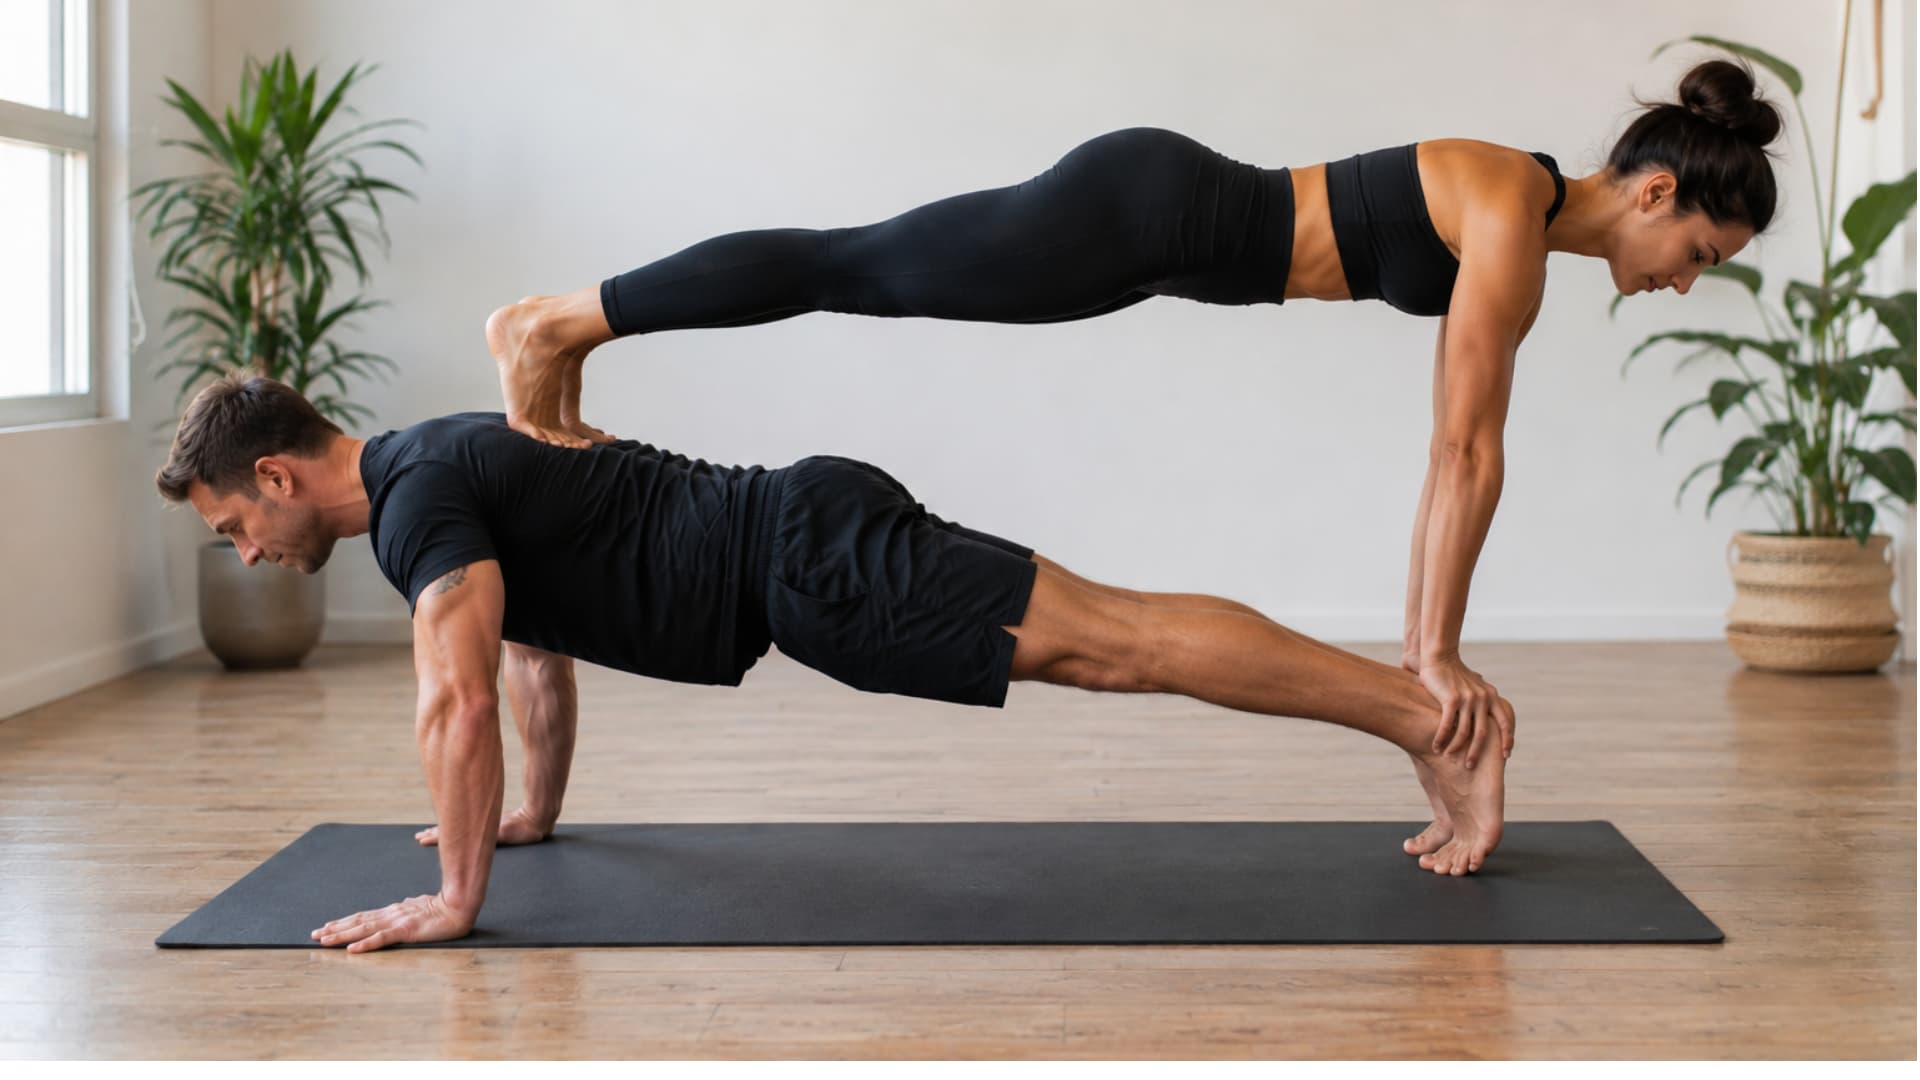
Difficulty: Hard | Time: 15 to 30 seconds | Rounds: 2 to 3 rounds | Best For: Core, shoulders, arms, strength
Double Plank is a demanding stacked pose. Both partners must already hold a stable solo Plank Pose before adding the shared element. This is not a pose to attempt on the first or second session together.
How to do it:
- Partner A comes into a strong Plank Pose with hands under shoulders, fingers spread, core firm, and body in one long line from head to heels.
- Partner B stands near Partner A’s feet and places hands near Partner A’s ankles.
- Partner B carefully places one foot on Partner A’s upper back or shoulder area, avoiding the lower back. Then adds the second foot slowly, allowing Partner A time to stabilize.
- Partner B enters full Plank Pose on top, keeping core engaged and avoiding letting weight drop suddenly.
- Both partners maintain strong, straight bodies. Communicate immediately if either feels strained. Hold 15 to 30 seconds.
- Partner B steps down one foot at a time carefully. Partner A lowers after Partner B is fully clear. Rest before repeating.
Modification: Partner B can rest their shins on Partner A’s upper back rather than full Plank hands, reducing the strength demand on both partners while maintaining the stacked shape.
Avoid if: Either partner has wrist, shoulder, or back pain, or if the base partner cannot hold a steady 30-second solo plank.
22. Double Downward Dog
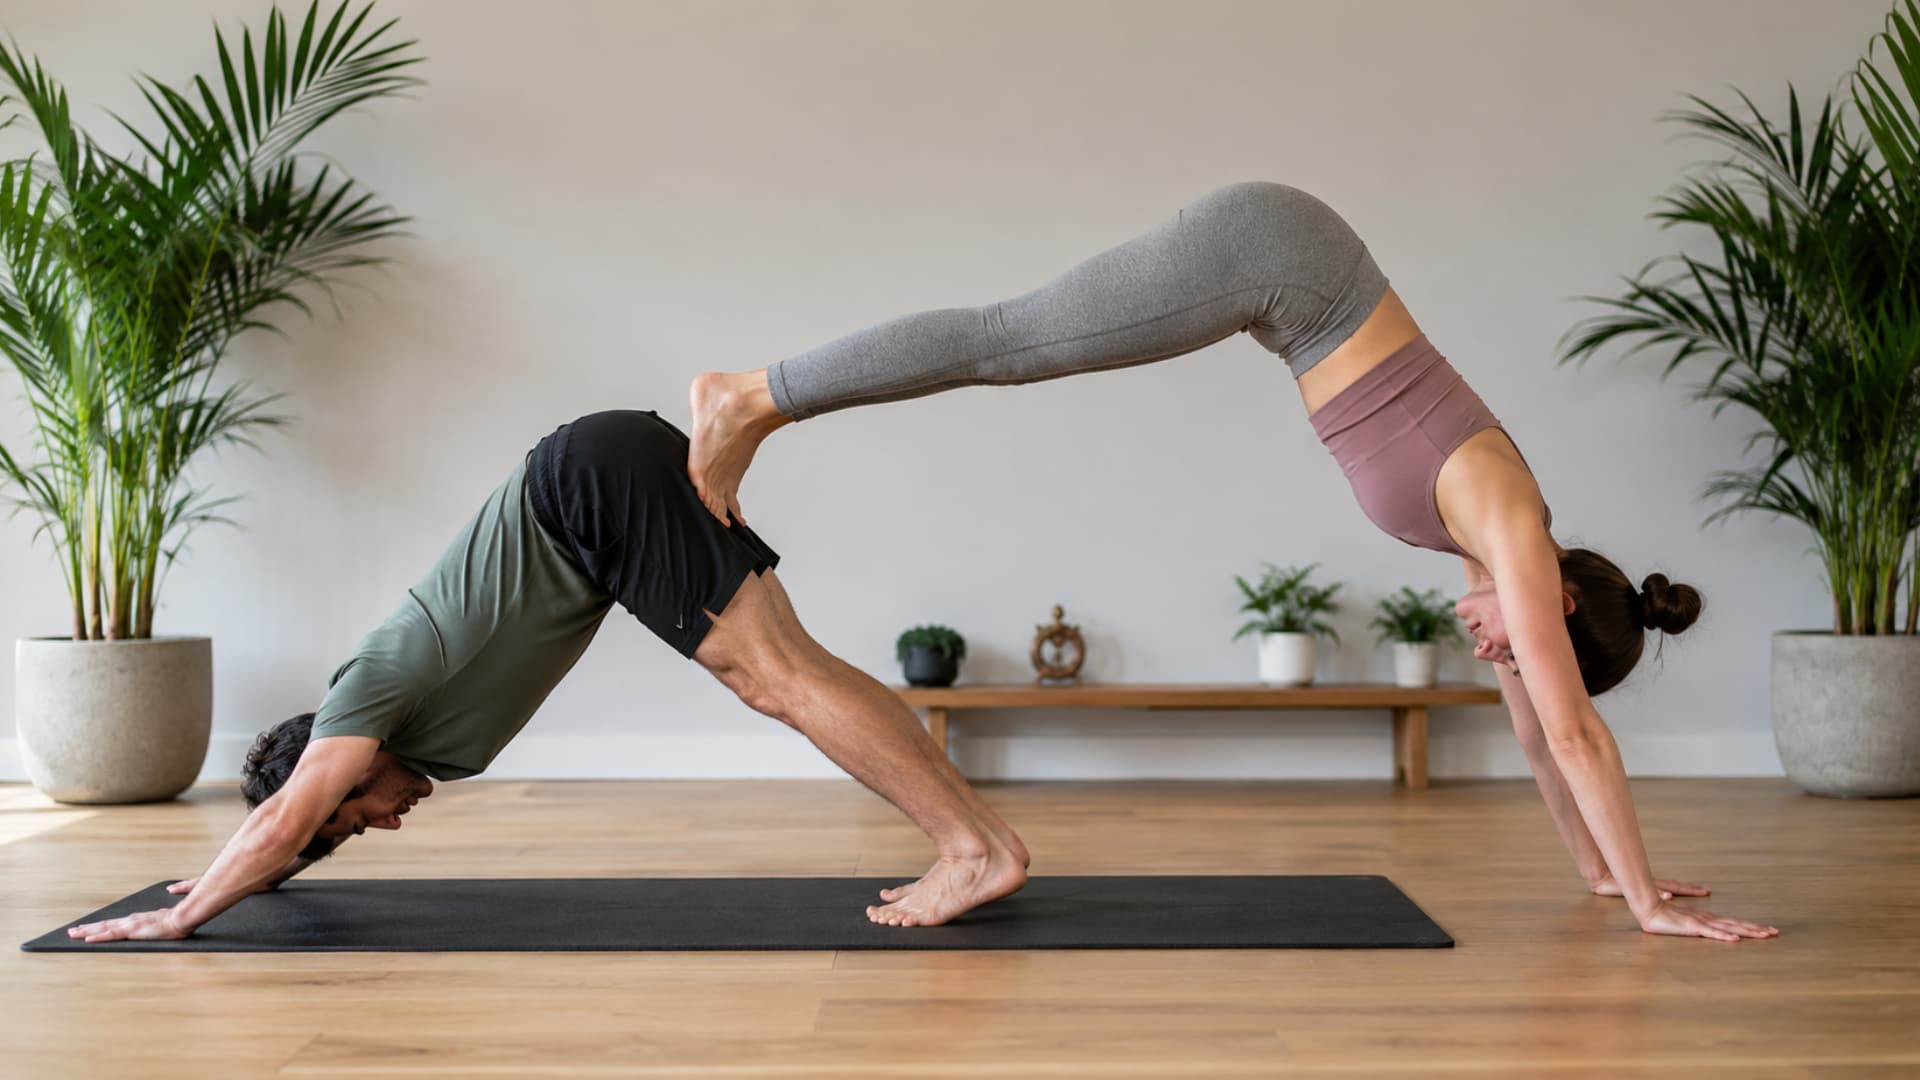
Difficulty: Hard | Time: 3 to 5 breaths | Rounds: 2 rounds | Best For: Shoulders, hamstrings, core, body control
Double Downward Dog creates a stacked shape where both people need stable shoulders and clear communication. A spotter is recommended when learning this pose for the first time.
How to do it:
Partner A:
- Come into Downward Dog with fingers spread and palms pressing firmly into the mat. Keep arms strong, shoulders stable, hips lifted, and spine long.
Partner B:
- Stand in front of Partner A with hands shoulder-width apart on the floor. Shift weight into your hands, engage core and arms.
- Place one foot on Partner A’s hips or upper thighs. Wait until steady before adding the second foot.
- Form a Downward Dog shape with hips lifted and spine long. Hold 3 to 5 breaths, communicating pressure clearly. Step down one foot at a time.
Partner A: Lower to Child’s Pose to rest after Partner B is clear.
Modification: Partner B can place just the shins rather than the full feet on Partner A’s hips for a lighter version that still creates the stacked shape.
Avoid if: Either partner has wrist, shoulder, or lower-back pain, or feels unsafe in stacked poses.
23. Partner Wheel Pose
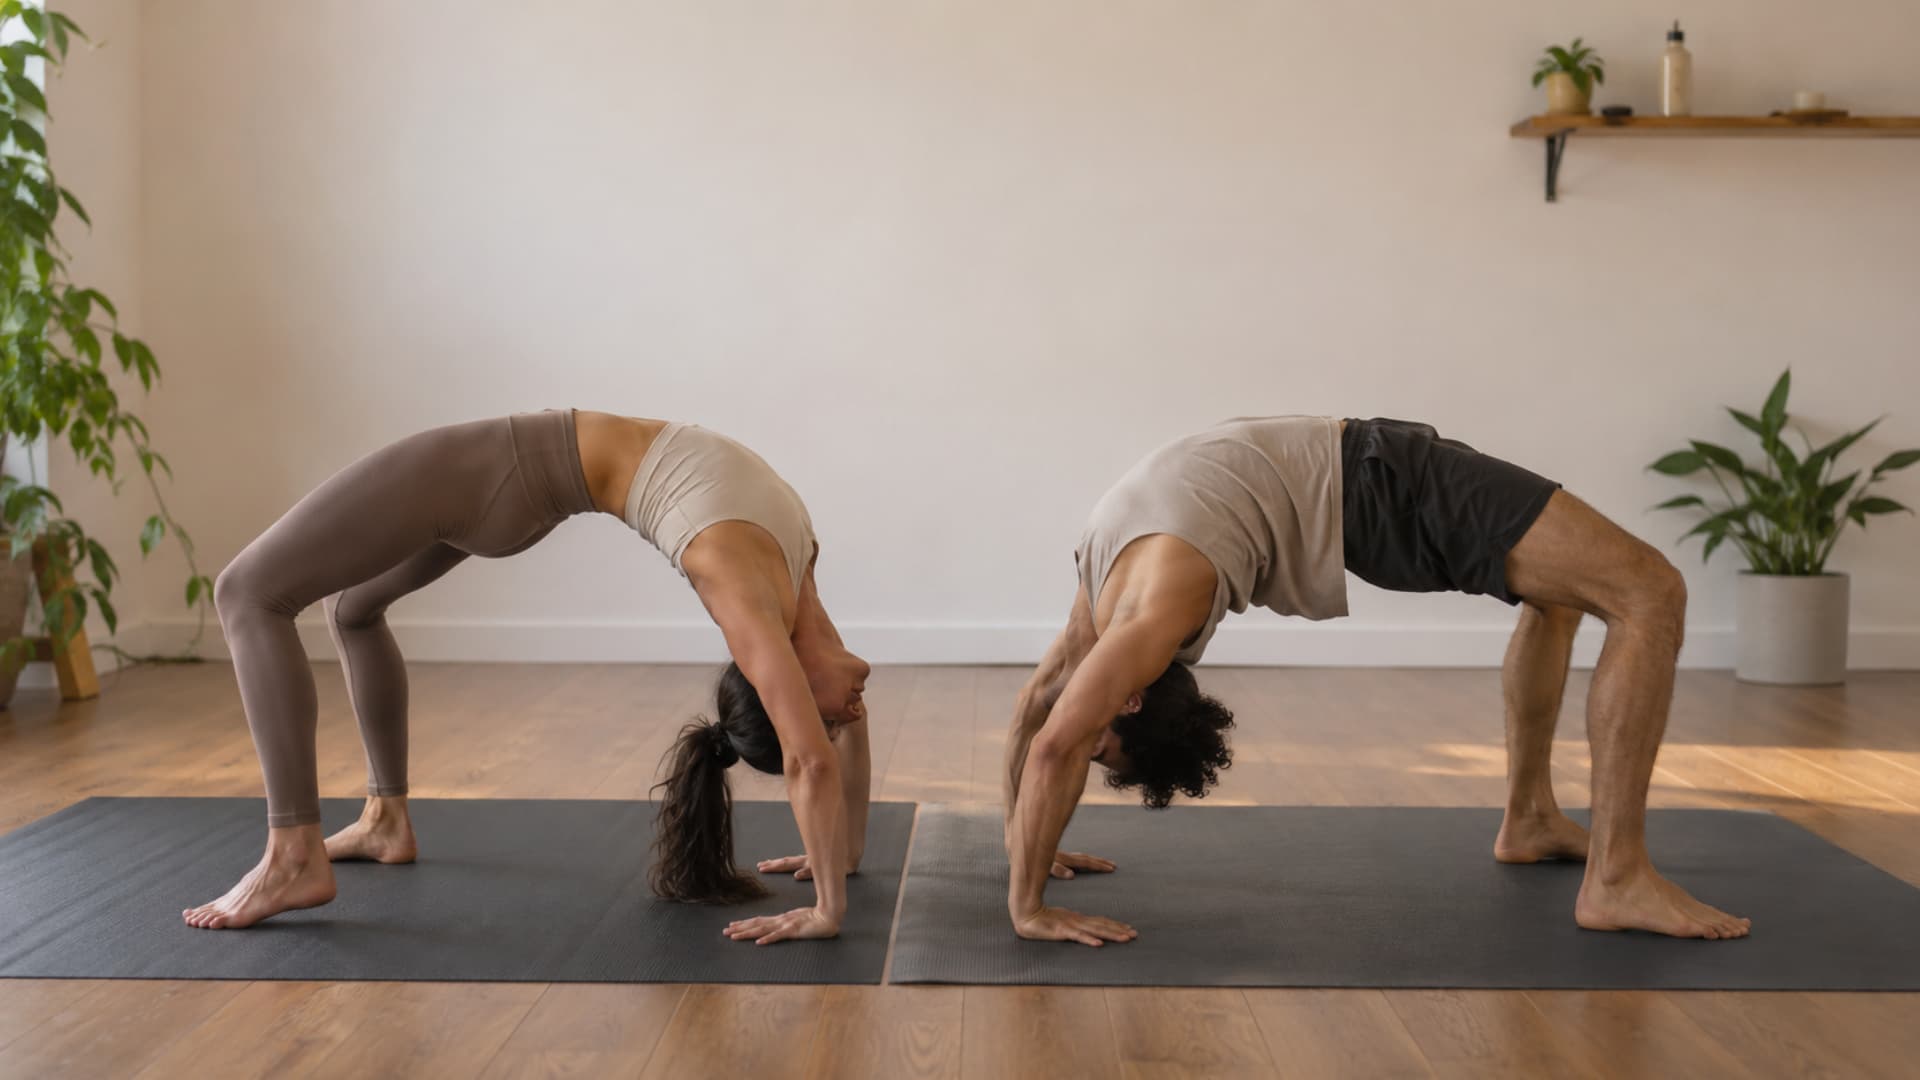
Difficulty: Hard | Time: 2 to 5 breaths | Rounds: 1 to 2 rounds | Best For: Chest, shoulders, spine, legs
Partner Wheel Pose is an advanced backbend. Both partners must be able to hold Solo Wheel Pose comfortably for 3 or more breaths before adding any partner contact.
How to do it:
- Lie on your backs near each other with enough space to move safely. Bend knees, place feet hip-width apart, and set hands beside your ears with fingers pointing toward your shoulders.
- Press evenly through feet and hands. Lift hips first, keeping legs active, then press up through the chest.
- Straighten arms as comfortably as possible. Maintain a small bend if the shoulders or wrists feel tight.
- Connect lightly with your partner (feet, hands, or shoulders) only once both partners are stable in their individual poses.
- Hold 2 to 5 breaths. Tuck the chin slightly and lower slowly through the spine, section by section.
- Rest on your backs, settle the breath, and confirm readiness before any second attempt.
Modification: Bridge Pose is an effective preparation that uses the same hip and chest-opening pattern at a fraction of the spinal extension load. Practice Bridge together before attempting Wheel.
Avoid if: You have wrist, shoulder, neck, or back pain, or Solo Wheel Pose is not comfortable and consistent.
Acro Yoga Poses for Two People
Acro yoga poses involve lifting, flying, and shared weight balance. They can look exciting, and they are genuinely fun once the foundation is solid. But they require careful setup, clear verbal cues, a spotter when learning, and a soft practice surface. Start with beginner acro yoga poses only, and do not progress to harder poses without a trained teacher or experienced spotter present.
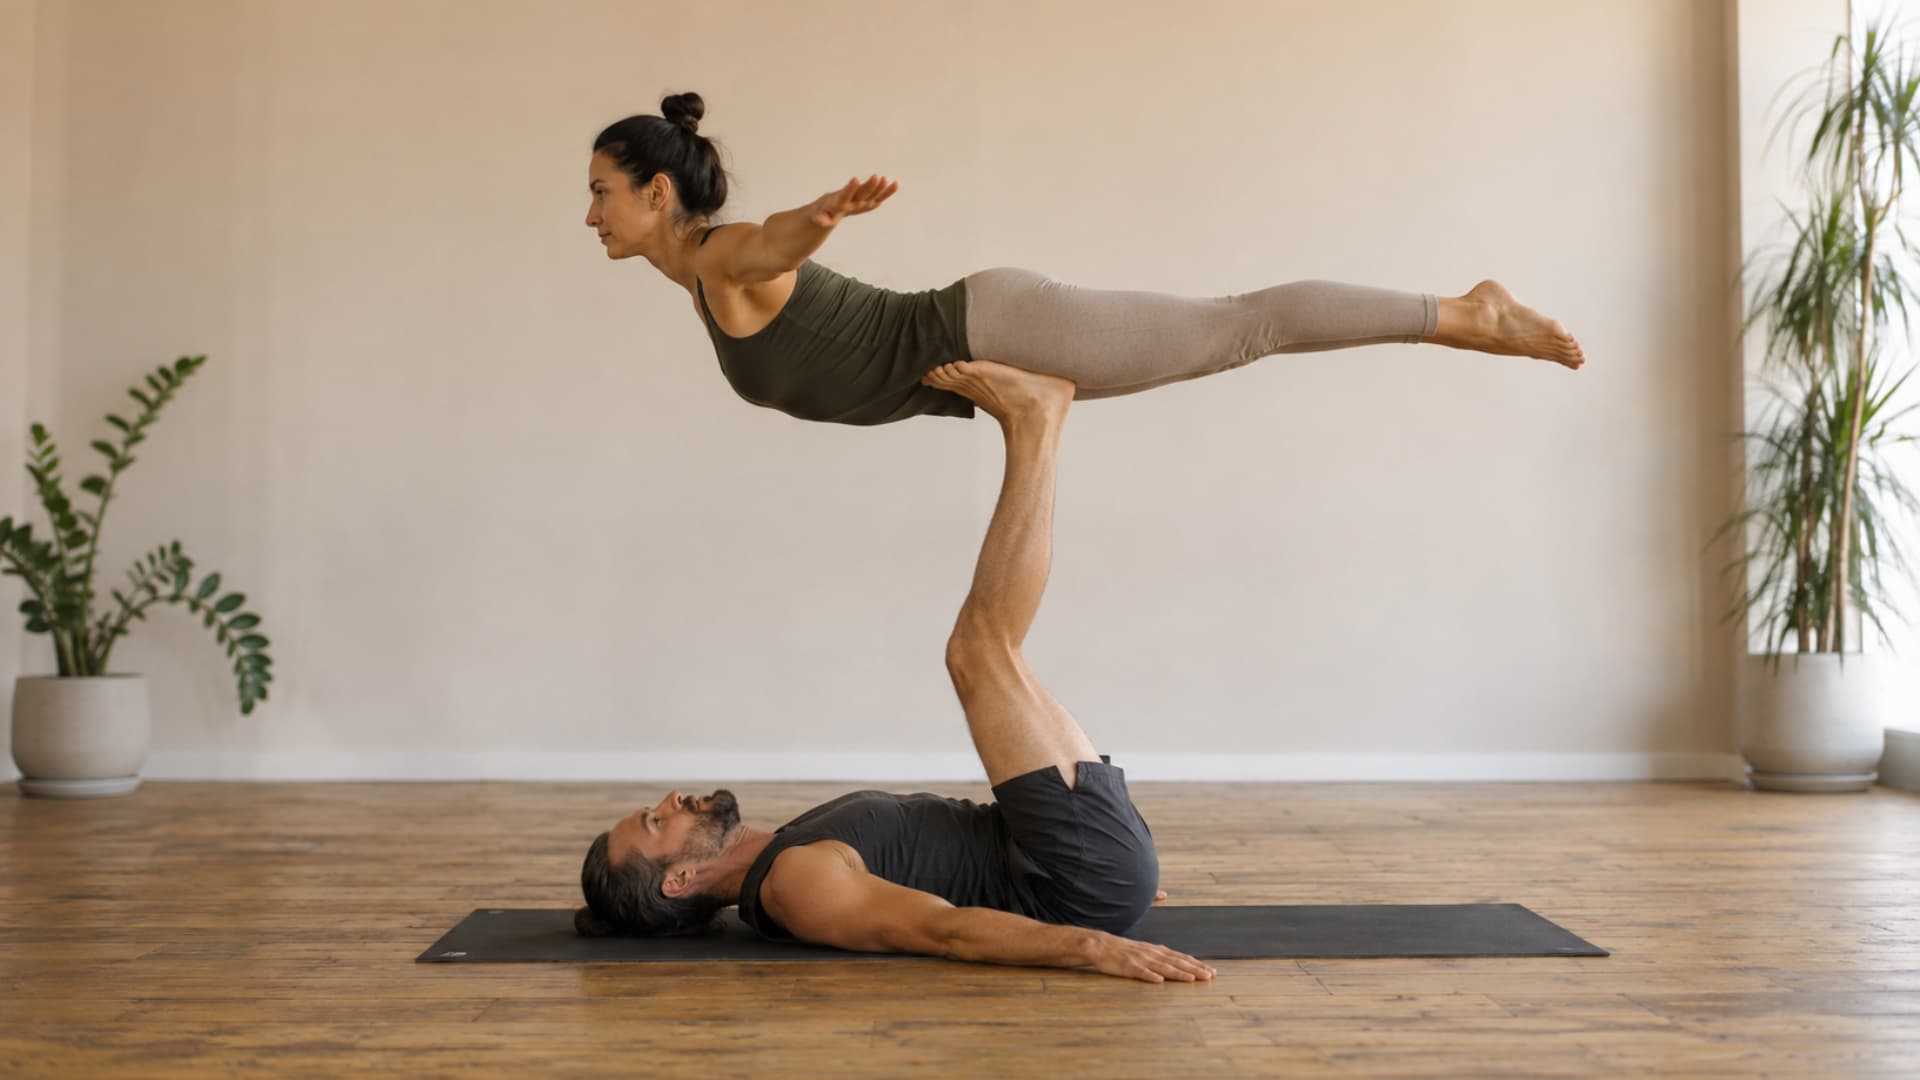
24. Airplane Plank (Front Plank)
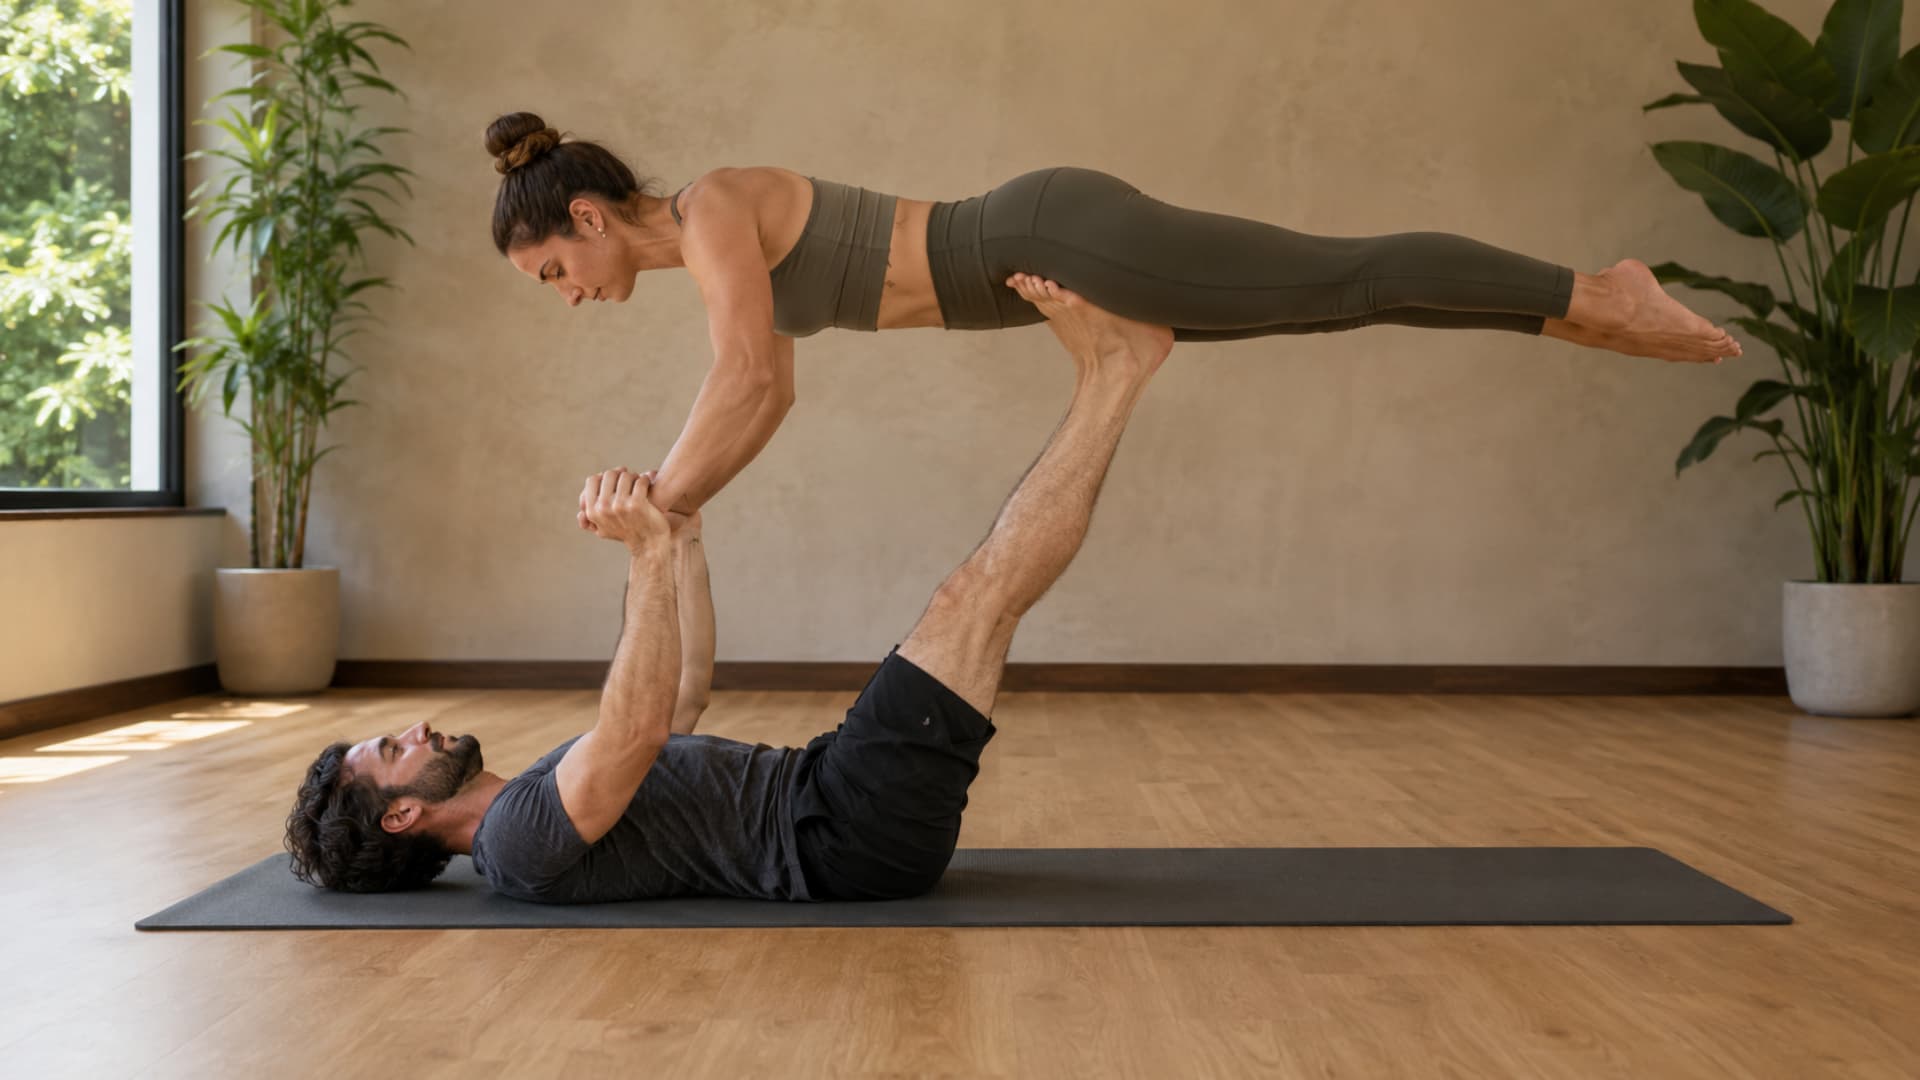
Difficulty: Hard | Time: 10 to 20 seconds | Rounds: 2 to 4 short attempts | Best For: Acro foundation, trust, core strength
Airplane Plank, also called Front Plank in acro yoga, is one of the most common entry-level acro poses. It is still significantly more demanding than grounded partner yoga, so approach it slowly and always use a spotter for the first several attempts.
How to do it:
- The base lies on their back with head, shoulders, and spine relaxed. Bend the knees and lift the legs softly.
- The flyer stands facing the base, close enough for control and clear communication.
- The base places feet at the flyer’s hip creases, keeping feet even and avoiding pressing into the ribs.
- Both partners hold hands with a supportive, relaxed grip. The flyer engages legs, core, and back, keeping the body firm and long.
- The flyer leans gradually forward while the base straightens legs slowly to lift. Press evenly and avoid locking the knees.
- Both partners keep arms strong for balance. The flyer maintains a straight body and active legs. Hold 10 to 20 seconds.
- Lower the flyer with control. Rest completely before any second attempt.
Avoid if: The base has lower-back, hip, or knee pain, or the flyer has wrist, shoulder, or back discomfort.
25. Bird Pose
Difficulty: Hard | Time: 10 to 20 seconds | Rounds: 2 to 4 short attempts | Best For: Acro balance, chest opening, core control
Bird Pose follows Airplane Plank once both partners feel genuinely steady in that shape. The flyer releases the hands and opens the arms, which removes the balance connection between partners entirely. Both people need real core control before attempting this.
How to do it:
- Both partners establish balance in Airplane Plank first. Communicate clearly before any hand movement.
- The base keeps feet steady at the flyer’s hip creases with even pressure. The flyer maintains a straight, active body.
- Pause and check stability. The flyer slowly lifts one hand with the chest staying forward. Lift the second hand only if both feel genuinely steady.
- The flyer opens arms to the sides, keeping shoulders relaxed and chest broad. Hold 10 to 20 seconds. Stop and reconnect hands if either partner feels unstable.
- Reconnect hands slowly. The base bends knees and lowers gently. The flyer lands softly and rests fully before repeating.
Avoid if: Airplane Plank is not consistently steady, either partner feels unstable at any point, or you do not have sufficient acro experience for hand-free flying.
How to Build a 20-Minute Partner Yoga Session
Students in my classes who get the most from partner yoga are the ones who approach it as a sequence rather than a collection of individual poses.
Here is a structure that works for first and second sessions together, using only the beginner and lower intermediate poses from this list.
| Time | Pose/Activity | Focus/Benefit |
|---|---|---|
| 1–3 min | Seated Partner Cat-Cow | Warm the spine and synchronize breath |
| 3–7 min | Seated Spinal Twist, Butterfly Pose, Seated Forward Fold | Open hips and stretch hamstrings |
| 7–12 min | Partner Temple Pose, Standing Partner Forward Fold | Open shoulders and back body |
| 12–16 min | Double Tree Pose, Partner Chair Pose | Improve balance and strengthen legs |
| 16–20 min | Partner Savasana | Full rest and integration |
Once this 20-minute structure feels easy and comfortable across two or three sessions, you can begin adding intermediate poses like Partner Boat Pose, Partner Warrior III, or the Child’s Pose and Fish Pose combination near the end of practice.
If you want a more structured long-term progression, yoga challenge programs give both partners a week-by-week framework that builds on the same habits this guide starts with.
Common Mistakes to Avoid in Partner Yoga
A few consistent habits make partner yoga safer and more effective. These are the mistakes I see most often in class, and all of them are easy to correct once you know what to look for.
- Pulling too hard: Gentle support is the entire point. Forcing your partner into a deeper stretch removes their ability to feel their own edge.
- Holding the breath: Both partners should breathe steadily throughout. If breathing becomes labored, the pose is too deep or too demanding for that session.
- Skipping the warm-up: Warm muscles respond better to partner-assisted stretching. Start with Seated Cat-Cow and the seated floor poses every time.
- Moving to acro too soon: Build grounded communication and body awareness across multiple sessions before attempting any lift.
- Ignoring height and flexibility differences: Use props, shorter stances, and smaller ranges of movement when partners have different body types. The goal is a good stretch for both people, not a matched aesthetic.
Frequently Asked Questions
Do you need to be flexible for partner yoga?
No. Partner yoga is not about flexibility. It is about coordination, communication, and mutual support. Many of the most effective beginner two person yoga poses ask for very little range of motion. Your partner’s job is to support you at your current level, not to pull you further than your body allows. Flexibility may improve over time as a side effect of regular practice, but it is never a prerequisite for starting.
What is the difference between partner yoga and acro yoga?
Partner yoga is a grounded practice that uses seated and standing poses where both people stay in contact with the floor. It is beginner-friendly and does not require a spotter. Acro yoga involves lifts, flying poses, and stacked body positions where one partner is completely off the ground. Acro yoga requires more strength, prior experience, and ideally a trained spotter when learning. Start with partner yoga and only add acro elements after months of grounded practice together.
Can you do partner yoga without a mat?
Yes, but a non-slip surface is strongly recommended. Yoga mats reduce the risk of slipping during standing poses, provide cushioning for seated and lying poses, and create a defined personal space for each partner. On a bare floor, even a small slip during a balance pose can cause both partners to fall. If mats are unavailable, practice on a carpet or low-pile rug and avoid any standing balance or stacked poses.
How should partners deal with height differences in yoga poses?
Height differences are common in partner yoga and rarely prevent any pose from working. For seated poses, the taller partner may need to sit on a folded blanket to bring hip height closer. For standing poses with hand connections, use a yoga strap between you if you cannot reach comfortably. For forward folds and back-to-back poses, adjust your foot distance until both partners feel stable rather than forcing a specific stance width. The pose adapts to the bodies, not the other way around.
Summing Up
Partner yoga works best when you treat it as a shared practice, not a performance. With these yoga poses for two people, you can start with grounded beginner poses, build trust through simple check-ins, and move into intermediate balance work when both bodies feel ready.
I’d save acro yoga for later, once you and your partner feel steady, strong, and clear with communication. The point is to feel supported, not pushed. Move slowly, use props when they help, and skip any pose that feels painful or awkward in the wrong way.
You do not need to finish every pose in one session. Choose five beginner poses, practice for 20 minutes, and notice what feels good. As your confidence grows, you can add stronger standing poses, deeper stretches, or simple acro shapes with proper support.
Save the full list for future sessions, and share which poses you enjoyed most.
Sources
Aron, A., Norman, C., Aron, E., McKenna, C., and Heyman, R., “Couples’ Shared Participation in Novel and Arousing Activities and Experienced Relationship Quality.” Journal of Personality and Social Psychology, 2000. https://pubmed.ncbi.nlm.nih.gov/10707338/
American College of Sports Medicine, “Exercise and Flexibility.” ACSM Resource Library, 2021. https://www.acsm.org/
Ross, A., and Thomas, S., “The Health Benefits of Yoga and Exercise: A Review of Comparison Studies.” Journal of Alternative and Complementary Medicine, 2010. https://pubmed.ncbi.nlm.nih.gov/20105062/