| Exercise Type | Strength / Back Development |
| Muscles Targeted | Lats, rhomboids, traps, rear delts, biceps, core |
| Difficulty | Beginner to Advanced (varies by variation) |
| Equipment | Bodyweight, dumbbells, barbell, cable machine, TRX |
| Best For | Back thickness, posture correction, push-pull balance, shoulder health |
| Avoid If | Acute lower back injury, rotator cuff tear (modify to supported variations) |
When I first started lifting, I kept hearing that you need to balance push and pull exercises. At the time, I did not really know what that meant.
Over time, I learned that horizontal pull exercises are among the most important moves you can do to develop a strong, healthy back. They target the muscles that help you sit tall, move better, and even lift heavier in other exercises. If you spend a lot of time at a desk (like me), these movements can also help undo the slouch we all tend to fall into.
Horizontal pull exercises are movements where you pull weight or resistance straight toward your torso in a row-style motion, parallel to the floor. They differ from vertical pulls like pull-ups because the angle shifts the load to your mid-back, rhomboids, and rear delts, rather than emphasizing shoulder adduction.
Most people simply call them rows, and they can be performed with a barbell, dumbbells, a cable machine, or just your bodyweight. They are also a core part of any solid functional strength training program, where pulling mechanics show up in everything from carrying groceries to climbing stairs.
| Disclaimer: This article is for informational and educational purposes only. It does not constitute medical advice. Always consult a qualified healthcare provider before starting a new exercise or fitness program. |
Benefits of Horizontal Pull Exercises
If you are wondering why horizontal pulls belong in every training week, here are the biggest reasons they make a difference. In my experience working through these movements myself, the shoulder health benefits showed up faster than almost anything else I had programmed.
- Improve posture by strengthening your back muscles, helping you sit and stand taller with less slouching throughout the day. Pairing rows with wall angels exercise at the end of a session accelerates this effect significantly.
- Reduce shoulder pain by balancing pressing and pulling movements. People who already deal with shoulder pain when benching often find that adding rows as a corrective measure helps restore that balance and reduces joint stress over time.
- Build a stronger, wider back that supports better athletic performance and more power in other compound lifts.
- Protect against injuries by training stabilizer muscles that often get ignored, giving your body more overall support and control.
- Balance your push-pull workout split by making sure pressing and pulling muscles develop evenly, preventing imbalances and poor movement patterns.
Adding these benefits together, it becomes clear why horizontal pulls are not optional. They are essential if you want strength, balance, and long-term results.
Horizontal Pull vs. Vertical Pull: What is the Difference?
A vertical pull, like a pull-up or lat pulldown, moves the resistance overhead and down.
A horizontal pull, like any row variation, moves the resistance parallel to the floor, directly toward your torso. That single change in angle shifts where the emphasis on the muscle lands.
Horizontal pulls recruit more rhomboid and mid-trap activity, which directly supports posture and scapular health. Vertical pulls hit the lats harder through shoulder adduction.
You need both for complete back development, but horizontal pulling is where most people fall short.
Best Horizontal Pull Exercises
These are the eleven horizontal pull exercises I recommend most, covering everything from heavy barbell loading to bodyweight-only options.
I have ordered them from the most commonly programmed to the more specialized, but all of them earn their place depending on your setup and goals.
1. Bent-Over Barbell Row
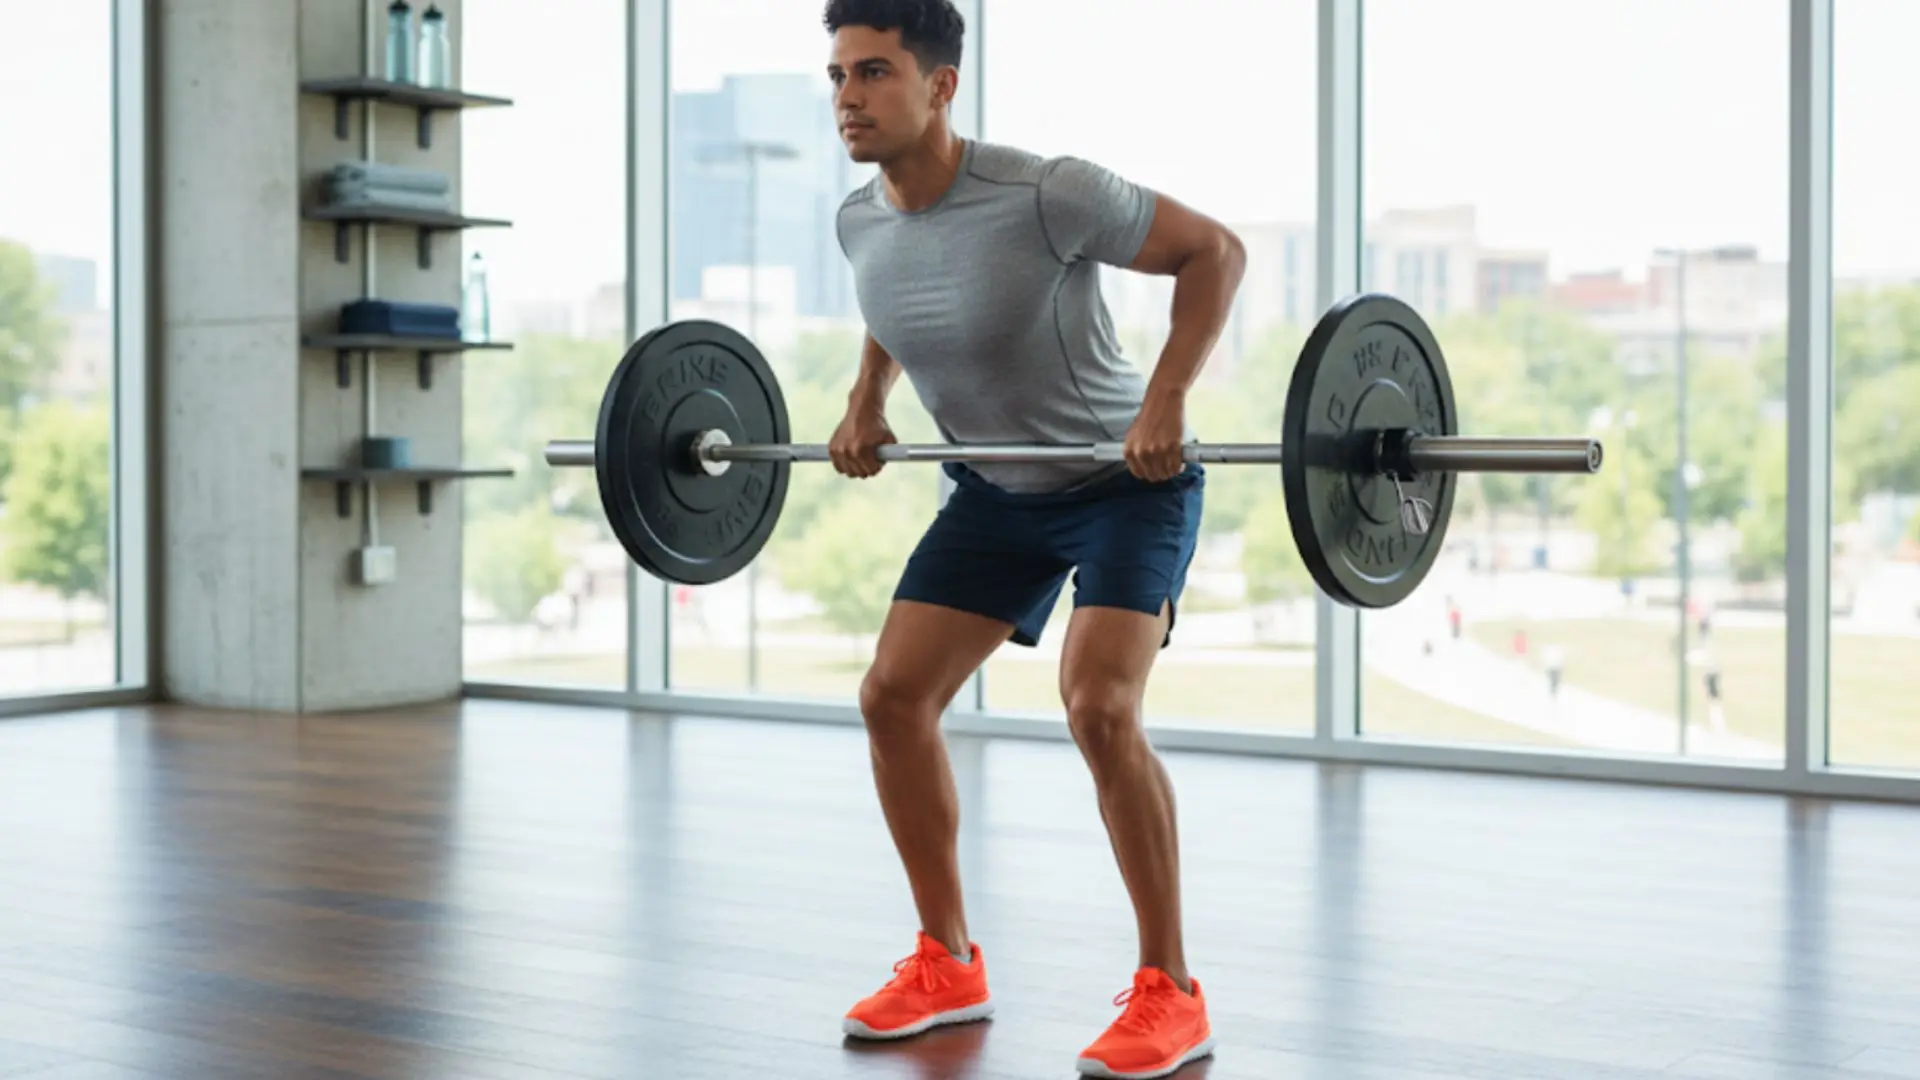
This is the foundational horizontal pull for building back size and strength. Hinge at the hips with a flat back, brace your core, and pull the bar toward your lower sternum.
The bent-over barbell row builds thickness through the lats and traps while also engaging your biceps and rear delts. When I program this for clients, I start them at a 45-degree torso angle and work toward a more horizontal position as their hip hinge mechanics improve.
Step-by-step:
- Stand with your feet hip-width apart and hold the barbell with an overhand grip.
- Hinge at your hips until your torso is about 45 to 60 degrees from the floor.
- Keep your back flat, chest slightly lifted, and core braced.
- Let the bar hang below your shoulders with your arms fully extended.
- Pull the bar toward your lower chest by driving your elbows back.
- Squeeze your shoulder blades together at the top of the rep.
- Lower the bar slowly until your arms are straight again.
- Repeat for 3 to 4 sets of 6 to 10 reps.
Muscles worked: lats, rhomboids, traps, rear delts, biceps.
| Trainer Tip: The biggest mistake I see on barbell rows is using the lower back to yank the weight up. If your torso rises more than a few degrees on each rep, drop the weight and focus on pulling with your elbows, not your spine. |
2. Single-Arm Dumbbell Row
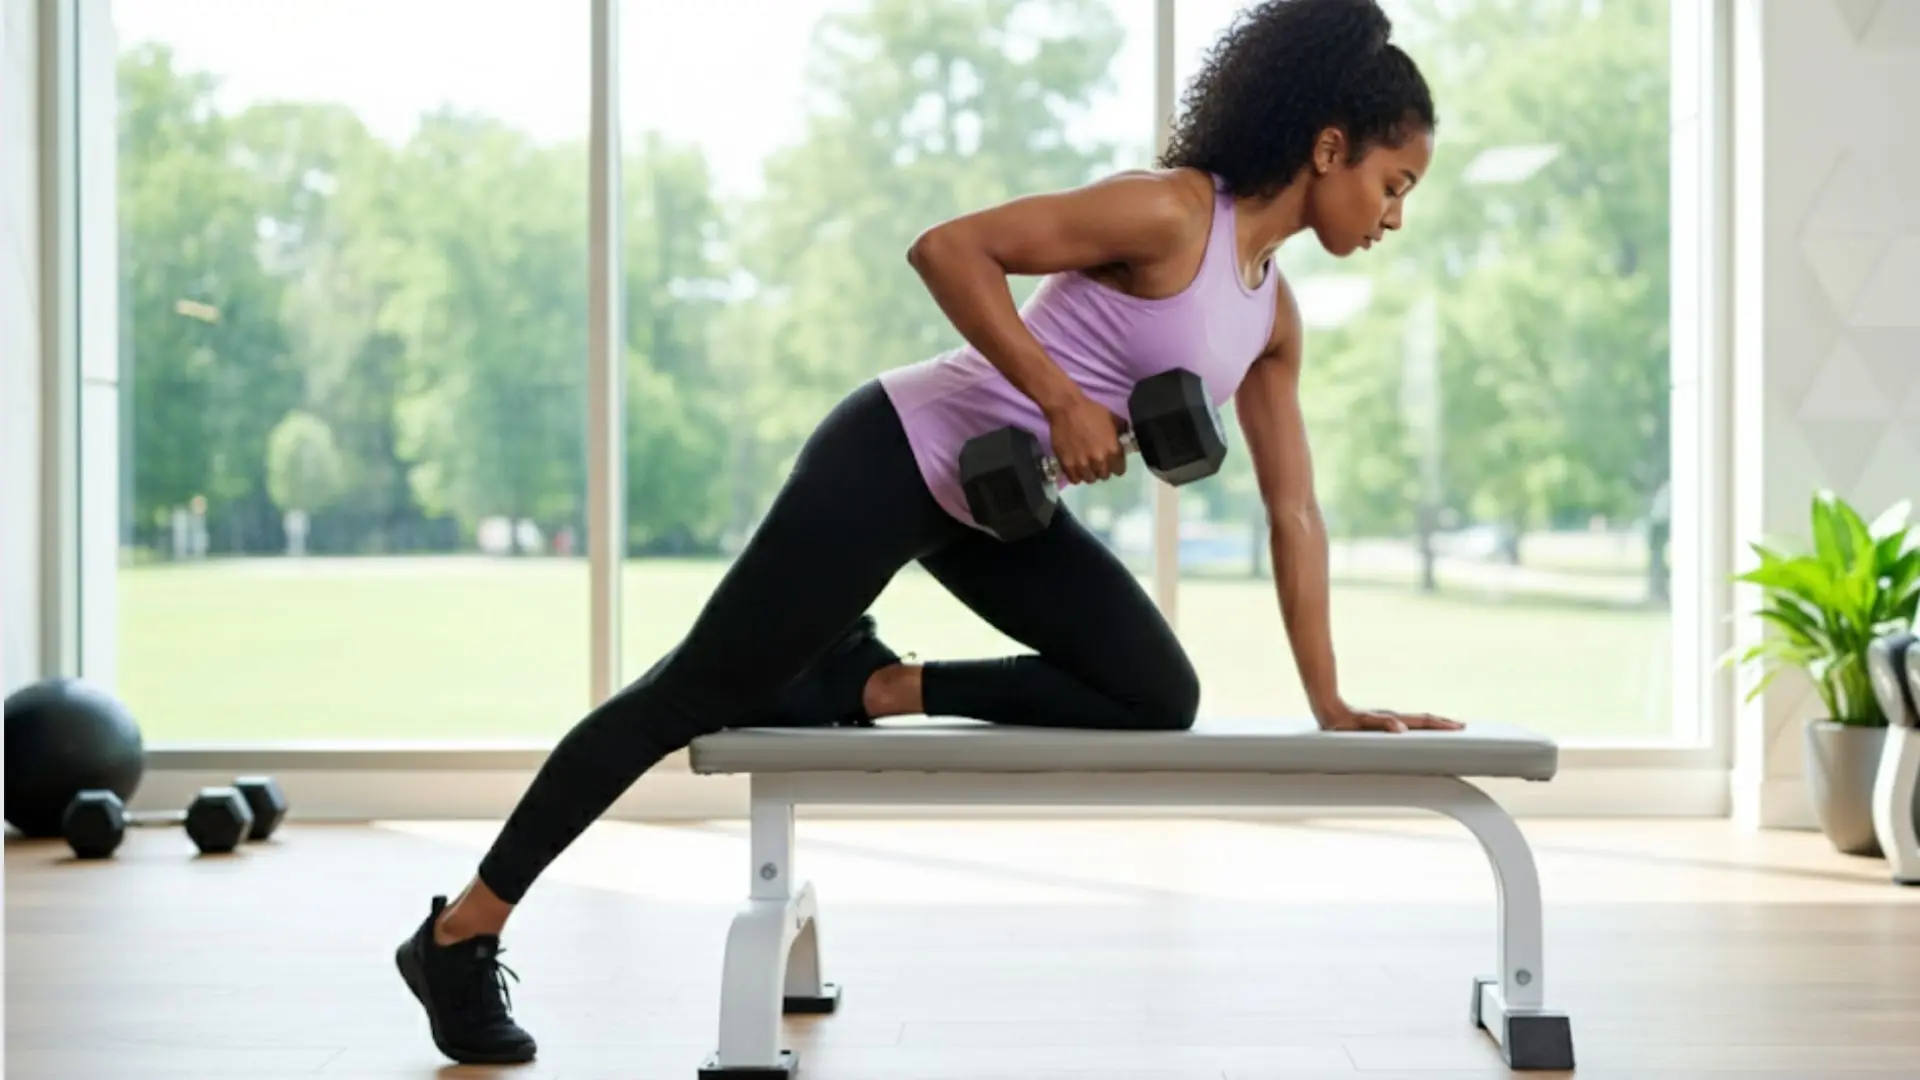
The single-arm dumbbell row is one of the best horizontal pull exercises for fixing left-right strength imbalances. Because each side works separately, your stronger side cannot take over.
This movement is also easier to control than a barbell row because one hand and knee stay supported on a bench. That makes it useful for beginners and lifters rebuilding clean pulling mechanics.
Step-by-step:
- Place one knee and the same-side hand on a bench for support.
- Keep your opposite foot planted firmly on the floor.
- Hold a dumbbell in your free hand with your arm extended.
- Keep your back flat, chest slightly lifted, and core tight.
- Pull the dumbbell toward your waist while keeping your elbow close to your ribs.
- Squeeze your back at the top of the movement.
- Lower the dumbbell slowly until your arm is fully extended.
- Repeat for 3 to 4 sets of 10 to 12 reps per side.
Muscles worked: lats, rhomboids, traps, core stabilizers.
3. Chest-Supported Row
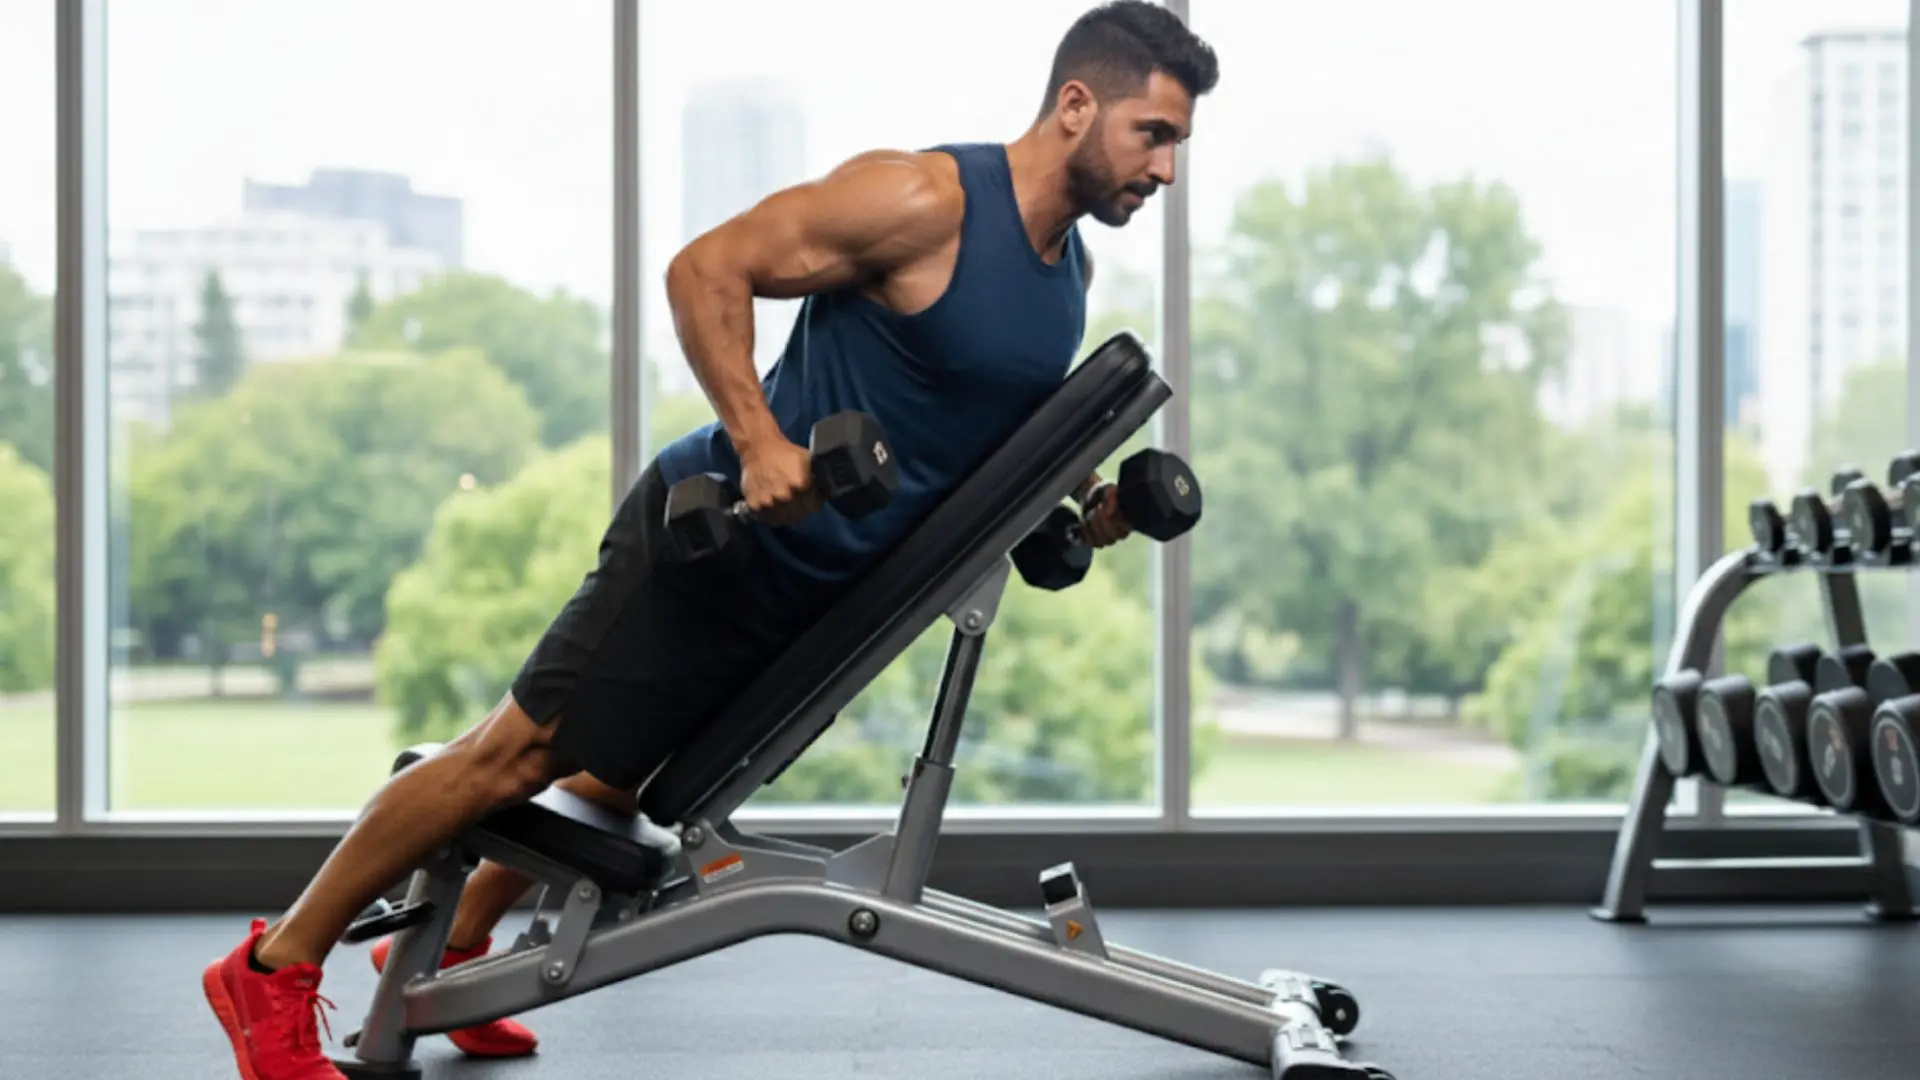
The chest-supported row is ideal if your lower back gets tired before your upper back does. Lying chest-down on a bench removes most lower-back strain from the movement.
This variation also limits momentum, which makes every rep stricter. It is a great choice for building mid-back strength with better control and less body swinging.
Step-by-step:
- Set an incline bench to a comfortable angle.
- Lie chest-down on the bench with a dumbbell in each hand.
- Let your arms hang straight below your shoulders.
- Keep your chest pressed into the bench throughout the movement.
- Pull the dumbbells toward your ribs by driving your elbows back.
- Squeeze your shoulder blades together at the top.
- Lower the dumbbells slowly with control.
- Repeat for 3 sets of 10 to 15 reps.
Muscles worked: rhomboids, mid traps, rear delts, lats.
4. Seated Cable Row
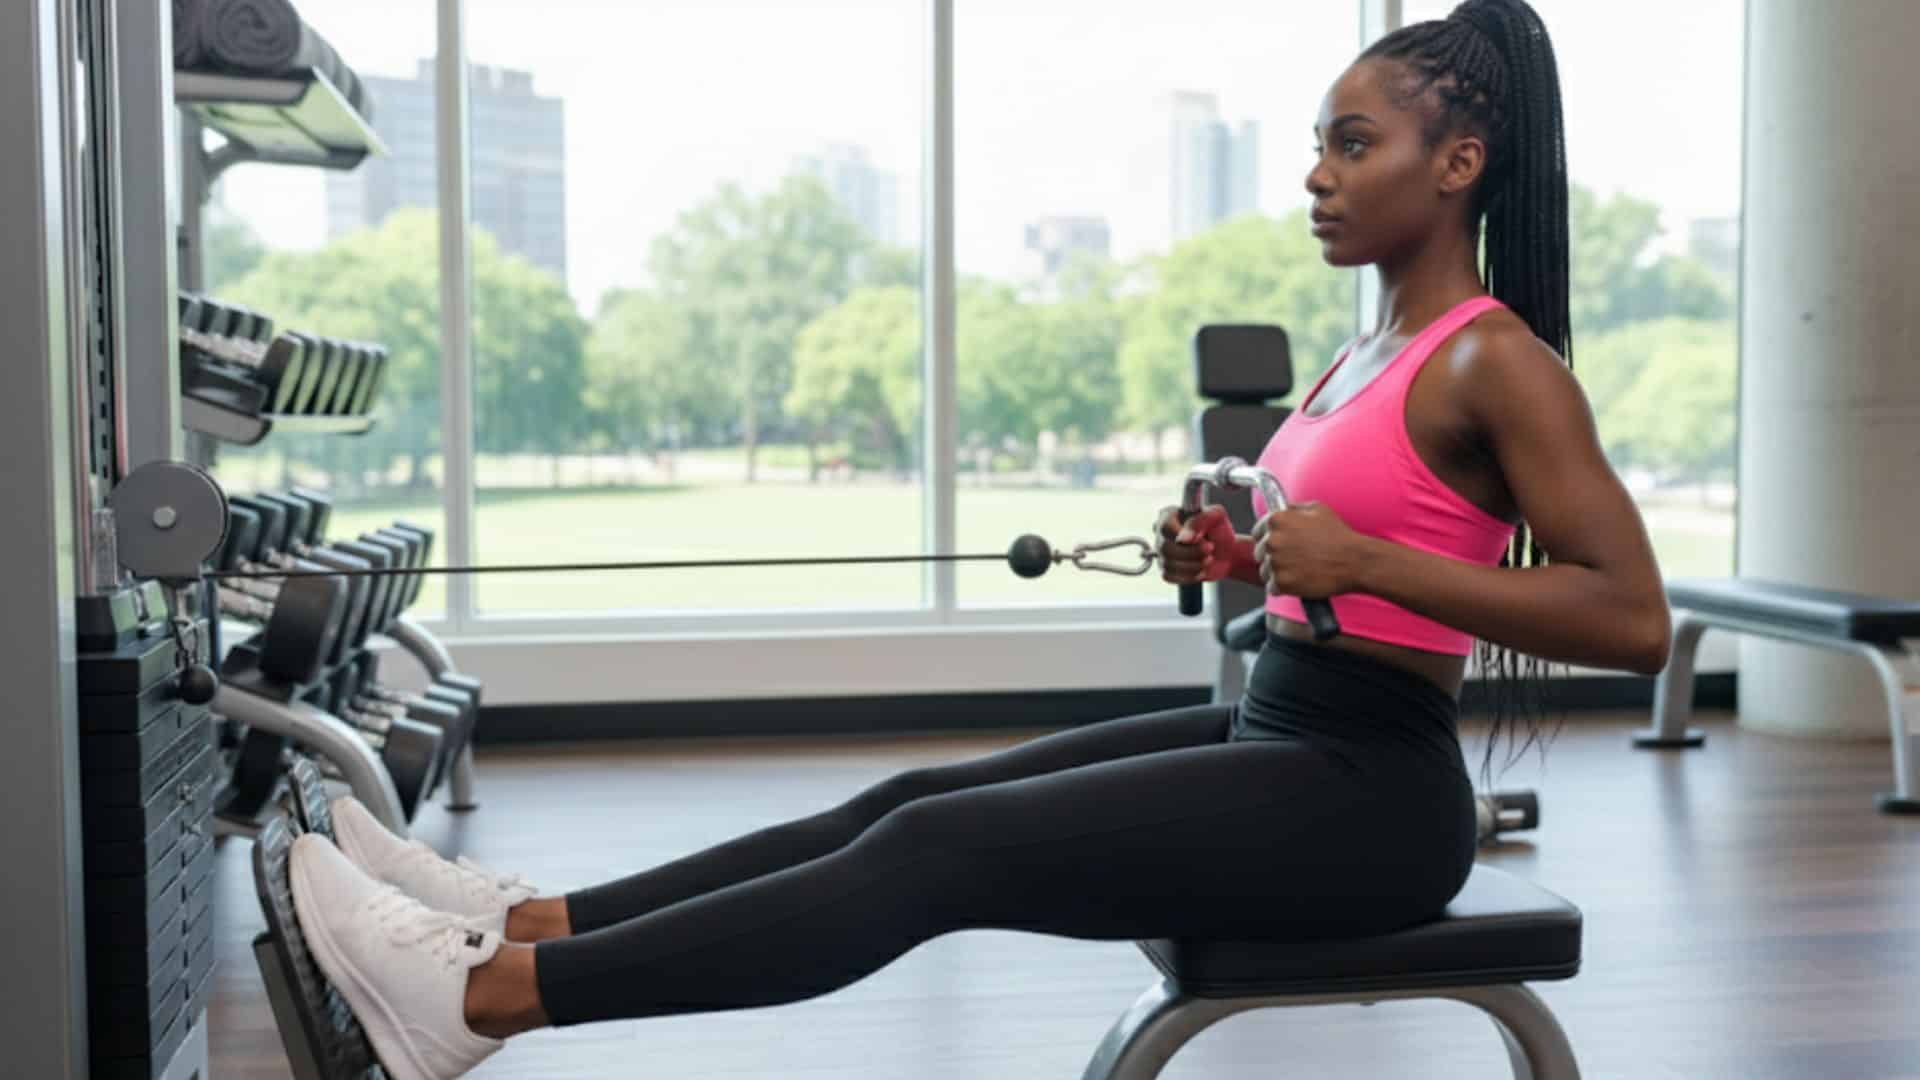
The seated cable row gives you steady resistance through the whole movement. That constant tension makes it one of the most reliable horizontal pulls for controlled back training.
You can use a close-grip handle for more lat emphasis or a wider handle for more upper-back and rear-delt work. Keep the movement smooth instead of leaning back to finish the rep.
Step-by-step:
- Sit on the cable row machine with your feet braced firmly.
- Hold the handle with both hands and sit tall.
- Keep your chest lifted, shoulders down, and core engaged.
- Start with your arms extended in front of you.
- Pull the handle toward your lower abdomen.
- Keep your elbows close to your ribs as you pull.
- Squeeze your back muscles at the end of the movement.
- Return the handle slowly until your arms are straight again.
- Repeat for 3 sets of 10 to 15 reps.
Muscles worked: lats, traps, rhomboids, biceps.
5. Inverted Row
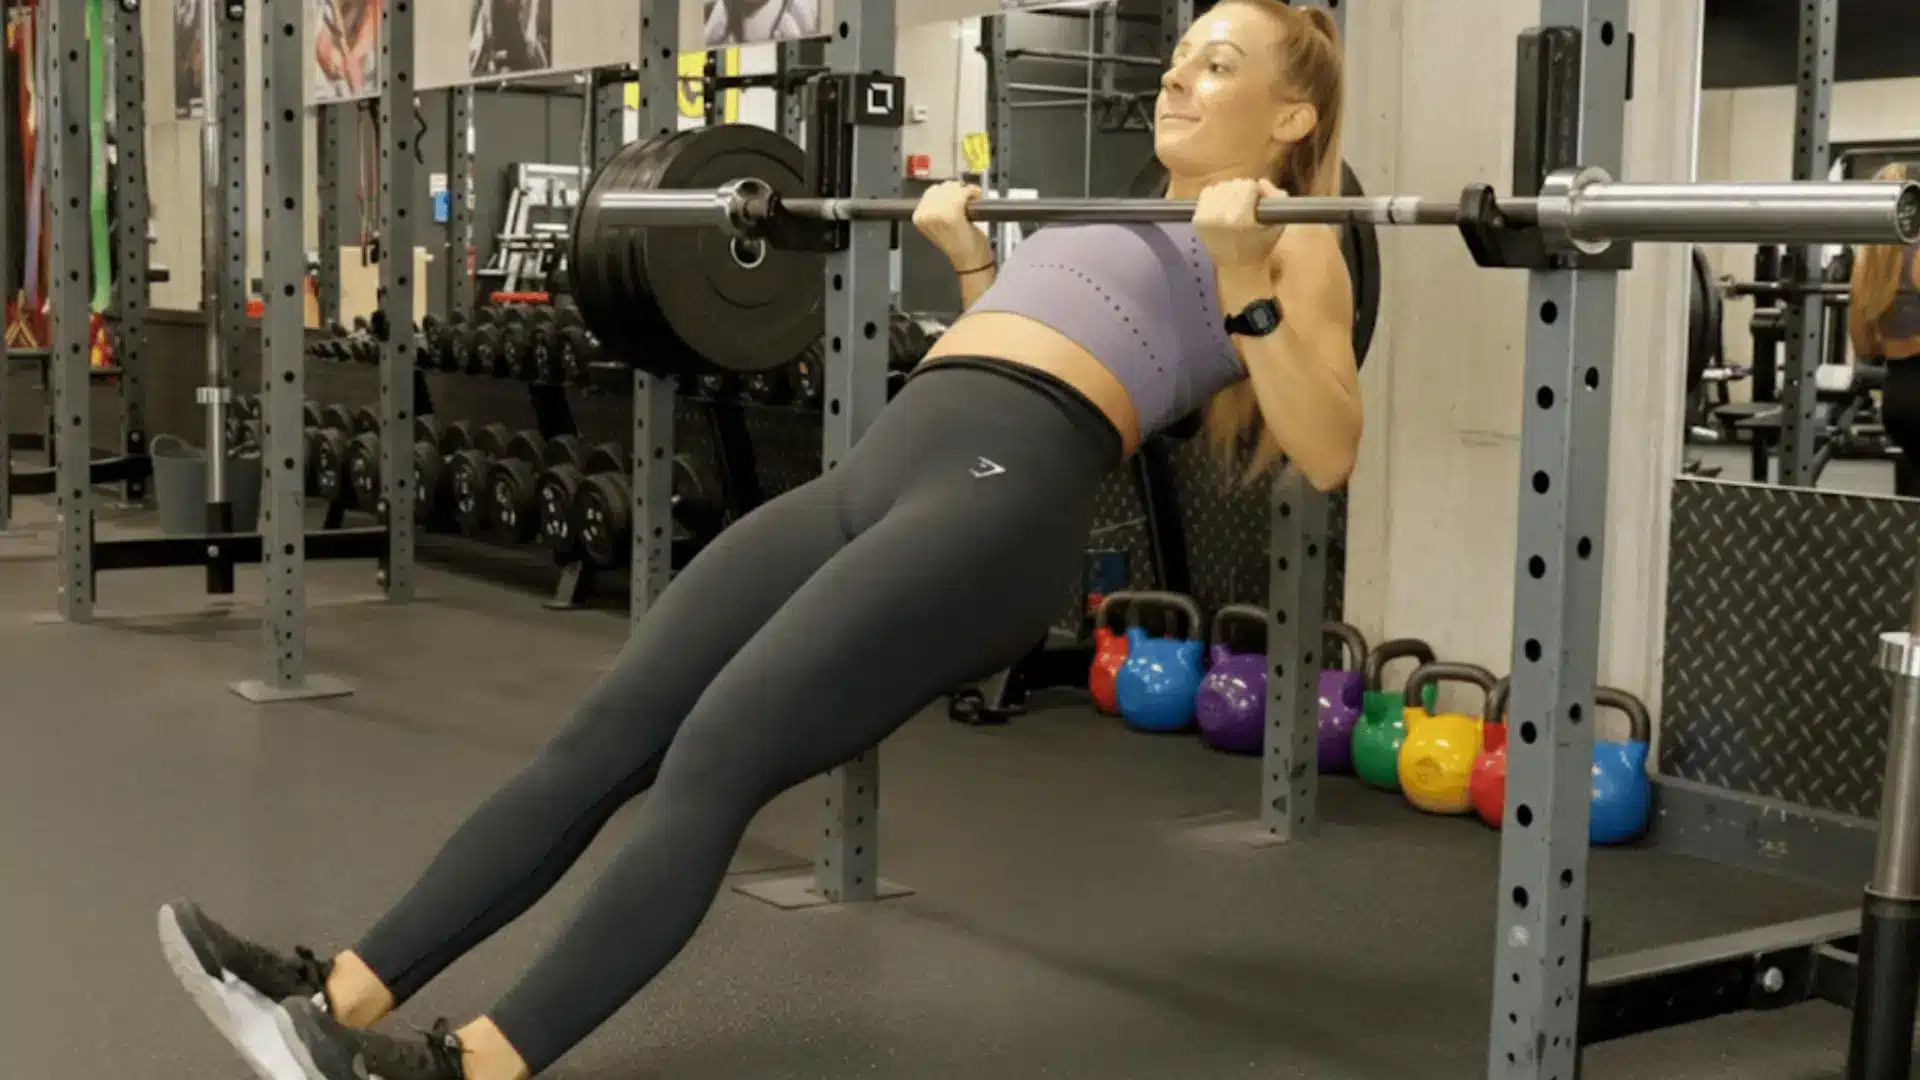
The inverted row is one of the best starting points for beginners because it uses bodyweight and can be scaled easily. Raising the bar makes it easier, while lowering the bar makes it harder.
This exercise teaches proper rowing mechanics without needing heavy weights. Keep your body straight throughout the movement so your core works along with your back.
Step-by-step:
- Set a bar at about hip height.
- Lie underneath the bar and grab it with an overhand grip.
- Keep your body in a straight line from head to heels.
- Brace your core and squeeze your glutes.
- Pull your chest toward the bar by driving your elbows back.
- Keep your shoulders away from your ears.
- Lower yourself slowly until your arms are straight.
- Make the move easier by raising the bar or bending your knees.
- Repeat for 3 sets of 8 to 12 reps.
Muscles worked: lats, rear delts, rhomboids, biceps, core
6. T-Bar Row
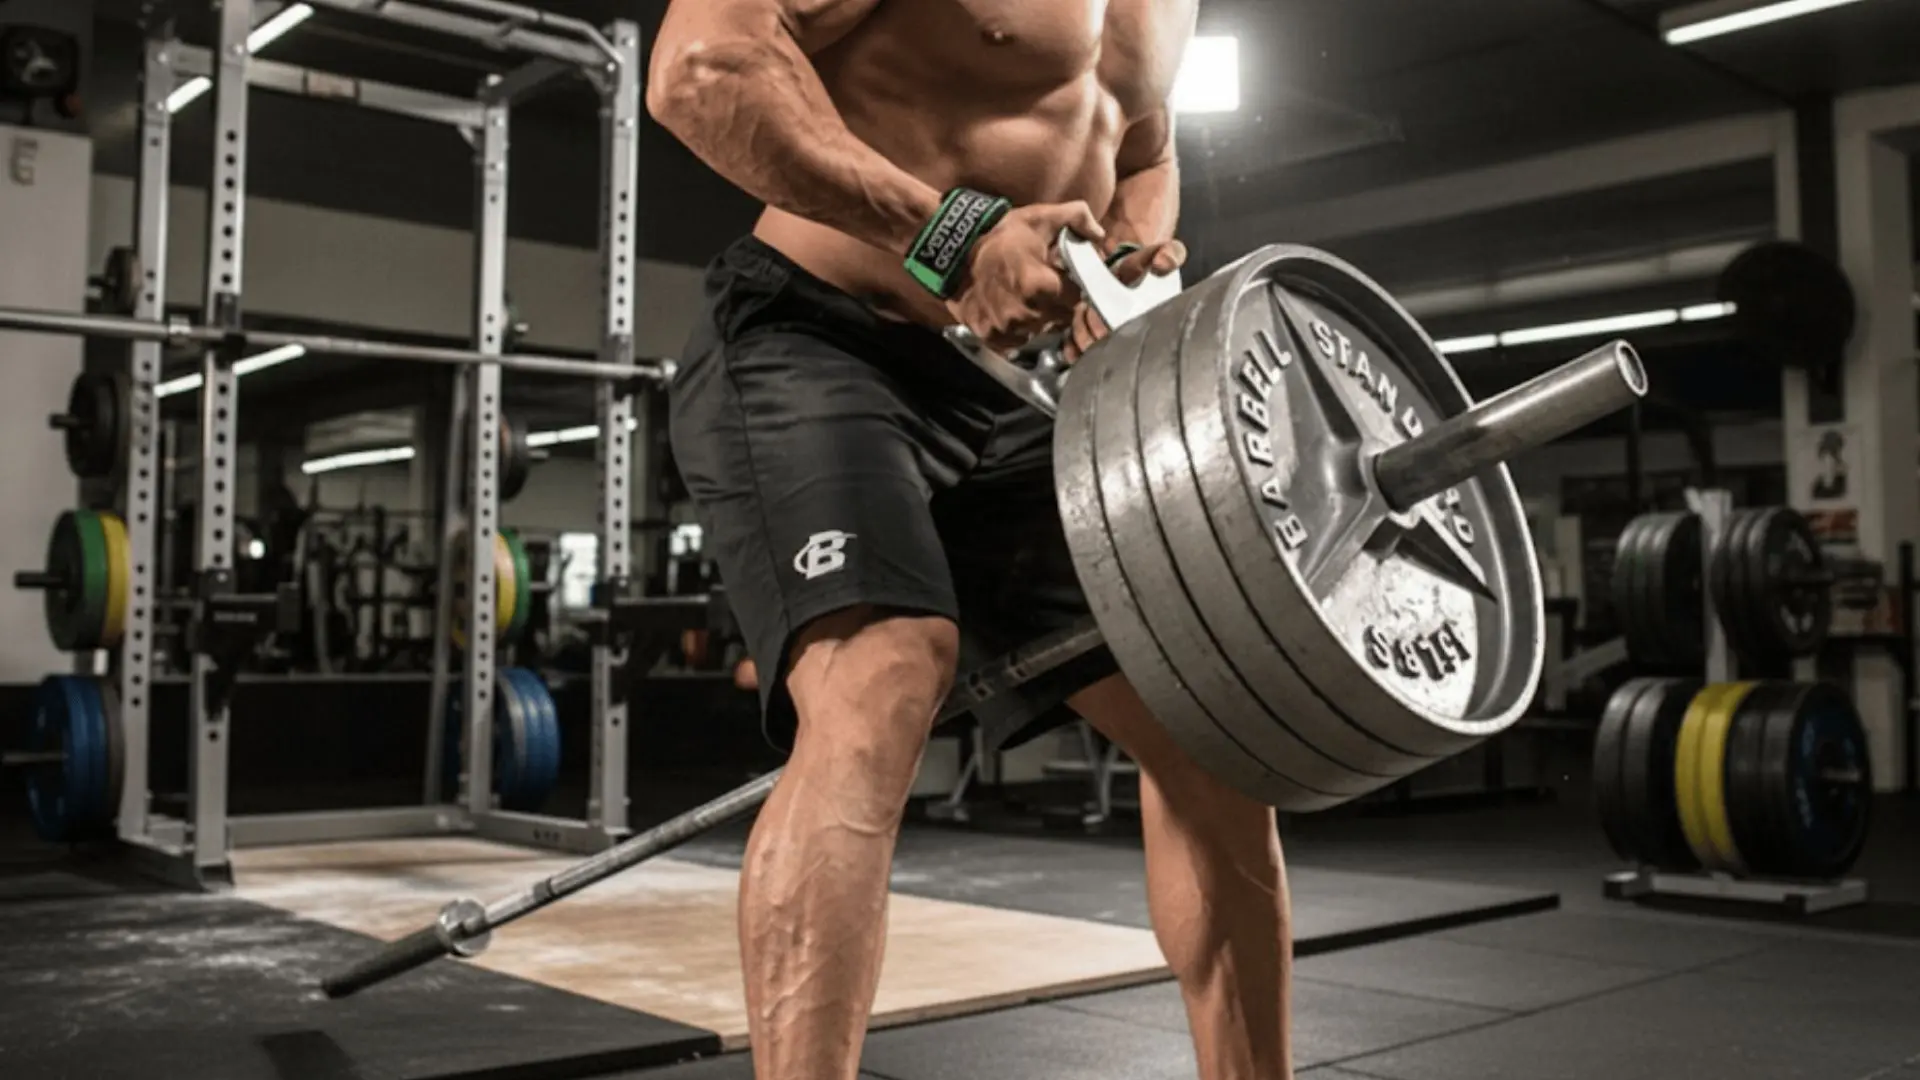
The T-bar row is built for heavier pulling and serious mid-back development. It lets you load more weight than many row variations while still keeping a strong rowing path.
This move also challenges grip strength and lower-back stability. Use controlled reps instead of jerking the weight upward, especially when the load gets heavy.
Step-by-step:
- Set up a landmine barbell or use a T-bar row machine.
- Stand with your feet about shoulder-width apart.
- Hinge at your hips and keep your back flat.
- Grab the handle with both hands.
- Brace your core before starting the pull.
- Row the handle toward your chest.
- Drive your elbows back and squeeze your mid-back.
- Lower the weight slowly until your arms extend fully.
- Repeat for 3 sets of 6 to 8 reps.
Muscles worked: lats, traps, rhomboids, erector spinae.
7. TRX Row
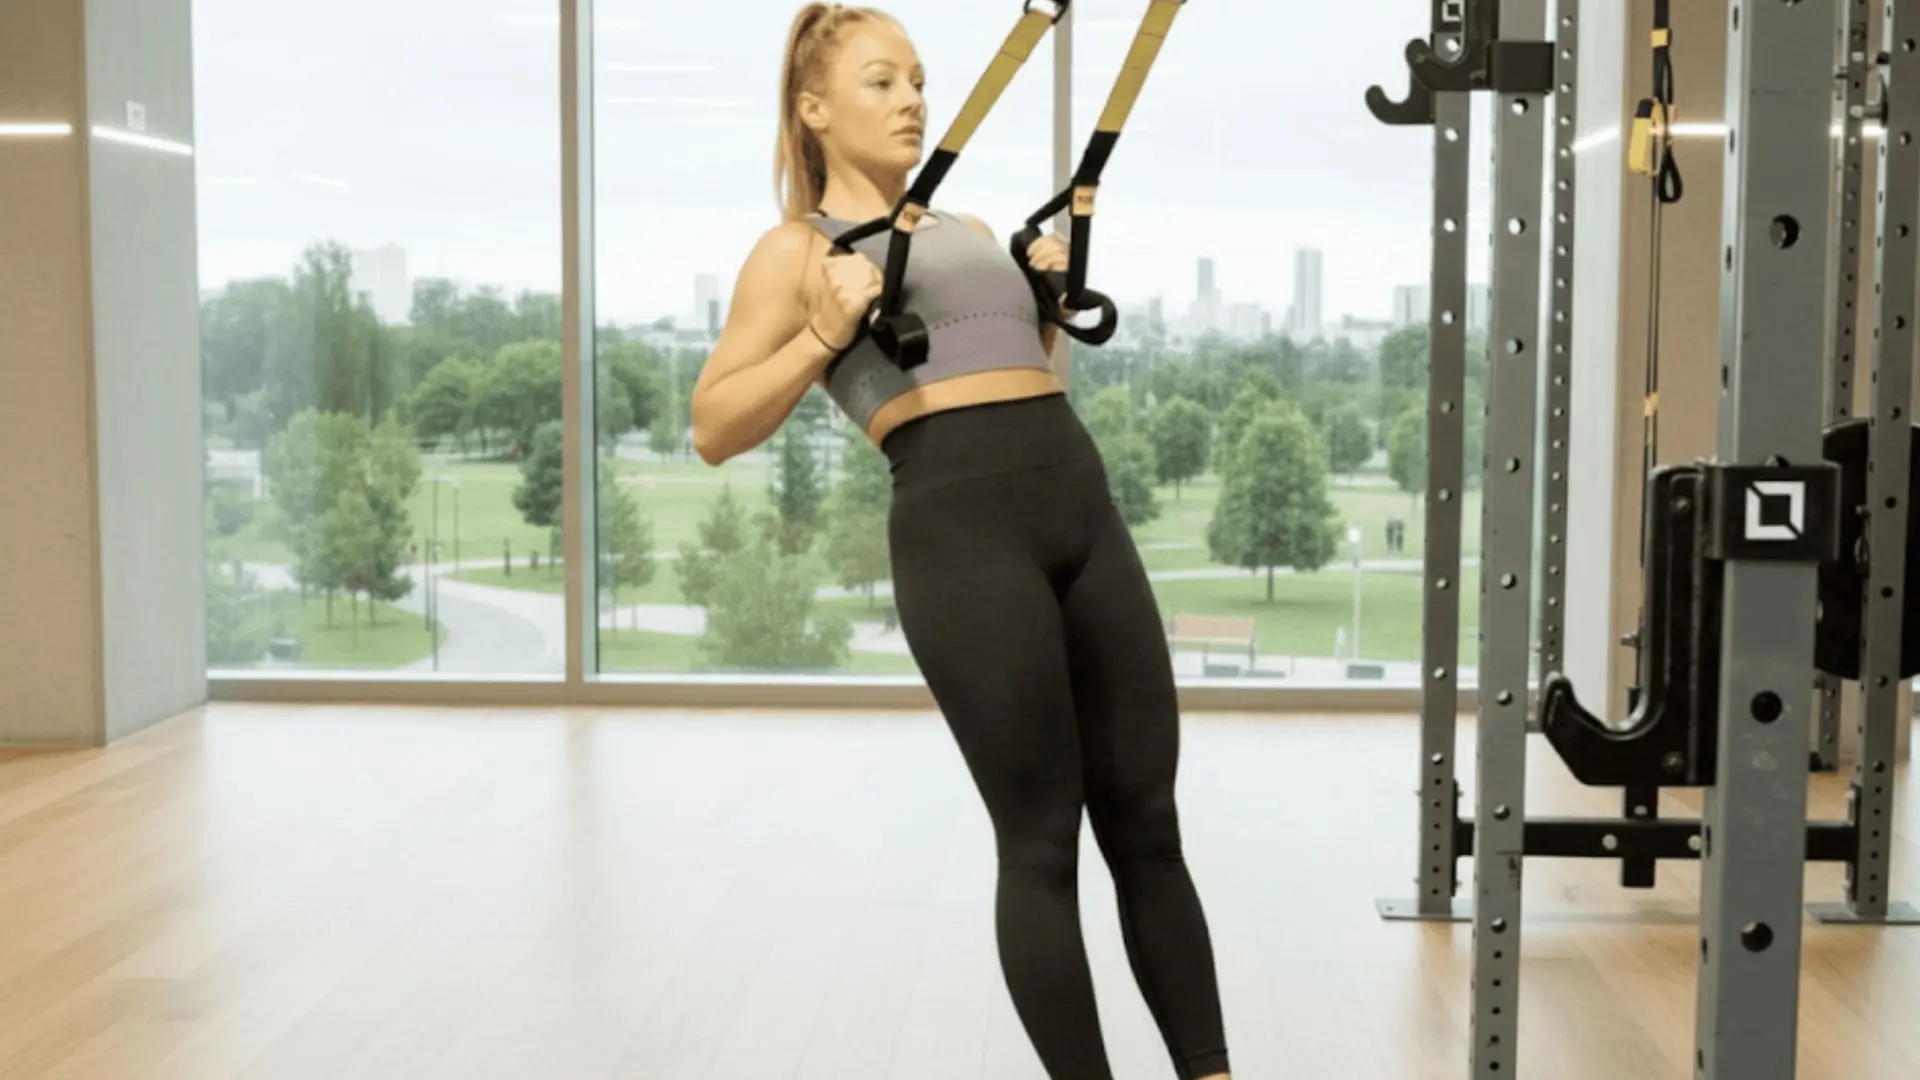
TRX rows use suspension straps, so they are easy to adjust for different fitness levels. The more horizontal your body becomes, the harder the exercise gets.
This is a joint-friendly horizontal pull that works well for beginners, home workouts, and people managing shoulder discomfort. Move slowly and keep your body in one straight line.
Step-by-step:
- Hold the TRX handles and lean back with your arms extended.
- Keep your feet planted and your body in a straight line.
- Brace your core and keep your hips from sagging.
- Pull your chest toward the handles.
- Keep your elbows close to your sides as you row.
- Squeeze your shoulder blades together at the top.
- Lower yourself slowly back to the starting position.
- Walk your feet forward to make the exercise harder.
- Repeat for 3 sets of 10 to 15 reps.
Muscles worked: lats, rhomboids, traps, rear delts, core stabilizers.
8. Face Pulls
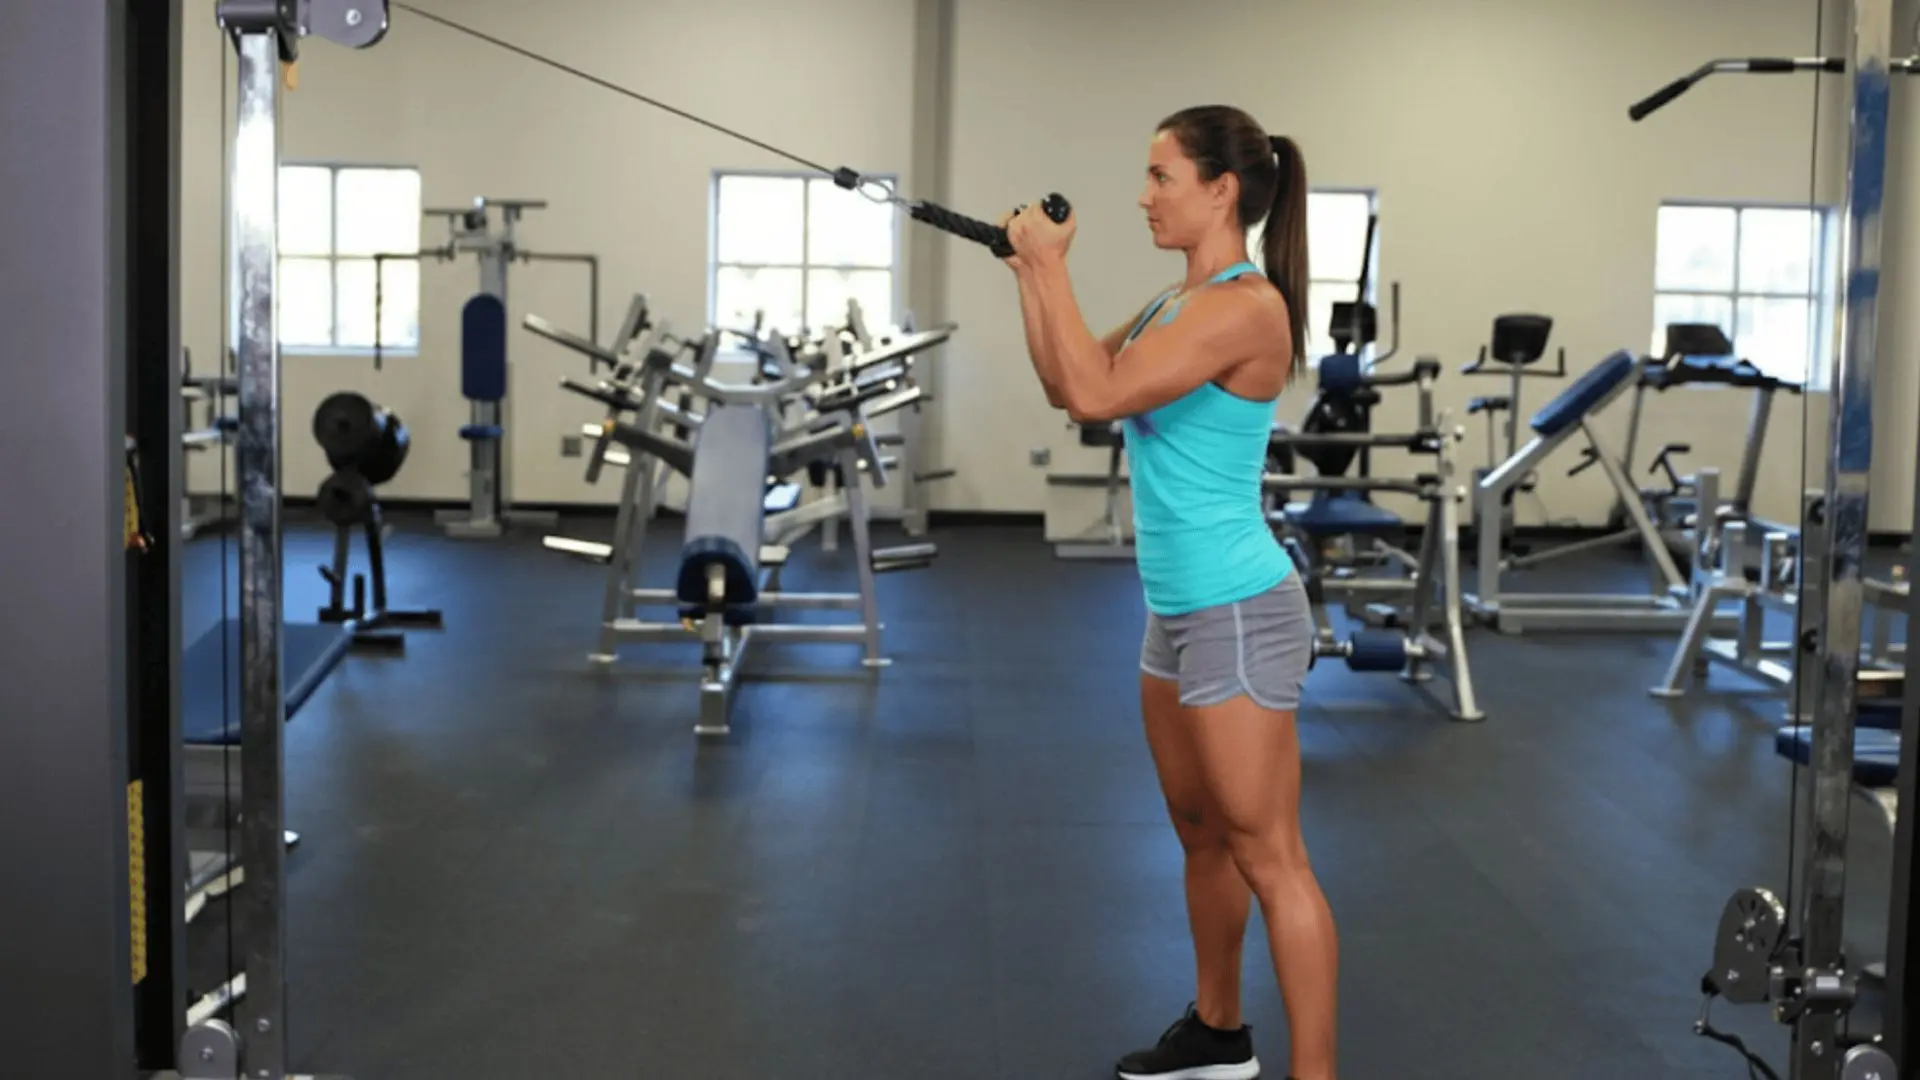
Face pulls are lighter than heavy row variations, but they are extremely useful for shoulder health. They target the rear delts, upper back, and rotator cuff muscles.
This exercise works best with controlled reps and a strong squeeze at the end. Avoid turning it into a heavy pulling movement where your lower back or traps take over.
Step-by-step:
- Attach a rope handle to a cable machine at face height.
- Hold one end of the rope in each hand.
- Step back until your arms are extended.
- Keep your chest tall and your core engaged.
- Pull the rope toward your forehead.
- Keep your elbows high and wide during the pull.
- Squeeze your rear delts and upper back at the end.
- Return slowly to the starting position.
- Repeat for 2 to 3 sets of 15 to 20 reps.
Muscles worked: rear delts, traps, rhomboids, rotator cuff.
9. Seal Row
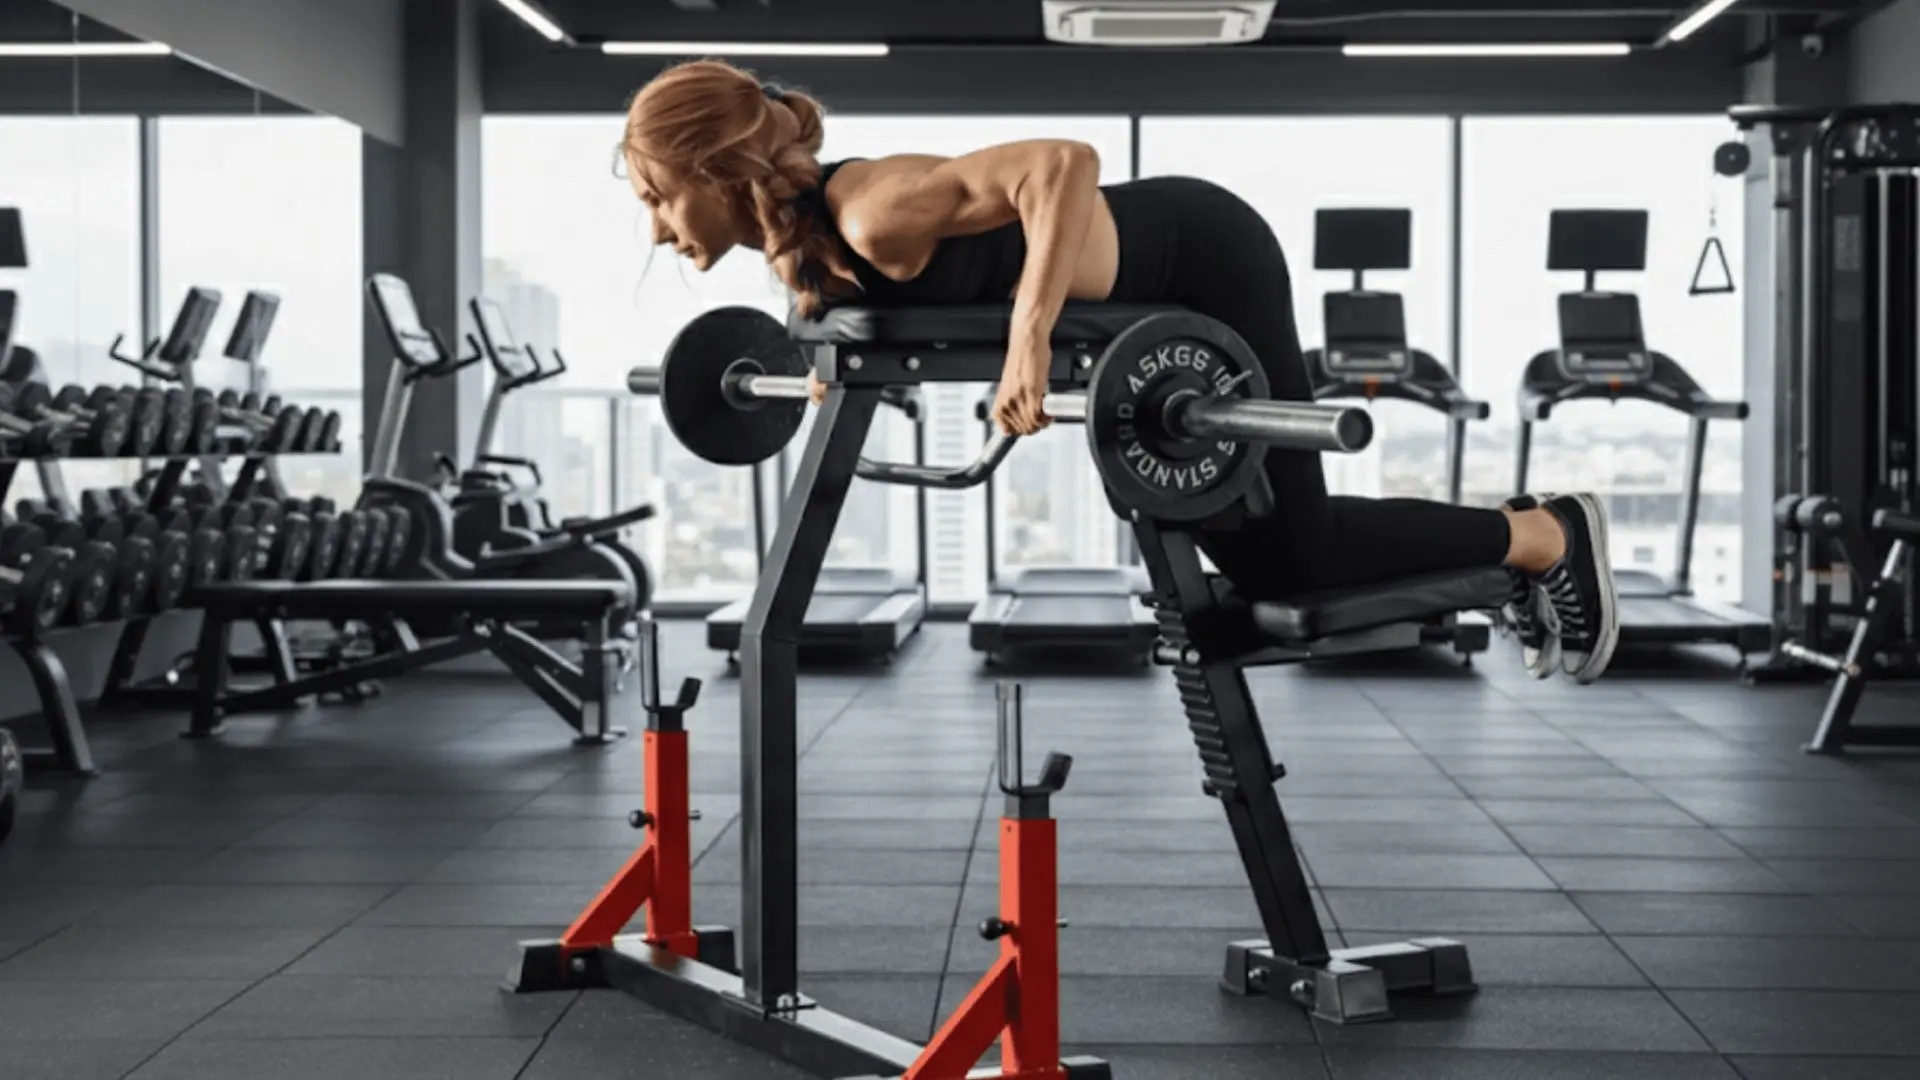
The seal row forces strict form because your chest stays supported on a raised bench. This removes lower-body drive and makes it almost impossible to cheat the rep.
It is excellent for isolating the lats and mid-back. The full arm extension at the bottom also gives the lats a strong stretch before each pull.
Step-by-step:
- Lie chest-down on a raised flat bench.
- Hold a barbell or dumbbells below the bench.
- Keep your legs relaxed and your chest supported.
- Let your arms extend fully at the bottom.
- Pull the weight upward toward your ribs.
- Squeeze your shoulder blades together at the top.
- Avoid lifting your chest off the bench.
- Lower the weight slowly with control.
- Repeat for 3 sets of 8 to 12 reps.
Muscles worked: lats, rhomboids, mid traps, rear delts.
10. Renegade Row
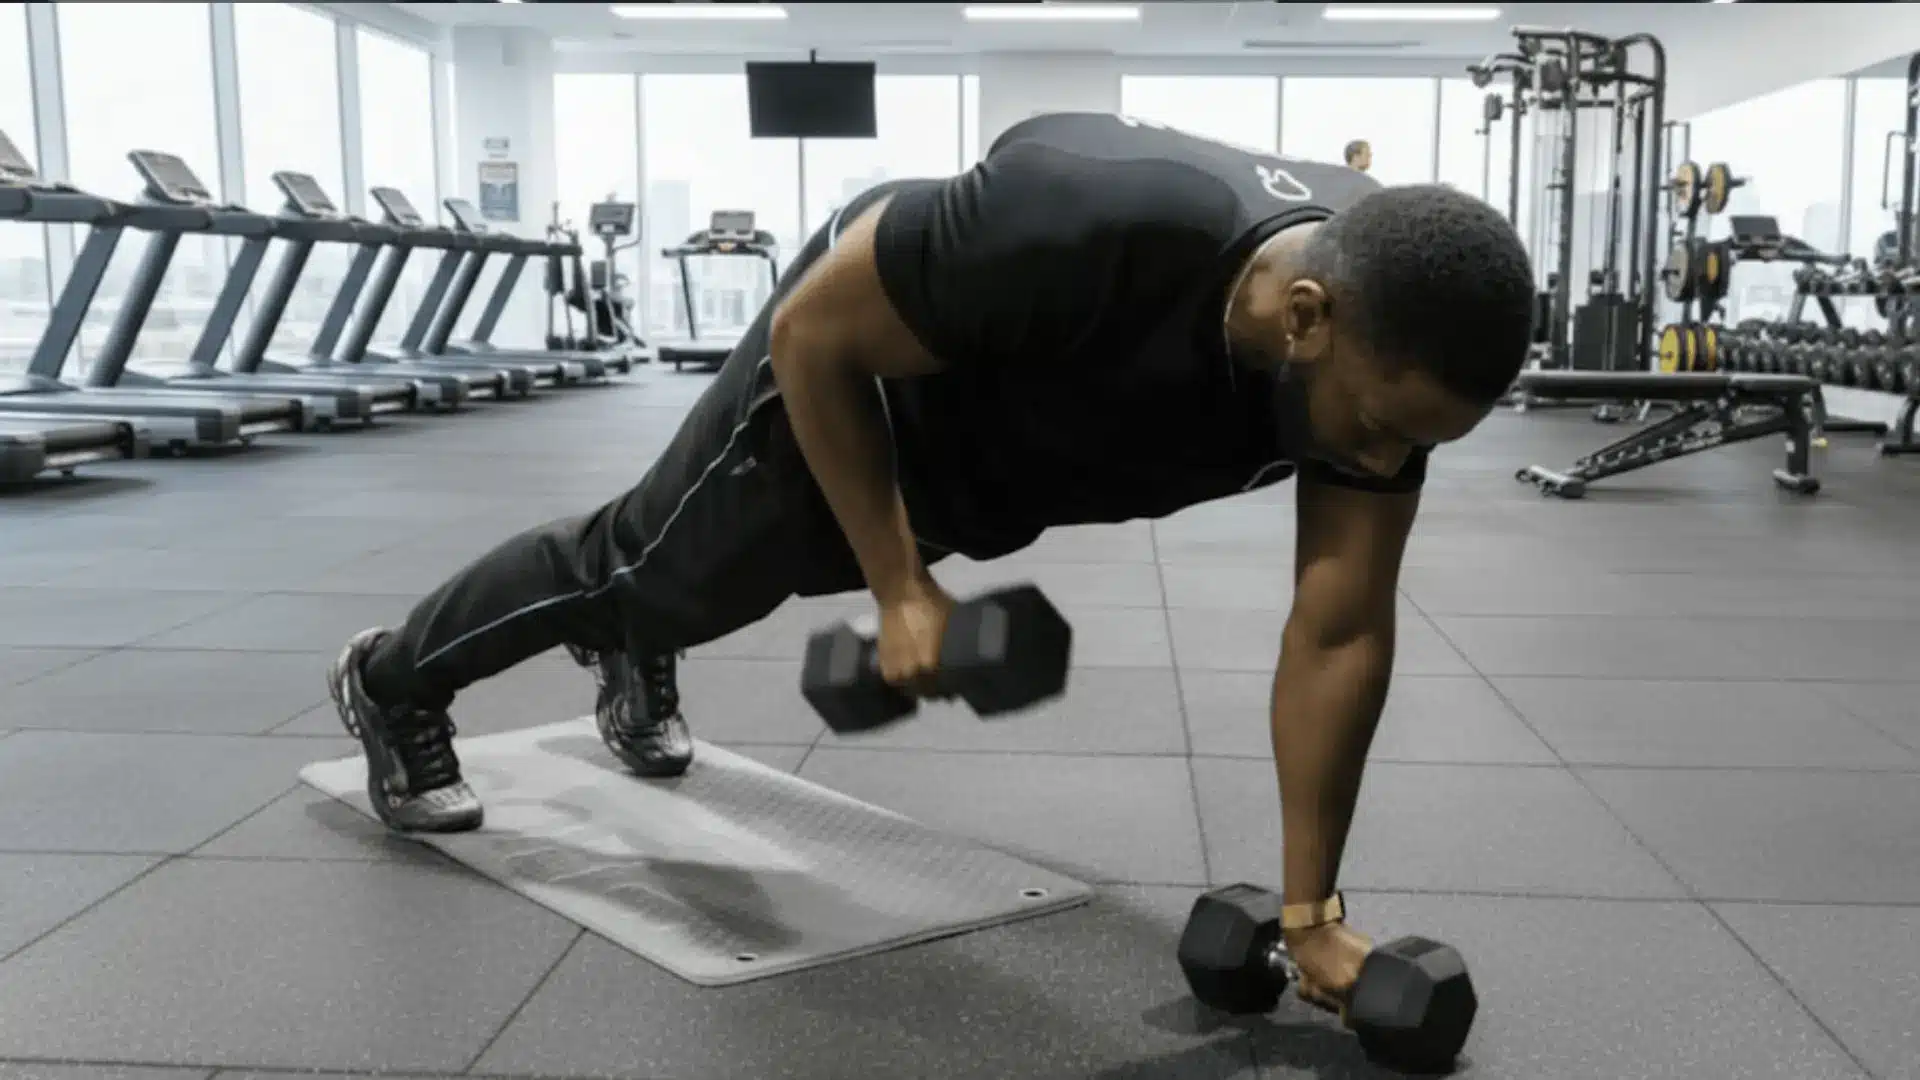
The renegade row combines a plank with a dumbbell row, making it a back and core exercise at the same time. The main challenge is resisting rotation.
This move is demanding, so use lighter dumbbells than you would for a normal row. Keep your hips level and focus on control before adding weight.
Step-by-step:
- Place two dumbbells on the floor about shoulder-width apart.
- Start in a push-up position with one hand on each dumbbell.
- Keep your feet slightly wider for better balance.
- Brace your core and keep your hips level.
- Row one dumbbell toward your ribs.
- Avoid twisting your torso as you pull.
- Lower the dumbbell slowly back to the floor.
- Repeat on the other side.
- Perform 3 sets of 6 to 8 reps per side.
Muscles worked: lats, traps, biceps, rear delts, core.
11. Single-Arm Landmine Row
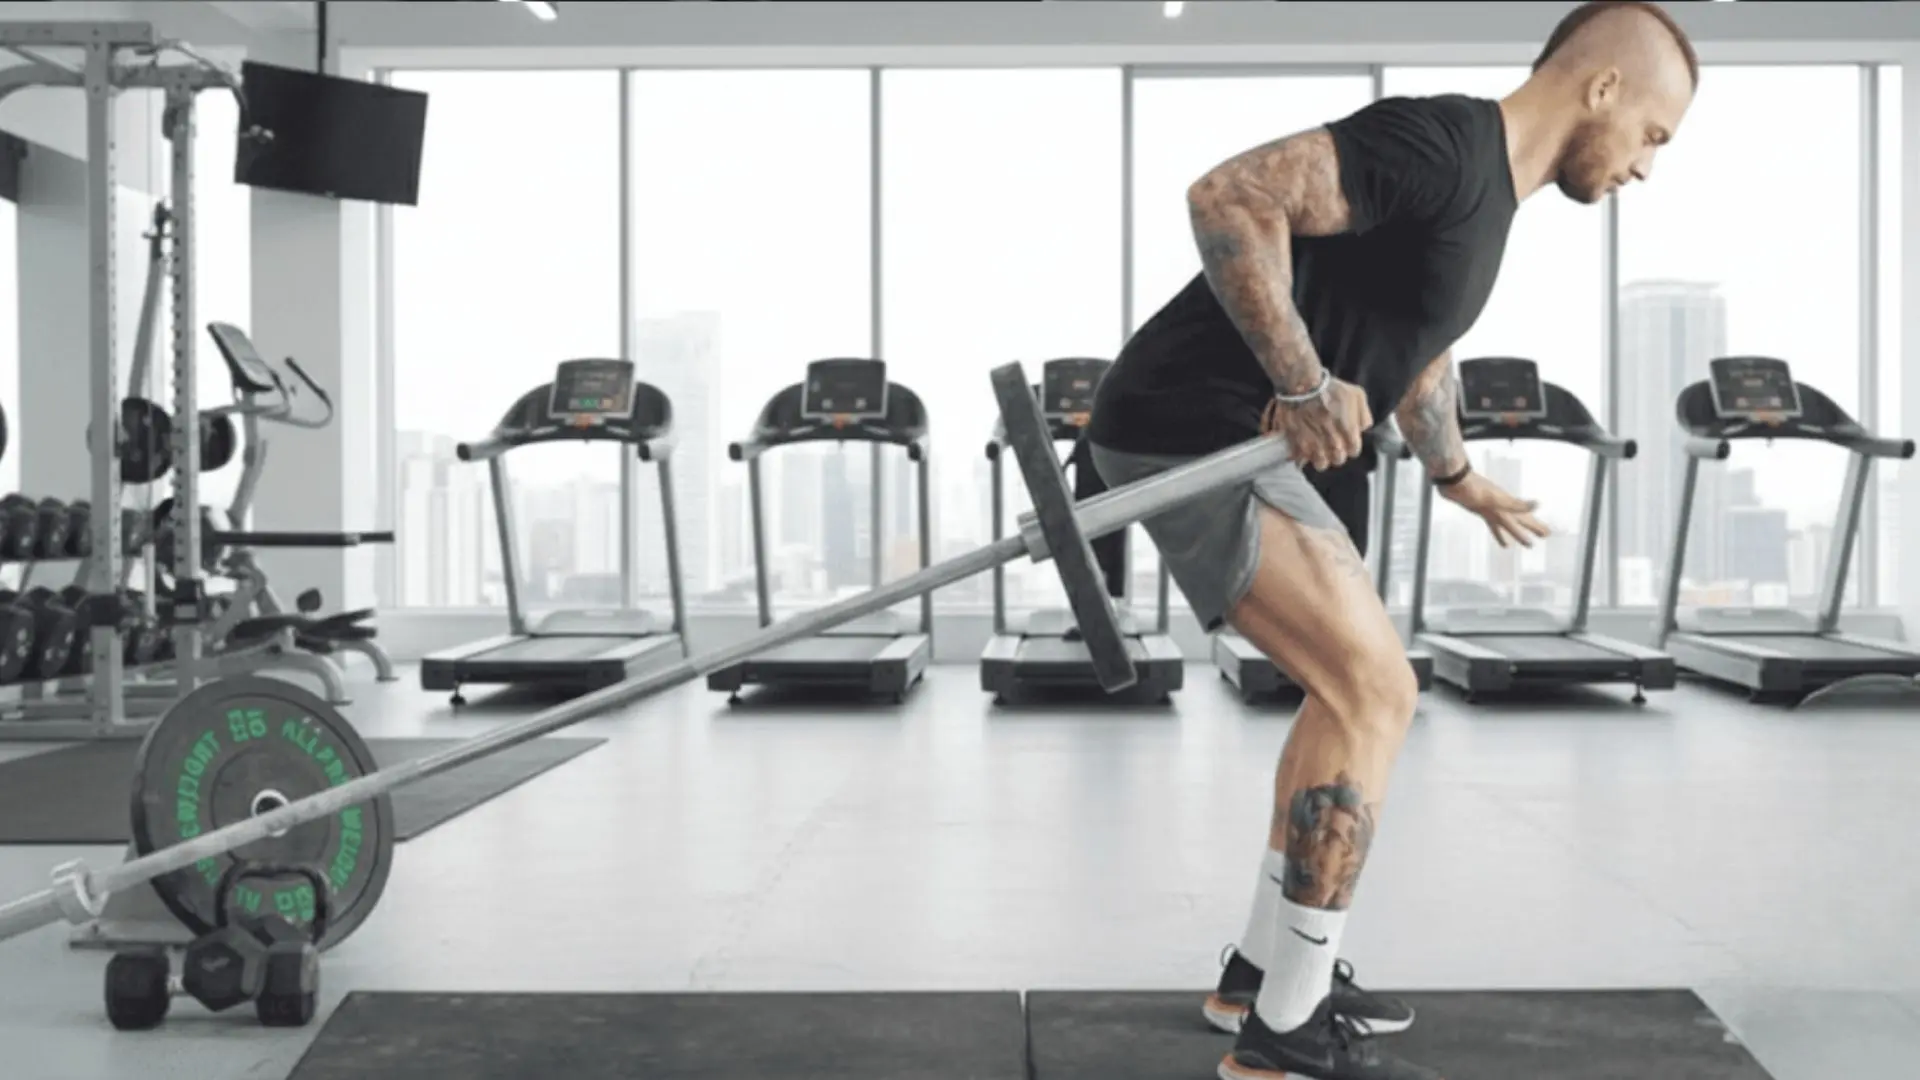
The single-arm landmine row uses an angled bar path, which can feel easier on the shoulder than a strict dumbbell row. It still allows solid loading and strong back engagement.
Because only one side works at a time, your obliques and core also help control rotation. Keep your torso steady and pull through your elbow.
Step-by-step:
- Anchor one end of a barbell in a landmine attachment or corner.
- Stand beside the bar with your feet shoulder-width apart.
- Hinge at your hips and keep your back flat.
- Hold the end of the barbell with one hand.
- Brace your core and keep your shoulders square.
- Pull the bar toward your ribs.
- Squeeze your back at the top of the movement.
- Lower the bar slowly until your arm is extended.
- Repeat for 3 sets of 8 to 12 reps per side.
Muscles worked: lats, traps, rear delts, rhomboids, obliques.
How to Program Horizontal Pull Exercises
Knowing which exercises to do is only half the equation. Here is how to actually fit horizontal pulls into your weekly training in a way that drives consistent improvement.
How Many Sets Per Week?
Most people doing a push-pull workout split benefit from 12 to 18 sets of horizontal pulling per week, spread across two to three sessions. A useful rule of thumb: match or slightly exceed your horizontal pressing volume. If you bench press 10 sets per week, do at least 10 to 12 sets of rows.
Many of my clients end up around 14 to 16 sets of pulling when you include face pulls alongside their heavier rows. This ratio helps protect shoulder health and prevents the muscle imbalances that show up as tight pecs and forward-rolled shoulders.
Beginner Programming (0 to 6 Months)
Start with the inverted row or seated cable row. These two movements teach the pulling pattern with minimal injury risk. Aim for 3 sets of 10 to 12 reps, two days per week.
Focus entirely on controlled form and a full range of motion before adding load. Do not progress to the barbell row until you can perform 15 clean inverted rows with your body parallel to the floor.
Intermediate Programming (6 to 24 Months)
Add the bent-over barbell row and single-arm dumbbell row as your primary strength movements. The right rep ranges for strength at this stage fall between 6 and 10 for your compound rows and 10 to 15 for your secondary cable or supported work.
Two to three pulling sessions per week, rotating the primary compound lift each session, produces steady strength and size gains.
Advanced Programming
At this level, variation and specificity matter more than novelty. Heavy T-bar rows and Pendlay rows in the 5 to 8 rep range build the dense mid-back that barbell work alone does not. Pair them with higher-rep cable or TRX work for volume.
Controlling the eccentric (lowering phase) on every rep with a 2-second count significantly increases time under tension and drives more back development than adding plates alone.
Common Mistakes to Avoid
Even though horizontal pull exercises look simple, I have seen the same errors show up repeatedly. Here are the most important ones to fix.
- Rounding your lower back instead of keeping it flat adds compressive load and significantly increases injury risk, especially on barbell rows.
- Using momentum to swing the weight shortens your range of motion and takes the stimulus off the back muscles you are trying to train.
- Letting your shoulders shrug upward instead of keeping them packed down and back. Shrugged shoulders during a row turn it into a trap exercise, not a back exercise.
- Pulling too far past your torso stresses the shoulder joint and reduces tension on the lats at the end of each rep.
- Ignoring core stability and allowing your body to twist or sway, especially during single-arm and bodyweight variations where there is no external support.
Fixing even one of these mistakes will make your horizontal pulls significantly more effective within a single session.
Frequently Asked Questions
Should I train rows before or after pressing?
Train rows before pressing if your back or posture is a weak point. Train them after pressing if your main goal is chest or shoulder strength. For balanced training, many lifters pair one push and one pull exercise in the same session.
Are horizontal pulls good for posture?
Yes. Horizontal pulls strengthen the rhomboids, traps, rear delts, and lats, which help pull the shoulders back and support an upright posture. They work best when paired with mobility work, chest stretching, and better daily sitting habits.
Do horizontal pulls help bench press strength?
Yes. A stronger upper back gives your shoulders more stability during the bench press. Rows help control the shoulder blades, improve pressing balance, and reduce the chance of overworking the front delts and chest without enough pulling strength.
Should rows feel more in arms or back?
Rows should mostly feel like a back exercise, not just an arm exercise. Your biceps will help, but the main effort should come from pulling your elbows back, squeezing your shoulder blades, and keeping your shoulders down.
What grip is best for horizontal pulls?
A neutral grip is usually the most joint-friendly option and works well for beginners. An overhand grip targets more upper back, while an underhand grip can involve more biceps and lower lats. Use the grip that feels controlled and pain-free.
Can horizontal pulls build a wider back?
Yes, but they mainly build back thickness and posture. For more width, combine horizontal pulls with vertical pulls like pull-ups or lat pulldowns. Rows still train the lats, but vertical pulling usually gives stronger width-focused development.
Should I use straps for heavy rows?
Straps can help if your grip fails before your back muscles do. They are useful for heavy sets, but do not rely on them for every row. Include some strap-free sets to keep building grip strength alongside your back.
Why do my traps take over during rows?
Your traps may take over if you shrug your shoulders during the pull or use too much weight. Lower the load, keep your shoulders down, and think about pulling your elbows back instead of lifting your shoulders toward your ears.
At the End
Building strength isn’t just about lifting heavy; it’s about training smart. Horizontal pull exercises give your back the balance and support it needs to stay healthy and strong for years.
When you combine them with pushing movements, your body works as one, improving posture, performance, and even everyday comfort.
The best part? You don’t need fancy equipment, just consistency and good form.
If you’ve tried any of these horizontal pulls, I’d love to hear which one is your favorite. Drop a comment and let’s share what’s working for you!
Sources
Fenwick, C.M.J., Brown, S.H.M., McGill, S.M., “Comparison of Different Rowing Exercises: Trunk Muscle Activation and Lumbar Spine Motion, Load, and Stiffness,” Journal of Strength and Conditioning Research, 2009. https://pubmed.ncbi.nlm.nih.gov/19387371/
Saeterbakken, A.H., et al., “Pulling Exercises for Strength Training and Rehabilitation: Movements and Loading Conditions,” Journal of Functional Morphology and Kinesiology, 2017. https://www.mdpi.com/2411-5142/2/3/33
American College of Sports Medicine, “Progression Models in Resistance Training for Healthy Adults,” Medicine & Science in Sports & Exercise, 2009. https://www.acsm.org/