
Tight hips can make everyday movement feel heavier than it should. Even a simple stretch can feel confusing when you are unsure how far to move, where to place your knee, or what the stretch should feel like.
That is why this move is worth learning slowly. A clear setup helps you stay comfortable, avoid forcing the position, and actually feel the stretch where you want it.
By the time you finish, you’ll know how to get into the low lunge stretch step by step, adjust it for your body, and fix the small mistakes that often make it feel awkward.
| Quick caution: The low lunge stretch should feel steady, not painful. If you feel sharp pain, numbness, tingling, hip pinching, or strong pressure in your knee or lower back, ease out and make the position smaller. If pain keeps coming back, get guidance from a qualified professional before continuing. |
Everything to Know About Low Lunges
The low lunge stretch works for most bodies and most schedules. Here is what you need to know before you begin.
| Style | Yoga Stretch / Mobility |
| Level | Beginner to All Levels |
| Duration | 20 to 45 seconds per side (static); 5 to 8 reps per side (dynamic) |
| Props Needed | Yoga mat; optional: yoga blocks, folded blanket or towel for back knee |
| Best Time | After a workout, after a long period of sitting, or during a yoga flow |
| Avoid If | Acute knee injury, sharp hip impingement pain, or unmanaged lower back conditions, consult a professional first |
Once you have checked the basics above, the step-by-step setup below will walk you through the position from the ground up.
How to Do the Low Lunge Stretch Step by Step
Low lunge and Anjaneyasana often refer to the same basic yoga shape: one foot forward, the opposite knee down, and the hips moving forward with control.
You may also see it called Crescent Low Lunge Pose, especially when the chest lifts or the arms reach overhead. These are the steps for doing one.
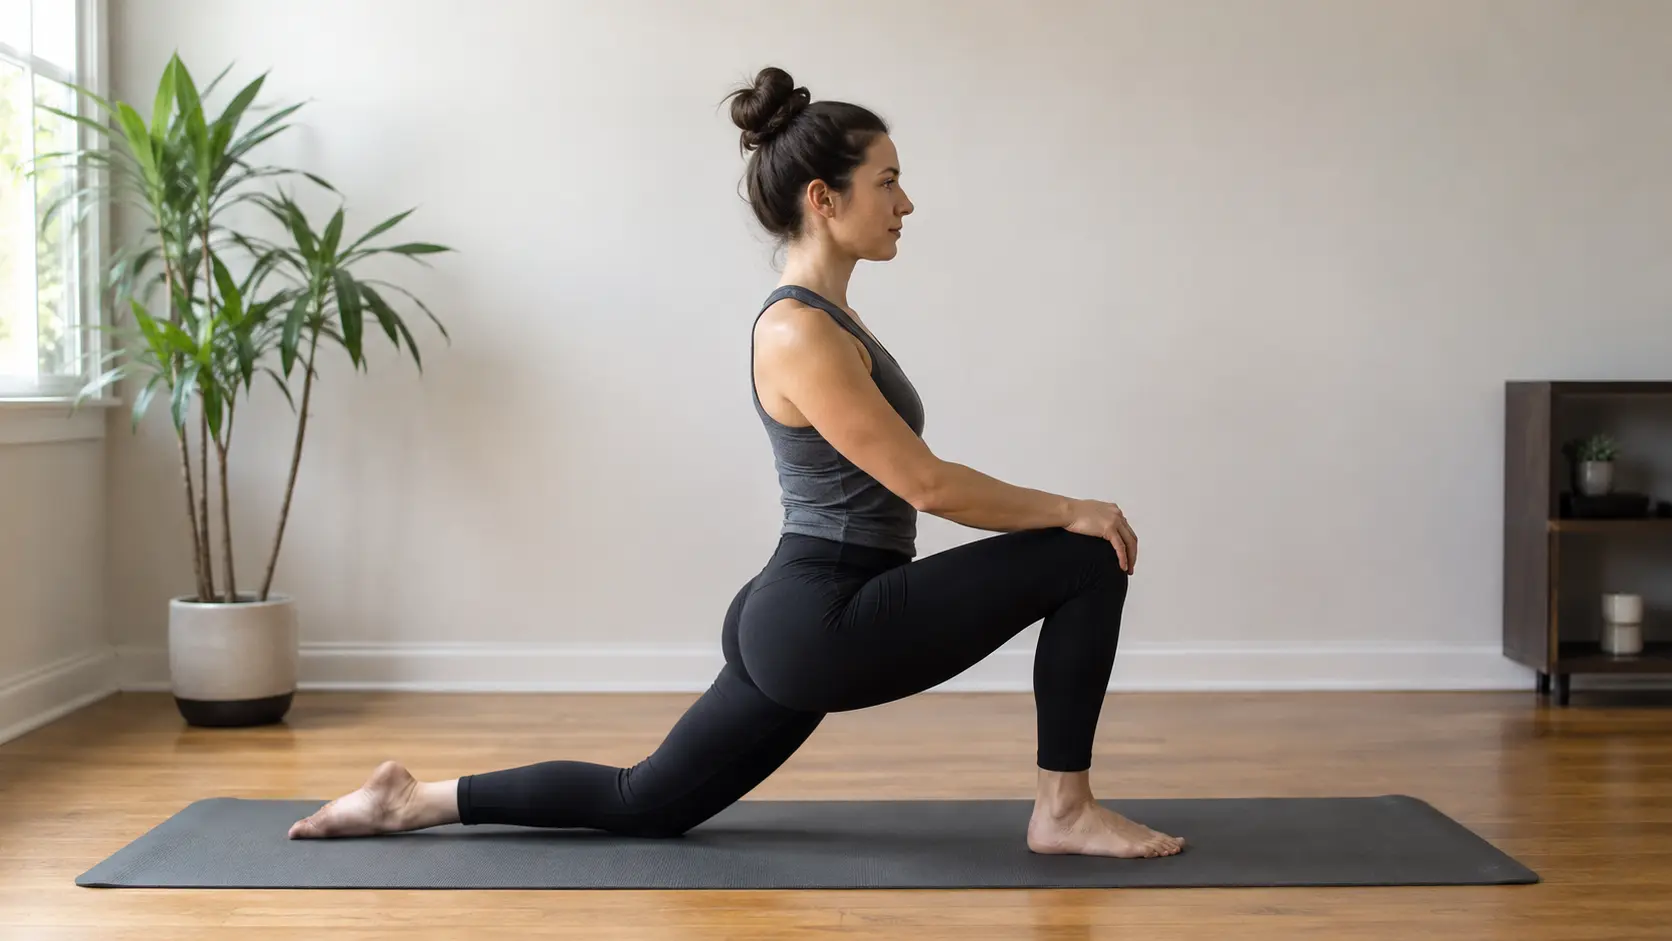
Step 1: Start in a Stable Half-Kneeling Position

Begin on the floor with one foot forward and the other knee resting behind you. Keep your front foot flat and place your front knee above your front ankle.
Your back knee should sit slightly behind your hips, not directly under them. This gives the front of your back hip room to stretch. If the floor feels hard, place a folded towel or mat under your back knee.
Keep your chest facing forward. Your weight should be shared between your front foot and back knee.
Step 2: Keep the Front Knee Over the Foot

Check your front leg before moving deeper. Your knee should stay lined up over your ankle, not far past your toes.
If your knee moves too far forward, step your front foot slightly farther ahead. If your heel lifts, shorten your stance a little. Keep the whole front foot grounded.
Step 3: Square Your Hip

Bring both hips to face forward. Many beginners let the back hip turn out to the side, but that can move the stretch away from the hip flexor.
Gently bring your back hip forward and draw your front hip slightly back. The movement should be small. Think of pointing both hip bones toward the front of the mat.
This helps you feel a cleaner stretch in the front of the back hip.
Step 4: Shift Forward Slowly

Once your hips are set, slowly move your body forward. Keep your front foot flat as the front knee bends.
Stop when you feel a steady stretch in the front of the back hip and thigh. Do not drop into the position or twist your hips open.
Move slowly enough that you can tell when the stretch starts.
Step 5: Brace Your Core

Lightly tighten your lower belly as you hold the pose. This keeps your ribs from pushing forward and helps protect your lower back.
Avoid leaning back to make the pose look deeper. Keep your ribs stacked over your hips and point your tailbone gently down.
Your core should feel supportive, not stiff. You should still be able to breathe slowly.
Step 6: Hold, Breathe, and Switch Sides

Hold the stretch for 3 to 5 slow breaths during yoga practice. After a workout, you can hold for about 20 to 45 seconds per side.
With each exhale, let your hips soften forward only a little. Do not bounce or force the stretch. To come out, place your hands on the floor or on your front thigh. Shift your hips back, move your front leg out, and repeat on the other side.
For a clearer view of the setup, watch the short tutorial below before you try the stretch. It shows the half-kneeling position, hip alignment, core brace, and forward shift in order.
| Instructor Tip: A cue I give in every class: imagine a headlight at each hip bone, and point both headlights straight ahead at the front wall. That single image tends to square the hips more effectively than any technical correction. Try it before you shift forward and notice how much more you feel in the front hip. |
For more details, refer to the YouTube video below.
Where You Should Feel the Low Lunge Stretch
Tight hips can make everyday movement feel heavier than it should. Even a simple stretch can feel confusing when you are unsure how far to move.
- Low Lunge Stretch: You should feel it through the front of the back hip and upper thigh. A light stretch near the groin can also happen.
- Hip Flexor Sensation: The feeling should be steady and manageable, not sharp or forced. If it moves into the wrong place, the pose works against you.
- Lower Back Pressure: This often means your body is compensating. Ease out, brace the core, and reset the position before going deeper.
- Hip Asymmetry: If one side feels tighter, slow down there instead of trying to match both sides. Control matters more than depth.
- Hip Mobility Benefits: This pose can help loosen tight hips, balance out long sitting, and prepare your body for yoga or workouts when done with steady form.
The low lunge stretch works best when it feels steady, not forced. Start small, breathe slowly, and let control do the work.
How Long to Hold the Low Lunge Stretch
How long you hold the low lunge stretch depends on when you are using it. A shorter, moving version works better before activity, while a longer hold works better after your body is warm.
For a simple routine:
| When | How | Duration |
|---|---|---|
| Before a workout or yoga flow | Shift in and out slowly | 5 to 8 reps per side |
| After a workout | Hold static | 20 to 45 seconds per side |
| During yoga practice | Hold with slow breaths | 3 to 5 breaths per side |
| Tight hips after sitting | Hold, repeat once if needed | 20 to 30 seconds per side |
You can practice it 3 to 5 times a week if it feels comfortable. If one side feels tighter, spend a little more time there, but do not force both sides to match. The stretch should feel steady enough that you can breathe normally the whole time.
Beginner Modifications

If the full position feels too strong, change the setup before going deeper. A smaller version can still give you a good hip stretch without making your knee, back, or balance work too hard.
Try these beginner options:
- Use yoga blocks: Place one block under each hand if the floor feels too far away. This keeps your chest lifted and makes the pose easier to control. Yoga props like blocks and straps make poses more accessible without reducing what you get from them.
- Rest your hands on your front thigh: This works well if your balance feels shaky or your wrists do not like being on the floor.
- Pad your back knee: Use a folded towel, blanket, or extra mat if the floor feels hard under your knee.
- Shorten your stance: Bring your front foot slightly closer if the stretch feels too intense or hard to hold.
- Keep the back toes tucked: This can help you feel more stable as you learn the position.
- Stay more upright: Lift your torso if your lower back feels tense or compressed.
Once the basic shape feels comfortable, you can try one simple variation at a time. Reach your arms overhead for more front-body length, add a gentle side bend, or shift back into a half split to stretch the front-leg hamstring.
Common Mistakes and Fixes
Use this table if the pose feels unstable, too strong, or uncomfortable.
| Common mistake | Simple fix |
|---|---|
| The front knee slides too far forward | Step your front foot slightly farther ahead and press your heel down. |
| Front heel lifts | Shorten your stance and keep the whole foot grounded. |
| Hips turn open | Bring your back hip forward and draw your front hip slightly back. |
| Lower back arches | Brace your belly, keep your ribs down, and point your tailbone gently down. |
| Back knee feels sore | Add a folded towel or thicker mat under the knee. |
| Stretch feels too intense | Stay higher and keep your hands supported. |
| Balance feels shaky | Place your hands on blocks, the floor, or your front thigh. |
The table above covers the patterns that come up most consistently. Each fix is adjustable rather than dramatic; the low lunge stretch rewards small, deliberate corrections far more than dramatic repositioning.
| Safety Note: Stop immediately if you experience sharp pain, numbness, tingling, or a strong pinching sensation deep in the hip joint. These are signals to ease out of the position, not to push through. If any of these sensations return consistently, consult a qualified healthcare professional or physiotherapist before continuing. |
Frequently Asked Questions
Why does my back knee hurt?
Your knee may be pressing into the floor, or your stance may be too short. Add a folded towel, slide the knee slightly back, and keep some weight through your front foot.
What should I feel?
You should feel a steady pull through the front of the back hip and upper thigh. A light groin stretch can happen too. Pain in the knee, hip joint, or lower back means adjust.
Why do I feel it in my lower back?
This often happens when the ribs push forward or the pelvis tips too much. Lightly brace your belly, point your tailbone down, and stay higher in the pose.
Final Takeaway
The low lunge stretch works best when it feels steady, not forced. Start with a small half-kneeling setup, keep your front knee stacked, square your hips, and use your core to keep your lower back calm.
I would rather hold a smaller shape with clean form than push into a deeper one that feels messy. Add it after sitting, running, yoga, or lower-body training.
Try both sides today, breathe slowly, and notice which hip feels tighter. Use the beginner changes above to make the pose fit your body, and keep the video nearby if visual cues help.