
| Medical Clearance Required: Always consult your doctor or physical therapist before beginning any exercise program for L5-S1 pain. Stop any movement immediately if it causes sharp pain, sudden leg weakness, numbness that spreads, or loss of bladder or bowel control. These exercises are for general guidance only and are not a substitute for professional medical assessment. |
| Exercise Type | Rehab / Mobility / Core Stability |
| Muscles Targeted | Multifidus, erector spinae, glutes, hamstrings, hip flexors, transverse abdominis |
| Difficulty | Beginner to intermediate, with progressions noted |
| Equipment | Yoga mat, chair (optional), pool access for water walking |
| Best For | L5-S1 disc herniation, disc bulge, sciatica, degenerative disc pain, general lower back stiffness |
| Avoid If | Recent spinal surgery, cauda equina syndrome, undiagnosed radiating leg pain not assessed by a clinician |
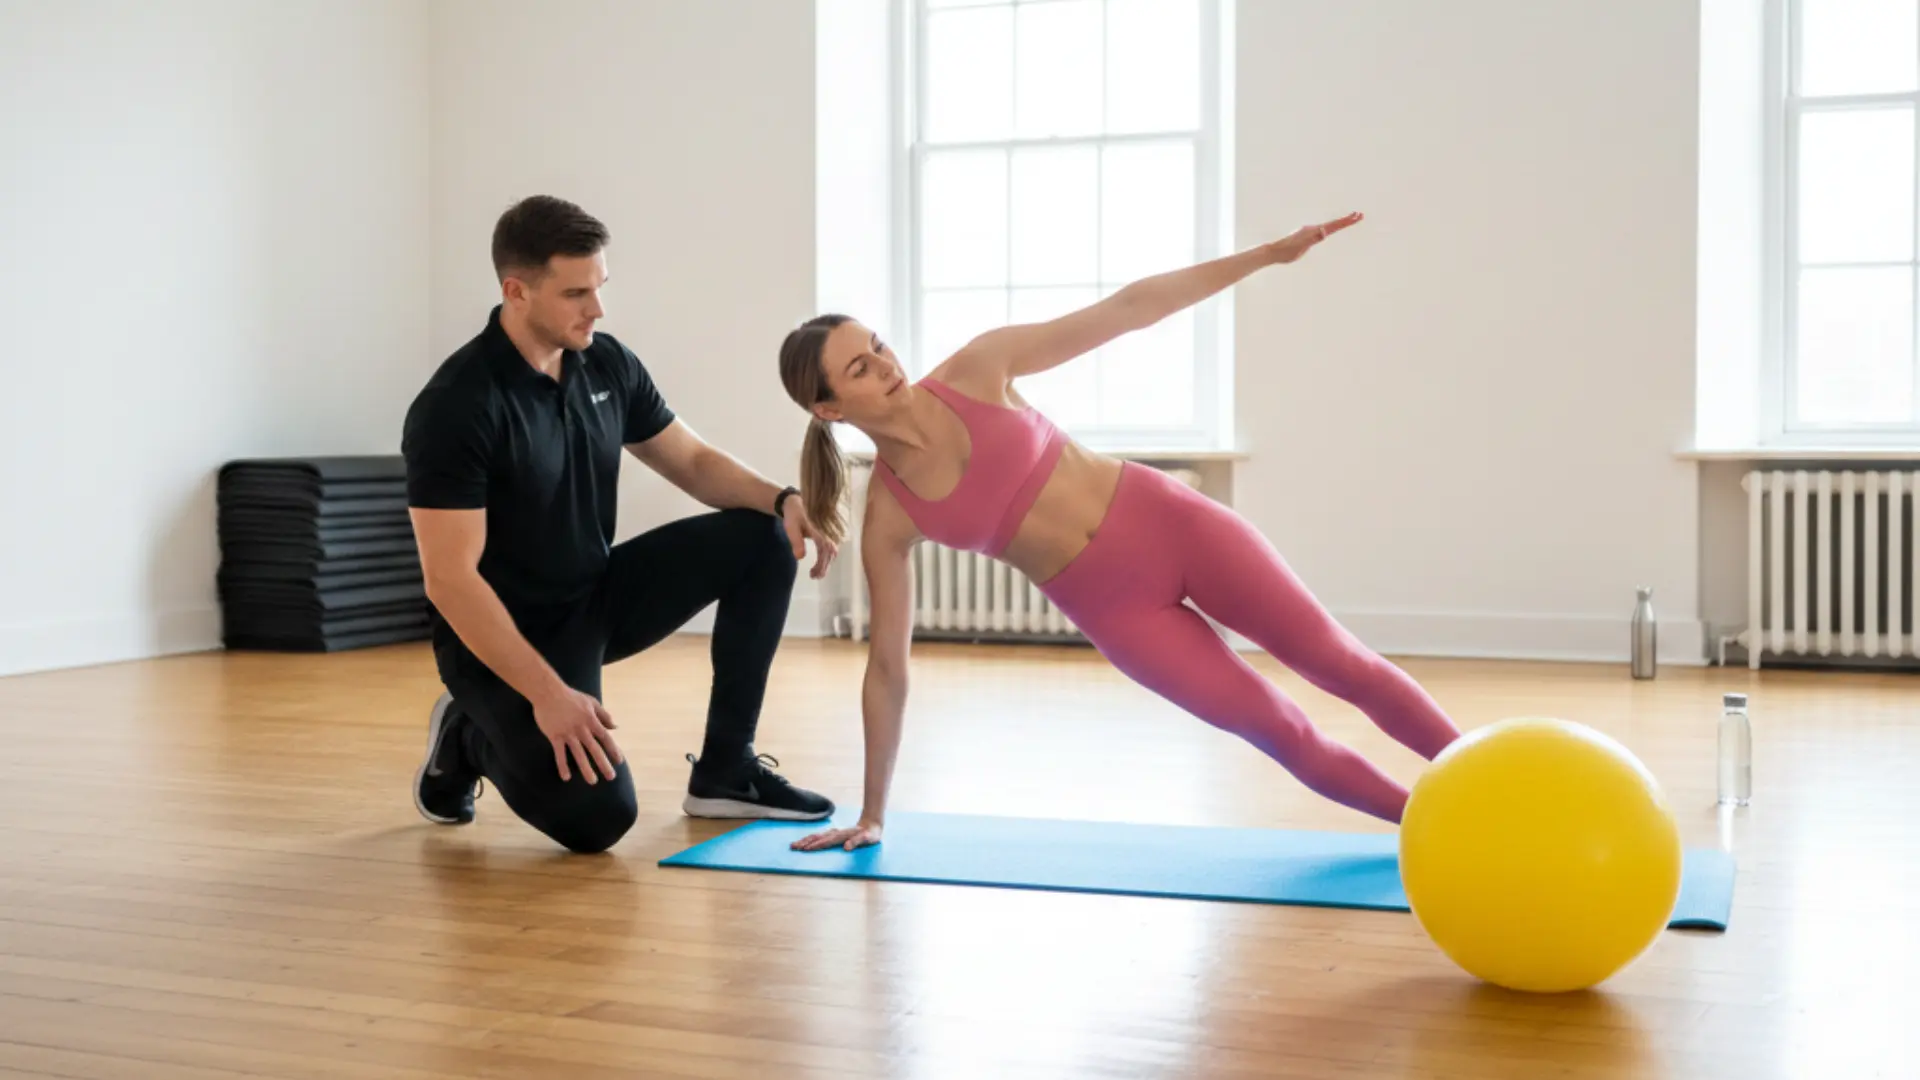
Waking up with sharp lower back pain can change your whole day. If you are searching for an L5 S1 pain relief exercise plan, you want something safe, specific, and backed by real clinical reasoning, not generic stretches copied from a fitness blog.
When I work with people dealing with L5-S1 pain, the first thing I tell them is that the joint they are fighting to protect is the most mechanically stressed segment in the entire spine. It bears the full weight of your upper body and absorbs force every time you stand, bend, lift, or walk.
That is why pain here tends to feel relentless. It is also why the wrong exercises can make things significantly worse, and the right ones, done consistently, can bring real relief within four to eight weeks.
I will walk you through the exercises that actually matter, what to avoid, how to build a weekly routine, and when exercise alone is not enough.
What Is Actually Causing Your L5-S1 Pain
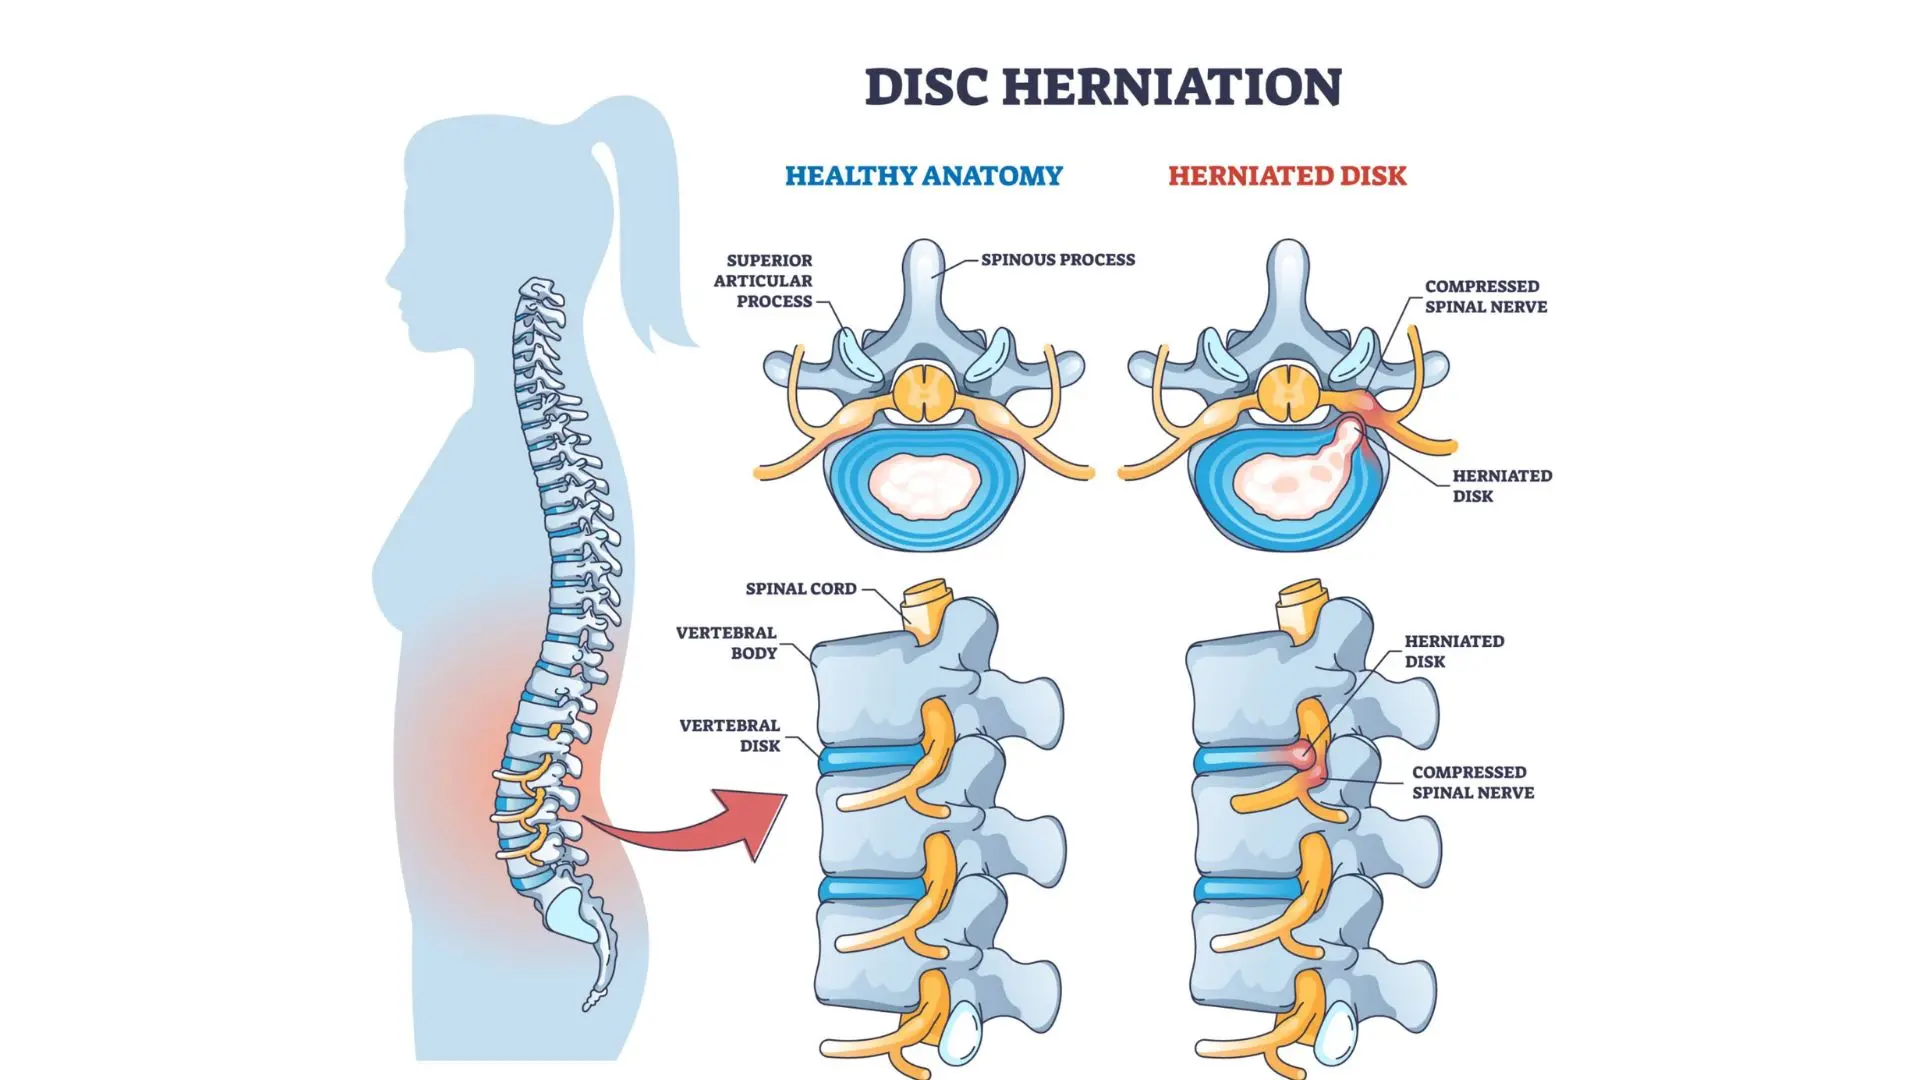
The L5-S1 segment connects your last lumbar vertebra to the sacrum. It is the lowest and most load-bearing joint in the spine, and it is the most frequently herniated spinal level in adults aged 25 to 55.
When this disc is irritated or herniated, it can compress the sciatic nerve, producing pain that radiates down the buttock, thigh, calf, or foot. That radiating pattern is one of the clearest signs the nerve root is involved, not just the muscle.
The most common causes of L5-S1 pain include lumbar disc herniation or bulge, degenerative disc disease, spinal stenosis, spondylolisthesis, and prolonged sitting that loads the disc without relief.
Poor lifting form and weak core muscles compound the problem: when the multifidus and transverse abdominis are not doing their job, the disc absorbs forces it was never designed to handle on its own.
The good news is that most L5-S1 pain responds well to targeted movement. Surgery is rarely necessary for disc herniations without progressive neurological deficits.
Exercise is the primary treatment recommended by physical therapists, and understanding your directional preference, the specific movement direction that centralizes your pain, is what separates an effective program from one that makes things worse.
L5 S1 Pain Relief Exercises: The Full Routine
These exercises are organized the way I program them for people starting out: mobility first, core stability second, strengthening third. Do not skip to the strengthening exercises before the mobility and stability work is comfortable and pain-free.
1. Knee-to-Chest Stretch
This stretch gently unloads the L5-S1 disc and relaxes the surrounding muscles that tighten when the joint is irritated. It is one of the safest starting points because it requires no spinal loading at all.
How to do it:
- Lie flat on your back on a firm surface or yoga mat.
- Bend both knees with your feet flat on the floor.
- Slowly bring one knee up toward your chest.
- Hold it with both hands, behind the thigh or on the shin, not behind the knee joint.
- Hold for 20 to 30 seconds, breathing slowly and letting the back relax.
- Lower the leg and repeat on the other side.
Sets and reps: 3 reps per leg, hold 20 to 30 seconds, once or twice daily.
| Trainer Tip: Do not pull the knee forcefully toward your chest. Let gravity and your breath do the work. If you feel any sharp shooting pain in the leg, ease off the range immediately. |
2. Pelvic Tilts
Pelvic tilts activate the deep stabilizers of the lower spine, particularly the transverse abdominis and multifidus, without placing any shear force on the L5-S1 joint. They also teach your body to maintain a neutral spine position, which is the foundation of every other exercise in this program.
How to do it:
- Lie on your back with knees bent and feet flat on the floor, hip-width apart.
- Relax your body completely.
- Tighten your stomach muscles and gently press your lower back flat against the floor.
- You should feel your pelvis tilt slightly upward.
- Hold for 5 seconds.
- Slowly release and return to the starting position.
Sets and reps: 10 to 15 reps, hold 5 seconds each, 2 sets, once or twice daily.
This is a very small movement. Think of it as “squishing” your lower back gently into the floor. If you feel any pain, reduce the effort level, not the frequency.
3. Cat-Cow Stretch
Cat-cow gently mobilizes the entire lumbar spine, improves blood flow to the disc, and loosens the muscles that tighten around the L5-S1 segment overnight. It is especially useful first thing in the morning when the back feels stiff and the disc is still slightly more hydrated from lying down.
How to do it:
- Get on all fours: hands under shoulders, knees under hips.
- Cow pose: breathe in, let your belly drop toward the floor, and lift your head and tailbone gently.
- Cat pose: breathe out, round your back toward the ceiling, tuck your chin to your chest, and draw your pelvis under.
- Move slowly and smoothly between the two positions, following your breath.
Sets and reps: 10 slow, controlled cycles, 2 sets, once or twice daily.
Never force the movement. If one direction produces leg pain, stay in the range that does not, and note which direction helps. That is your directional preference, and it matters.
4. Child’s Pose
Child’s pose creates gentle traction through the lower spine and light decompression at L5-S1. It also stretches the hip and glute muscles that frequently pull on the lower back when tight, and it gives the nervous system a genuine break from the pain signals that drive muscle guarding.
How to do it:
- Start on all fours on a mat.
- Push your hips back toward your heels as far as is comfortable.
- Extend your arms forward on the floor.
- Rest your forehead on the mat and let your chest drop toward the floor.
- Breathe deeply and hold, relaxing a little more with each exhale.
Sets and hold time: Hold 30 to 60 seconds, repeat 3 times, daily.
If your hips do not quite reach your heels, place a folded blanket or pillow between your hips and heels for support. You can also try a yoga strap to gently assist your flexibility as you build range over time.
5. Prone Press-Up (McKenzie Extension)
The prone press-up is one of the most clinically effective movements for L5-S1 disc herniation. It works on a principle called directional preference: for most people with disc-related lower back pain, extension movements push the disc material away from the nerve root and centralize the pain back toward the spine, where it is more manageable.
The standing back extension in the original article covers the same mechanism. This version, done lying down, is gentler and more specific for acute disc pain.
How to do it:
- Lie face down on a firm mat with your hands flat under your shoulders, elbows bent.
- Press gently through your hands to lift your upper body, keeping your hips on the floor throughout.
- Go only as far as is comfortable; you do not need to fully straighten your arms.
- Hold 5 to 10 seconds at the top, then lower slowly.
- If leg pain centralizes toward the spine during this movement, that is a positive sign: continue.
- If leg pain increases or spreads further down the leg, stop and consult a physiotherapist.
Sets and reps: 10 reps, 2 to 3 sets, every 1 to 2 hours if well-tolerated during an acute flare.
| Trainer Tip: The McKenzie method is not about how far you push up. It is about identifying whether extension or flexion reduces your leg pain. If press-ups increase leg pain, you may be a flexion-responder, and the knee-to-chest stretch will be your priority movement instead. |
6. Standing Back Extension
The standing version of the McKenzie extension is ideal when sitting or lying down for long periods has caused your symptoms to worsen. It can be done throughout the day, at your desk, between walks, or after long drives, giving the disc repeated brief decompression signals.
How to do it:
- Stand tall with your feet hip-width apart.
- Place both hands on your lower back, fingers pointing downward.
- Slowly bend backward as far as is comfortable, using your hands for support.
- Look slightly upward and keep your knees soft, not locked.
- Hold 2 to 3 seconds at the end of the range, then return to standing.
Sets and reps: 10 reps, 2 to 3 sets, every 1 to 2 hours if tolerated.
7. Seated Hamstring Stretch
Tight hamstrings pull the pelvis into posterior tilt, which increases pressure on the L5-S1 disc and limits the spine’s ability to move correctly during forward bending. Loosening these muscles regularly is one of the fastest ways to reduce chronic lower back tension. If you also deal with sciatic nerve symptoms, a tight hamstring can compress the nerve further along its path.
How to do it:
- Sit on the edge of a firm chair with both legs straight out in front.
- Keep your back straight; do not round your spine.
- Slowly hinge forward from your hips (not your waist) until you feel a gentle stretch in the back of your thigh.
- Rest your hands on your thighs or shins. Do not grab your feet and pull.
- Hold, release, and repeat.
Sets and hold time: 3 reps per leg, hold 20 to 30 seconds, once or twice daily.
If this stretch produces pain shooting down your leg, stop immediately. That is nerve tension, not muscle tightness, and it needs a physio assessment before you continue.
8. Bird-Dog
Bird-dog is the most important core stability exercise for L5-S1 pain. It trains the multifidus, the small but critical muscle that runs along the spine and directly supports the L5-S1 segment, alongside the erector spinae and gluteus medius.
Research published in the Journal of Orthopedic and Sports Physical Therapy (2015) confirms that multifidus activation exercises reduce pain and improve function in chronic lower back pain compared to general exercise alone.
How to do it:
- Start on all fours with hands directly under shoulders and knees under hips.
- Tighten your core gently, bracing as if expecting a light punch to the stomach.
- Slowly extend your right arm straight forward while extending your left leg straight back.
- Keep your hips level. Do not let one side drop or rotate.
- Hold for 5 to 10 seconds, then slowly return to the start.
- Repeat on the opposite side.
Sets and reps: 8 to 10 reps per side, hold 5 to 10 seconds, 2 to 3 sets, daily.
Quality over speed. A slow, controlled rep with a level spine does more for the multifidus than ten fast, sloppy ones. When this becomes easy, add a 2-second pause at the top before returning.
9. Glute Bridge
Weak glutes are one of the most overlooked contributors to L5-S1 pain. When the glutes are not activating properly, the lower back muscles compensate by taking on more load during everyday movements like walking, standing up, and climbing stairs. The glute bridge targets the gluteus maximus and medius directly, reducing that compensation pattern.
How to do it:
- Lie on your back with knees bent and feet flat on the floor, hip-width apart.
- Keep your arms relaxed at your sides.
- Gently tighten your core muscles.
- Press through your heels and lift your hips toward the ceiling.
- Stop when your body forms a straight line from shoulders to knees.
- Hold briefly, then slowly lower down.
Sets and reps: 10 to 12 reps, hold 3 to 5 seconds at the top, 2 to 3 sets, daily.
Avoid arching your lower back at the top of the movement. If you feel the work shifting into your spine rather than your glutes, lower your hips slightly and focus on squeezing through the glutes only.
10. Standing Hurdler Stretch
This stretch targets the hamstrings and the piriformis, both of which can compress the sciatic nerve when tight. The standing version allows you to control depth precisely and keeps the spine in a safer position than seated floor stretches for most people with acute L5-S1 pain.
How to do it:
- Stand in front of a chair, bench, or low step.
- Place one heel up on the surface with your leg as straight as possible.
- Keep your standing leg slightly bent and your spine long and upright.
- Hinge gently forward from your hips toward your raised leg until you feel a stretch behind the thigh.
- Hold, release, and switch legs.
Sets and hold time: 3 reps per leg, hold 20 to 30 seconds, once or twice daily.
Start with a low surface. A step that puts your heel at knee height is plenty. Raising it further when you are not ready places unnecessary stress on the sciatic nerve.
11. Side Glide (Lateral Shift Correction)
The side glide is specifically for people whose pain is causing them to lean or shift visibly to one side. This lateral shift is the body’s way of trying to reduce nerve compression, but it creates a secondary imbalance that slows recovery. The side glide gently encourages the spine back toward neutral alignment.
How to do it:
- Stand sideways next to a wall, with the painful side away from the wall.
- Place your elbow on the wall for support.
- Slowly push your hips toward the wall while keeping your shoulders in place.
- You should feel a gentle shift through your lower back.
- Hold for 2 to 3 seconds, then return to center.
Sets and reps: 10 to 15 reps, 2 to 3 sets, every few hours if needed.
If you are not sure whether you have a lateral shift, ask a physiotherapist to assess your standing posture before starting this exercise. Done incorrectly, it can push the spine in the wrong direction.
12. Water Walking
Water is one of the best training environments available for L5-S1 pain. Buoyancy reduces spinal loading by up to 90% at chest depth, meaning you can move, strengthen, and build conditioning without the compressive forces that land-based exercise applies to an already irritated disc.
How to do it:
- Enter a pool at waist-to-chest depth.
- Walk slowly from one end to the other at a comfortable pace.
- Keep your posture upright and avoid leaning forward.
- You can also try gentle side steps or light flutter kicks while holding the pool edge.
- Gradually increase duration as your comfort improves.
Frequency and duration: Start with 10 to 15 minutes, build to 30 minutes, 3 to 5 times per week.
If pool walking produces leg pain, try floating on your back with a pool noodle supporting your knees. The passive traction this creates can provide meaningful disc decompression on its own.
Progression: When to Advance Each Exercise
One of the most common mistakes people make with an L5-S1 exercise program is either advancing too quickly or staying at the beginner level too long. Here is how to judge readiness for each phase.
| Phase | Criteria to Advance | What to Add |
|---|---|---|
| Phase 1 (Weeks 1-2) Mobility and pain reduction |
Morning pain below 4/10, able to complete stretches without leg pain increase | Add pelvic tilts and McKenzie press-ups to the rotation |
| Phase 2 (Weeks 2-4) Core stability |
Pelvic tilts and press-ups are comfortable, and leg symptoms at rest have reduced | Add bird-dog and glute bridge, progress hold time to 10 seconds |
| Phase 3 (Weeks 4+) Functional strengthening |
Bird-dog and glute bridge pain-free for two full weeks, daily function improved | Add water walking duration, single-leg glute bridge, and light resistance bands |
These timelines are averages, not rules. If you are still in significant pain at week four, do not force progression. Stay at Phase 2 and reassess with a physiotherapist.
Sample Weekly Schedule
This schedule balances mobility, core stability, and gentle strengthening without overloading the L5-S1 segment on consecutive days.
| Day | Focus | Exercises | Time |
|---|---|---|---|
| Day 1 | Mobility | Knee-to-Chest Stretch, Pelvic Tilts, Cat-Cow | 15 to 20 mins |
| Day 2 | Rest or light movement | Easy walking, Child’s Pose, Standing Back Extensions | Optional 10 to 15 mins |
| Day 3 | Core stability | Bird-Dog, Glute Bridge, Pelvic Tilts, Prone Press-Up | 20 to 25 mins |
| Day 4 | Active recovery | Water Walking or Cat-Cow and Child’s Pose at an easy pace | 15 to 20 mins |
| Day 5 | Flexibility | Seated Hamstring Stretch, Standing Hurdler Stretch, Side Glide | 20 to 25 mins |
| Weekend | Recovery | Repeat best-feeling exercises or rest fully if symptoms are irritated | As needed |
Following this structure gives the L5-S1 segment what it needs most: regular gentle movement without compressive overload on back-to-back days. Many people also find that restorative yoga poses woven into the recovery days, particularly restorative yoga positions held for two to five minutes, add meaningful decompression benefits on top of the stretches listed here.
Exercises to Avoid with L5-S1 Pain
What you do not do matters as much as what you do. These movements are problematic for most people with active L5-S1 disc symptoms.
- Full sit-ups and crunches: These place repeated forward shear force on the L5-S1 disc. Even people without back pain are advised to minimize these in favor of bracing-based core work. With a disc injury or herniation, they can actively increase nerve compression.
- Heavy deadlifts and squats without guidance: Excessive load through a compromised L5-S1 segment can worsen herniation. These exercises are not permanently off the table, but they require pain-free movement and proper programming before you return to them.
- High-impact cardio during a flare: Running, jumping, and step aerobics create repeated spinal impact. Walk instead. Water walk if walking is too uncomfortable. Preserve these activities for Phase 3 and beyond, when the disc has had time to settle.
- Toe touches with a rounded lower back: Bending forward with a flexed lumbar spine while loading the posterior disc is one of the most common injury mechanisms. If you stretch your hamstrings, do it with a straight spine, hinging from the hip as shown in the seated version above.
- Prolonged static sitting: Sitting for more than 30 to 40 minutes without a movement break loads the disc continuously. Set a timer. Stand, do five Standing Back Extensions, and sit back down. Your disc needs that break.
Posture and Daily Habits That Protect L5-S1
The exercises in this guide are only effective if the rest of your day does not undo the work. These daily habits directly reduce the stress load on the L5-S1 segment outside of your exercise sessions.
- Lumbar support when sitting: Use a chair with a proper lumbar roll or place a rolled towel at your lower back. This maintains the natural lumbar curve and reduces disc pressure by up to 40% compared to unsupported slumped sitting.
- Sleep position: Side-lying with a pillow between your knees is the most protective sleep position for L5-S1 pain. It keeps the pelvis neutral and reduces rotational stress on the joint. Back sleeping with a pillow under your knees is a close second.
- Lifting mechanics: Hinge at the hips, not the waist. Keep the load close to your body. Never twist and lift at the same time. This is the single most repeatable cause of L5-S1 re-injury in people who are otherwise recovering well.
- Movement breaks: Walk for two to three minutes every 30 to 40 minutes of sitting. Walking lubricates the disc with nutrient-rich fluid and prevents the muscle guarding that settles in after long static holds.
- Core engagement during daily activity: A light bracing of the transverse abdominis during walking, lifting, and bending adds a protective layer of spinal stability without requiring any equipment or extra time. Think of it as 20% of your maximum core contraction, not a stomach vacuum.
Building these habits alongside the exercise plan is what makes the difference between temporary relief and lasting recovery. If you are also dealing with stiffness that is unrelated to the disc specifically, the exercises targeting back pain from stiffness cover complementary movements worth reviewing.
When to See a Doctor or Physiotherapist
Exercise is the right first step for most L5-S1 pain, but there are situations where professional assessment is not optional. Stop exercising and seek medical attention promptly if you experience:
- Loss of bladder or bowel control (this is a medical emergency, cauda equina syndrome, go to an emergency department immediately)
- Progressive weakness in the leg, foot drop, or inability to lift the foot while walking
- Numbness in the saddle area (inner thighs, genitals, or buttocks)
- Pain that is worsening consistently after two to three weeks of a proper exercise program
- Radiating leg pain that starts below the knee and has not improved after four weeks
For pain that is improving but plateauing, a physiotherapist who uses the McKenzie method can assess your directional preference precisely and advance your program in a way that no general guide can do for your individual presentation.
Frequently Asked Questions
Can I exercise during an L5-S1 flare-up?
Yes, but only gentle movements are best during a flare-up. Start with pain-free mobility exercises, short walks, or supported positions. Avoid heavy lifting, deep bending, and high-impact activity. Stop if pain travels farther down the leg or symptoms feel sharper.
What exercises make L5-S1 pain worse?
Exercises that bend, twist, or load the lower spine can worsen symptoms. Full sit-ups, toe touches, heavy squats, heavy deadlifts, and jumping workouts are common triggers. During recovery, choose controlled core stability and gentle mobility instead of aggressive stretching or loaded movements.
Is heat or ice better for L5-S1 pain?
Ice may help during the first day or two if pain feels sharp or inflamed. Heat may help later when muscles feel tight or guarded. Some people use both, but keep sessions short and avoid placing extreme temperatures directly on the skin.
Can sitting make L5-S1 pain worse?
Yes, long sitting can increase pressure on the lower lumbar discs. If sitting triggers pain, use lumbar support and take short standing or walking breaks every 30 to 40 minutes. A few gentle standing back extensions may also help reduce stiffness.
Should I stretch my hamstrings with L5-S1 pain?
Hamstring stretching can help if tightness is pulling on the pelvis, but it should be gentle. Keep your back straight and hinge from the hips. Stop if the stretch causes sharp pain, tingling, or symptoms shooting down the leg.
Can core exercises help L5-S1 pain?
Yes, the right core exercises can support the lower spine and reduce stress on the L5-S1 area. Focus on gentle stability moves like pelvic tilts, bird-dog, and controlled bracing. Avoid crunches or sit-ups during active pain.
How often should I do L5-S1 exercises?
Most gentle mobility and stability exercises can be done daily if they do not increase symptoms. Start with short sessions and build slowly. If soreness lasts into the next day or leg pain worsens, reduce the volume and check with a physiotherapist.
Can L5-S1 pain come back after recovery?
Yes, L5-S1 pain can return if the same triggers continue, such as long sitting, poor lifting, weak core muscles, or sudden heavy activity. Regular movement, strength work, better posture, and safer lifting habits can lower the chance of future flare-ups.
Final Verdict
Dealing with L5 S1 pain can feel frustrating, especially when simple movements trigger discomfort.
I’ve walked you through safe, practical options that you can start at home, including mobility stretches, core stability work, posture tips, and a simple weekly plan.
The right L5 S1 pain relief exercise routine can reduce pressure on the disc, calm irritated nerves, and help you rebuild strength slowly and safely. You don’t need to do everything at once.
Start with one or two exercises that feel manageable and stay consistent. Small daily effort adds up over time. If something increases your pain, pause and seek guidance.
Try one movement today and let me know which exercise helped you most.