

| Exercise Type | Isometric / Mobility / Grip Conditioning |
| Muscles Targeted | Forearms, latissimus dorsi, rotator cuff, upper trapezius, core |
| Difficulty | Beginner to Intermediate |
| Equipment | Pull-up bar or doorway bar |
| Best For | Grip strength, shoulder mobility, spinal decompression, pull-up progression |
| Avoid If | Acute rotator cuff tear, unstable shoulder dislocation, unmanaged elbow tendinopathy |
| Disclaimer: This article is for informational and educational purposes only. It does not constitute medical advice. Always consult a qualified healthcare provider before starting a new exercise or wellness program, especially if you have a shoulder, elbow, or wrist injury. |
When I first started working with clients who were trying to build toward their first pull-up, grip strength was almost always the bottleneck, not back strength. The dead hang exercise solves that bottleneck directly.
By hanging from a bar with arms fully extended and letting the body’s weight do the work, you train the forearms, shoulders, lats, and core simultaneously, with no complex equipment and no loaded barbell required.
In my own training, I added structured dead hang sets during a period when I was rehabbing a shoulder and needed low-impact upper-body work.
Within three weeks of consistent 20-to-30 second holds, my grip endurance in pulling movements improved noticeably, and shoulder stiffness after desk work dropped. The mechanism is straightforward: decompression, passive stretch, and isometric grip load in one movement.
Below, I will walk through exactly how to perform dead hangs safely, what muscles they work, what the research says about grip strength and long-term health, and how to progress from your first 10-second hold to two minutes of accumulated hang time per session.
What the Dead Hang Exercise Actually Does
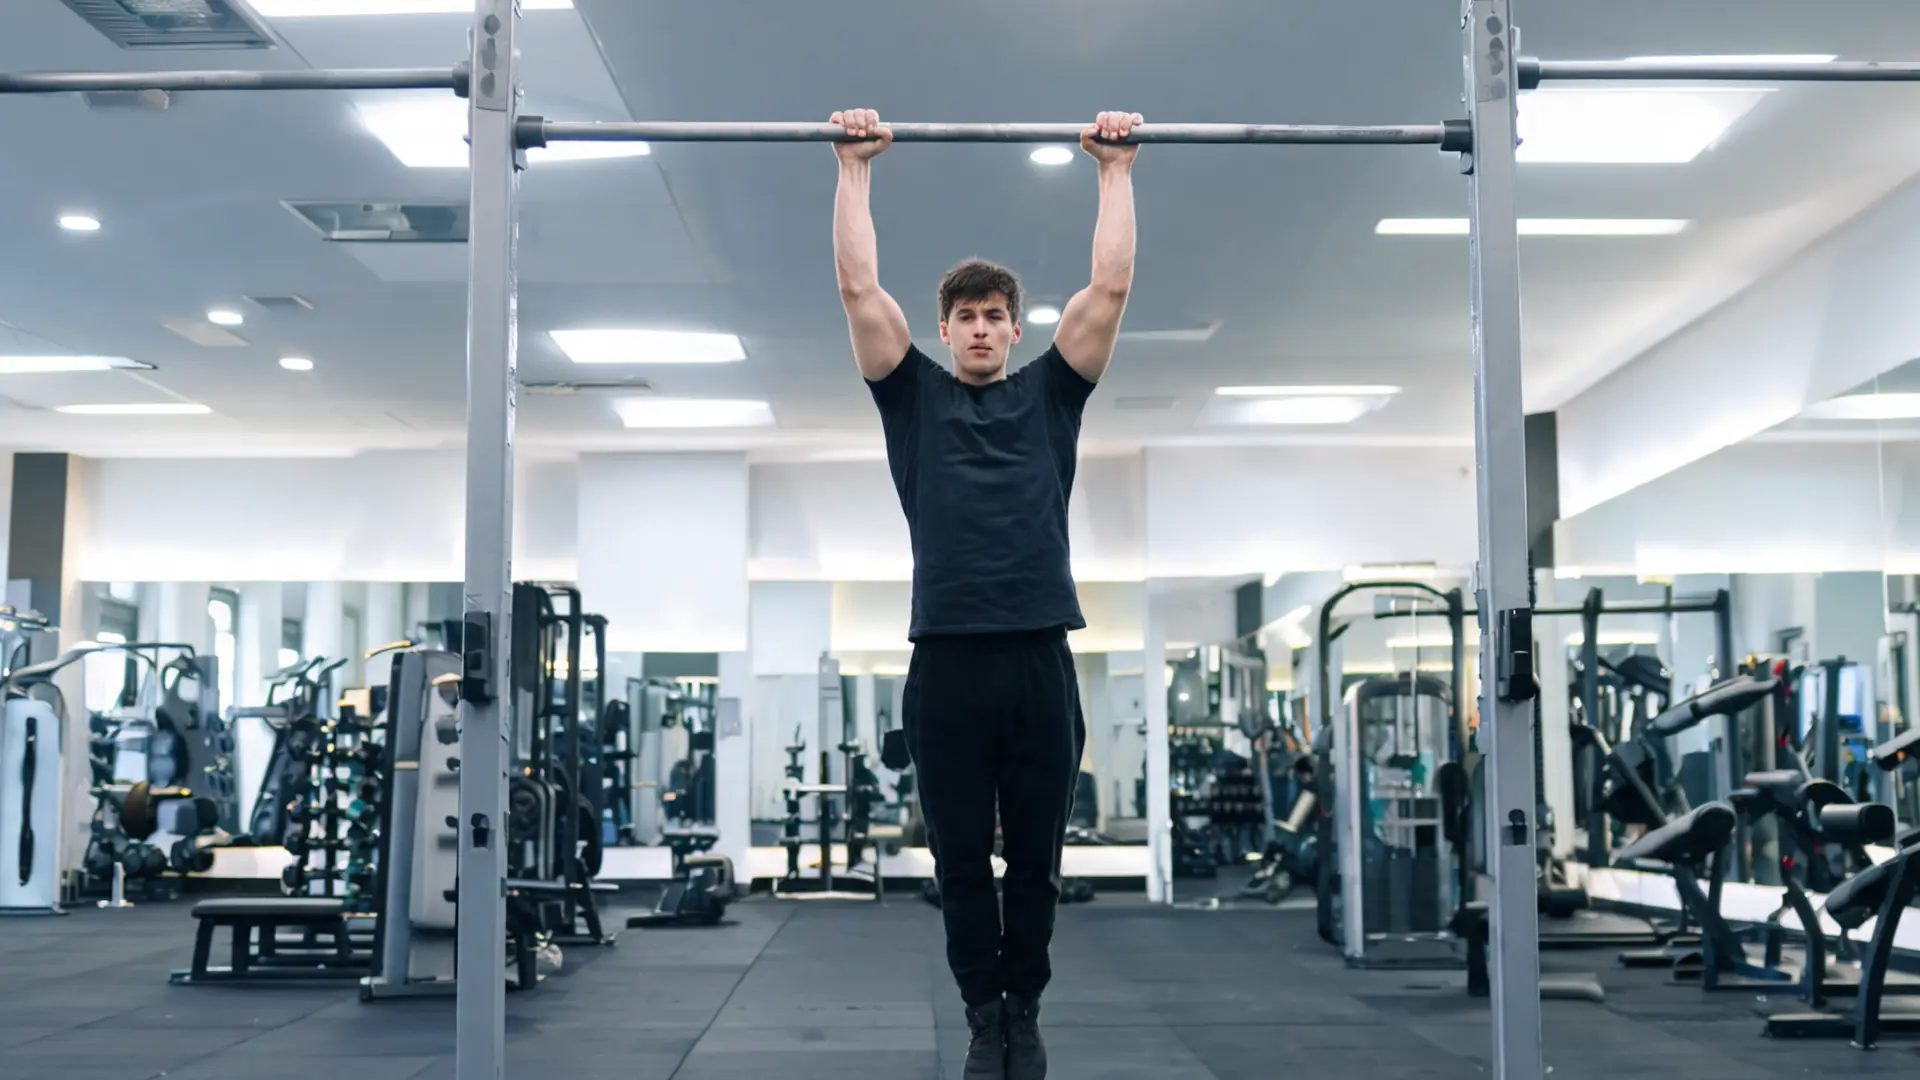
A dead hang is an isometric bodyweight exercise performed by gripping a pull-up bar with arms fully extended and letting the body hang freely under its own weight. Unlike a pull-up, you do not pull. The goal is controlled stillness: a firm grip, relaxed shoulders, a light core brace, and steady breathing.
During the hang, two things happen simultaneously. First, gravity creates a passive longitudinal stretch through the thoracic spine, relieving compression that builds up during extended sitting or heavy axial loading from exercises like back squats.
Second, the forearm flexors and intrinsic hand muscles contract isometrically to maintain the grip, accumulating meaningful training stimulus without any joint-loading movement pattern. Dead hangs sit within the broader category of functional strength training, movements that build real-world capacity rather than isolated muscle size.
Research published in the Journal of Cachexia, Sarcopenia, and Muscle (Peterson et al., 2022) found that grip strength is inversely associated with biological age acceleration, meaning people who maintain stronger grip strength show slower cellular aging markers.
Grip strength is a functional proxy for total-body muscle health, and dead hangs are one of the most direct ways to build it.
Dead Hang Benefits: What You Are Actually Training

Dead hangs offer specific, well-defined adaptations when practiced consistently. Here is what is actually happening in the body across each benefit.
1. Grip Strength and Forearm Endurance
The forearm flexors, specifically the flexor digitorum superficialis and flexor carpi radialis, contract continuously throughout the hang to maintain your grip on the bar.
A 2020 study in the Journal of Strength and Conditioning Research found that a four-week weighted dead hang program in rock climbers produced significant improvements in grip strength and endurance compared to controls.
For general fitness, unweighted hangs produce similar adaptations when hold duration is progressively increased over time. In my experience programming this for clients, grip strength becomes a limiter at around 30 seconds for most beginners. Getting past that threshold unlocks direct carryover to rowing, deadlifting, and pull-up volume.
2. Shoulder Stability and Rotator Cuff Health
During a passive dead hang, the rotator cuff muscles, including the supraspinatus, infraspinatus, and subscapularis, activate to prevent the humeral head from subluxing upward in the glenoid fossa. This low-load, end-range position gradually improves tolerance in the shoulder joint capsule.
Dead Hangs may specifically benefit individuals with rotator cuff injuries by strengthening shoulder structures through a pain-free passive range. I would add the caveat that anyone with an acute tear should get medical clearance first.
For chronic tightness or impingement from desk posture, dead hangs are often part of the solution, not the problem.
3. Spinal Decompression
Extended sitting and heavy spinal loading compress the intervertebral discs over time, reducing the fluid and space between vertebrae.
Hanging inverts that process: gravity pulls the lower body away from the upper body, creating axial traction through the lumbar and thoracic spine. This allows oxygen and nutrient-rich synovial fluid to re-enter compressed disc spaces.
Even a 20-to-30-second hang after a heavy lower-body session can noticeably reduce the feeling of spinal compression. I use this regularly after squat or deadlift days.
4. Upper-Body Mobility
The latissimus dorsi and the connective tissue of the shoulder joint capsule stretch under load during a dead hang in a way that overhead arm raises do not replicate.
Over weeks of consistent hangs, this increases overhead shoulder range of motion and reduces the rounded-shoulder posture that comes from prolonged sitting.
If you are working toward overhead pressing movements or finding that tight lats limit your squat depth, dead hangs address both issues without a dedicated stretching session.
5. Postural Correction
During a dead hang, the scapulae retract and depress as the body stabilizes, which has a corrective effect on the protracted, elevated shoulder position that most desk workers adopt. When performed consistently, this remodels scapular positioning over time.
Pairing dead hangs with the wall angels exercise targets the same scapular depression pattern and compounds the postural benefit across both movements.
What Muscles Do Dead Hangs Work?
| Muscle Group | Role During the Dead Hang |
|---|---|
| Forearm flexors and grip muscles | Isometric contraction to maintain grip on the bar throughout the hold |
| Latissimus dorsi | Supports the shoulder joint and undergoes passive lengthening under load |
| Rotator cuff (supraspinatus, infraspinatus, subscapularis) | Stabilizes the humeral head in the shoulder socket throughout the hang |
| Core (transverse abdominis, obliques) | Low-level bracing to control body position and prevent swinging |
| Upper trapezius and scapular stabilizers | Manages shoulder blade positioning and prevents passive shoulder elevation |
The forearms and grip muscles carry the primary training load, but the shoulder stabilizers and scapular muscles are doing quiet, important work throughout every second of the hang. That combination is what makes dead hangs effective for both grip development and shoulder health simultaneously.
How to Perform a Dead Hang
Hanging from a bar may seem simple, but it engages multiple muscles and improves grip, posture, and shoulder mobility. Following these steps will help you perform dead hangs safely, effectively, and with maximum benefit.
Step 1: Position Your Hands
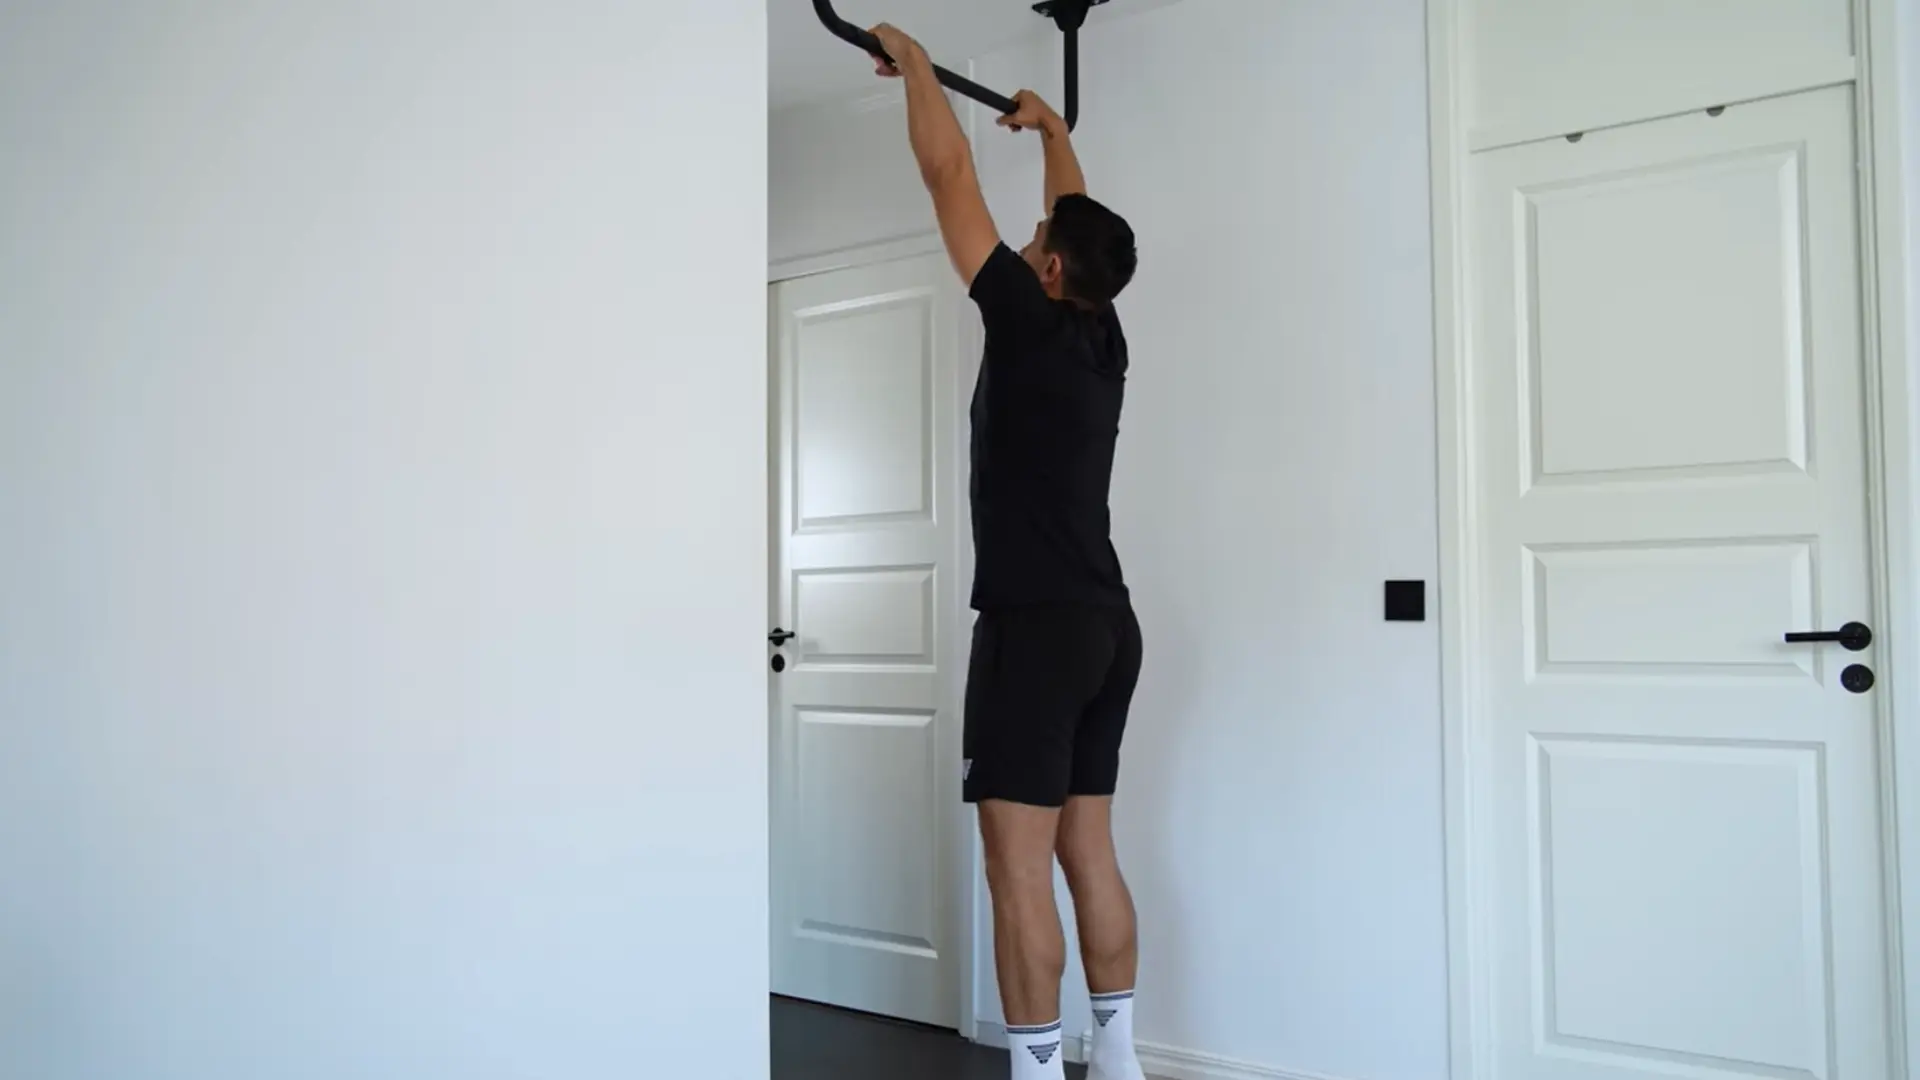
Grip the bar slightly wider than your shoulders to create a stable base. Keep your palms in a neutral position so your knuckles aren’t pointing fully upward. This keeps your wrists comfortable and reduces strain.
Adjust your grip width until it feels natural, and ensure your hands are secure before lifting your feet off the ground. Proper hand positioning sets the foundation for a safe, effective hang.
Step 2: Lift and Hang
Step or jump up carefully so your feet leave the ground. Allow your arms to extend fully and your body to hang freely. Avoid locking your elbows aggressively; instead, let your arms bear your weight naturally.
Keep your shoulders engaged but not tense. Focus on controlling your body and staying balanced to ensure stability and prepare your muscles for the benefits of the dead hang.
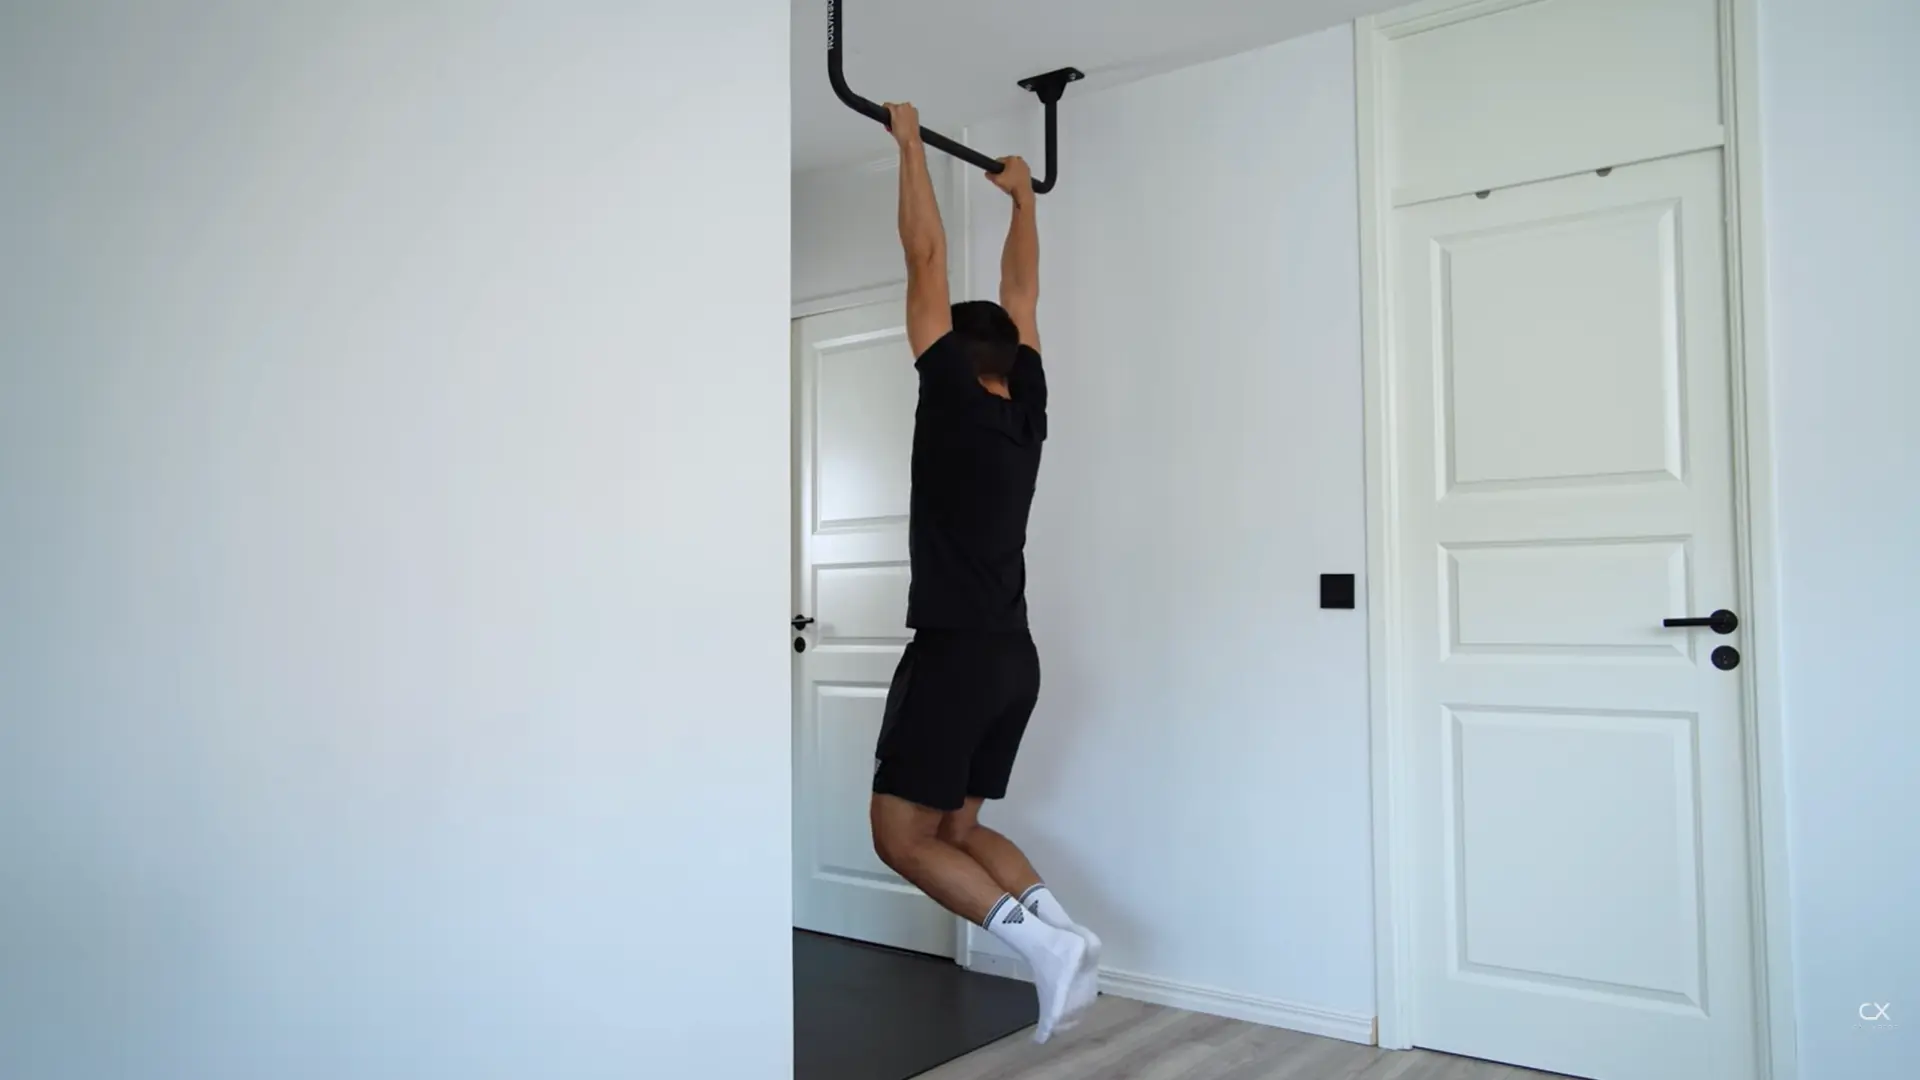
Step 3: Relax, Engage, and Maintain Posture
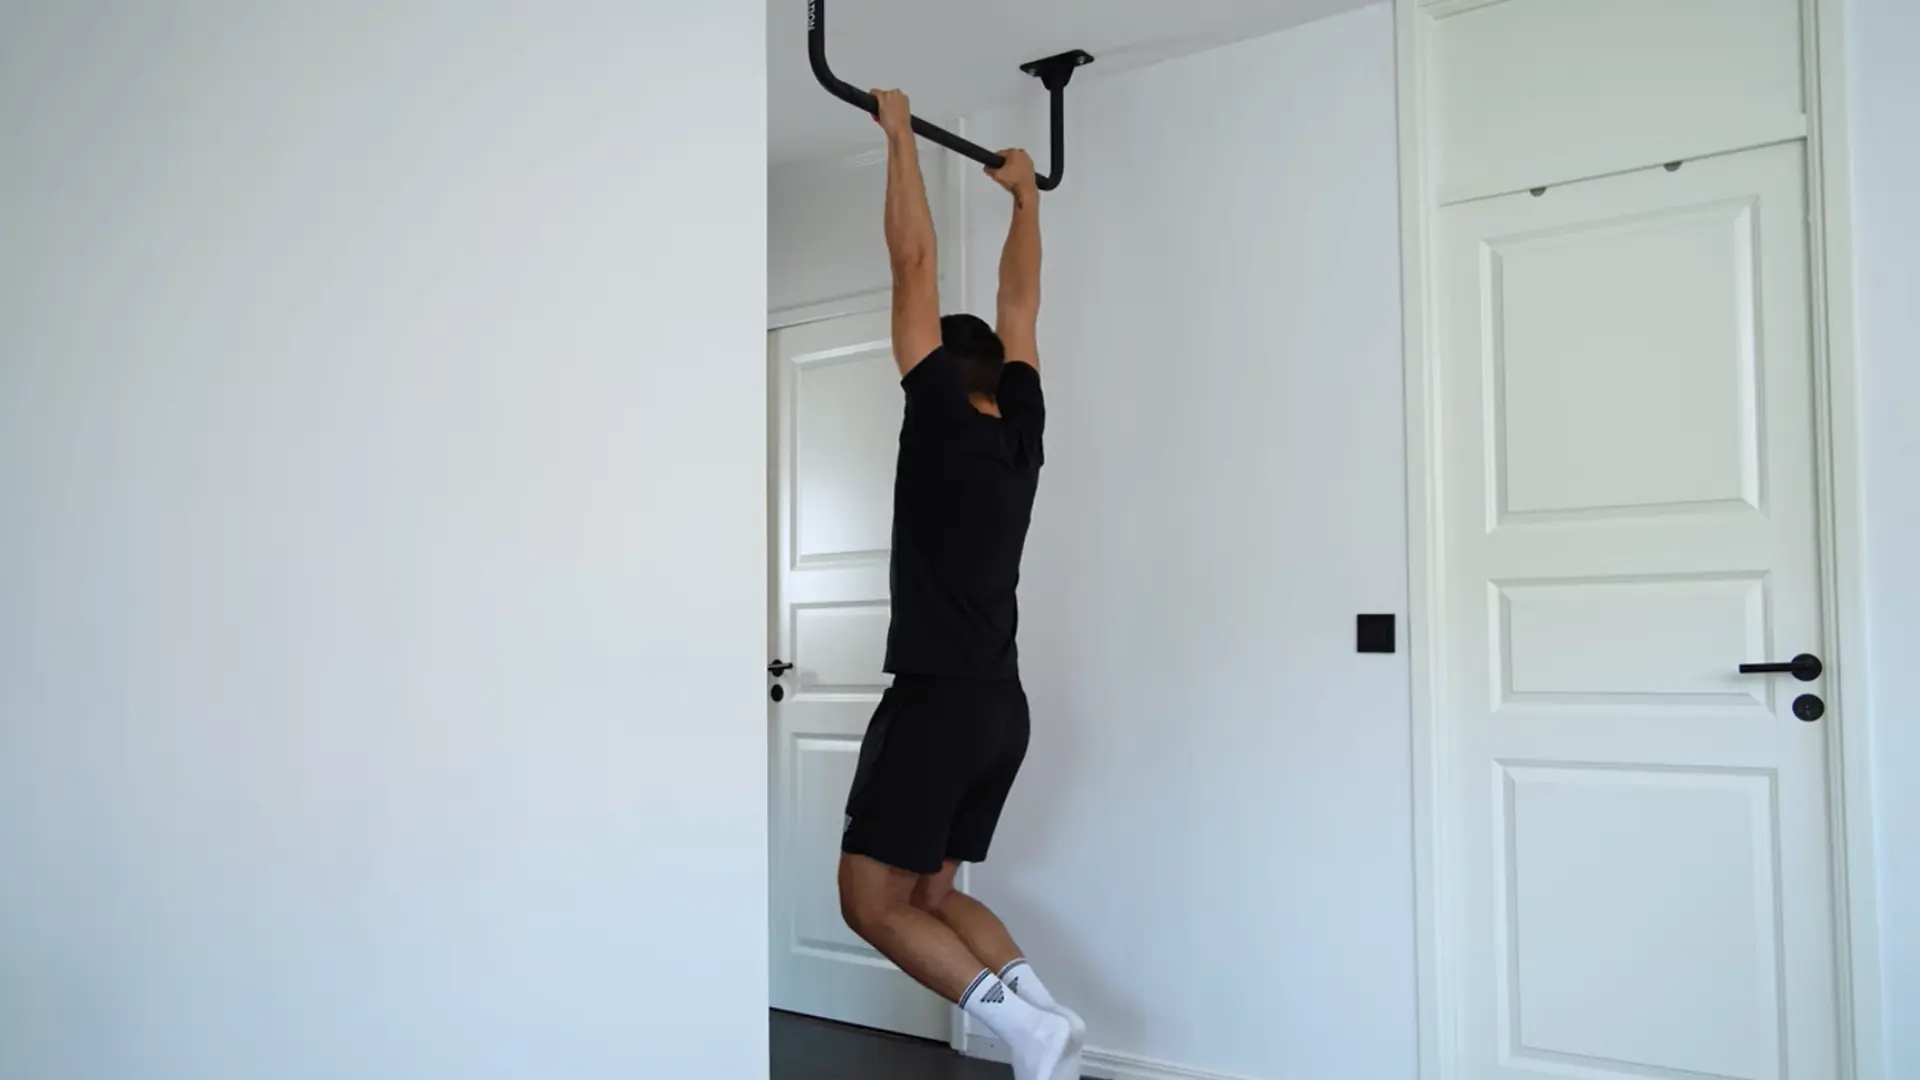
Once you’re hanging, let your shoulders, lats, and upper back release while lightly engaging your core for support. Focus on controlled breathing and subtle adjustments to prevent swinging.
Engage your hands and forearms just enough to hold your weight, strengthening your grip without over-tensing. Keep your back straight, chest open, and shoulders relaxed.
This posture enhances spinal decompression, shoulder mobility, and upper-body stability, while activating your core, lats, traps, and forearms for functional strength.
| Trainer Tip: The most productive dead hang is one where the limiting factor is grip, not pain. If you feel shoulder pain, jaw discomfort, or tingling in the fingers, step off immediately. Brief grip fatigue is expected and productive. Shoulder joint discomfort is not. |
Dead Hang Progressions: Beginner to Advanced
The dead hang is one of the few exercises where progressive overload is measured entirely in time, not load. Here is how I structure it for clients at different levels.
1. Beginner: Foot-Supported Hang (0 to 10 Seconds Unassisted)
If you cannot hold a full hang for 10 seconds, keep one or both feet lightly on a box or step to reduce the load on your grip. The goal here is not to reduce effort entirely but to allow a 20-to-30 second hold with controlled form.
Perform 3 sets with 90 seconds of rest between sets, three times per week. Once you can hold the foot-supported hang for 30 seconds with good shoulder position, progress to a full hang.
2. Intermediate: Full Dead Hang (10 to 45 Seconds)
Perform 3 to 4 sets of full hanging holds, resting 90 seconds to 2 minutes between sets. The total accumulated hang time per session should be 90 to 120 seconds. When you can consistently complete 4 sets of 30-second hangs with grip to spare, increase the duration of individual sets by 5 seconds per week.
At this stage, dead hangs pair well with pull-up progressions. The grip and shoulder stability you are building directly transfer to the first few inches of a pull-up, which is where most beginners fail.
3. Advanced: Extended and Loaded Variations (45 Seconds and Beyond)
At this level, the training stimulus from a bodyweight hang diminishes for grip specifically.
To continue progressing, use a thicker bar or add a towel draped over the bar to increase grip demand, perform single-arm hangs with the non-working hand on the wrist for assistance, or add a lightweight vest.
I would not recommend adding more than 10 pounds until hang time exceeds 90 seconds unloaded. Accumulated hang time per session can extend to 3 to 5 minutes for grip-focused training blocks.
Dead Hang Variations
Dead hang variations build grip strength, shoulder stability, and pull-up performance by shifting emphasis across scapular control, forearm load, and muscular engagement patterns in different ways.
| Variation | Description | Primary Benefit |
|---|---|---|
| Passive Dead Hang | Arms fully extended, shoulders relaxed, body hanging freely from the bar | Spinal decompression and passive shoulder stretch |
| Active Dead Hang | Scapulae retracted and depressed while hanging without bending elbows | Builds lat and lower trap activation for pull-up strength |
| Scapular Pull-Up Hang | Small controlled shoulder blade pull without elbow bend, held briefly | Improves scapular stability and pull-up control strength |
| Towel Hang | Hanging from a towel instead of a bar to increase grip diameter | Develops forearm strength and crushing grip power |
Each variation changes how force is distributed through the upper body. Passive hangs are best for recovery and joint unloading, while active versions shift toward strength and control.
Scapular variations directly target pull-up mechanics, and towel hangs significantly increase grip demand by altering handle thickness. When combined in a training plan, these variations create a complete progression from mobility to performance strength
How to Program Dead Hangs in Your Routine
Dead hangs are versatile enough to appear in three positions within a training session: warm-up, finisher, or standalone grip work. Here is how I use each.
- As a warm-up: 2 sets of 20-to-30-second passive dead hangs before any upper-body session. This mobilizes the shoulder, primes grip engagement, and decompresses the spine after sitting on the way to the gym. Keep the intensity low enough that you are activating, not exhausting, the grip.
- As a training finisher: 3 to 4 sets of maximum-effort holds at the end of a pulling session. Grip is already pre-fatigued from rows and pull-downs, so holds will be shorter, but the cumulative training effect on grip endurance is high. Rest 90 seconds between sets.
- As a standalone session: For anyone specifically focused on grip strength or working toward a first pull-up, three standalone dead hang sessions per week, each consisting of 90 to 120 seconds of total hang time across multiple sets, are sufficient.
If you are recovering from a lower-body injury and looking for upper-body work you can do without weight-bearing, dead hangs apply zero lower-body stress and fit naturally into a crutches workout routine where the upper body carries the full conditioning load.
Common Dead Hang Mistakes and Exactly How to Fix Them
Even a simple exercise like the dead hang can be done incorrectly, reducing its benefits or causing strain. By being aware of common mistakes, you can maintain proper form, protect your joints, and get the most out of each hang.
- Swinging reduces the isometric demand on the grip and core, shortens effective hold time, and stresses the shoulder joint through uncontrolled end-range movement. Fix: step off the box slowly rather than jumping, and engage a low-level core brace immediately upon hanging. If you start to swing, brace your core and wait for the movement to settle before beginning your count.
- Fingertip-only gripping leads to rapid fatigue and reduces forearm activation. The bar should rest across the proximal phalanges and into the palm for better load distribution. This increases contact surface area, improves grip efficiency, and engages the full forearm flexor chain. If hand stiffness occurs, trigger finger exercises may help reduce discomfort during early hang training.
- Holding the Breath: Breath-holding during isometric holds increases intrathoracic pressure and accelerates peripheral muscle fatigue. Breathe in a controlled rhythm: 3 seconds in, 3 seconds out. This extends hold time by 15 to 25% in my experience working with clients who previously breath-held during hangs.
- Progressing Duration Too Quickly: Grip and tendon tissues in the shoulder adapt slowly compared to muscles, so increases in hold time should stay gradual. Adding more than 5 seconds per week or skipping rest can lead to tendon strain, soreness, and delayed recovery, reducing overall training progress.
Frequently Asked Questions
How long should I be able to dead hang?
For general fitness, a 30-to-45-second dead hang is a reasonable baseline for most healthy adults. Research and performance standards generally place 60 seconds as a solid benchmark for intermediate-level grip endurance. From a longevity standpoint, the research focuses less on specific time targets and more on the trend: people who can sustain grip-demanding activities without rapid fatigue tend to score better on broader health and mortality markers. Start with whatever you can hold with proper form and add 5 seconds per week.
Can dead hangs help with pull-ups?
Yes, directly. The dead hang develops the two most common weak links in pull-up progression: grip endurance and shoulder stabilizer strength. Many people who struggle to complete a single pull-up have adequate lat strength but grip out before their pulling muscles fatigue. Active dead hang variations and scapular pull-up hangs build the specific motor patterns, grip capacity, and shoulder stability that carry over into the first inch of a pull-up. I typically program 4 weeks of dedicated dead hang work before introducing assisted pull-up variations.
Is a dead hang good for shoulder impingement?
For most people with shoulder impingement related to poor posture and tight anterior shoulder structures, passive dead hangs can help by stretching the pec minor and anterior capsule while building rotator cuff stability. However, this depends on the specific type and severity of impingement. If the hang produces sharp pain, numbness, or increased symptoms within 24 hours, stop and consult a physical therapist before continuing. For sub-clinical tightness without diagnosed pathology, gentle dead hangs are generally appropriate and often therapeutic.
How often should I do dead hangs?
Two to four times per week is the most effective range for most goals. Daily short hangs of 10 to 20 seconds for spinal decompression are generally well-tolerated. Dedicated grip-training sessions with multiple sets of near-maximum holds should be limited to three times per week to allow connective tissue recovery. More is not better here. Grip structures need 48 hours to recover from high-intensity isometric loading.
Can dead hangs help with back pain?
Dead hangs address one specific cause of back pain: axial compression from prolonged sitting or heavy loading. By creating traction through the spine, they temporarily increase disc space and reduce pressure on compressed structures. They do not address muscular imbalances, disc herniation, or nerve impingement directly. If you have diagnosed back pathology, speak with a physical therapist before adding dead hangs. For general desk-related stiffness and upper back tightness, two to three short hang sessions per day of 20 to 30 seconds are a practical and low-risk intervention.
What is the difference between a passive and active dead hang?
A passive dead hang allows the shoulder to fully relax into the hanging position, prioritizing spinal decompression and shoulder capsule stretch. An active dead hang involves deliberately depressing and retracting the scapulae throughout the hold, building the scapular stability and lat engagement required for pulling movements. Both are useful and serve different purposes. Use passive hangs for recovery, mobility, and spinal decompression. Use active hangs for pull-up progression and shoulder strength development. Alternating between both within the same session, as I described in the Variations section, captures both benefits.
Summing Up
The dead hang exercise proves that even simple movements can make a big difference in your strength and mobility. By practicing proper form, you can strengthen your grip, engage your shoulders and core, and decompress your spine in just a few minutes each session.
I’ve noticed that consistent hangs improve posture, make everyday tasks like carrying groceries easier, and help with overall upper-body stability.
You can start small with feet-supported holds or resistance bands and gradually increase duration as your strength grows. Try incorporating dead hangs into your routine, pay attention to how your body responds, and see the improvements for yourself.
Share your progress or tips with others and keep building your strength.
Sources
Leong, D. et al., “Prognostic Value of Grip Strength: Findings From the Prospective Urban Rural Epidemiology (PURE) Study.” The Lancet, 2015. https://www.thelancet.com/journals/lancet/article/PIIS0140-6736(14)62000-6/abstract
Peterson, M. et al., “Grip Strength Is Inversely Associated with DNA Methylation Age Acceleration.” Journal of Cachexia, Sarcopenia, and Muscle, 2022. https://pubmed.ncbi.nlm.nih.gov/35441482/
GoodRx Health, “7 Benefits of Dead Hangs for Strength and Flexibility.” https://www.goodrx.com/well-being/movement-exercise/dead-hang-benefits