
| Style | Standing Balance / Backbend |
| Level | Beginner to Intermediate |
| Duration | 3 to 5 breaths per side (hold longer as balance improves) |
| Props Needed | Optional: yoga strap, wall for support |
| Best Time | Mid-practice, after a thorough warm-up |
| Avoid If | Sharp knee or shoulder pain, lower back injury, dizziness, or balance disorders. Consult a healthcare provider before practicing if you have any of these conditions. |
| Disclaimer: This article is for informational and educational purposes only. It does not constitute medical advice. Always consult a qualified healthcare provider before starting a new exercise or yoga program, especially if you have an existing injury or medical condition. |
Understanding Dancer Pose in Yoga
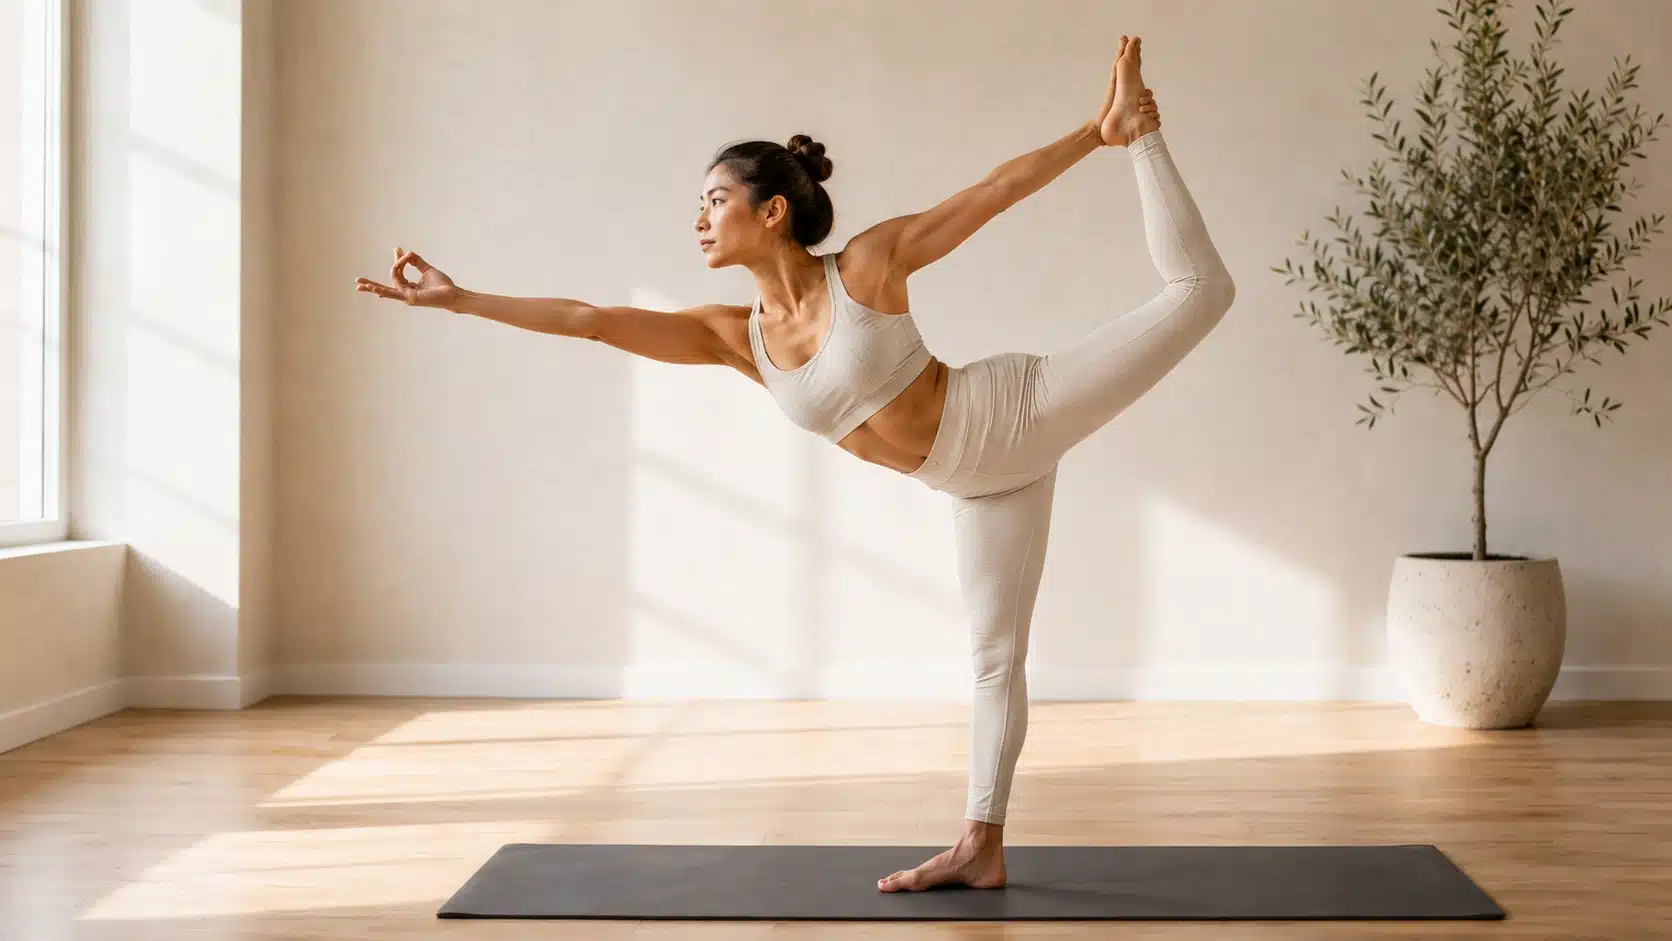
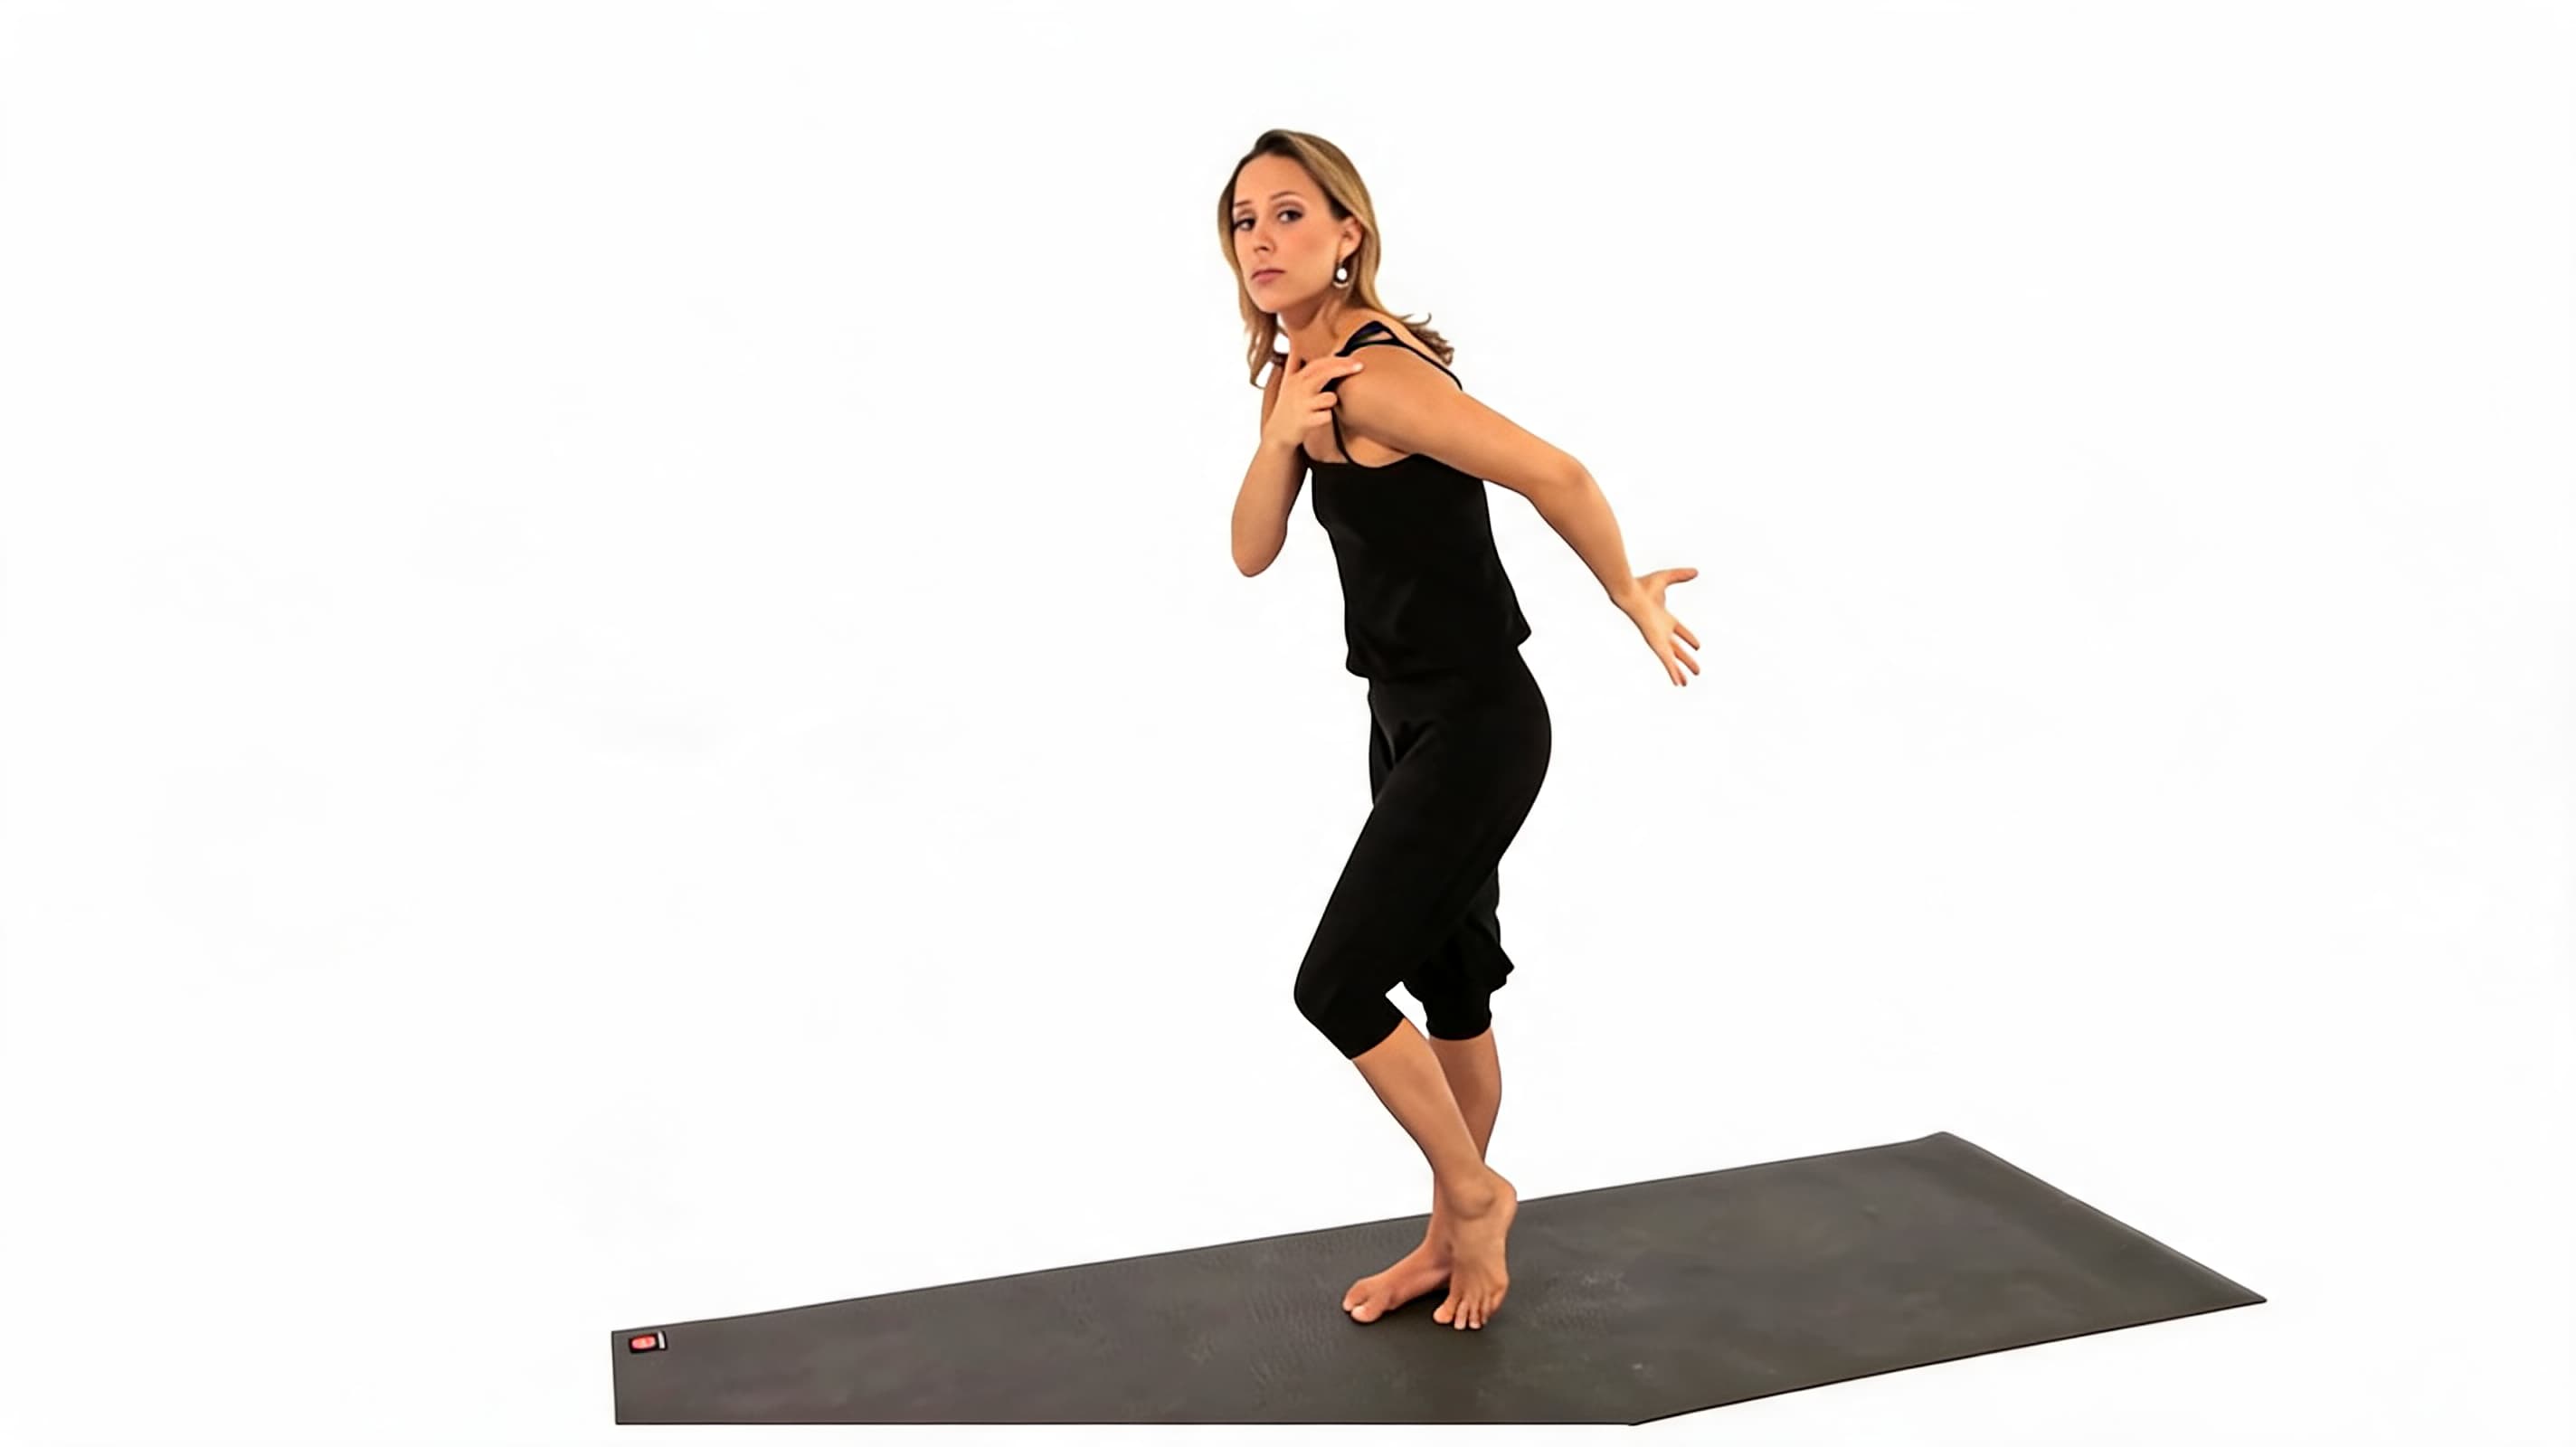
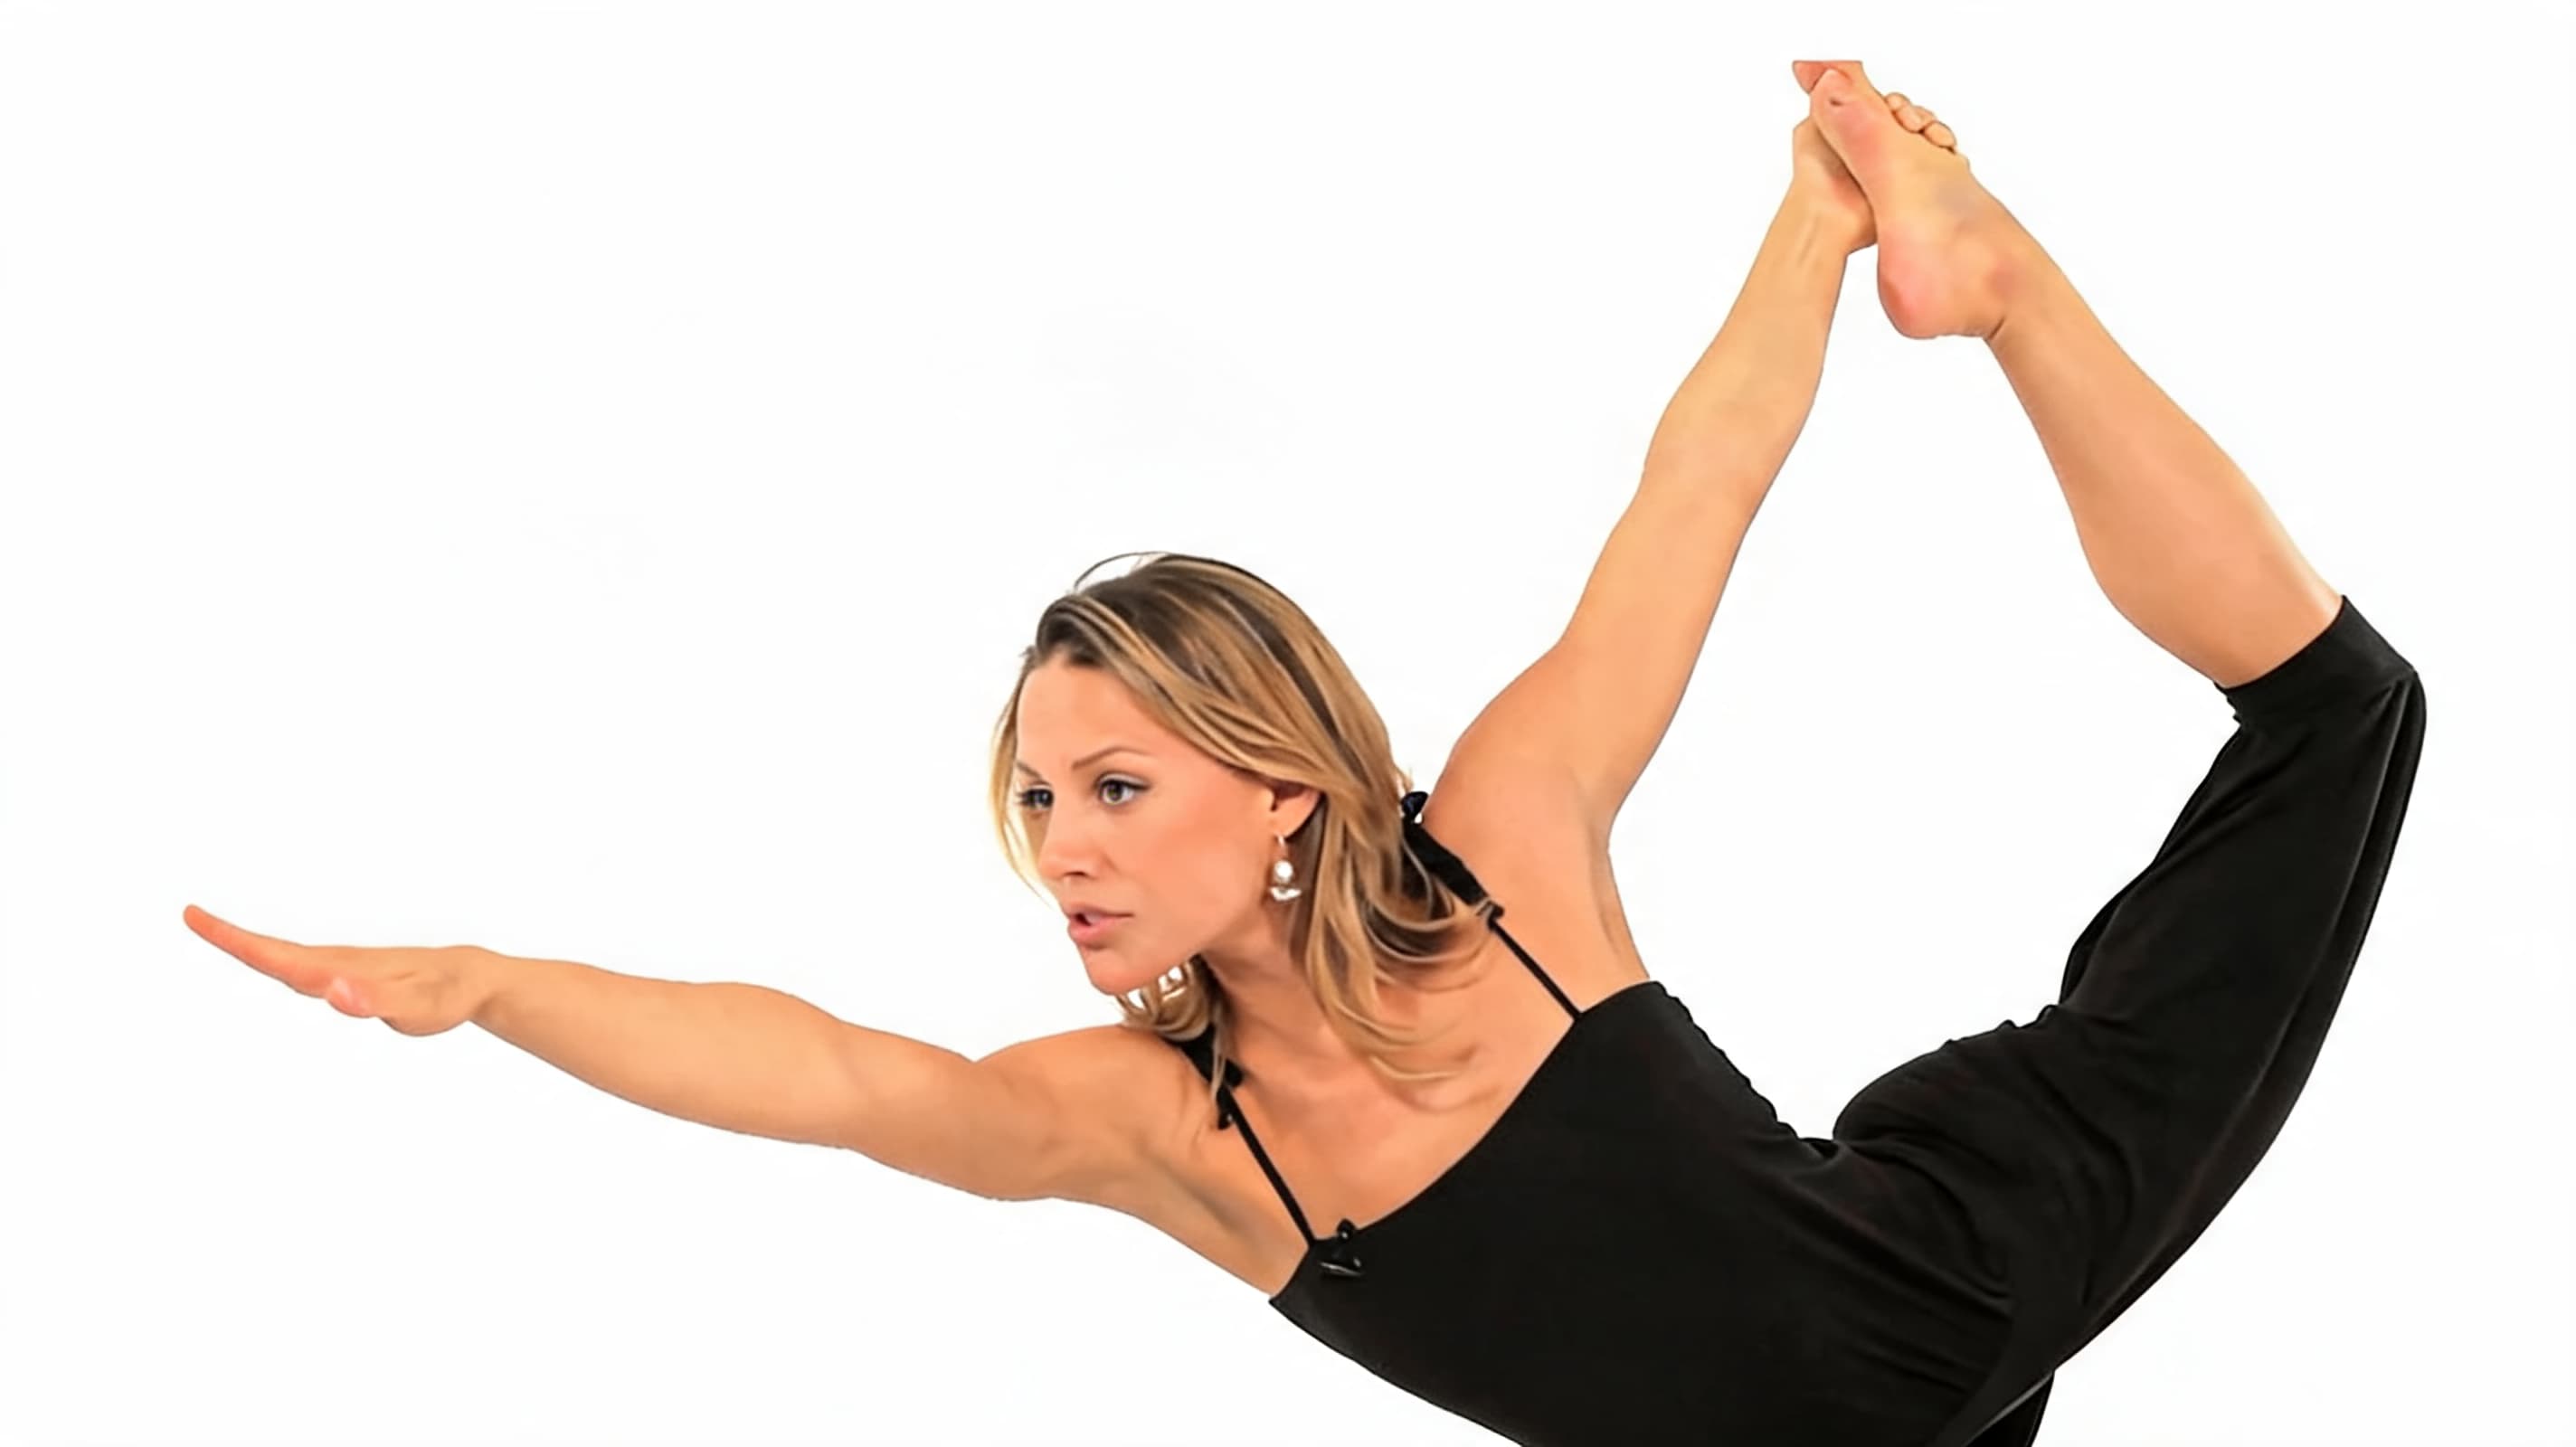
The first time I introduced the dancer pose in one of my classes, half the room tipped over within five seconds. That is not a failure. It is how this pose works. Dancer pose, also called Natarajasana or Lord of the Dance Pose, is a standing yoga balance that looks effortless from the outside but requires serious muscular engagement the moment you leave the floor.
In the pose, one foot stays rooted on the mat while the other leg lifts behind you, and one hand holds the lifted foot or ankle. Your standing leg creates the base. Your lifted leg presses back into your hand. Your chest reaches forward. Your spine moves into a backbend. Your eyes fix on one point to keep the whole shape steady.
The basic shape has four main parts: one foot roots into the floor, the opposite knee bends behind you, one hand holds the lifted foot or ankle, and the chest reaches forward and up. The height of the lifted leg is not the goal. A lower version with steady breath and clear form will serve you far better than a high lift that pulls the body out of line.
Why Is It Called Natarajasana or Lord of the Dance Pose?
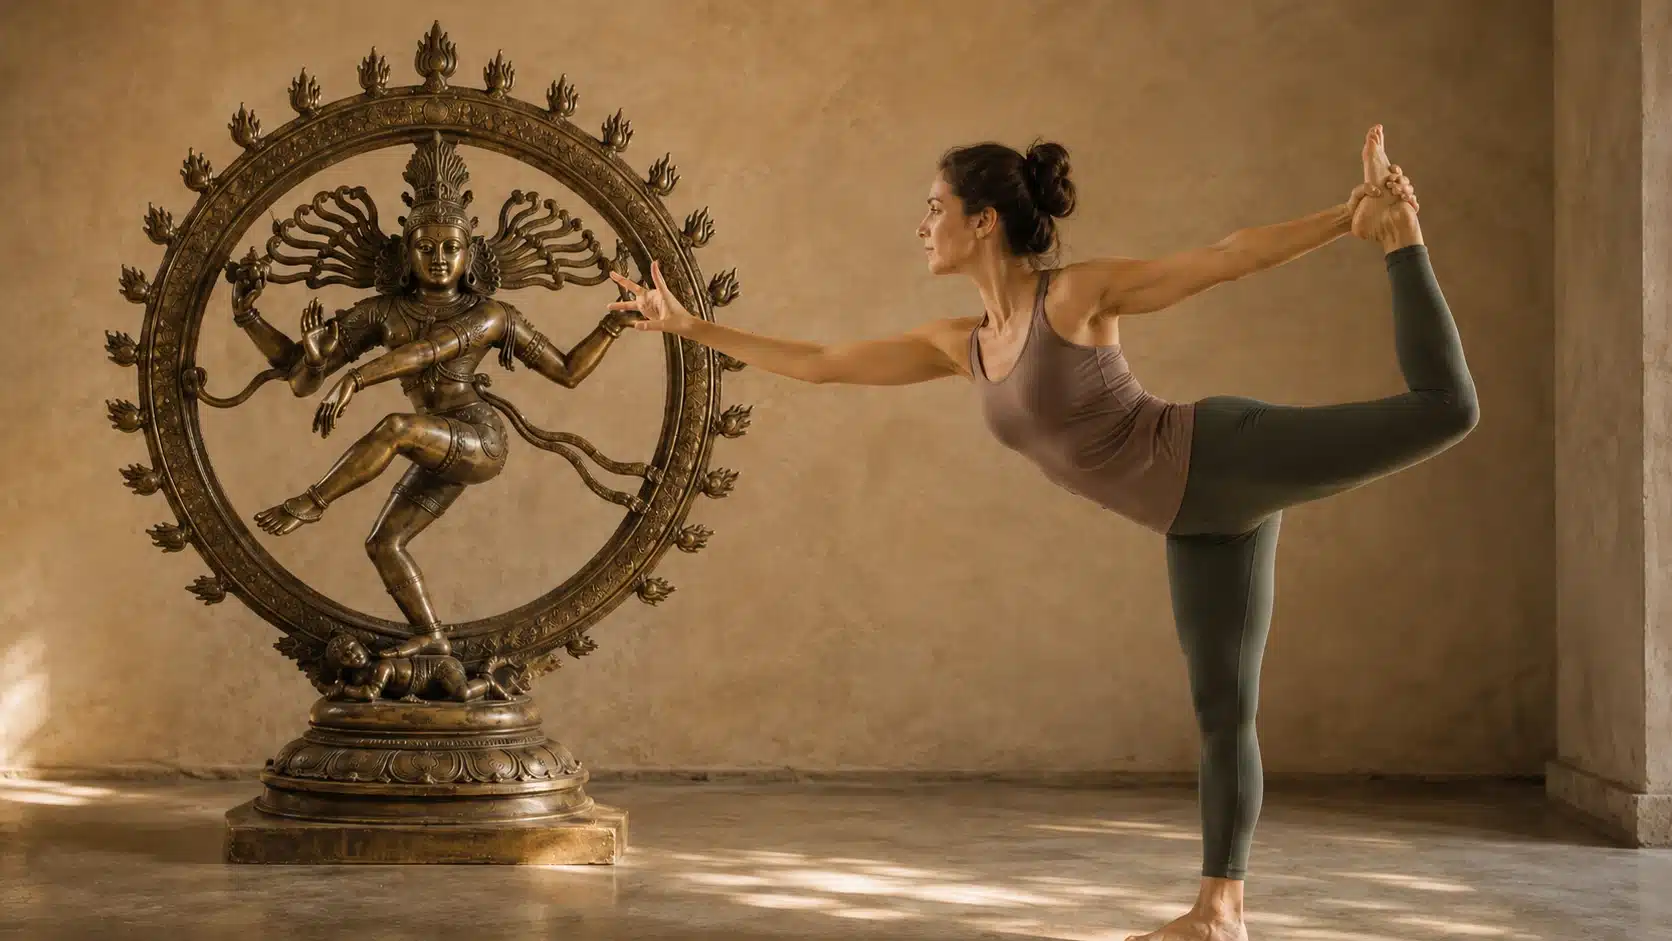
Natarajasana is pronounced nah-tah-rah-JAH-suh-nuh. The word comes from Sanskrit. Nata means dancer, Raja means king or lord, and Asana means pose. That combination gives us the name Lord of the Dance Pose.
The name is linked to Shiva as Nataraja, the cosmic dancer in Hindu tradition. Shiva’s dance is understood as a sign of movement, change, rhythm, and control. The pose reflects a similar quality. You are not standing still. You are holding balance while the body opens in opposite directions at once.
If you want to understand the deeper roots of yoga philosophy and how names like this came to carry such significance, the history of yoga’s origins provides useful context for poses like Natarajasana.
A dancer is not stiff. A dancer has control, but also softness. In Natarajasana, the same idea applies. You need strength in the standing leg, but you also need enough ease in the body to keep the breath moving.
Benefits of Dancer Pose Yoga
The dancer pose offers physical and mental benefits because it combines balance, strength, flexibility, and focus in one shape. Rather than targeting one area, it asks the whole body to stay active and connected.
- It trains single-leg balance by activating the foot, ankle, calf, thigh, and glutes of the standing leg together.
- It simultaneously strengthens the quadriceps, hamstrings, glutes, and core.
- It opens the chest, shoulders, hip flexors, and front thighs with each repetition.
- It supports better posture by encouraging the spine to lengthen rather than compress during the backbend.
- It builds mental focus because the gaze and breath must stay steady throughout.
- It improves coordination as the arms, lifted leg, hips, and chest work together in opposing directions.
The balance benefit is worth highlighting on its own. In my classes, students who struggle with single-leg stability often discover through the dancer pose that their standing foot and ankle are doing very little work.
The pose teaches the foot to spread, the ankle to stabilize, and the thigh to engage without locking. That foot-to-hip chain of awareness builds over time and transfers directly to walking, running, and other standing movements.
The front-body opening is another outcome students notice quickly. The chest, shoulders, hip flexors, and quadriceps all stretch as the lifted foot presses back.
For anyone spending long hours sitting or working at a desk, this stretch can feel like a reset. Mentally, the pose builds patience and confidence over time. It reminds you to breathe, focus on one still point, and choose control over height.
Anatomy of Dancer Pose Yoga
Before entering the pose, it helps to understand which muscles are working and why. This makes the shape feel safer, steadier, and less forced from the first attempt.
- The standing foot, ankle, calf, quadriceps, hamstrings, and glutes create the entire base of the pose.
- A small bend in the standing knee keeps the leg active and prevents hyperextension at the joint.
- The quadriceps and hip flexors of the lifted leg are stretched as the foot presses backward.
- The gluteus maximus of the lifted leg controls how high the leg rises and protects the lower back from over-arching.
- The core, especially the transverse abdominis, keeps the pelvis stable and supports the spine during the backbend.
- The chest and shoulder of the holding arm open as the arm reaches back, with the grip direction determining how much the shoulder rotates externally.
- The gaze, called drishti in yoga, and the breath together keep the nervous system calm enough for the whole structure to hold.
When these parts work together, the dancer’s pose becomes controlled rather than desperate. The goal is never a higher leg lift. It is a steady base, an open chest, a supported spine, and a smooth breath held consistently across each side.
How Do You Do Dancer Pose Step by Step
Each step builds on the one before it. Students who rush past the early steps are almost always the ones who wobble most by step six. Work through this sequence patiently and notice how much steadier the pose feels when the foundation is set before the lift.
| Key action before you start: Do not just pull your foot toward your body. Reach forward as you kick the lifted foot back into your hand. That kick-and-reach action creates the shape without compressing the lower back. |
Step 1: Warm Up the Right Muscles First
Before entering dancer pose, warm up the quadriceps, hip flexors, spine, shoulders, and single-leg balance.
In my classes, I sequence Standing Quad Stretch, Low Lunge, and Tree Pose before we ever attempt Natarajasana. These warm-up poses help your body understand the main actions needed, so you are not forcing cold muscles into an unfamiliar shape.
If you want to add more depth to your cool-down after practice, restorative yoga poses make a good recovery layer after any standing balance sequence.
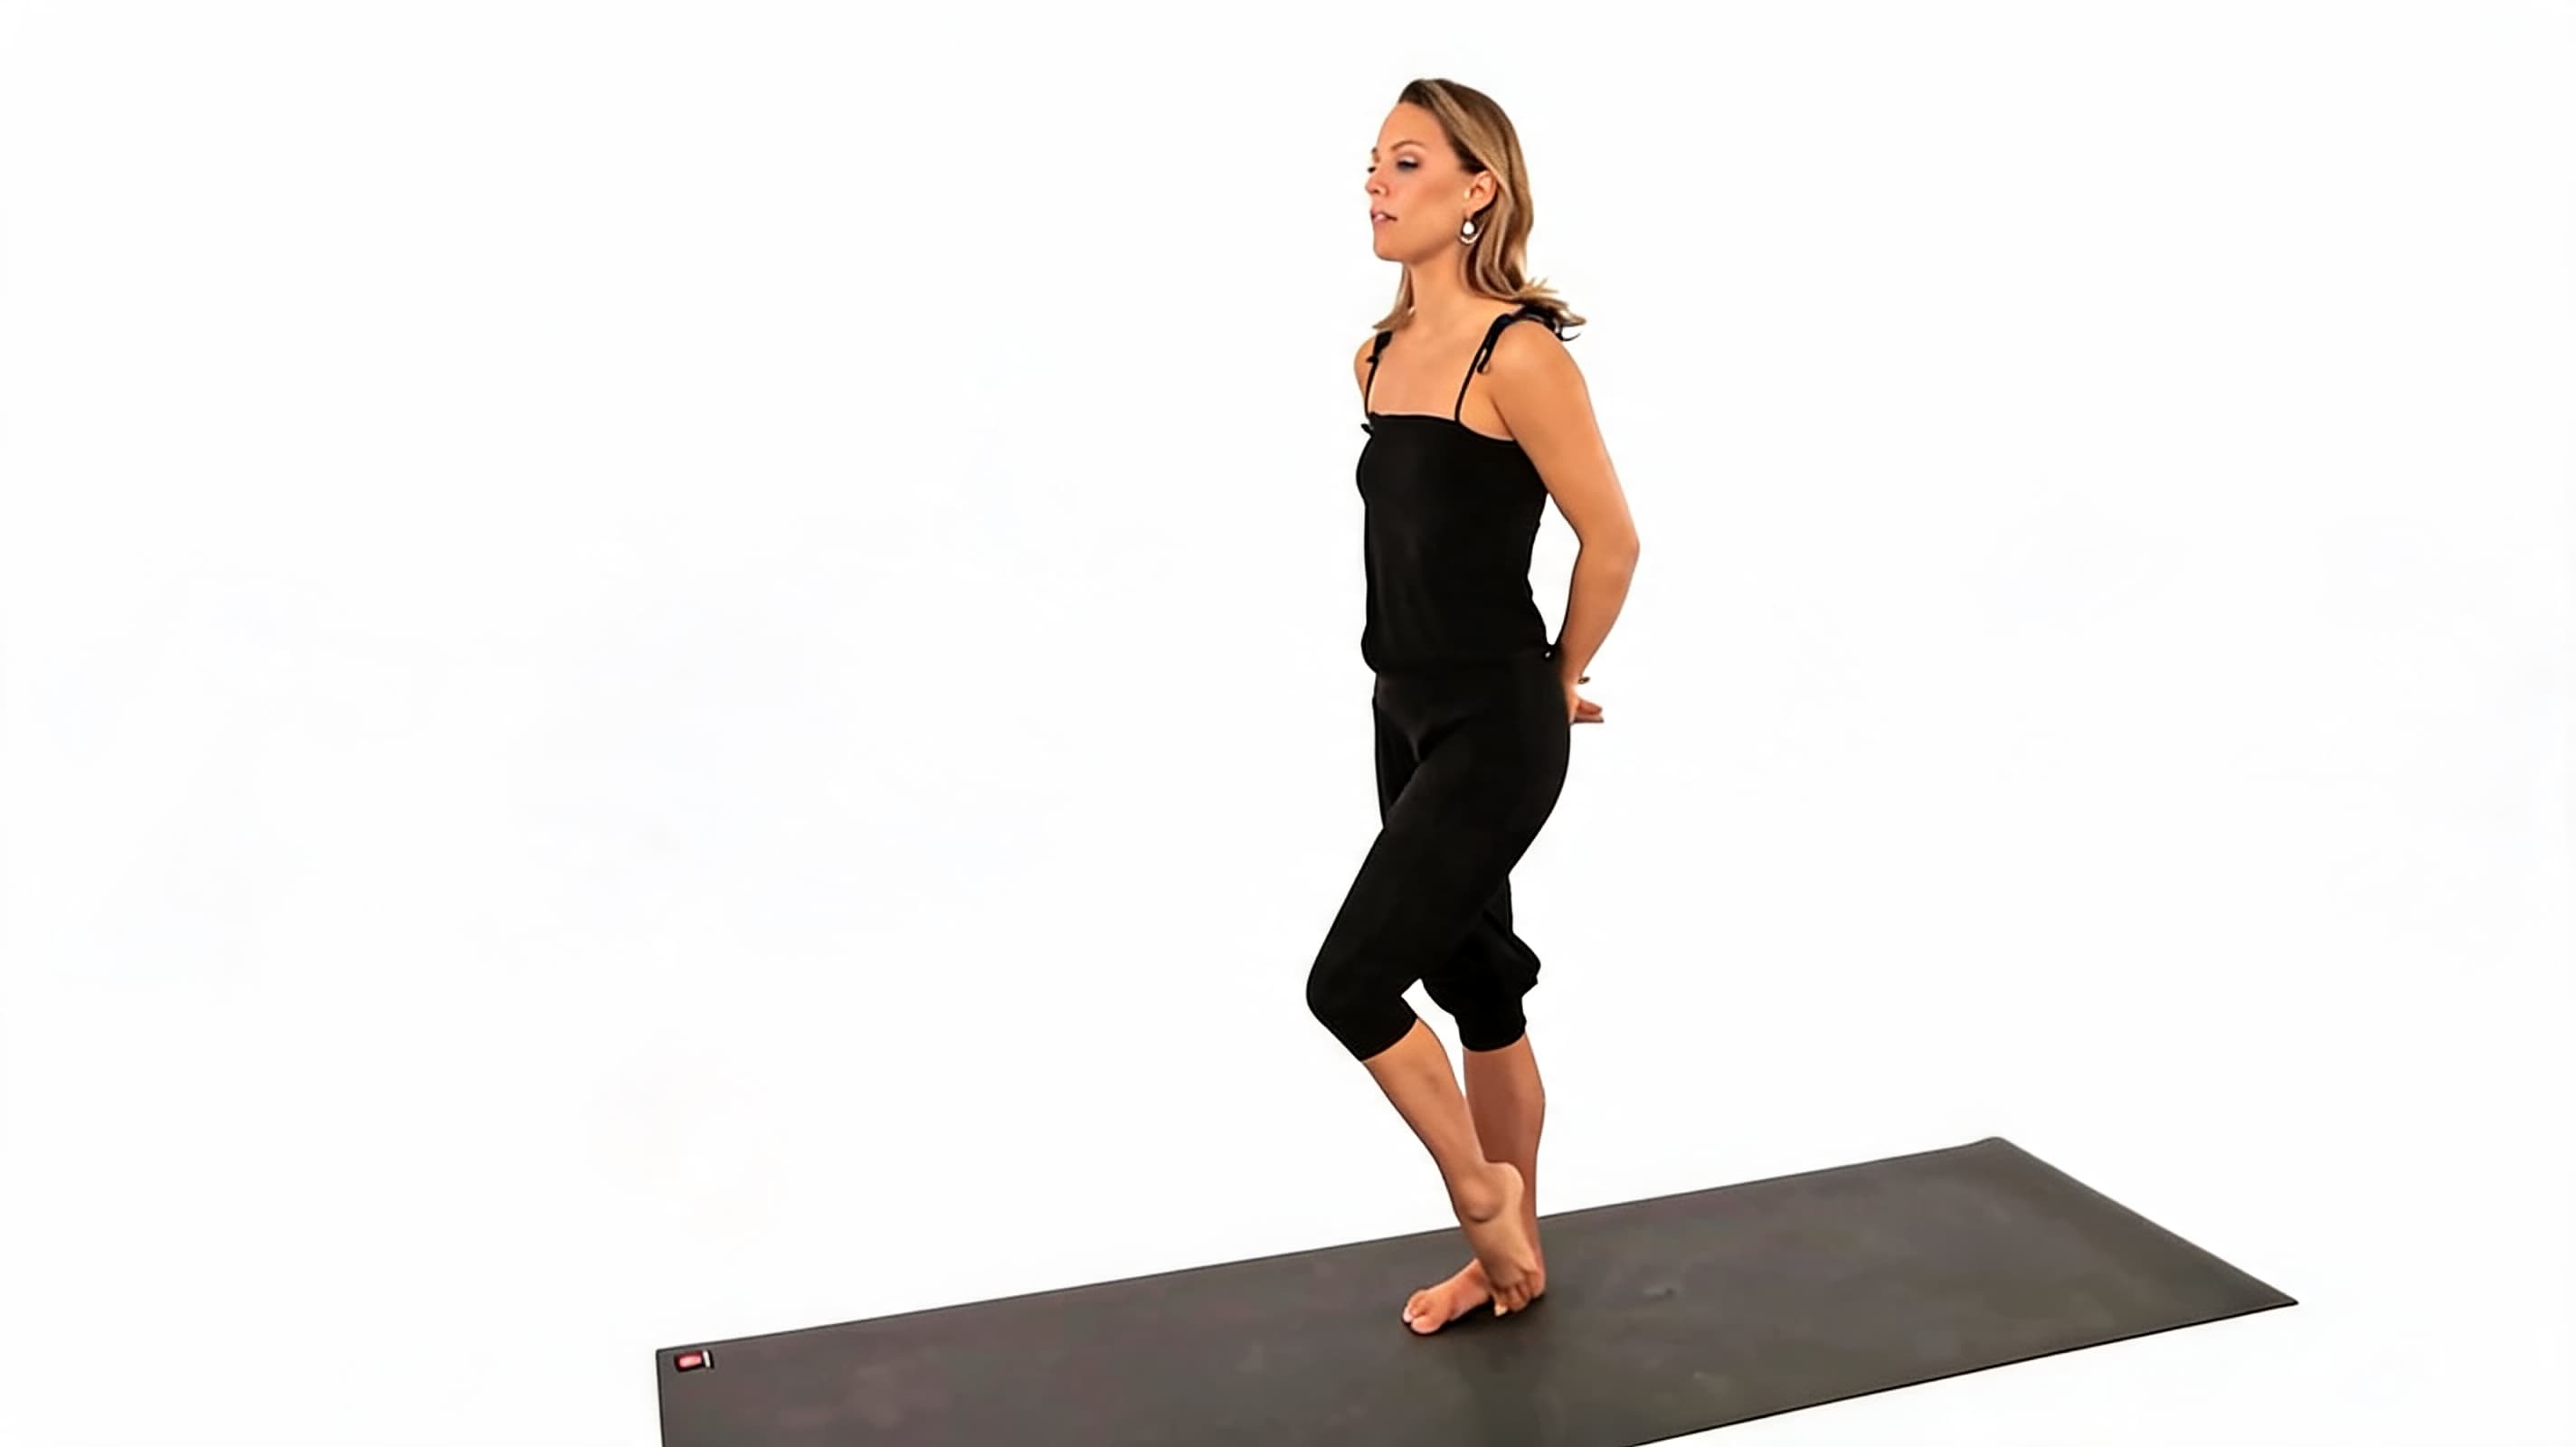
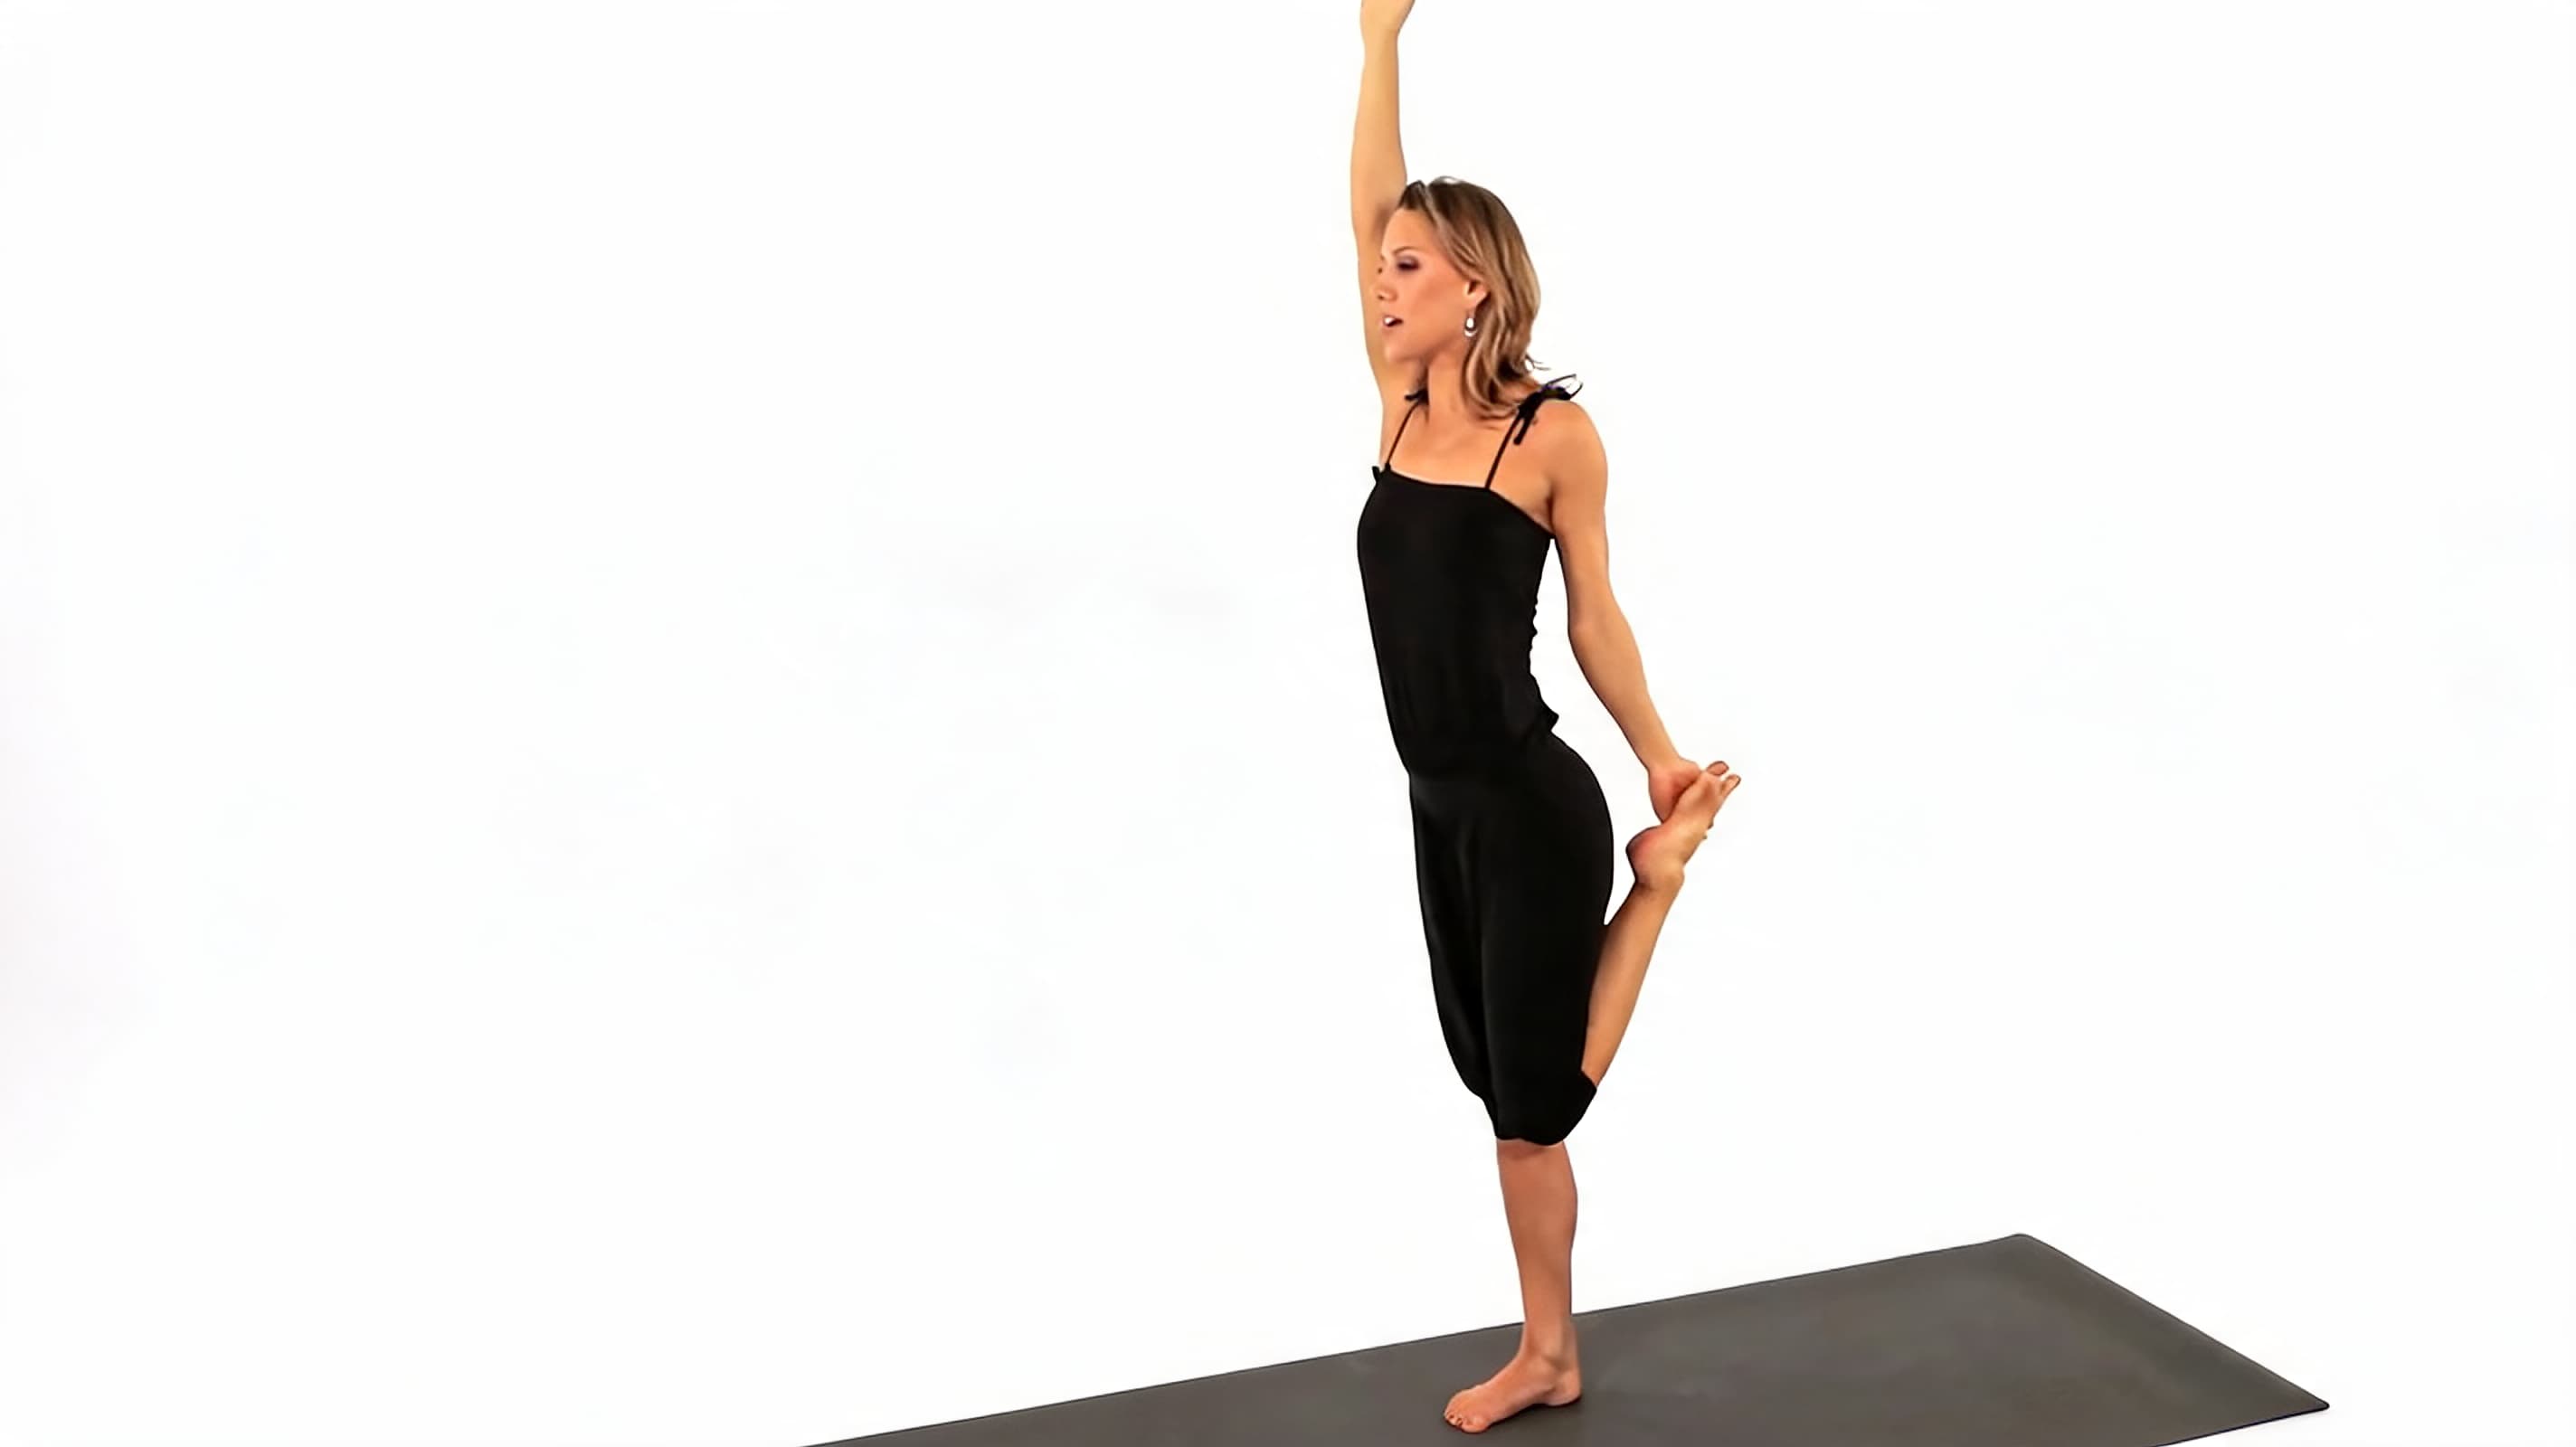
Step 2: Shift Your Weight and Find Your Footing
Stand tall and shift your weight into your right foot. Spread all five toes, press evenly through the heel and ball of the foot, and keep the standing knee slightly soft.
Point your left toes behind you before reaching for the foot. This pause is often skipped, but it is where balance actually begins. The standing foot, not the lifted leg, is what holds the pose together.
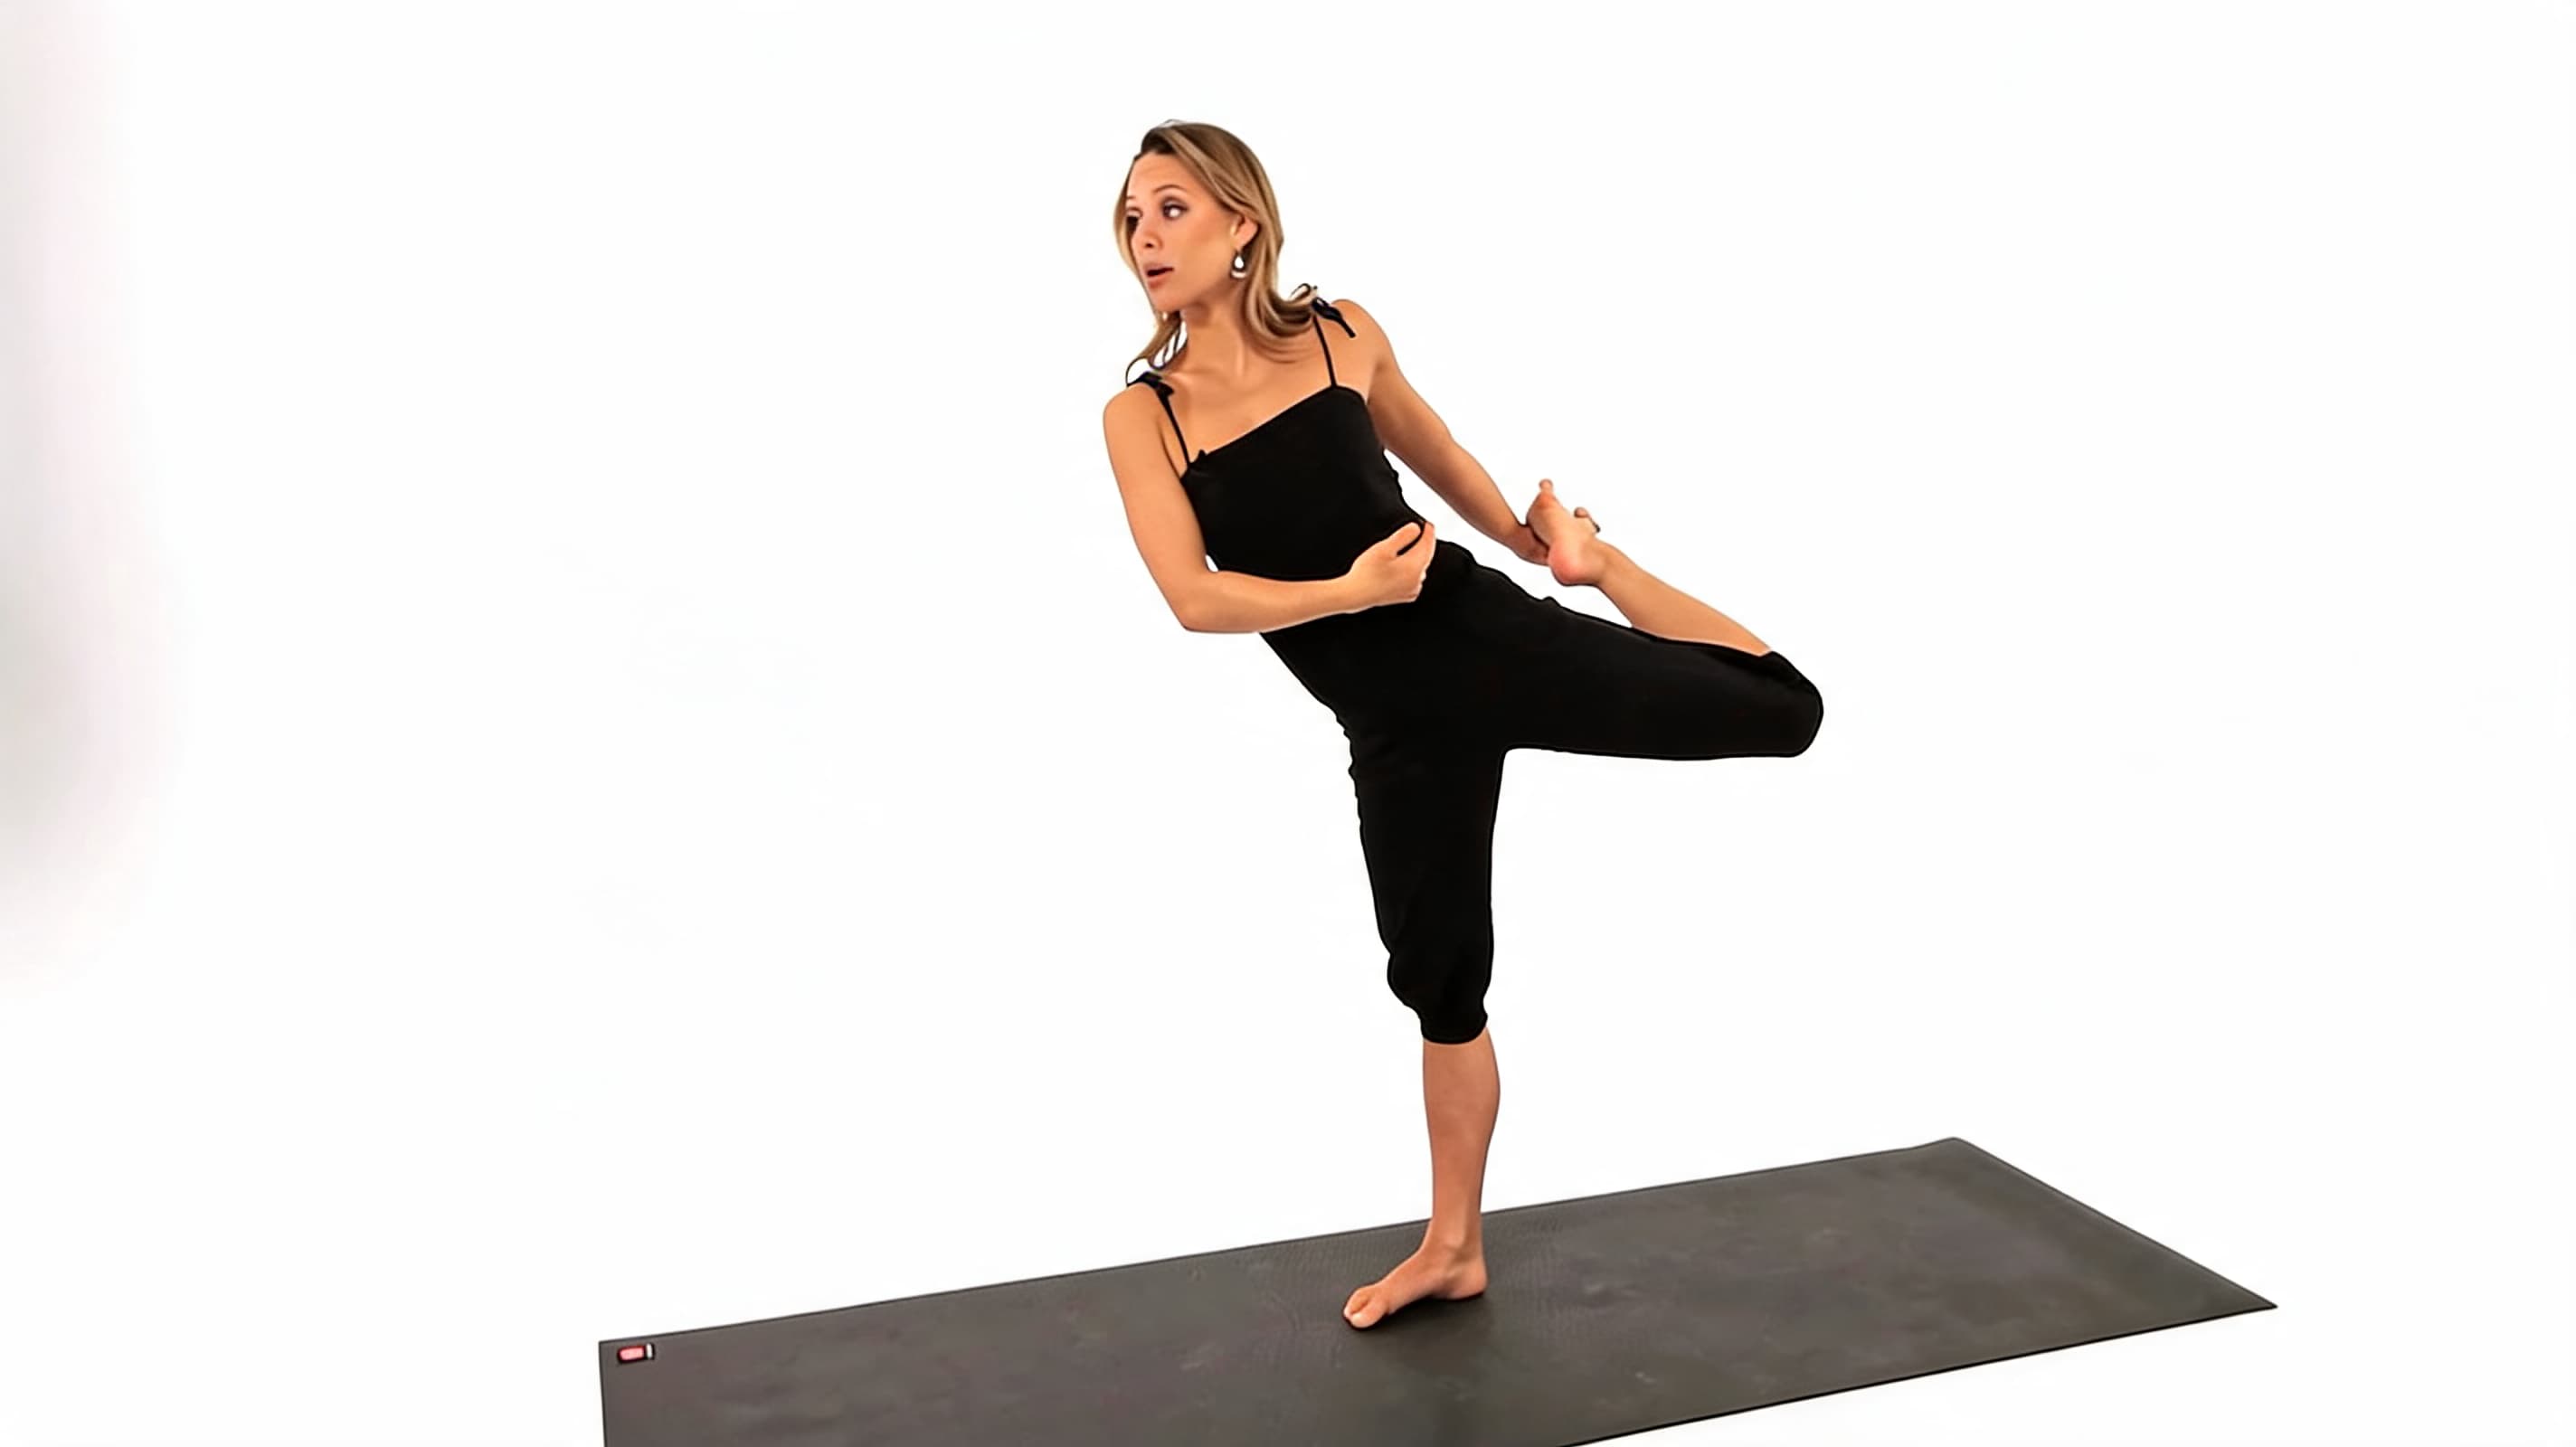
Step 3: Reach Back and Hold the Foot Safely

Reach your left hand behind you with the thumb pointing upward. Hold the big-toe side or inner edge of your left foot and wrap your fingers and thumb around it so the grip feels secure.
Avoid yanking the leg toward your body. A controlled grip with the thumb up supports shoulder external rotation and sets you up to press back effectively rather than just pull.
Step 4: Bring Both Knees Back to Center
Reach your right arm forward at shoulder height, pressing your hand toward the horizon. Keep the chest lifted and look softly over your middle finger. This steady gaze point, your drishti, is not a nice-to-have. It is structural.
When the eyes move, the body follows. Setting a clear yoga intention before you lift also sharpens the focus that drishti depends on. Pick one still point on the wall or floor before you move any deeper, and keep it throughout the hold.
Step 5: Reach Forward and Set Your Gaze
Reach your right arm forward at shoulder height, pressing your hand toward the horizon. Keep the chest lifted and look softly over your middle finger. This steady gaze point, your drishti, is not a nice-to-have.
It is structural. When the eyes move, the body follows. Pick one still point on the wall or floor before you move any deeper, and keep it throughout the hold.
Step 6: Hinge Forward From the Hips
Begin tilting your torso forward from the hips rather than collapsing through the lower back. Keep both hip points facing down toward the mat. Let the chest move forward and slightly up.
If the lifted hip opens to the side at any point, lower the leg, reset both hip points forward, and rebuild. Hip rotation here is the most common breakdown in the pose, and correcting it early protects the lower back.
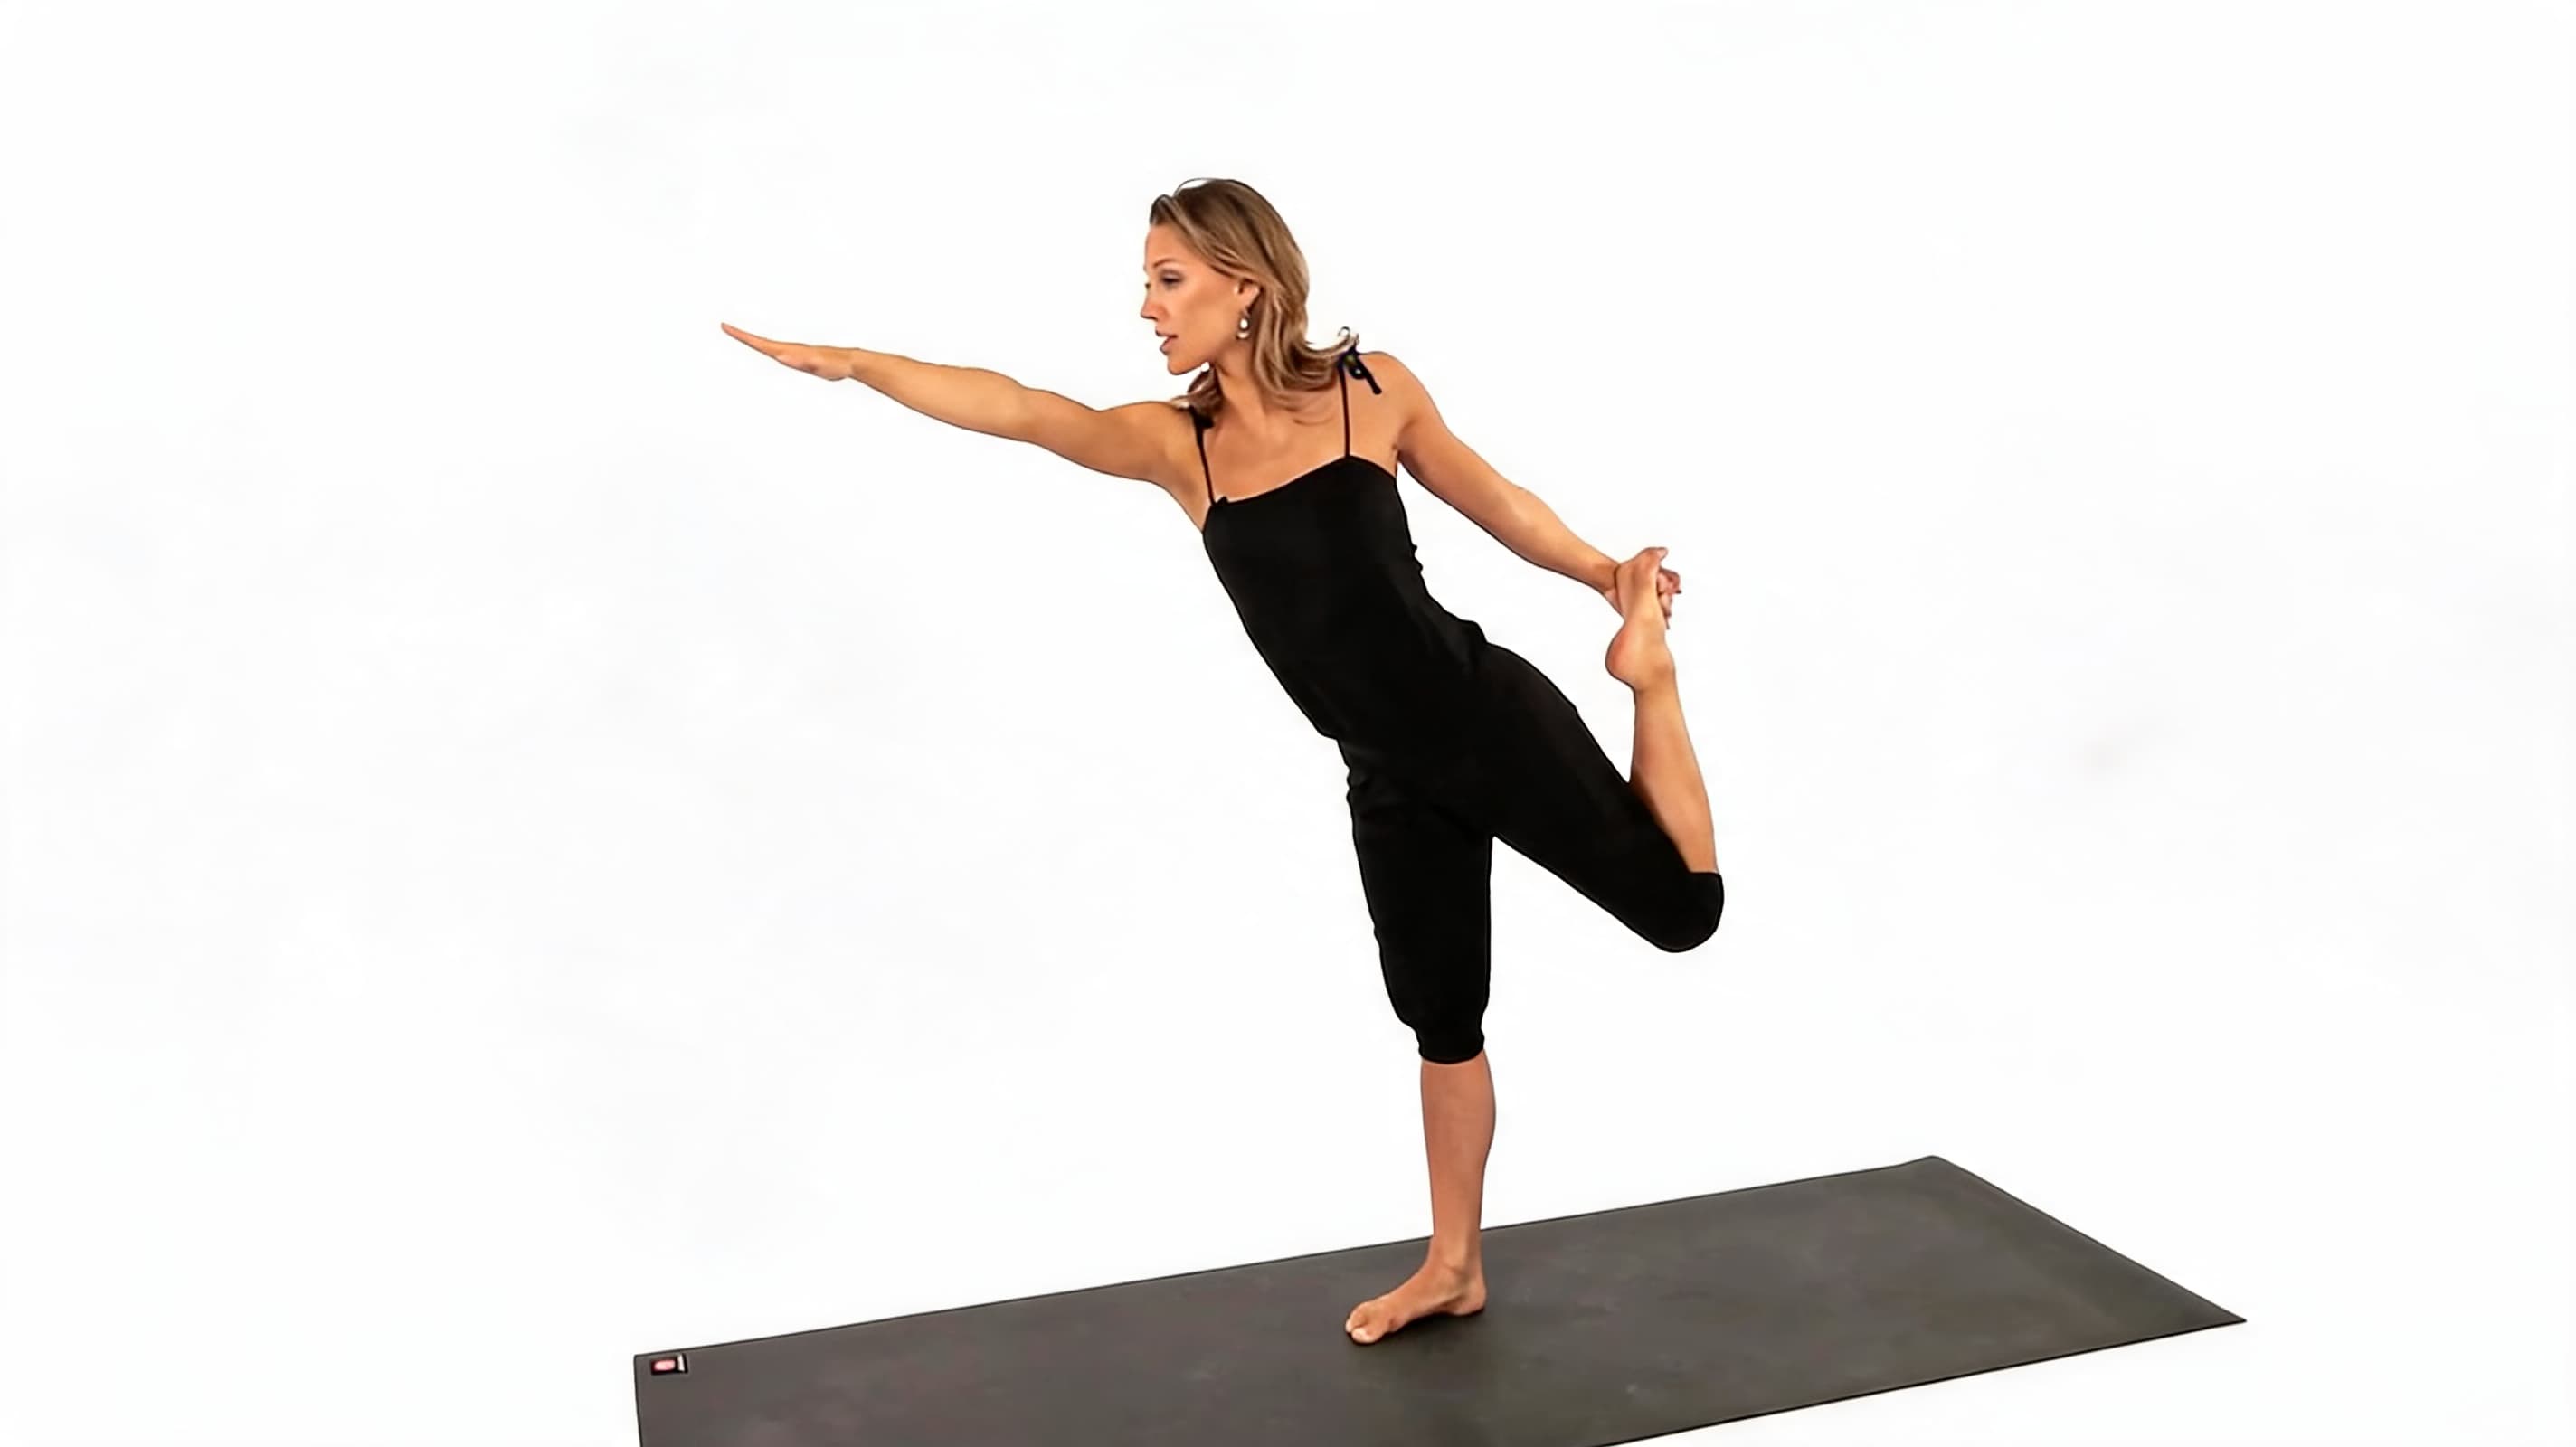
Step 7: Kick Back While You Keep Reaching
Press your lifted foot back into your hand while continuing to reach forward through the front arm. These two actions must happen at the same time. The back leg kicks, and the chest and arm lengthen forward.
This opposition creates space in the pose without forcing the pose to be taller. Keep the breath moving slowly. The moment you start holding your breath, the pose tightens and the balance disappears.
Step 8: Come Out With Control
To release the pose, avoid dropping or swinging the lifted leg down. First, draw the knees back toward each other to return to your midline. Then let the lifted foot lower slowly to the mat.
Drop the front arm, stand tall for one full breath, and then switch sides. A controlled exit protects the balance you built and keeps the practice intentional rather than reactive.
|
Standing knee note: If your standing knee tends to hyperextend, keep the quadricep actively engaged without locking the joint. This gives the leg real support rather than passive joint compression. Breathing cue: Inhale to lengthen and create space before you move. Exhale to kick the back foot into the hand and hinge forward from the hips. Do not hold your breath. The breath is what keeps the pose stable. How long to hold: For beginners, 3 to 5 full breaths is a strong target. Longer holds come with consistent practice. Holding longer than you can control does not improve the pose. It reinforces wobble. |
The basic steps give you the shape, but the smaller details decide how the pose actually feels. A steady foot, soft knee, clear gaze, and active back leg working together can make the dancer pose feel controlled rather than chaotic from the very first attempt.
What Alignment Tips Make Dancer Pose Safer and Easier?
Even when the steps are clear, the dancer pose can still feel unstable. Small alignment choices change the whole experience. These cues address the most common breakdown points: the standing leg, the hips, the grip, and the gaze.
| Alignment Cue | What to Do | Why It Helps |
| Standing leg | Keep a small bend in the standing knee and gently engage the quadriceps. | Protects the knee joint and improves balance by keeping the leg muscles active. |
| Hips | Keep both hip points facing forward. Only lift the back leg as high as you can without turning the hip out. | Reduces lower back compression and keeps the pelvis stable throughout the pose. |
| Inside grip | Hold the inner or big-toe side of the foot with the thumb pointing up. | Supports shoulder external rotation and helps the chest open naturally. |
| Outside grip | Hold the outer side of the foot with the thumb down only if it feels safe in the shoulder. | May support deeper backbend work, but can feel intense for some shoulders. Try this only after the inside grip feels stable. |
| Drishti | Pick one still spot on the wall, floor, or an object directly in front of you. | Steadies the mind and body. When the eyes move, balance follows almost immediately. |
Good alignment gives you more control, but the pose should still fit your body. If the full shape feels forced, use support, lower the lifted leg, or choose a modified version that lets you breathe evenly throughout.
Best Dancer Pose Modifications for Beginners
A modified pose is not a weaker pose. In my experience teaching Natarajasana to students at all levels, the people who start with support almost always build steadier balance faster than those who push straight into the full version. Modifications let you learn the main actions with more control and less strain before adding depth.
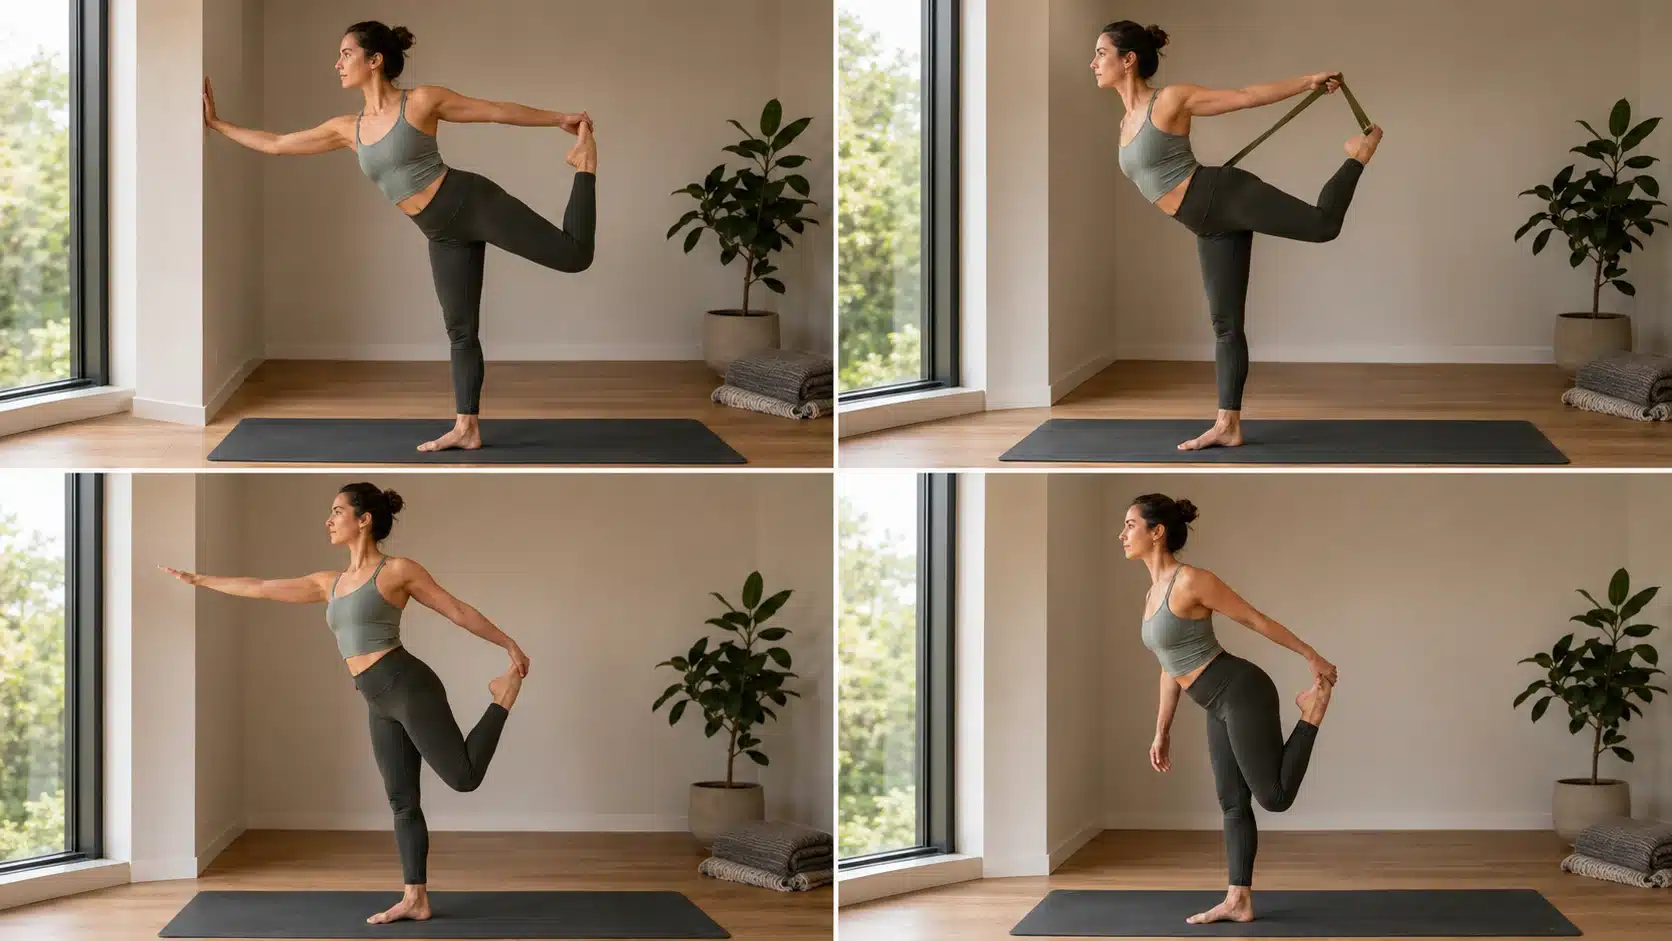
| Modification | How to Do It | Best For |
| Wall Support | Place your free hand lightly on a wall while keeping the back leg active, and the chest lifted. | Balance support, new practitioners |
| Strap Support | Loop a yoga strap around your ankle and hold the strap instead of reaching directly for the foot. | Tight shoulders or quadriceps |
| Half Dancer Pose | Keep the back leg low and the torso more upright rather than hinging forward. | Lower back sensitivity |
| Low-Lift Dancer Pose | Hold the foot gently and keep the knee at or below hip height while still practicing the kick-and-reach action. | Building base strength and body awareness |
These options let you practice the pose without forcing it. Once one version feels steady across 5 full breaths, you can slowly add more lift, more forward reach, or longer holds while keeping the breath smooth throughout.
Common Mistakes in Dancer Pose
Most people do not struggle with the dancer pose because they lack flexibility. They struggle because one small action breaks down, and then the whole structure follows. The pattern is almost always the same: the standing foot loses grip, the knee locks, the hips rotate open, the chest drops, the eyes move, and the balance disappears. Here are the five mistakes I see most often, along with the exact correction for each.
- Pulling the foot instead of kicking back. This happens when you treat the pose like a simple quad stretch. Instead, press your foot actively into your hand and let the lifted leg work from the glute. The kick creates the shape. The pull just creates tension.
- Opening the hips too early. This usually happens when you try to lift the leg higher than your hip control allows. Lower the leg until both hip points face forward again, then rebuild from that aligned position.
- Locking the standing knee. A locked knee may feel stable, but it often makes balance harder and adds stress to the joint. Keep a small bend and engage the quadriceps actively.
- Letting the eyes move around. Looking at the lifted leg, the mirror, or the room can break your balance within one breath. Pick one still point before you lift and keep your gaze there through the full hold.
- Forcing depth before control. The full expression of a dancer’s pose is not useful if your breath feels tight or your lower back is strained. Use a smaller range of motion until the pose feels steady, and build from there.
How to Progress From Beginner to Full Dancer Pose
Students who try to jump to the full expression in their first few sessions almost always plateau faster than those who build through clear stages. Here is how I structure the progression in my classes for anyone new to Natarajasana.
Stage 1: Wall-Assisted Dancer Pose (Weeks 1 to 2)
Stand facing a wall and place one hand on it lightly. Shift your weight, bend the back knee, hold the foot with the opposite hand, and practice the kick-and-reach action with the wall available if needed. The goal here is not to avoid using the wall. It is to feel what the foot, ankle, and standing leg need to do before removing the support. Hold 3 breaths per side, twice per session.
Stage 2: Low-Lift Free Balance (Weeks 3 to 4)
Remove the wall but keep the lifted leg low, with the knee at or near hip height. Focus on keeping both hip points facing forward and maintaining the forward reach of the free arm. The chest should be parallel to the floor or only slightly tilted. This is where most of the core and glute work builds. Hold 3 to 5 breaths per side.
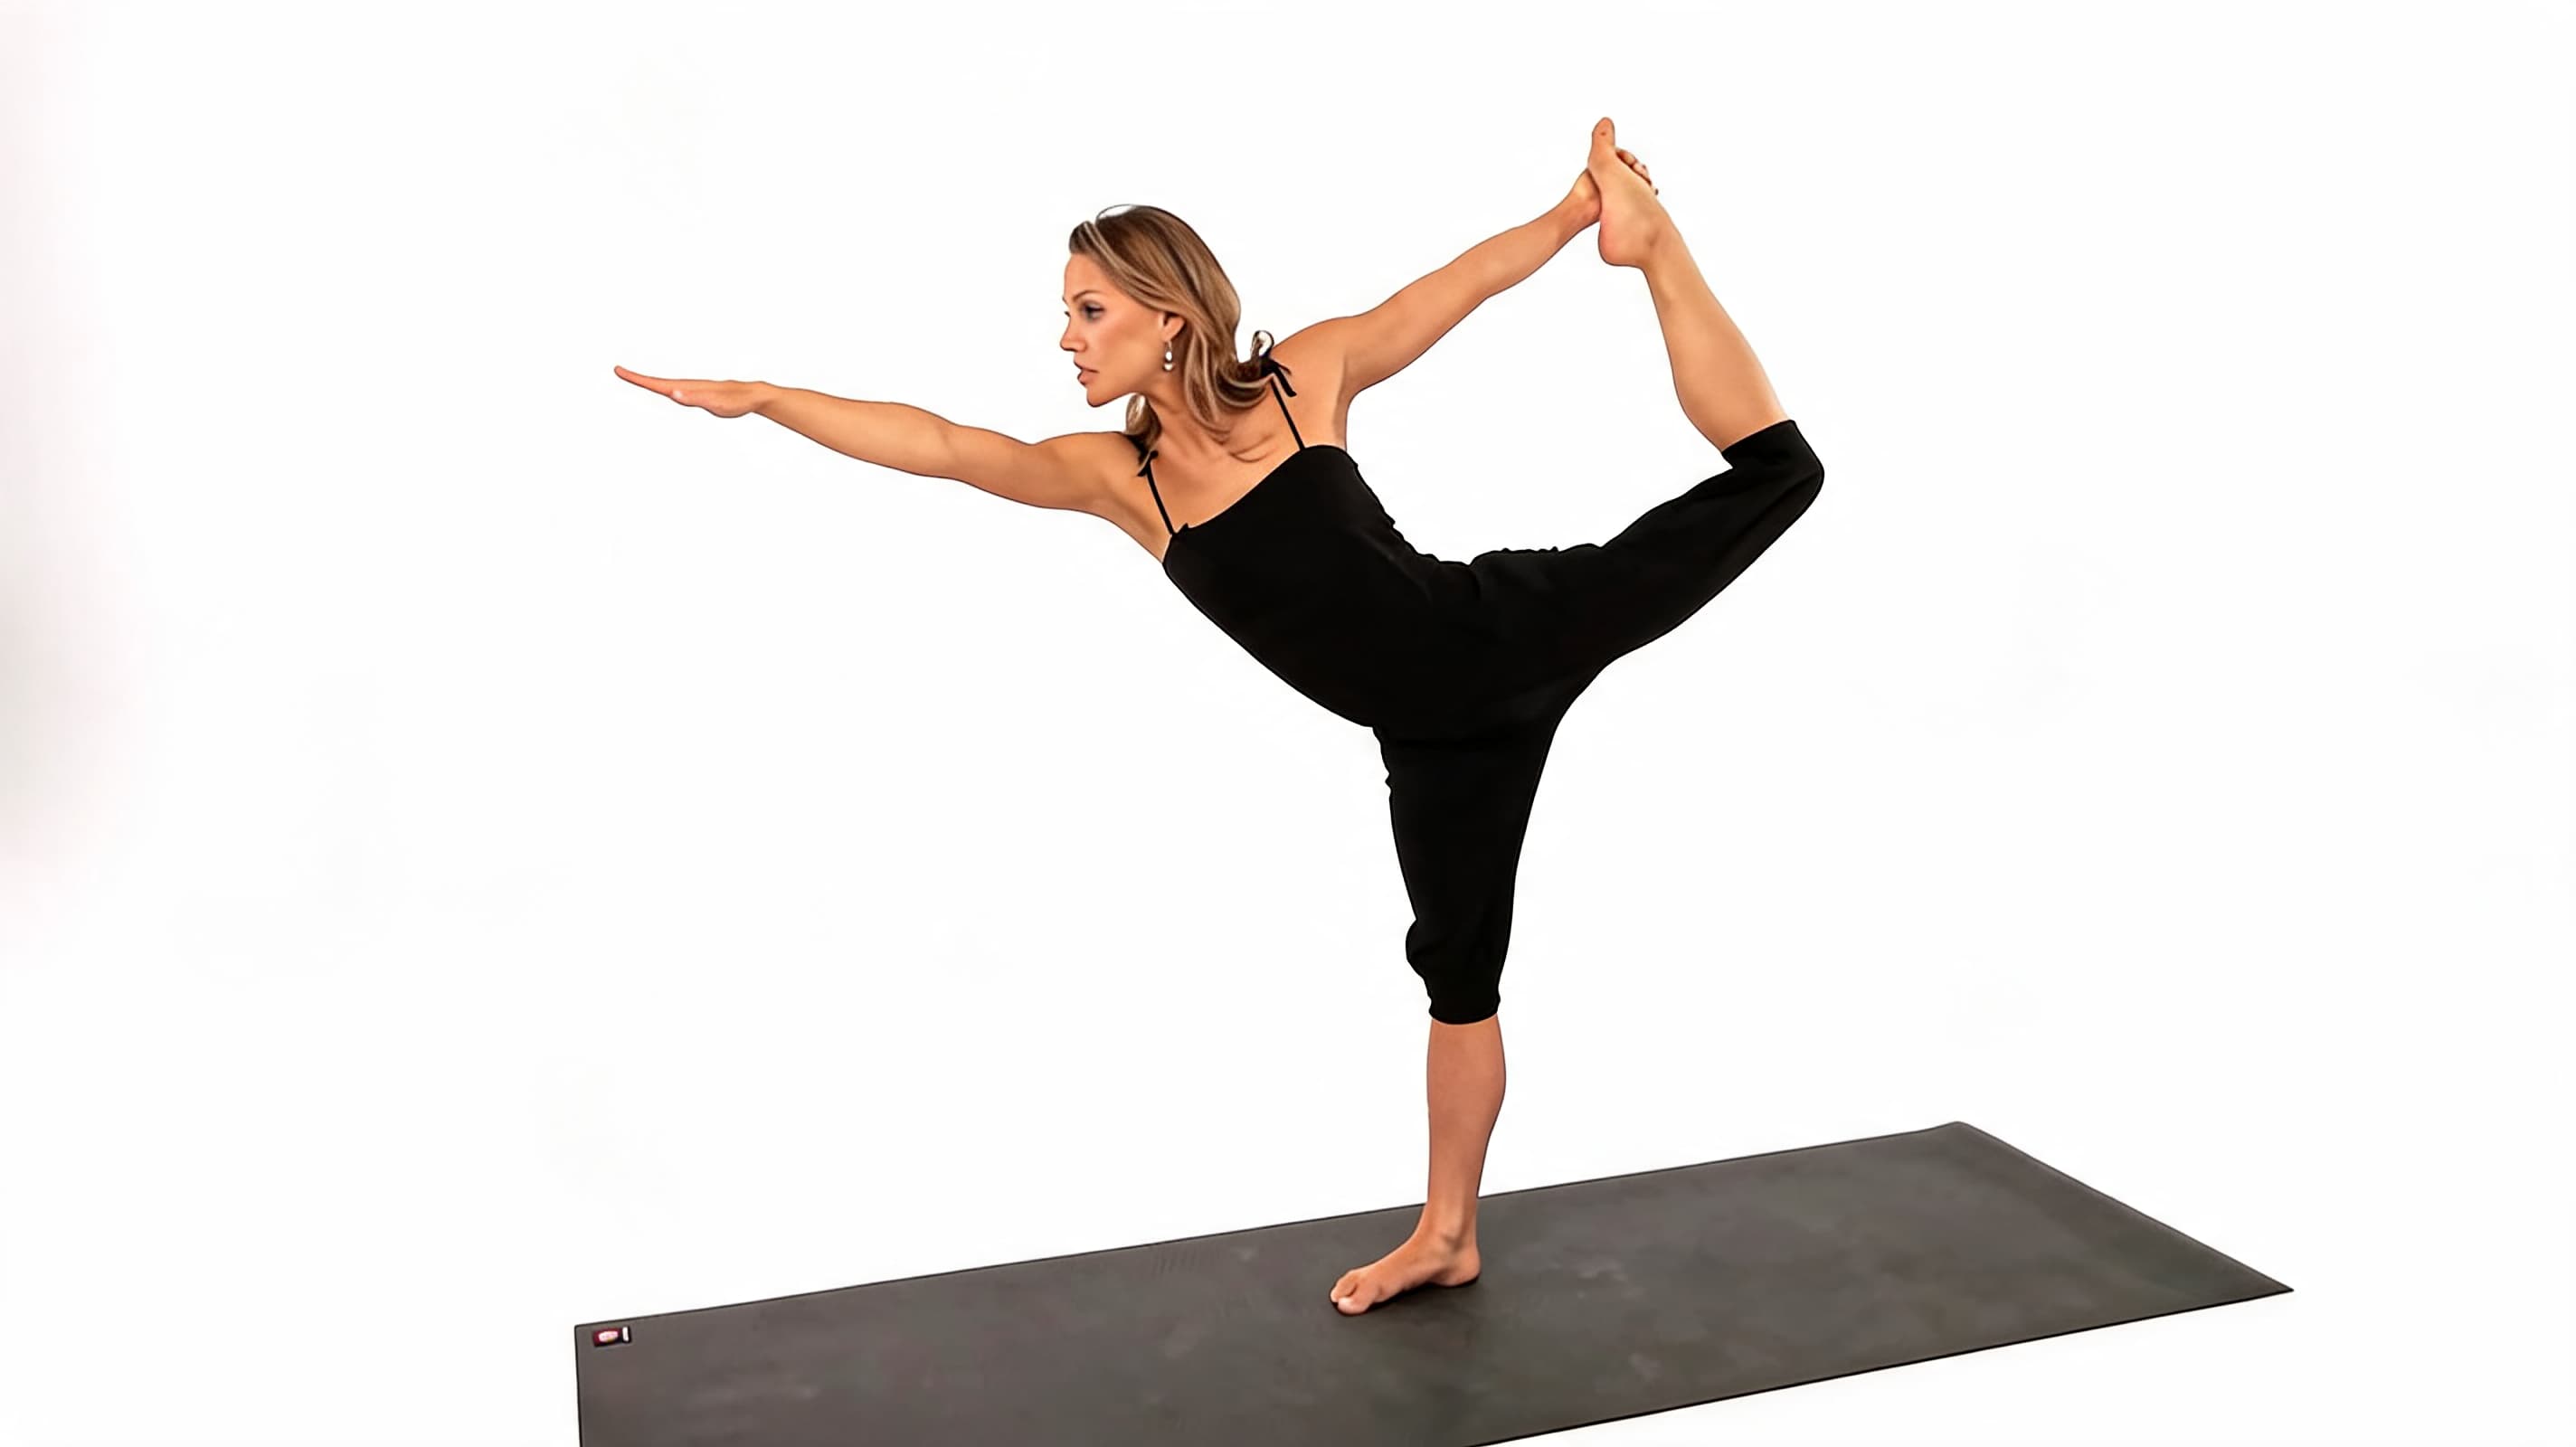
Stage 3: Full Expression With Controlled Lift (Week 5 onward)
Allow the lifted leg to rise only as high as the hips remain square. Some students will find this is already a significant backbend. Others will be able to lift the thigh parallel to the floor or higher.
Both are valid. The criterion for progressing is not leg height. It is whether the standing leg stays active, the hips stay forward, the chest stays lifted, and the breath stays even across all 5 breaths.
Is Dancer Pose Yoga Good for Beginners?
Yes, beginners can practice the dancer pose, but the modified version is the right starting point. You do not need a deep backbend or a high leg lift on your first session. If you can stand on one foot for a few breaths, hold Tree Pose with reasonable steadiness, and do a gentle quad stretch without knee, back, or shoulder discomfort, you are ready to begin with wall or strap support.
Use a wall, strap, or lower leg lift if balance feels hard. Modify or skip the pose entirely if you feel sharp knee pain, shoulder strain, lower back discomfort, or dizziness. This is yoga education, not medical advice. Check with a healthcare professional if you have a pre-existing injury before attempting this or any new yoga practice.
Before your first session, warm up with Tadasana for standing body awareness, Low Lunge for the hip flexors, Standing Quad Stretch for the front thigh, and a gentle shoulder opener for the arm reach. Once those feel comfortable, entering dancer pose with support becomes much more manageable.
Frequently Asked Questions
These are the questions that come up most often when I introduce Natarajasana in class, and the ones that reveal where people are actually getting stuck in their own practice.
What muscles does the dancer pose work?
The dancer pose works the standing quadricep, hamstring, calf, glute, and foot muscles that hold you upright. The lifted leg stretches the quadriceps and hip flexors while the glute controls the lift. The core keeps the pelvis steady during the backbend, and the chest and shoulder of the holding arm open as the arm reaches back. The pose is genuinely a full-body balance, not just a leg or back exercise.
How do you keep your balance in the dancer pose?
Balance in the dancer pose starts with the standing foot. Spread the toes, press through the heel and ball of the foot evenly, and keep a small bend in the knee with the quadricep engaged. Set your drishti on one still point before you lift, and keep your gaze there throughout. The kick-and-reach action, pressing the foot back while reaching the chest forward, also helps stabilize the pose by creating opposing tension that keeps the body organized around its midline.
Why does the dancer pose hurt my lower back?
Lower back discomfort in dancer pose usually comes from one of three things: the hips rotating open, the lifted leg being forced too high too quickly, or the torso collapsing into the backbend rather than hinging forward from the hips. Lower the lifted leg until both hip points face forward again. Hinge from the hips rather than arching the lumbar spine. If discomfort continues, practice Half Dancer Pose with the torso upright until the lower back feels supported enough to add a forward tilt.
Can beginners do Natarajasana?
Yes. Beginners do best starting with wall support or a yoga strap rather than the full expression. The key actions, standing leg stability, the kick-and-reach, and the forward chest, are all accessible from day one in a modified version. The full backbend and high leg lift come with time and consistent practice. Starting with support is not a shortcut. It is how the pose is meant to be learned.
What is the difference between the dancer pose and the king dancer pose?
Dancer pose (Natarajasana) refers to the standard version where one hand holds the inner edge of the lifted foot while the other arm reaches forward. King Dancer Pose typically refers to the advanced variation where both arms reach overhead, and the foot is held with both hands above the head, requiring much greater shoulder, spine, and hip flexor flexibility. The standard version is the appropriate starting point for most practitioners, including those with several years of yoga experience.
How long does it take to learn the dancer pose?
Most students with a consistent yoga practice can hold a stable low-lift version of dancer pose within four to six weeks of targeted work. The full expression with a high leg lift and forward chest tilt takes longer for most people, often several months of progressive practice. The timeline depends largely on hip flexor and quadricep flexibility, single-leg balance strength, and how much warm-up and progressive work you do before entering the pose each session. Consistency matters far more than frequency here.
What are the contraindications for Natarajasana?
Dancer pose should be avoided or significantly modified if you have a current lower back injury, knee instability, sharp shoulder pain, ankle weakness, or a condition that affects balance such as vertigo. People with hypermobile knees should focus on keeping the standing knee actively engaged rather than allowing the joint to lock. Pregnant practitioners should work with a qualified instructor and avoid deep backbends. Always consult a healthcare provider before attempting the pose if you have any of these conditions.
Final Verdict: Is Dancer Pose Worth Adding to Your Practice?
Dancer pose has a way of humbling you. One day, it feels light and steady. Another day, your foot slips, your eyes move, and the whole shape disappears. I think that is part of why this pose teaches more than balance.
Natarajasana is not about copying the deepest version you have seen online. It is about learning to stay grounded as the body opens, reaches, and works through challenges. A wall, strap, or lower lift still counts when it helps you move with care.
Try one version today and notice what feels different when you start from your standing foot first. If one cue helped you feel steadier, comment below and share your experience.