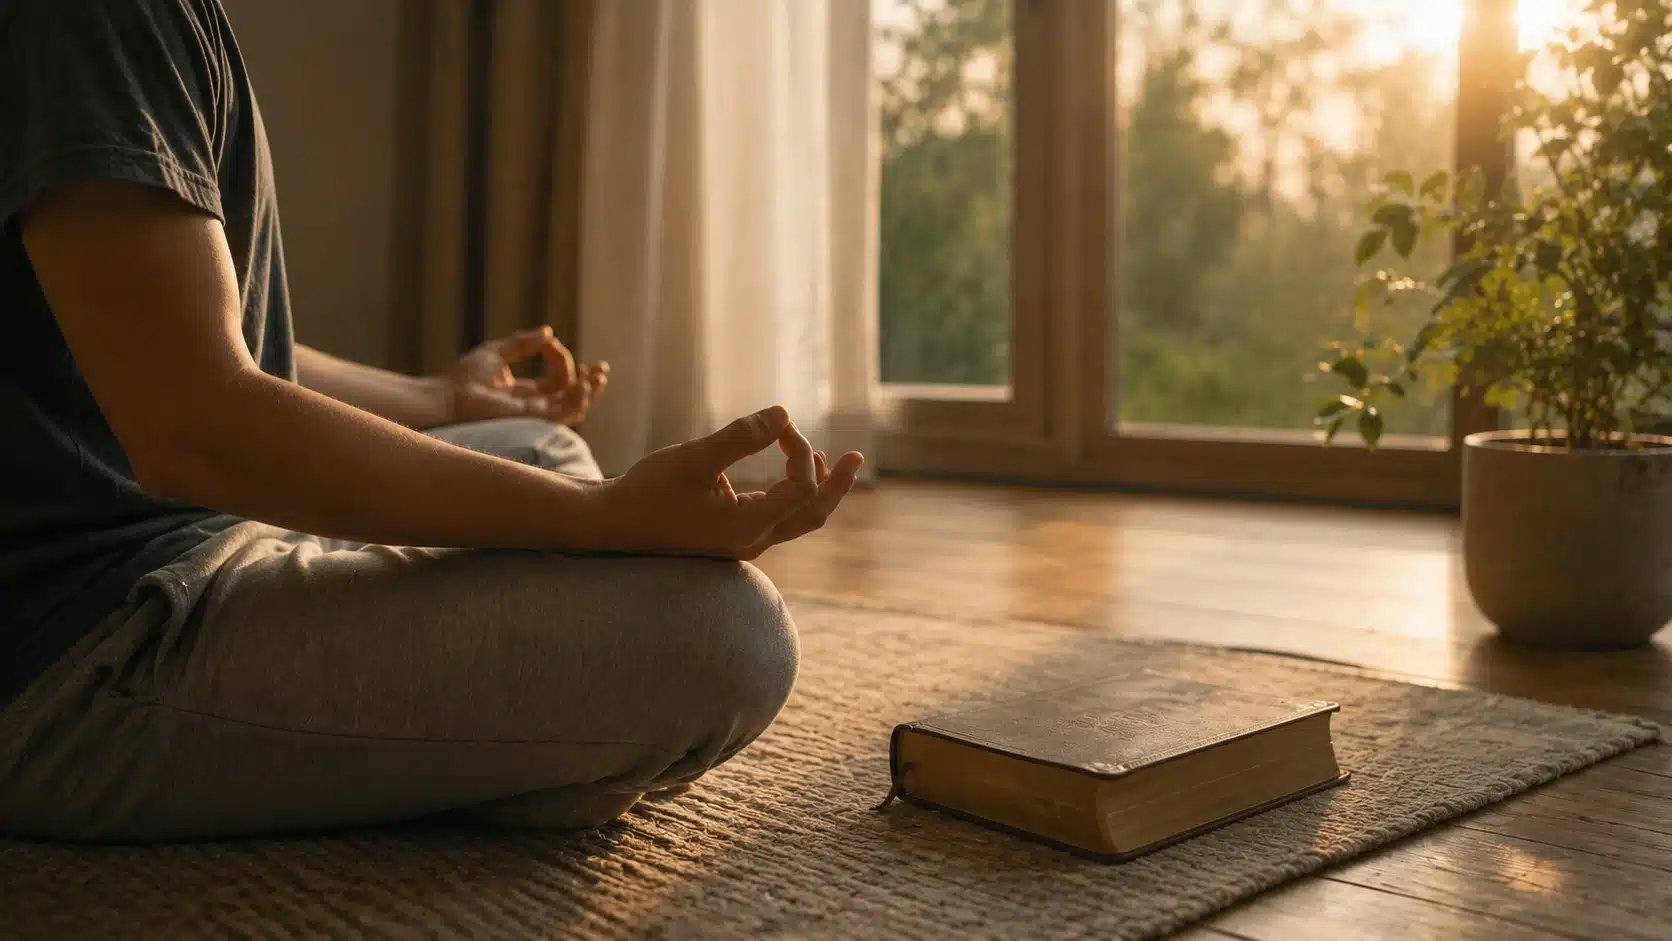
Back pain can make even small movements feel harder than they should. You bend, sit, stand, or turn, and suddenly your lower back asks for attention.
I know how frustrating it feels when your body becomes careful with every move. That is where back pain relief exercises can help when they are done slowly and safely.
The right routine may ease stiffness, support your spine, and help your back feel more stable during daily movement.
You will learn how to warm up, perform each exercise step by step, follow a simple 15-minute routine, avoid common mistakes, and know when pain needs medical help.
Why Should You Warm Up Before Back Pain Exercises?
Before you start exercises for back pain relief, take a few minutes to check how your body feels. A warmup is not just about getting loose. It helps your muscles wake up, your joints move better, and your back handle movement with less strain.
Ask yourself how your pain feels before you move:
- Mild stiffness usually means that gentle movement may be okay
- A dull ache may improve once your body warms up
- Sharp, stabbing, or shooting pain means you should stop
- Pain that travels down your leg needs extra care
- Tingling, numbness, or weakness mean you should not push through
- Pain that feels blocked or intense means you should wait and get checked
A simple warmup sequence that works well: five slow diaphragmatic breaths lying on your back, eight gentle shoulder rolls, ten small pelvic tilts, and a short two-minute walk around the room. That is enough to wake up the stabilizing muscles and bring some circulation into the discs before you ask them to handle more demanding movement.
How to Perform Back Pain Relief Exercises: Step-by – Step
These exercises for back pain relief work best when you move slowly and stay in control. You do not need to push your body far. You need to move in a way that eases tightness, supports your spine, and helps your back feel safer.
Start with a small range of motion. Then build only when the exercise feels comfortable.
1. Standing Lumbar Extension
Standing lumbar extension is particularly useful for people whose lower back pain is triggered by prolonged sitting or forward bending. It moves the lumbar spine in the opposite direction of flexion, which can help centralize pain caused by disc-related issues.
Note: This exercise is not appropriate for everyone. If it increases your leg symptoms or causes sharp pain in your back, stop immediately.
How to do it:
- Stand upright with your feet hip-width apart.
- Place both hands on your lower back for support.
- Keep your fingers pointing downward.
- Keep your knees straight but not locked.
- Lengthen your spine and keep your chest lifted.
- Slowly lean your upper body backward.
- Keep the movement small, gentle, and controlled.
How long to do it: Repeat 5 to 10 times. Hold each gentle bend for 2 to 3 seconds.
Make it easier: Keep the bend very small. You can also place your hands higher on your hips for support. Stop if the movement causes sharp pain or pain down your leg.
| Trainer Tip: If you are not sure you are doing this correctly, place your hand under your lower back. You should feel your back gently press into your hand at the top of each tilt. If your back does not move at all, you are probably only tightening your glutes — focus on engaging your belly first |
2. Supine Bridge
The supine bridge builds strength in the glutes and the posterior chain, the muscles that take load off your lumbar spine during walking, standing, and bending. Weak glutes are one of the most consistently overlooked contributors to chronic lower back pain.
A 2022 study in the Journal of Orthopedic and Sports Physical Therapy identified core and posterior chain training as among the most effective exercise categories for reducing pain and disability in adults with chronic low back pain.
How to do it:
- Lie on your back on a mat or soft surface.
- Bend both knees and place your feet flat on the floor.
- Keep your feet hip-width apart.
- Rest your arms beside your body.
- Keep your shoulders relaxed and your neck comfortable.
- Gently tighten your belly muscles.
- Squeeze your glutes and slowly lift your hips.
- Keep your ribs down and avoid arching your lower back.
- Pause briefly at the top.
- Lower your hips back down slowly with control.
How long to do it: Start with 8 to 10 reps. Do 1 to 2 sets if your back feels okay.
Make it easier: Lift your hips only a few inches off the floor. Focus on using your glutes, not your lower back. Stop if you feel pinching in your spine.
3. Bird Dog
Bird Dog builds balance, core control, and spinal support. It helps train your back to stay steady while your arms and legs move.
How to do it:
- Start on your hands and knees in a tabletop position.
- Place your hands directly under your shoulders.
- Place your knees directly under your hips.
- Keep your back flat and your neck long.
- Gently tighten your belly muscles.
- Slowly reach your right arm forward.
- Extend your left leg straight back at the same time.
- Keep your hips level and avoid twisting your body.
- Hold for 2 seconds while breathing normally.
- Return to the starting position with control.
- Repeat with your left arm and right leg.
How long to do it: Do 8 to 10 reps on each side. Move slowly and pause for 2 seconds each time.
Make it easier: Start with only your legs or only your arms. You can also slide your toes along the floor instead of lifting your leg.
4. Cat-Camel Movement
Cat-Camel is a gentle spine movement. It can help reduce stiffness and prepare your back for other exercises.
How to do it:
- Start on your hands and knees in a tabletop position.
- Keep your hands under your shoulders.
- Keep your knees under your hips.
- Inhale and gently lower your belly toward the floor.
- Lift your chest slightly and look forward.
- Exhale and slowly round your back upward.
- Tuck your chin slightly toward your chest.
- Move smoothly between both positions.
- Keep the movement slow and comfortable.
How long to do it: Repeat 8 to 10 times. Match each movement with slow breathing.
Make it easier: Keep the movement small. Do not force your back into a deep arch or deep round.
5. Knee-to-Chest Stretch
Knee-to-Chest Stretch can help ease tightness in the lower back, hips, and glutes. It often feels good when your back feels tense or stiff.
How to do it:
- Lie on your back on a mat or soft surface.
- Bend both knees and place your feet flat on the floor.
- Keep your shoulders relaxed.
- Slowly bring one knee toward your chest.
- Hold the back of your thigh or the front of your shin.
- Pull gently without forcing the knee too close.
- Keep your other foot on the floor for support.
- Breathe slowly while holding the stretch.
- Lower your foot back to the floor.
- Repeat on the other side.
How long to hold: Hold for 20 to 30 seconds on each side. Repeat 1 to 3 times.
Make it easier: Hold behind your thigh rather than pulling it near your knee. Keep the other knee bent for more support. Stop if pain spreads down your leg.
6. Supine Twist
Supine Twist adds gentle rotation to your spine. It can help ease tightness on one side of your lower back or hips.
How to do it:
- Lie on your back with your knees bent.
- Keep both feet flat on the floor.
- Stretch your arms out to the sides for support.
- Relax your shoulders against the floor.
- Slowly let both knees fall to one side.
- Keep the movement soft and gentle.
- Stop before you feel strain in your back.
- Hold the position for a few slow breaths.
- Bring your knees back to the center.
- Repeat on the other side.
How long to hold: Hold for 10 to 30 seconds on each side. Repeat 1 to 3 times.
Make it easier: Place a pillow between your knees or under your knees. You do not need to have your knees touch the floor.
7. Child’s Pose
Child’s Pose is a gentle resting stretch for the lower back, hips, and thighs. It can help your body settle after stronger movements.
How to do it:
- Start on your hands and knees.
- Keep your knees comfortably apart.
- Slowly move your hips back toward your heels.
- Reach your arms forward on the floor.
- Lower your chest gently toward the mat.
- Rest your forehead on the mat, pillow, or folded towel.
- Let your shoulders, back, and hips relax.
- Breathe slowly and steadily.
- Stay only as long as the pose feels comfortable.
How long to hold: Stay for 20 to 30 seconds. Repeat 1 to 3 times if it feels soothing.
Make it easier: Place a pillow under your chest, forehead, or hips. If your knees feel strained, widen them slightly or skip this stretch.
8. Cobra Stretch
Cobra Stretch gently extends your spine. It can help if your back feels stiff from slouching or sitting.
How to do it:
- Lie on your stomach on a mat or soft surface.
- Stretch your legs straight behind you.
- Keep the tops of your feet resting on the floor.
- Place your hands under your shoulders.
- Keep your elbows close to your sides.
- Relax your legs and keep your hips on the floor.
- Press lightly through your hands.
- Lift your chest only a little.
- Keep your shoulders away from your ears.
- Hold briefly for 1 to 3 slow breaths.
- Lower your chest back down with control.
How long to do it: Hold for 1 to 3 slow breaths. Repeat 5 to 8 times.
Make it easier: Keep the lift small. Do not lock your elbows. Stop if you feel sharp pain, pinching, or pressure in your lower back.
9. Sphinx Pose
Sphinx Pose is a gentle backbend that supports the lower back without too much pressure. It can help open the chest, lengthen the spine, and reduce stiffness caused by sitting for long hours.
How to do it:
- Lie on your stomach on a mat or soft surface.
- Stretch both legs straight behind you.
- Keep the tops of your feet resting on the floor.
- Place your elbows directly under your shoulders.
- Keep your forearms flat on the floor and parallel to each other.
- Press gently through your forearms and lift your chest.
- Keep your hips, thighs, and feet grounded.
- Relax your shoulders away from your ears.
- Keep your neck long and look slightly forward.
- Breathe slowly and hold the position.
How long to hold: Hold for 20 to 30 seconds. Repeat 1 to 3 times if it feels comfortable.
Make it easier: Place a folded towel under your chest or ribs for support. Keep the lift small and stop if you feel pinching in your lower back.
10. Pelvic Tilt
Pelvic Tilt is a gentle core exercise that helps you control your lower back position. It may reduce stiffness and support better spinal movement.
How to do it:
- Lie on your back on a mat or soft surface.
- Bend both knees and place your feet flat on the floor.
- Keep your feet hip-width apart.
- Rest your arms beside your body.
- Relax your shoulders and keep your neck comfortable.
- Gently tighten your stomach muscles.
- Press your lower back lightly toward the floor.
- Tilt your pelvis slightly upward without lifting your hips high.
- Hold the position for 2 to 3 seconds.
- Relax and return to the starting position.
How long to do it: Repeat 8 to 12 times. Move slowly and keep each repetition controlled.
Make it easier: Keep the movement small. Focus on gentle stomach engagement instead of forcing your lower back into the floor.
11. Seated Forward Fold
Seated Forward Fold is a gentle stretch for the lower back, hamstrings, and hips. It may help ease tightness caused by sitting or standing for long periods.
How to do it:
- Sit on the floor with both legs stretched forward.
- Keep your feet close together or hip-width apart.
- Point your toes upward toward the ceiling.
- Sit tall and lengthen your spine.
- Relax your shoulders away from your ears.
- Inhale and reach your chest slightly forward.
- Exhale and fold forward slowly from your hips.
- Place your hands on your thighs, shins, ankles, or feet.
- Keep your knees slightly bent if your hamstrings feel tight.
- Breathe slowly and avoid pulling your body down.
How long to hold: Hold for 20 to 30 seconds. Repeat 1 to 2 times.
Make it easier: Sit on a folded blanket or cushion. Bend your knees more if your lower back rounds or your hamstrings feel too tight.
12. Wall Sit
The wall sit strengthens the quadriceps, glutes, and core simultaneously, a combination that directly reduces the mechanical load that the lower back handles during daily movements like standing from a chair, climbing stairs, and walking.
When I program this for clients who cannot yet tolerate floor exercises easily, the wall sit is a reliable early-stage strengthening option because the wall provides feedback and reduces the fear of losing control.
How to do it:
- Stand with your back against a wall.
- Keep your feet hip-width apart.
- Step your feet about one to two feet away from the wall.
- Keep your back and shoulders touching the wall.
- Slowly slide your body down the wall.
- Bend your knees only as far as comfortable.
- Keep your knees pointing in the same direction as your toes.
- Press gently through your heels.
- Keep your stomach lightly engaged.
- Hold the position while breathing normally.
- Slowly slide back up the wall to return to standing.
How long to hold: Start with 10 to 20 seconds. Repeat 2 to 3 times if your back feels okay.
Make it easier: Do a shallow wall sit instead of going low. Stop if you feel knee pain, back pressure, or sharp discomfort.
How to Progress These Exercises Safely
This is where most people go wrong. They feel better after a few sessions and immediately try to do more. In my experience, the back responds better to gradual, consistent increases in load than to sudden jumps in volume or intensity. Here is a simple three-phase progression framework I use with clients:
| Phase | Timeframe | Focus | Criteria to Advance |
| Phase 1 — Settle | Days 1 to 7 | Mobility and gentle activation: pelvic tilt, cat-camel, knee-to-chest | No increase in pain during or after exercises. Stiffness begins to ease. |
| Phase 2 — Stabilize | Weeks 2 to 4 | Add bird dog, supine bridge, supine twist, child’s pose | Exercises feel controlled throughout. Back pain is not worsening. Form is consistent. |
| Phase 3 — Strengthen | Week 4 onward | Add wall sit, cobra, sphinx, and seated forward fold. Begin increasing sets and hold durations. | Pain is manageable or resolved. You can complete Phase 2 exercises cleanly with no compensations. |
Do not advance phases based on time alone. The criteria column matters more than the calendar. If Phase 1 exercises still cause a flare at the end of week one, stay in Phase 1 and re-evaluate. Back recovery is not linear — some weeks will plateau or slightly regress, and that is normal.
Simple 15-Minute Back Pain Relief Routine
A short routine can work well when your back feels stiff, tight, or tired. You do not need a long workout to feel some relief. The goal is to move gently, wake up your support muscles, and help your back feel safer with motion.
| Time | Exercise | What to Do |
| 0 to 2 min | Body check and breathing | Lie on your back, take five slow breaths, and note your starting pain level. |
| 2 to 4 min | Pelvic Tilt + Cat-Camel | 10 pelvic tilts, then transition to all fours for 8 cat-camel cycles. |
| 4 to 6 min | Bird Dog | 6 to 8 reps per side with a 2-second hold. Keep your hips level throughout. |
| 6 to 8 min | Supine Bridge | 8 to 10 slow reps. Focus on glute drive, not lower back lift. |
| 8 to 10 min | Knee-to-Chest Stretch | 25 seconds each side, repeated twice. |
| 10 to 12 min | Supine Twist | 20 to 30 seconds per side. Move gently and do not force the range. |
| 12 to 14 min | Child’s Pose | Rest in the pose and breathe slowly for the full two minutes. |
| 14 to 15 min | Recheck | Compare your current pain level to where you started. Note any changes. |
Your back should feel looser, calmer, or easier to move. If pain feels stronger, sharper, or spreads, stop the routine and avoid those movements next time.
When Exercises Help and When They Don’t
Exercises can help with back pain, but only when the cause matches the movement. I’ve seen many people follow routines that work well for some cases but make others worse. That’s why it helps to know when these exercises actually support recovery and when they don’t.
| Situation | Reasons | What You Should Do |
|---|---|---|
| When exercises are effective | Muscle strain, stiffness, or pain from sitting too much. These issues stem from weak muscles or a limited range of motion. | Start gentle exercises for lower back pain relief. Focus on slow, controlled movements and stay consistent. |
| When exercises may not help | Pain caused by nerve compression, serious spine issues, or a wrong diagnosis. The problem is deeper than muscle weakness. | Avoid random exercises. Get proper guidance before continuing any routine. |
| Red flags that need medical attention | Pain going down the leg, numbness, tingling, or loss of bladder or bowel control. These may signal nerve problems. | Stop the exercises immediately and seek medical help as soon as possible. |
These signs can point to nerve involvement or more serious conditions. Acting early can prevent long-term problems.
The key is simple. Use exercises when your body responds well, and step back when it doesn’t. Paying attention to these signals helps you avoid setbacks and move toward real relief.
Common Mistakes That Slow Down Recovery
Even when you follow the right exercises, small mistakes can hold back your progress. I’ve noticed that most people don’t struggle with what to do; they struggle with how to do it. Fixing these habits can make a big difference in how your back feels.
- Skipping warm-up: Starting cold can stress stiff muscles. A short warm-up loosens your back and lowers strain.
- Poor posture: Bad form shifts pressure onto your spine. Keep your core active and move with control.
- Moving too fast: Rushing lowers control and loads your lower back. Slow movement keeps you safer.
- Ignoring pain signals: Sharp or worsening pain is a warning. Stop and adjust before irritation builds.
- Inconsistent routine: Random exercise rarely helps in the long term. Regular practice keeps muscles stronger and less stiff.
All these mistakes have one thing in common. They increase strain on your spine rather than reduce it. When your muscles are not working the right way, your back has to take on extra load. Over time, this slows recovery and keeps the pain cycle going.
When to See a Doctor or Physiotherapist

Exercise for lower back pain is appropriate for many presentations, but not all back pain should be managed at home. When I program clients with back pain, there are certain presentations I refer immediately rather than trying to address with exercise alone.
See a doctor or physiotherapist if:
- Pain is severe, sudden, or follows a fall, accident, or heavy lifting incident
- Pain does not improve after five to seven days of gentle movement
- Pain wakes you from sleep or does not ease with rest
- Numbness, tingling, or weakness is present in your leg or foot
- Pain travels below your knee
- You have difficulty controlling walking or standing
- Back pain is accompanied by fever or unexplained weight loss
- You have lost control of bladder or bowel function, which requires urgent medical evaluation
A physiotherapist can assess how your spine, pelvis, hips, and core work together as a system. They can identify which exercises are appropriate for your specific pain pattern and which ones you should avoid, which is something a general exercise guide, including this one, cannot do for you individually.
For back pain specifically related to lumbar disc problems, an article on herniated disc physical exercise covers what the evidence supports for disc-related presentations.
Frequently Asked Questions
Can I do back pain relief exercises every single day safely?
Yes, gentle back pain exercises can usually be done daily if they reduce stiffness and do not increase pain. Start with short sessions, use slow movements, and stop any exercise that causes sharp pain, numbness, or symptoms down the leg.
Should I use heat or ice before back exercises?
Heat may help relax tight muscles before gentle movement, while ice may feel better after a recent strain or swelling. Use what feels soothing, but avoid applying extreme temperatures directly to the skin or using them for too long.
Why does my back hurt more after stretching?
Stop the stretch and notice what kind of pain you feel. Mild pulling may be normal, but sharp pain, spreading pain, tingling, or weakness means the movement is not right for you and needs adjustment or medical advice.
Is walking good for lower back pain relief?
Walking and stretching help in different ways. Walking keeps the body moving and improves circulation, while stretching may ease tight muscles. Many people benefit from combining both, starting with a short walk and then adding gentle stretches.
Can sleeping position make back pain worse?
Yes, poor sleep posture can strain the back and make stiffness worse in the morning. Try keeping your spine supported, using a pillow under or between the knees, and avoiding positions that twist the lower back for hours.
To Sum Up
Your back usually needs steady support, not harsh movement or complete rest.
I’ve shown you how gentle stretches, strength-building moves, warmups, and a short routine can help your body move with more comfort.
You also learned when exercise may not be enough, what warning signs to watch for, and which mistakes can slow recovery. These details matter because safe movement can help you build confidence instead of guessing what your back needs.
Keep your back pain relief exercises simple, slow, and consistent. Try one short routine today, notice how your body responds, and check out more related tips if you want to keep improving your movement.