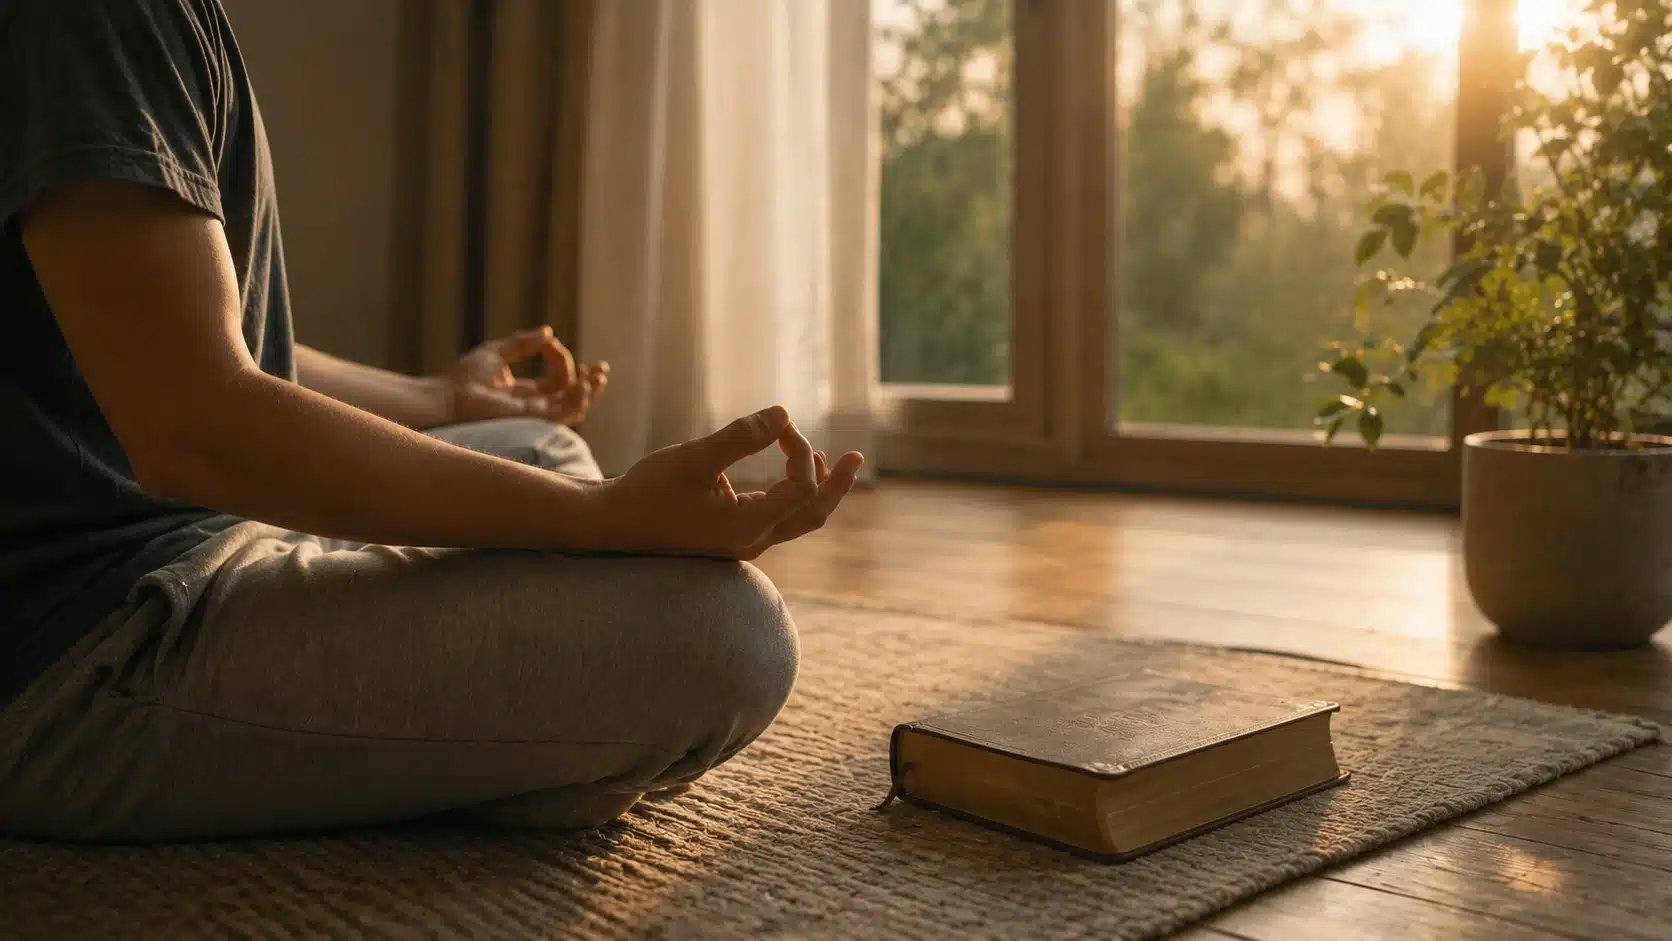

Ever tried going upside down and felt your body panic before your feet even left the floor? A yoga headstand can look simple, but the setup often feels confusing when you are new to it.
You may worry about neck pressure, falling backward, or not having enough strength. I get why that makes the pose feel out of reach.
The good news is that headstand becomes much safer when you understand the base, the weight shift, and the tuck hold first.
Here, you’ll learn how to prepare your body, build control step by step, avoid common mistakes, and know when this pose is not right for you.
Why the Headstand is Worth Learning
The headstand, known in Sanskrit as Sirsasana, is often called the king of all yoga poses. That title exists for good reason.
In a well-supported headstand, your shoulders, forearms, upper back, and core work together to keep your body steady. That makes the pose less about balancing on your head and more about learning how to create a stable foundation from the ground up.
Some practitioners find inversions calming because the pose demands slow breathing and full attention. Still, benefit claims around circulation, hormones, and the nervous system should be treated carefully. Headstand is best approached as a strength, balance, focus, and body-awareness practice rather than a cure for any health concern.
Beyond the physical side, the mental focus required to stay balanced upside down is unlike most other poses. It demands full attention, which naturally quiets a busy mind.
Is Headstand Safe for Beginners?
A headstand can be safe for beginners when you build up to it with proper preparation, correct alignment, and a steady beginner yoga practice. It should never feel like you are dumping your full body weight into your head or neck.
Most of the support should come from your forearms, shoulders, upper back, and core. Your head touches the floor, but your neck should not carry the whole pose. This is why the forearm base matters so much before you lift your legs.
If possible, learn headstand with a certified yoga teacher, especially during your first few attempts. A teacher can check your setup, spot you safely, and help you fix small mistakes before they become painful habits.
Avoid headstand, or speak with a healthcare professional first, if you have a neck injury, uncontrolled high blood pressure, glaucoma, recent surgery, frequent dizziness, or any condition that makes inversions unsafe for you.
Before You Try a Yoga Headstand: A Quick Readiness Check
Before teaching headstand, I usually look for three things: active shoulders, steady breathing, and control in a tuck. If one of these is missing, the full pose can wait.
- You can hold Dolphin Pose for 20 to 30 seconds without collapsing into your shoulders.
- You can keep your elbows shoulder-width apart without letting them slide wide.
- You can breathe slowly while weight-bearing on your forearms.
- You can walk your feet in without feeling sharp neck pressure.
- You are willing to stop at the tuck instead of forcing straight legs too soon.
If these do not feel steady yet, stay with the progressions below. That is still headstand training.
Benefits of Yoga Headstand
A yoga headstand can offer helpful benefits when practiced with proper setup, control, and safe alignment.
- Builds Upper Body Strength: Headstand strengthens the shoulders, upper back, arms, and core because these muscles work together to keep the body steady.
- Improves Core Control: The pose teaches you to engage your core strength while lifting, balancing, and lowering your legs with control.
- Supports Better Balance: Being upside down challenges your balance and helps improve body awareness over time.
- Builds Focus and Concentration: Headstand requires slow breathing, steady attention, and careful movement, which can improve mental focus during practice.
- Teaches Safe Body Alignment: Practicing headstand helps you learn how to press through the forearms instead of putting too much pressure on the neck.
- Builds Confidence for Beginners: For beginners, the biggest benefit is learning how to create a stable base, tuck safely, breathe calmly, and come down with control.
- May Support Calm Breathing: Some studies on Sirsasana have looked at breathing patterns and heart rate changes, but results can vary by experience level.
- Helps Develop Body Awareness: Headstand helps you notice how your shoulders, core, neck, breath, and balance work together in one controlled movement.
- May Support Calm Breathing: The pose may feel calming for experienced practitioners when breath stays smooth, but it should not be used as a substitute for medical or mental health care.
How to Do a Yoga Headstand
The full headstand breaks into clear phases. I like teaching it this way because it slows the pose down and helps you notice where your support is coming from. Moving through each phase with patience is what separates a safe practice from a painful one.
Step 1: Build Your Forearm Base

Start on your hands and knees. Lower your elbows to the mat and keep them about shoulder-width apart. You can check the width by holding opposite elbows, then placing the forearms back down without letting them slide wider.
Press your forearms into the mat and spread the weight across both arms evenly. Think of the forearms as your brakes and support system. This base matters because the it focuses on building a strong, supported headstand, not balancing only on the head. Your shoulders should stay active from the start.
Step 2: Set Your Head and Hands

Interlace your fingers and create a small cup with your hands. Place the crown of your head on the mat, then let the back of your head rest lightly into your hands.
Your hands should support the head without pulling on it. Keep pressing the forearms down so the neck does not carry the full load. If the head feels heavy or compressed, come down and reset your base.
Step 3: Lift the Hips and Walk In

Curl your toes under, lift your knees, and raise your hips toward the ceiling. Slowly walk your feet closer to your elbows until your hips move over your shoulders.
This part can feel awkward at first, but it is where the pose starts to become stable. Avoid kicking up. The video’s beginner focus works best when you move with control and keep awareness in your shoulders, core, and breath.
When I cue beginners, I often ask them to pause here and notice whether their neck still feels light. If it does not, they are not ready to lift the feet yet.
Step 4: Practice the Tuck Hold

Before lifting both legs straight up, bring one knee toward your chest. Then bring the second knee in to meet it. Keep both knees bent and close to your body.
Stay in this tuck shape for a few breaths. This is one of the most important beginner steps because it teaches balance without the weight of straight legs pulling you backward. If the tuck feels shaky, keep practicing here before moving on.
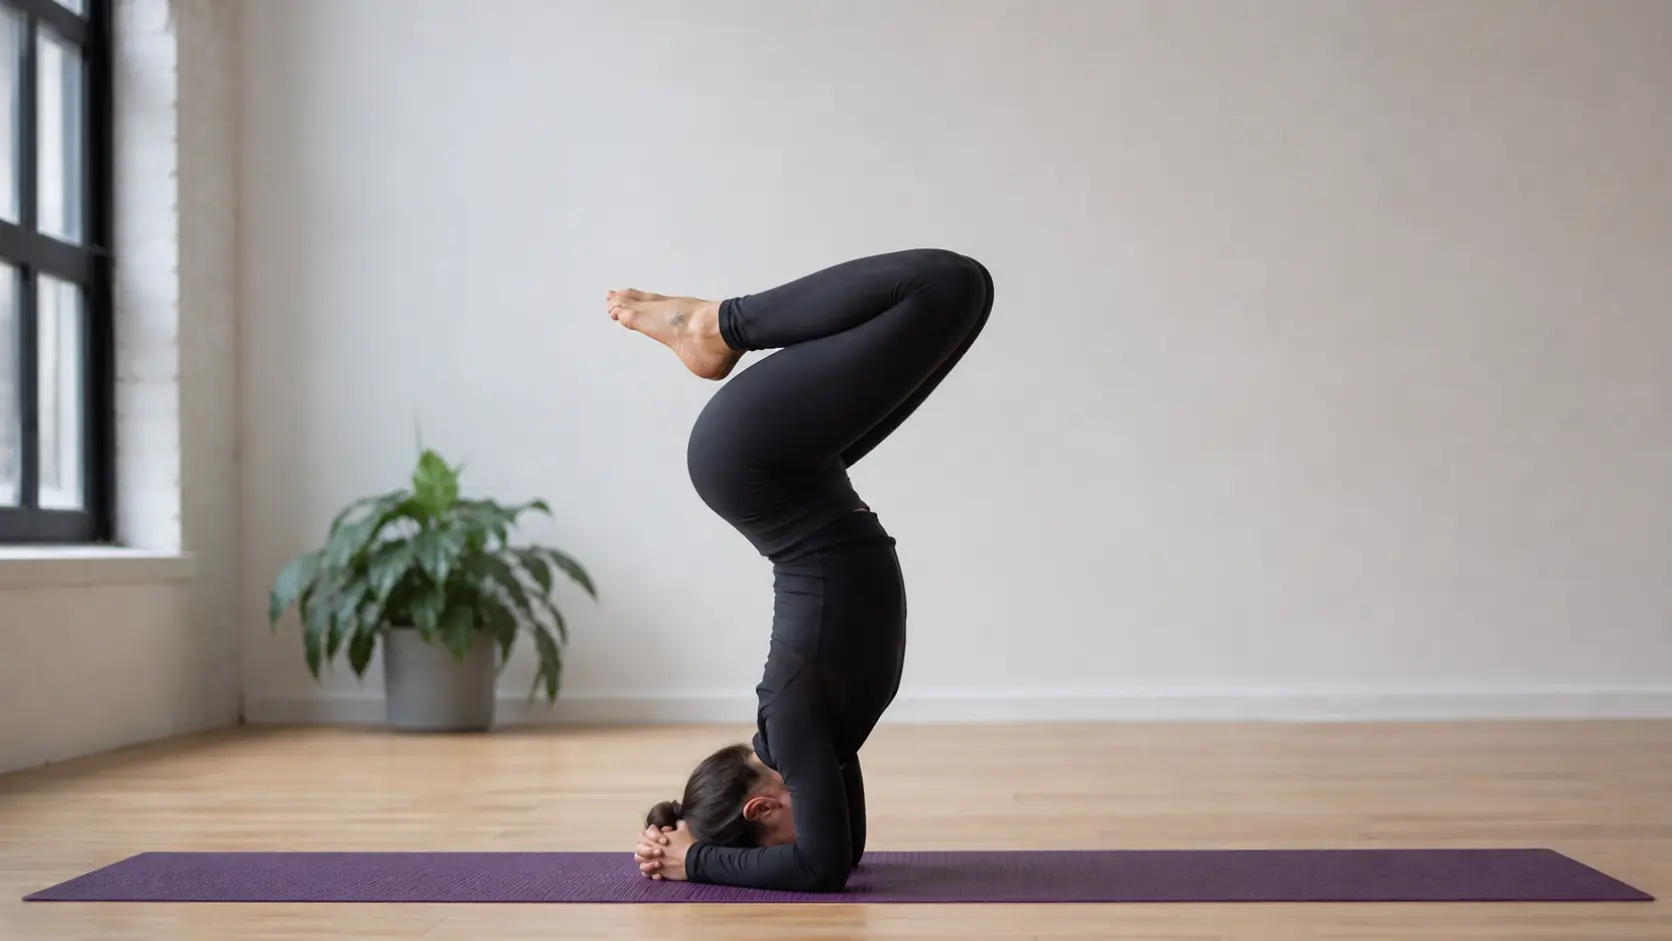
Step 5: Lift the Legs With Control

Once the tuck feels steady, slowly straighten your legs toward the ceiling. Keep your inner thighs active, ribs controlled, and forearms pressing down.
Do not rush this part. A safe headstand should feel supported through the arms, shoulders, upper back, and core. If your breath becomes tight or your neck feels pressure, bend the knees and come down.
Step 6: Come Down Safely

To exit, bend one knee back into your chest, then the other. Lower one foot to the mat with control, followed by the second foot.
Rest in Child’s Pose for several breaths after coming down. This gives your neck, shoulders, and breathing time to settle before you move into another pose.
Watch this beginner-friendly headstand tutorial by Yoga With Adriene to see the setup, lift, and safe exit in action
Beginner Headstand Progressions
Use progressions to build strength, control, and confidence before lifting into a full headstand. Do not rush the final pose if your neck, shoulders, or breathing feel strained.
| Progression | How to Practice | What It Builds |
|---|---|---|
| Dolphin Pose | Keep forearms on the mat, lift the hips, and press the floor away with your arms. | Shoulder strength, upper back support, and forearm pressure |
| Forearm Plank | Hold a plank on your forearms with your body in one straight line. | Core strength, shoulder stability, and body control |
| Headstand Base Hold | Set your forearms and head in position, but keep both feet on the floor. | Proper setup, neck awareness, and shoulder engagement |
| Walk-In Drill | From the headstand base, lift the hips and walk your feet closer until the hips stack over the shoulders. | Alignment, hamstring control, and weight shift |
| One-Knee Tuck | Bring one knee toward your chest while the other foot stays on the floor. | Balance, core control, and confidence |
| Double-Knee Tuck | Bring both knees into the chest and hold without straightening the legs. | Stability, control, and safe entry practice |
| Wall-Supported Headstand | Practice near a wall with your knuckles a few inches away. Let the wall catch your heels lightly, but do not kick into it. | Confidence, balance, and safe support |
| Full Headstand | Straighten both legs only after the tuck feels steady and the neck feels light. | Full balance, control, and steady breathing |
Move to the next step only when the current one feels steady, controlled, and free from neck pressure.
Common Mistakes Beginners Make
Even with good preparation, a few mistakes often show up when learning headstand. Knowing what to watch for can help you practice with more control and less strain.
- Letting the elbows slide outward: This weakens the base and makes the pose feel unstable.
- Putting too much weight on the neck: The head should not carry the full body weight.
- Walking the feet only halfway in: If the hips do not stack over the shoulders, lifting the legs becomes much harder.
- Kicking up too fast: This can make you lose control and fall backward.
- Skipping the tuck hold: The tuck is where balance and core control start to build.
- Holding the breath: Tight breathing usually means the body is forcing the pose.
- Coming down too quickly: Dropping the legs can strain the neck, shoulders, or back.
If any of these happen, come down and reset before trying again. A slower attempt is usually safer than forcing the full pose.
Yoga Headstand Variations for Beginners
Beginner variations help you build control before trying a full headstand in the center of the room. Choose the version that feels steady, safe, and free from neck pressure.
| Variation | How to Practice | Best For |
|---|---|---|
| Wall-Supported Headstand | Set your forearm base a few inches from the wall and let your heels rest lightly against it. | Building confidence and learning balance |
| Tuck Headstand | Keep both knees pulled into the chest instead of straightening the legs. | Core control and safe entry practice |
| One-Leg Headstand | Keep one knee tucked while slowly extending the other leg upward. | Learning control before lifting both legs |
| Half Headstand | Lift the hips and walk the feet in, but keep both feet on the floor. | Practicing alignment without lifting |
| Straddle Headstand | From a steady tuck, open the legs wide instead of lifting them straight together. | Slower balance work and leg control |
| Supported Headstand With Blocks | Place blocks near the wall for extra setup support under teacher guidance. | Extra support when learning alignment |
| Partner-Spotted Headstand | Practice with a certified yoga teacher or trained spotter beside you. | Safer first attempts and alignment feedback |
Move slowly through each variation. If your neck feels heavy or your breathing gets tense, come down and return to prep work.
Who Should Avoid Yoga Headstand?
A yoga headstand is not safe for everyone. Avoid it, or speak with a healthcare professional first, if any of these apply to you:
- Neck injury or neck pain: Headstand can place pressure on the cervical spine if your setup is weak or misaligned.
- Uncontrolled high blood pressure: Inversions can change pressure in the head and upper body.
- Glaucoma or eye pressure concerns: Going upside down may increase pressure around the eyes.
- Recent surgery: Your body may not be ready for weight-bearing or upside-down movement yet.
- Frequent dizziness or balance issues: Headstand can increase fall risk if you feel lightheaded.
- Shoulder injury or wrist pain: The forearms, shoulders, and upper body need to support most of the pose.
- Pregnancy: Balance and pressure changes can make inversions unsafe unless a qualified professional clears you.
- Heart condition or circulation concerns: Ask a doctor before trying inversions if you have heart-related health issues.
If you are unsure, skip the pose and work with a certified yoga teacher or healthcare professional before practicing.
When to See a Doctor or Yoga Teacher

See a healthcare professional before practicing headstand if you have neck pain that travels into the shoulder or arm, numbness, tingling, loss of strength, frequent dizziness, or symptoms after a fall or injury. Mayo Clinic advises medical care for neck pain with numbness, loss of strength in the arms or hands, or pain that shoots into the shoulder or down the arm.
A qualified yoga teacher brings something no tutorial can: live feedback. They can see whether your elbows are widening, your shoulders are collapsing, or your hips are not stacked before you try to lift.
If neck or shoulder strength is a limiting factor, build capacity before returning to headstand. Physical therapy and strengthening work can be useful when neck and shoulder weakness are part of the issue, especially if pain or symptoms are present.
For your first several attempts, practice with a trained teacher or spotter. This matters even if you are strong, because headstand is as much about alignment and control as strength.
For the first several attempts, having a trained spotter present is strongly recommended. It is strongly recommended regardless of fitness level.
Frequently Asked Questions
Can I learn headstand without a wall?
Yes, but beginners should use a wall first for safety and confidence. The wall helps you understand balance without the fear of falling. Once your tuck hold feels steady and your neck feels light, you can slowly move away from the wall under the teacher’s guidance.
Why does my neck hurt during a headstand?
Neck pain usually means too much weight is going into your head instead of your forearms, shoulders, and core. Come down immediately if you feel pressure or pain. Recheck your elbow width, press firmly through your forearms, and practice the Dolphin Pose before trying again.
Where should the weight be in a headstand?
Most of the weight should be supported by your forearms, shoulders, upper back, and core. Your head touches the mat, but it should not carry your full body weight. If your neck feels compressed, your base is not active enough.
Is headstand good for stress relief?
Headstand may feel calming for some people because it requires slow breathing and full focus. However, it should not feel stressful, forced, or scary. If the pose makes you anxious, start with easier inversions like Dolphin Pose or Legs Up the Wall.
What is the best time to practice headstand?
Practice headstand when your body feels awake, focused, and not full from a meal. Many people prefer practicing it earlier in a yoga session after warming up the shoulders and core. Avoid practicing right after eating or when you feel tired, dizzy, or rushed
Final Thought
A headstand becomes less intimidating when you stop rushing the final pose and focus on the foundation.
I want you to remember the key parts: build a strong forearm base, keep the neck light, walk the feet in with control, practice the tuck hold, and come down slowly.
These details matter because they help you practice with more confidence and less strain.
A yoga headstand is not about forcing balance or proving strength. It is about learning where support comes from and respecting your body’s limits.
Try the progressions slowly, use a wall when needed, and share which step feels hardest for you.