

There’s a good chance you’ve walked past this exercise in a gym without giving it a second thought: someone standing on one leg, knee propped up, looking almost too relaxed to be working hard.
But the Captain Morgan exercise might be doing more for hip stability, especially when you look at how it supports key areas from the components of fitness.
I’ll cover what the movement is, how to do it correctly, who it’s built for, and why it keeps showing up in rehab clinics and training programs alike.
You’re tracking better balance or just want your hips to stop complaining after a long run, stick around, this one’s worth your time.
What is the Captain Morgan Exercise?
The Captain Morgan exercise is a single-leg isometric hold where you stand on one leg with the opposite knee raised to hip height, mimicking the stance of the Captain Morgan rum logo.
It looks simple, but it’s one of the most targeted ways to train the gluteus medius, the muscle responsible for keeping your pelvis level when you’re on one leg.
You may also see it called the “stork exercise” in physical therapy settings, and the terms are used interchangeably in clinical literature. The wall-supported version, where you press your raised knee into a wall for active resistance, is the variant most commonly used in PT rehab. The freestanding hold described here builds on the same principle.
It’s commonly used in physical therapy for runners and athletes recovering from IT band syndrome, patellofemoral pain, or hip impingement, and it’s increasingly found in warm-up protocols at every level of sport. You don’t need any equipment, any particular fitness background, or even much space to do it.
Muscles Worked in Captain Morgan Exercise
The Captain Morgan hold looks deceptively simple, but it quietly activates more muscles than most people realize, making it a powerful diagnostic tool for movement quality.
| Muscle | Role | How It Works in the Hold |
|---|---|---|
| Glute Medius | Primary Stabilizer | Keeps the pelvis level and controls knee tracking throughout the hold |
| Glute Maximus | Primary Stabilizer | Stabilizes the hip and supports the standing leg |
| Core | Secondary Support | Maintains overall body alignment and prevents trunk sway |
| Hip Flexors | Secondary Support | Help hold the raised knee up and balance the pelvis |
| Hamstrings | Secondary Support | Assist in stabilizing the standing leg and controlling the hip position |
If any of these muscles are weak, the body compensates in ways that slowly build into overuse injuries, making this simple hold worth taking seriously.
Benefits of Captain Morgan Exercise
The Captain Morgan exercise looks deceptively simple, but the benefits it delivers are anything but. Here’s what consistent practice actually does for your body.
- Improves Hip Stability: Holding that single-leg position forces your hip stabilizers to work isometrically, building the lateral hip strength that most traditional exercises simply don’t train.
- Reduces Knee Pain Risk: A stronger gluteus medius improves knee tracking. Less inward collapse during movement translates directly to less stress on the knee joint over time.
- Builds Single-Leg Strength: Real-world movement is rarely bilateral. This exercise builds the unilateral strength your body needs for walking, running, and daily functional activity.
- Supports Better Balance and Coordination: Regular holds sharpen the neuromuscular connection between your brain and stabilizing muscles, improving overall body control and proprioception.
- Helps With Athletic Performance: From sprinting to cutting to jumping, almost every athletic movement passes through a single-leg phase. Stronger hip stability here means more power and control everywhere else.
- Supports Injury Rehab and Prevention: Physical therapists frequently use this drill for runners and patients recovering from hip, knee, or lower back issues because it restores functional stability without loading the joint under heavy resistance.
Add this to your warm-up or accessory work consistently, and if you notice soreness, it often indicates whether being sore is a good sign of muscle growth in targeted stabilizers like the glute medius.
Captain Morgan Exercise: How To Do It Correctly (Step-by-Step)
Here’s exactly how to perform the Captain Morgan exercise with proper form, every detail you need to do it right from your very first rep.
Step 1: Set Your Starting Position
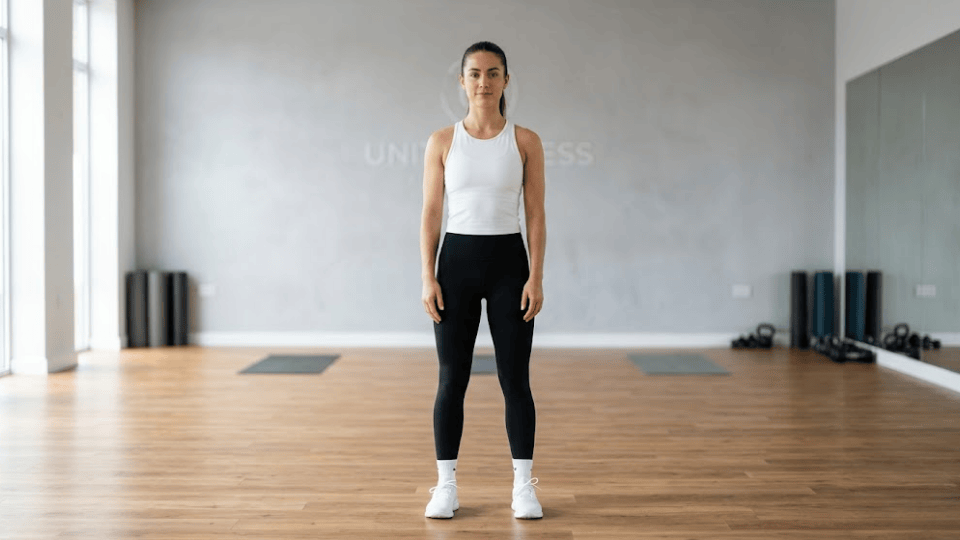
Stand with your feet hip-width apart on a flat, stable surface, evenly distributing your weight across both feet. Keep your arms relaxed at your sides, your spine tall and neutral, and your eyes fixed on a point straight ahead.
Make sure you’re not already leaning or shifting to one side before the movement even begins; your weight should feel centered and grounded.
Step 2: Shift Your Weight, Lift Your Knee, and Engage
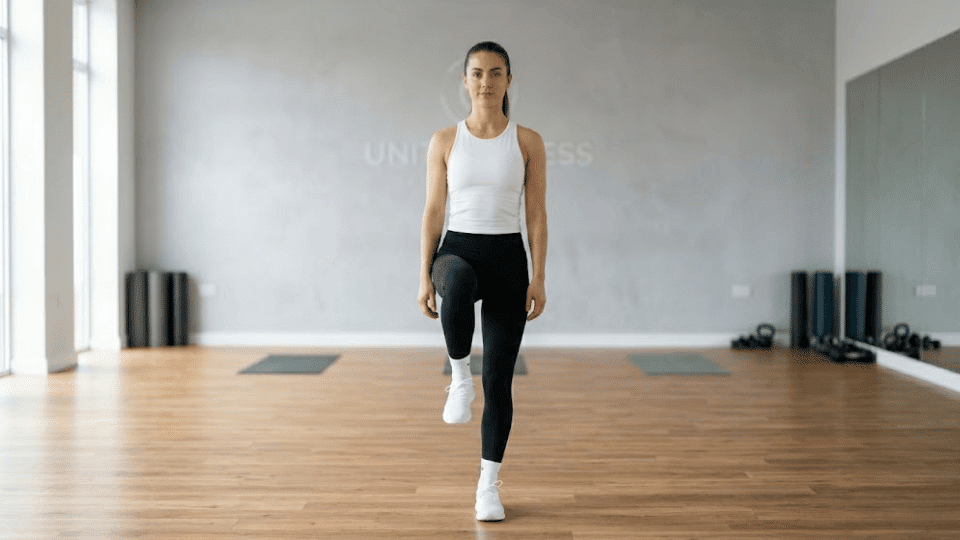
Shift your weight onto one leg and raise the opposite knee to hip height, keeping your thigh roughly parallel to the floor.
As you settle into position, keep a soft bend in your standing knee, never locked straight, and immediately squeeze the glute of that standing leg while bracing your midsection. Your raised knee should point straight forward, not flaring outward.
A useful cue here: think of driving the ball of your standing foot into the ground as you squeeze the glute. This creates a chain reaction of tension from the foot through the hip that makes the hold significantly more effective than simply balancing passively.
Step 3: Find Your Alignment and Hold
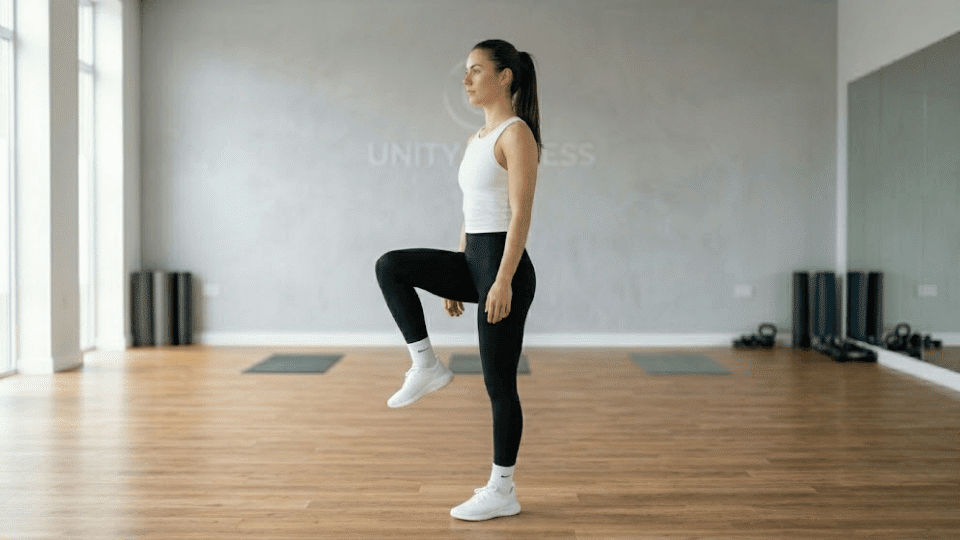
Check that neither hip is hiking up or dropping down; both should sit level with your ankle, knee, and hip stacked in one straight line.
Once everything feels right, fix your eyes on a point ahead, breathe steadily, and hold that position for 20 to 30 seconds without letting form slip.
Step 4: Lower with Control and Switch Sides
Slowly bring your foot back to the floor with intention, don’t just drop it.
Reset your starting position, evenly distribute your weight again, and then repeat on the opposite leg for the same duration. One side matched to the other, every single set.
Most people find a meaningful difference between their left and right sides on this drill. That’s not a problem, it’s exactly the kind of information that makes your training more precise.
Start on your weaker side, complete the hold, then match the time on the stronger side.
Who Should Do the Captain Morgan Exercise?
This movement is genuinely useful across a wide range of people, but the specific reason you’d include it depends on where you’re starting from.
- Runners and endurance athletes: Glute medius fatigue during long runs contributes to IT band issues and hip drop. This is one of the most targeted drills for addressing that.
- People recovering from knee or hip injuries: When you can’t load through a heavy range of motion, an isometric hold like this builds stability without aggravating the joint. Always clear this with your physical therapist first if you’re post-surgery or managing an active injury.
- Desk workers and sedentary adults: Extended sitting weakens the glutes and tightens the hip flexors. This exercise begins to undo that pattern with minimal time investment.
- Strength athletes: Weak hip stabilizers reduce power transfer in squats and deadlifts. Adding single-leg balance work fills a gap that bilateral training leaves open.
- Older adults: Balance and hip stability decline with age, increasing fall risk. This exercise is low-impact, modifiable, and directly addresses the stability deficits that matter most for daily function.
If you have an active lower-body injury, a recent surgery, or significant balance impairment, get clearance from a physical therapist before adding single-leg work to your routine.
What Good Form Actually Looks and Feels Like
A low, deep burn along the outer hip of the standing leg, not in the lower back, not in the knee, and not primarily in the quad. Key Alignment Cues:
- Hips stay level. The pelvis should not tilt, hike, or rotate. Think of keeping both hip bones at the same height throughout.
- Standing knee tracks forward. It should point in the same direction as your toes, not collapse inward toward the midline.
- Tall posture. Avoid leaning the torso over the standing leg as a compensation. Some forward lean is natural in the squat variation, but it should come from the hip hinge, not a collapse through the spine.
- Soft jaw, relaxed shoulders. Tension tends to creep upward when balance is challenged; keep checking in on it.
The most common error I see, even in experienced gym-goers, is a subtle lateral trunk lean toward the standing leg. It feels stable because it shortens the lever arm, but it takes the glute medius almost entirely out of the equation. If you’re comfortable, you’re probably cheating. Stand tall and let it be hard.
Some mild ankle fatigue is normal as the foot adjusts to single-leg loading. If discomfort is showing up in the lower back or the knee feels stressed, revisit your hip and pelvis position before continuing.
Sets, Reps, and Programming
| Goal | Sets | Hold Time | Rest | Frequency |
|---|---|---|---|---|
| General stability/warm-up | 2–3 per side | 20–30 sec | 30 sec | 3–5x/week |
| Rehab/weakness correction | 3–4 per side | 30–45 sec | 45 sec | Daily |
| Athletic performance | 3 per side | 30 sec | 30 sec | 3x/week pre-training |
Keep the hold time conservative enough that you can maintain perfect alignment throughout. A clean 20-second hold trains the right muscles. A sloppy 45-second hold trains compensations.
Captain Morgan Exercise Variations
Your standard version has no equipment, no modifications. However, there are variations that build specific muscles and meet the experience level of individuals. Some of them are:
1. Beginner Version (Wall Support)
Equipment: A wall or sturdy surface within arm’s reach.
Place one hand lightly against a wall for support while you hold the position. The contact point takes just enough uncertainty out of the balance to let you focus entirely on building glute engagement and proper hip alignment first. As stability improves, gradually reduce your reliance on the wall.
- Difficulty: Beginner
- Best for: Those new to single-leg training or returning from a lower-body injury
2. Resistance Band Version
Equipment: A looped resistance band placed just above the knees.
The band creates an inward pull on your standing knee, forcing your glute medius to work harder to resist it throughout the hold. This small addition significantly increases the lateral hip demand without changing the movement itself, making it an effective progression when the standard version starts to feel manageable.
- Difficulty: Intermediate
- Best for: Targeting glute medius weakness or preparing for knee-dominant sport movements
3. Ball Version
Equipment: A stability ball placed between your raised knee and a wall.
Press your raised knee gently into the stability ball against the wall as you hold the position. This gives your lifted leg an active role rather than just floating, increasing total muscle recruitment and adding a proprioceptive challenge that sharpens body awareness through the hip and knee simultaneously.
- Difficulty: Intermediate
- Best for: Improving neuromuscular coordination between both legs during the hold
Mistakes to Avoid
Even small form breakdowns can quietly shift the work away from the muscles you’re actually trying to train. These are the ones that come up most often.
- Letting the hip push out to the side. This is the most common compensation and effectively takes the gluteus medius out of the equation.
- Rushing the hold or the descent. Speed is not the point here. Control is.
- Using the wall for balance instead of just touch support. The wall should barely be grazed with fingertips, not leaned on.
- Skipping the weaker side. Most people have a noticeable difference between sides. The temptation is to spend more time on the stronger leg. Do the opposite.
- Locking out the standing knee. A hyperextended knee shifts the load away from the glute and into the joint itself. Always maintain a soft bend.
- Holding the breath. Breath-holding spikes tension and reduces your ability to maintain proprioceptive feedback. Breathe steadily throughout the hold.
If a few of these sound familiar, that’s not a bad thing. It just means there’s something specific to work on in the next session.
Wrap Up
Hip stability rarely gets attention until something goes wrong, and by then, the fix takes longer than it would have if you’d caught it earlier.
The Captain Morgan exercise is a straightforward, low-equipment way to build the hip stabilizer strength that supports everyday movement, athletic performance, and long-term joint health.
What this blog covered comes down to a few things: the gluteus medius is worth training directly, form and control matter far more than reps or depth, and consistency is what actually produces results.
From what I’ve seen, the people who get the most out of this are the ones who slow down and feel the movement working. If something clicked, I’d love to hear. Drop a comment below!
Frequently Asked Questions
How long should you hold the Captain Morgan exercise?
Hold for 20 to 30 seconds per side to start, progressing to 45 seconds. Focus on steady control and proper alignment rather than longer holds that cause loss of balance or poor form.
Is the Captain Morgan exercise good for knee pain?
It can help reduce knee discomfort linked to poor hip stability by improving glute medius strength and knee tracking. For sharp or persistent pain, consult a qualified professional before starting.
Can beginners do the Captain Morgan exercise?
Yes, beginners can perform it easily using wall support for balance. It is a low-impact movement that helps develop basic hip strength, coordination, and alignment without needing any equipment.
What does the Captain Morgan exercise do?
The Captain Morgan exercise builds isometric strength in the gluteus medius and hip stabilizers. It also engages the core, hip flexors, and ankles, improving balance, control, and overall lower-body stability.
How often should you do the Captain Morgan exercise?
Practice it 3 to 5 times per week for general stability or daily for rehab-focused routines. Its low-impact nature allows frequent use, provided you maintain proper form and controlled execution.