
The Zercher squat is a front-loaded exercise in which you hold the barbell in the crooks of your elbows rather than on your back or shoulders.
This position puts most of the work on your quads, glutes, and core while taking pressure off your lower back.
I’ve found it’s one of the better squat variations for building leg strength without stressing your spine. You’ll also see improvements in your mobility and posture as you get used to the movement.
I’ll cover everything from proper setup and form to common mistakes and useful variations you can try.
Context & Benefits of the Zercher Squat
The Zercher squat gets its name from strongman Ed Zercher, who popularized this unconventional loading position.
You’ll cradle the barbell in the bend of your elbows rather than placing it across your upper back or front delts, creating a stable shelf with your arms tight against your ribs.
This front-loaded position forces your torso upright, which changes how your muscles work compared to back squats.
The benefits extend beyond building leg strength; your core constantly works to keep you stable against the forward pull, while your upper back prevents shoulder rounding.
You’ll build serious quad strength since the upright position keeps tension on your thighs, and the reduced spinal loading makes this safer if you deal with back sensitivity.
Your hip and ankle mobility will improve as you practice getting deeper, and you won’t need the wrist or shoulder flexibility that front squats demand. The awkward bar position also teaches proper bracing that carries over to other lifts.
Step-by-Step Guide to the Zercher Squat
Following these steps carefully ensures you perform the movement correctly and get the most from each rep without risking injury.
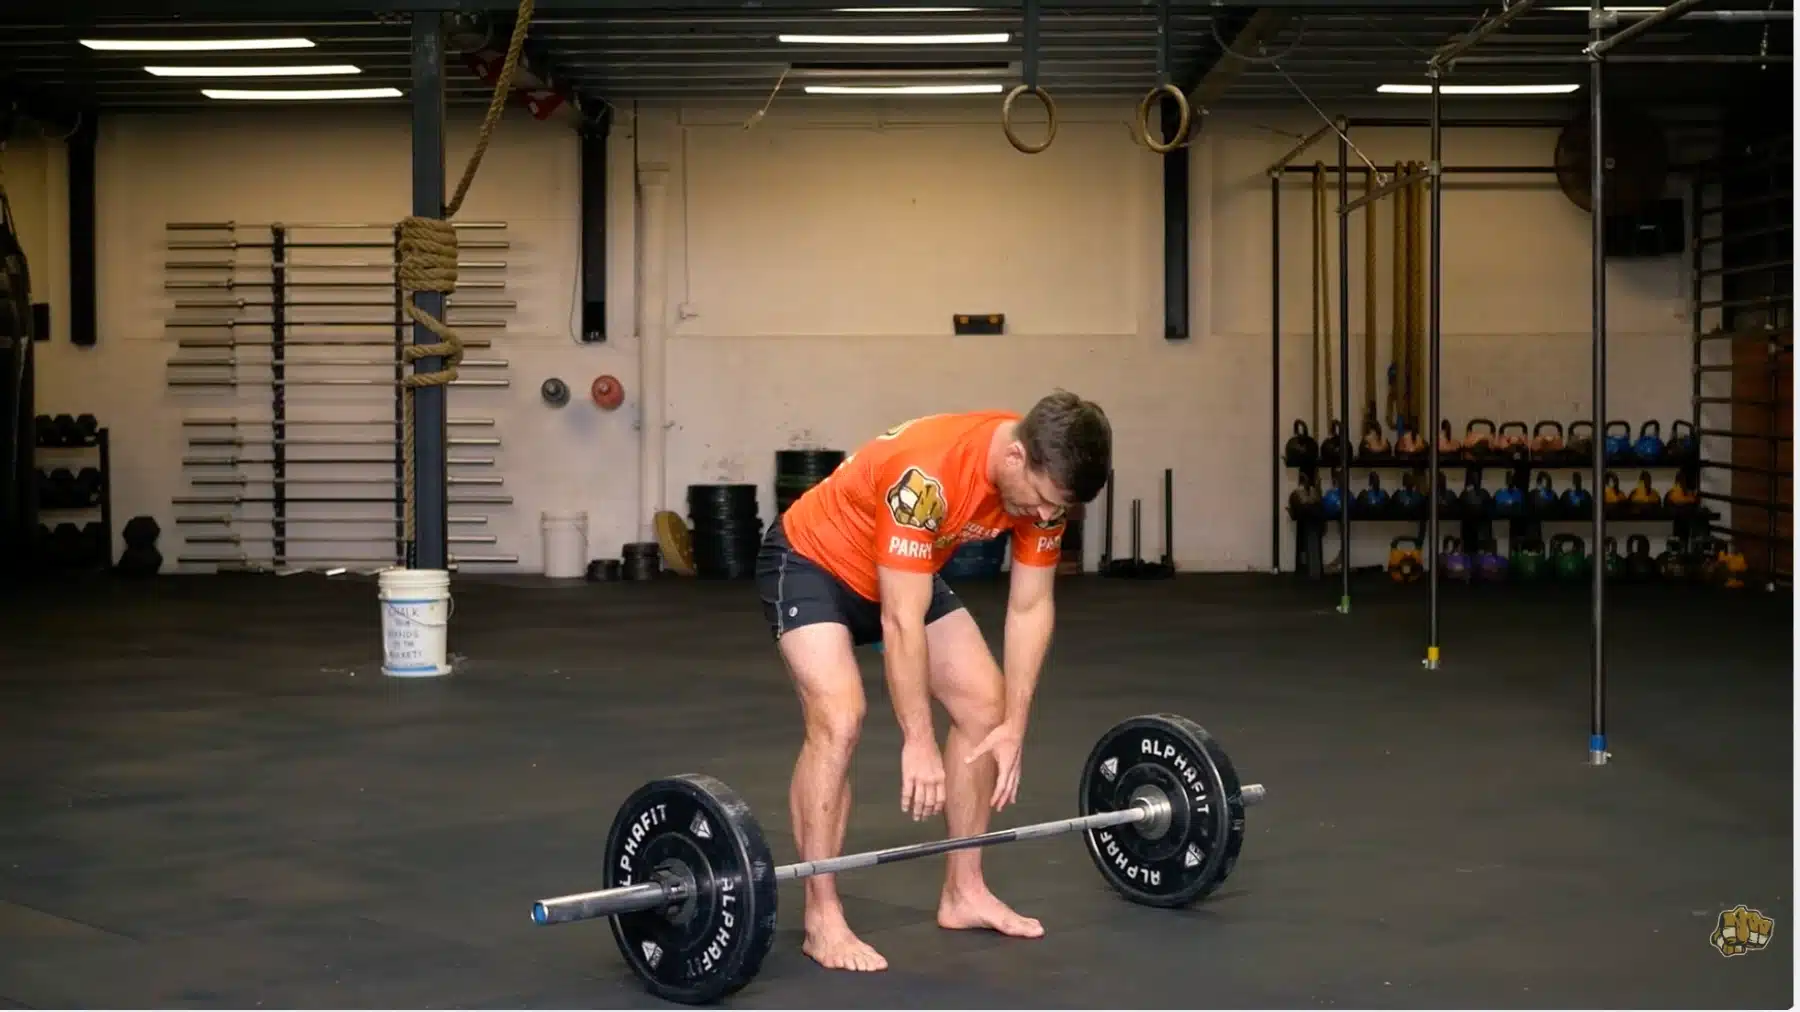
Step 1: Set Up the Barbell
Getting your setup right is key to lifting safely and effectively. Here’s how to do it:
- Adjust the barbell to just below elbow height
- Load the bar with an appropriate weight
- Set safety pins below the starting position
- Ensure enough space behind the rack
After setting up, double-check everything to ensure a smooth and safe lift. A solid setup makes the exercise easier.
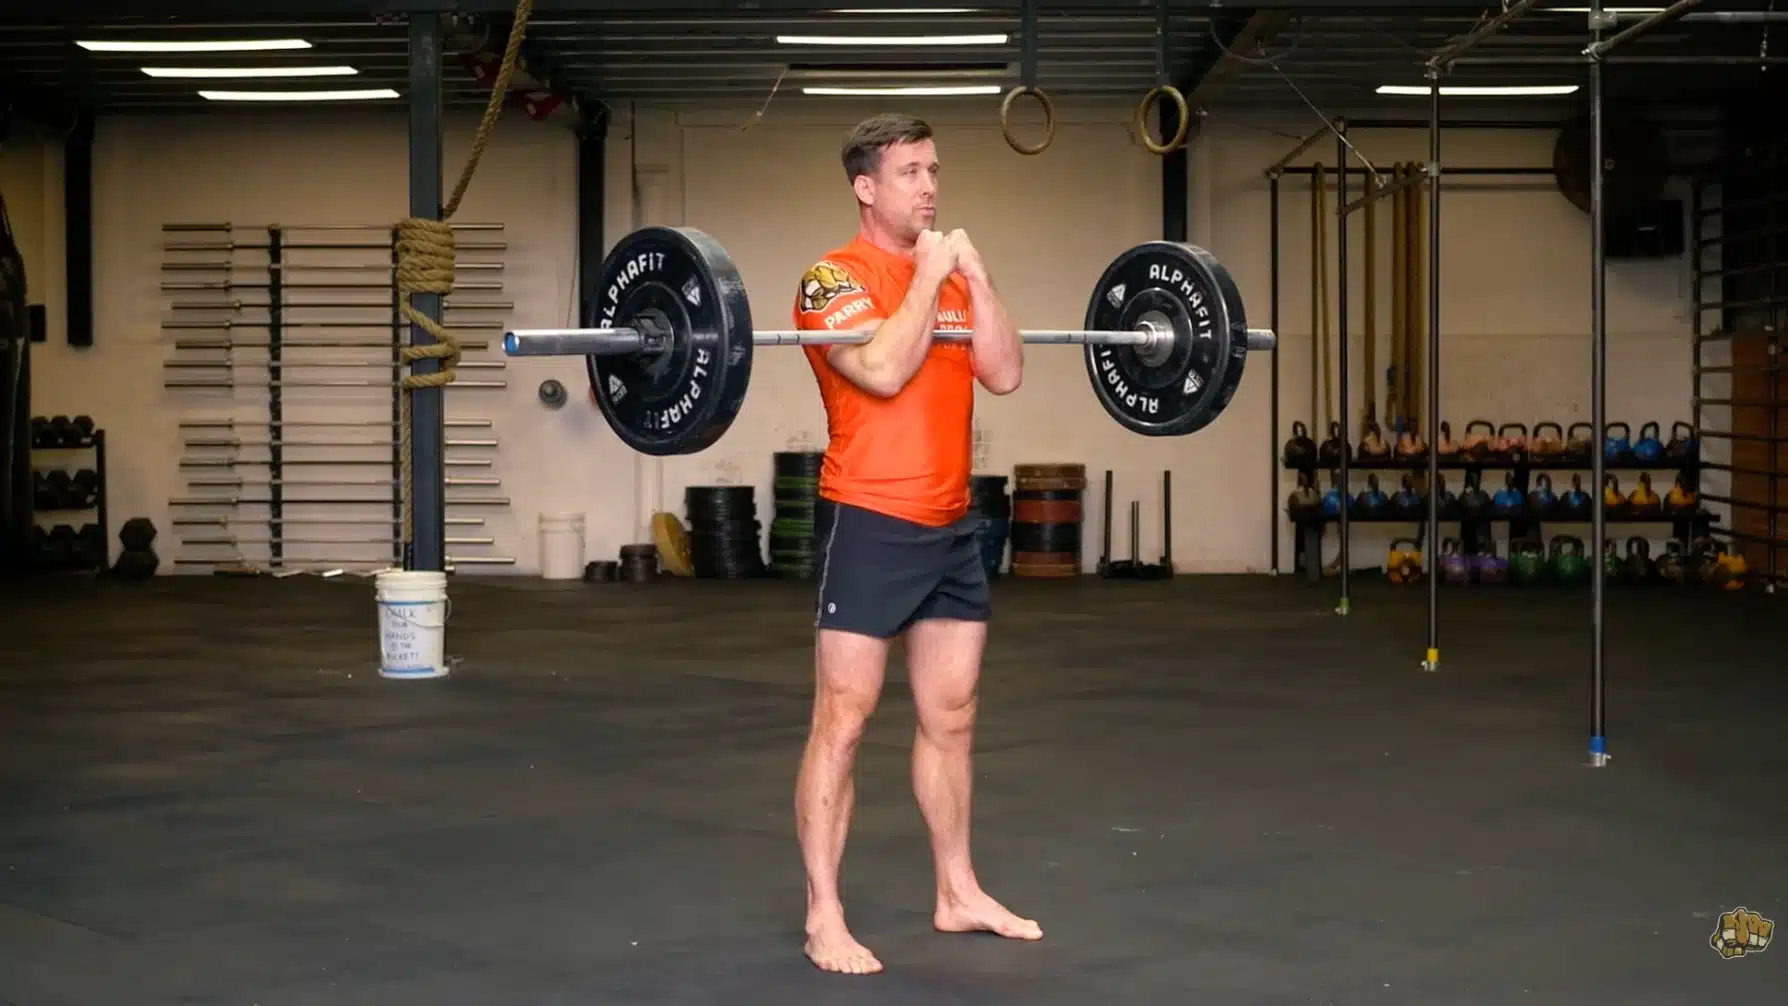
Step 2: Position the Bar on Your Elbows
Positioning the bar on your elbows correctly can minimize discomfort. This step is essential for a solid lift:
- Step up and slide your arms underneath the bar
- Keep elbows bent at 90 degrees
- Bring your hands together without gripping the bar
- Use padding or elbow sleeves for comfort
Proper positioning ensures comfort throughout the movement. Make sure everything feels secure before proceeding to the next step.
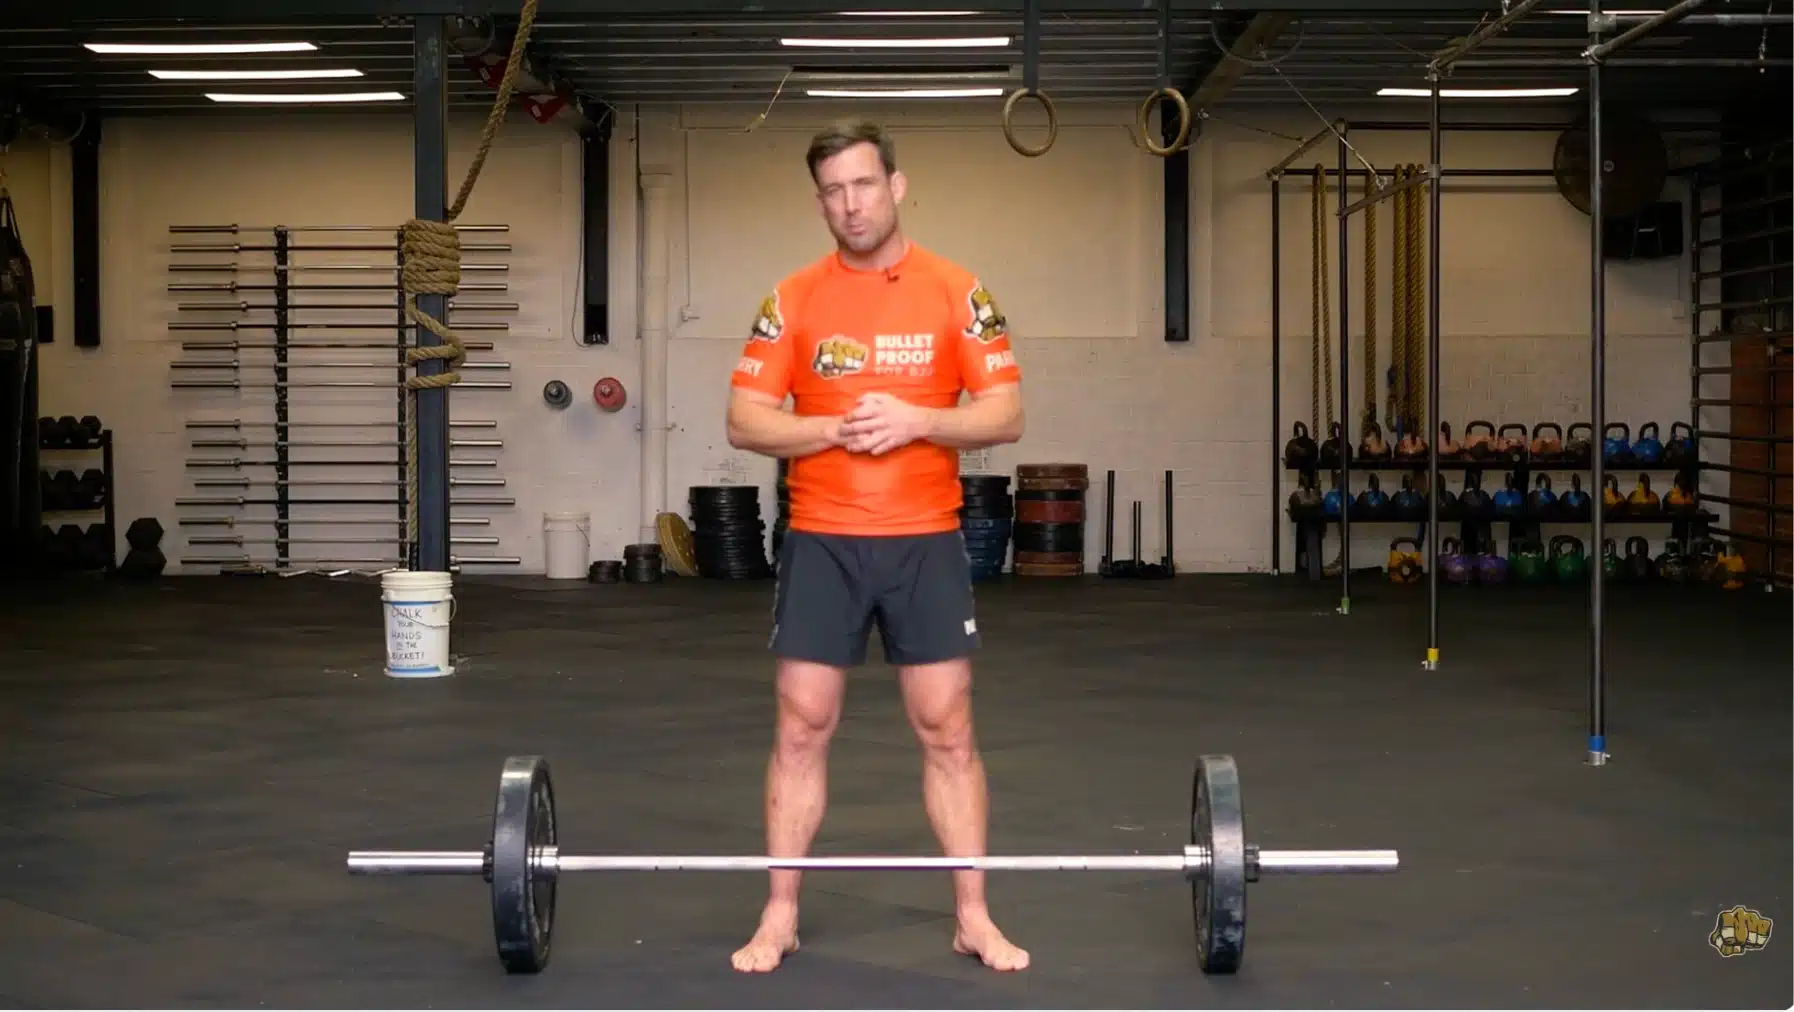
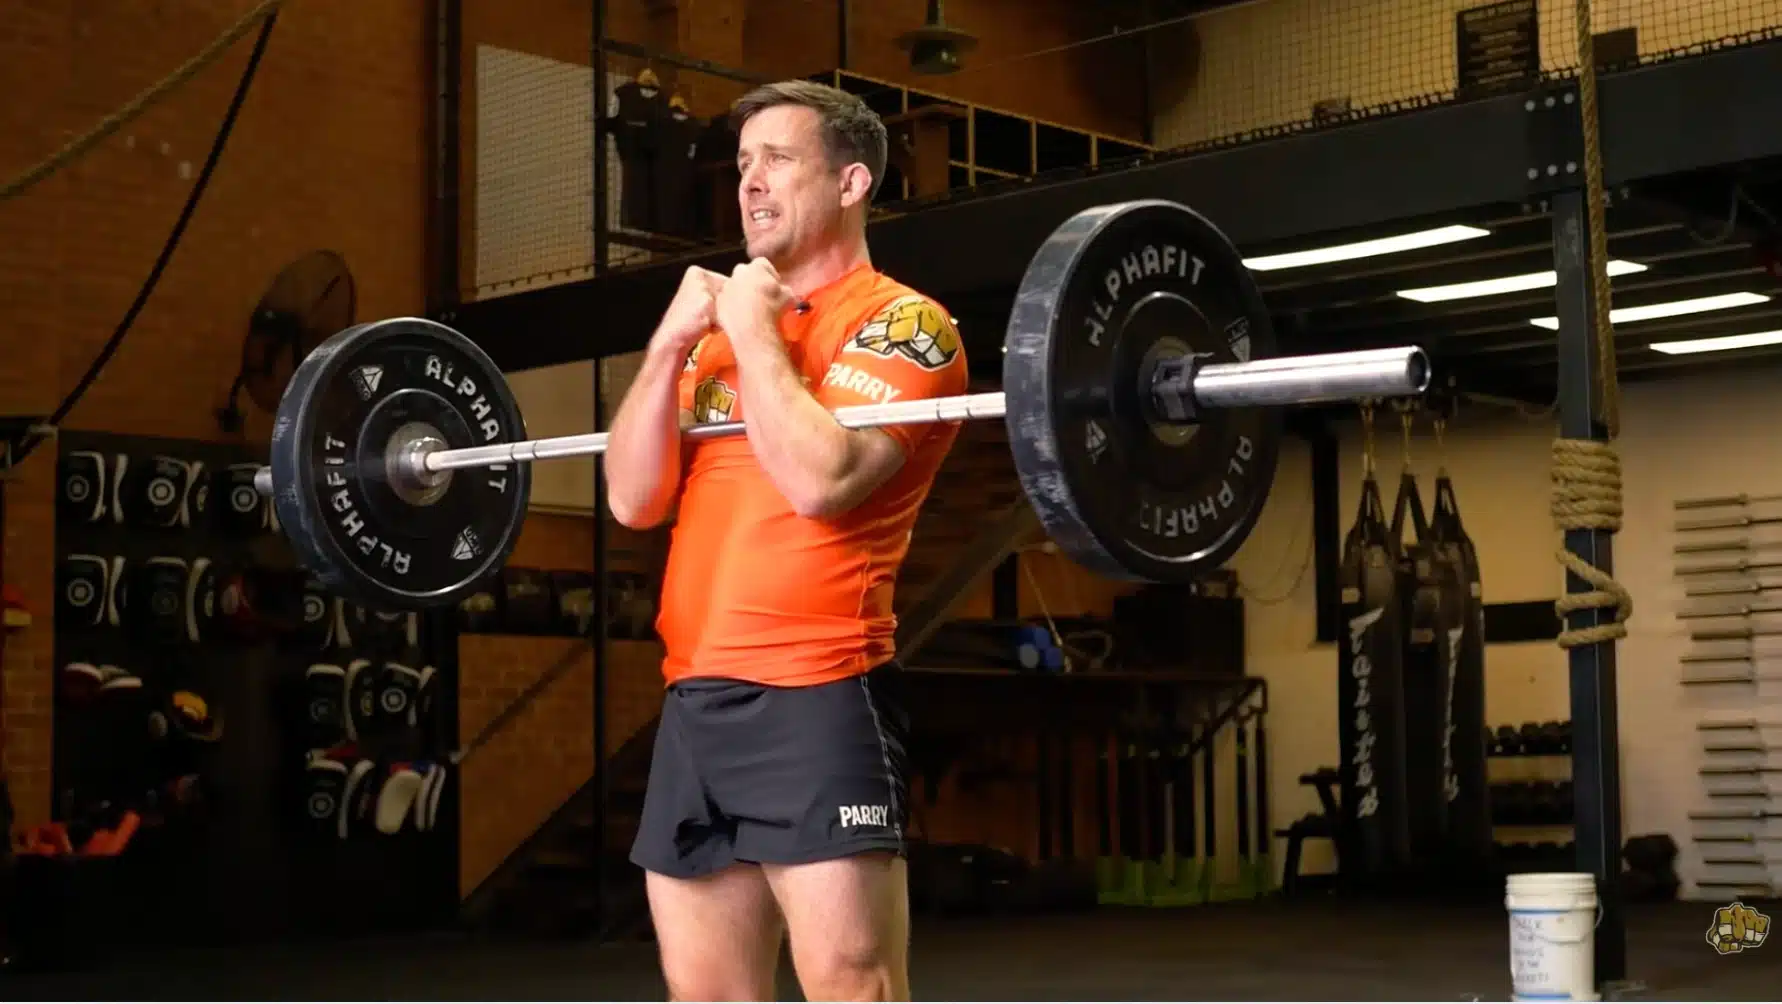
Step 3: Get Into the Starting Position
Now that you’re ready, it’s time to find your stance and posture. Get into position to begin the squat:
- Stand tall and lift the bar from the rack
- Step back with small movements for the room
- Position feet shoulder-width apart with slight toe turnout
- Brace your core and engage your back
Focus on maintaining a strong, stable position. This helps set the foundation for a successful squat.
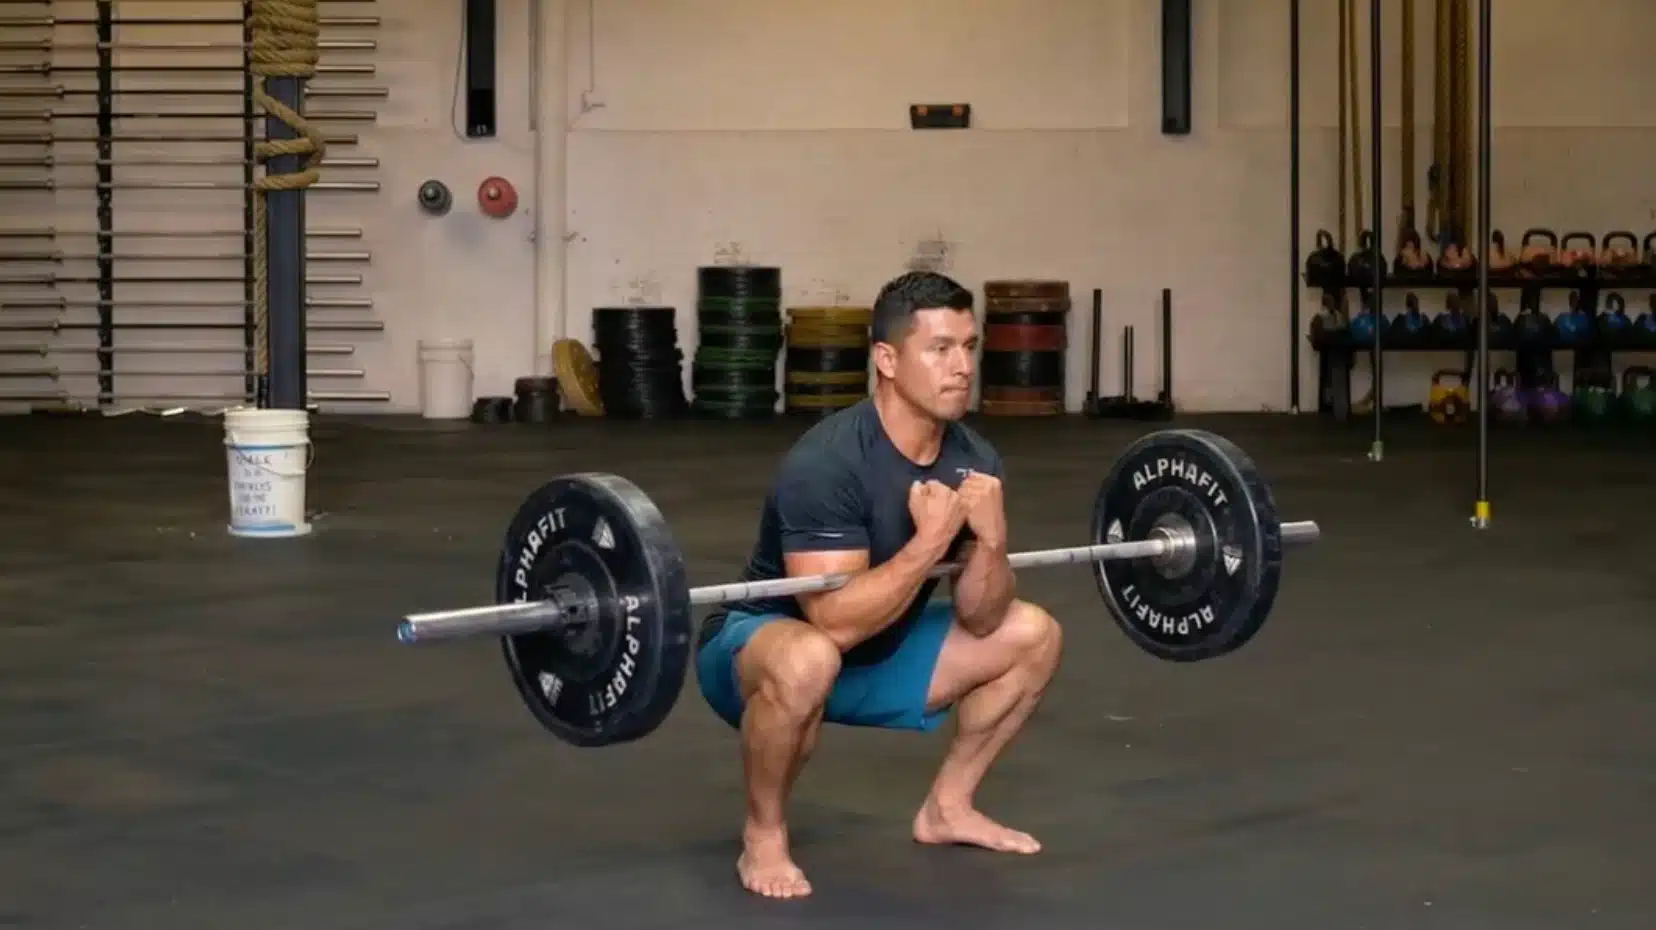
Step 4: Lower Into the Squat
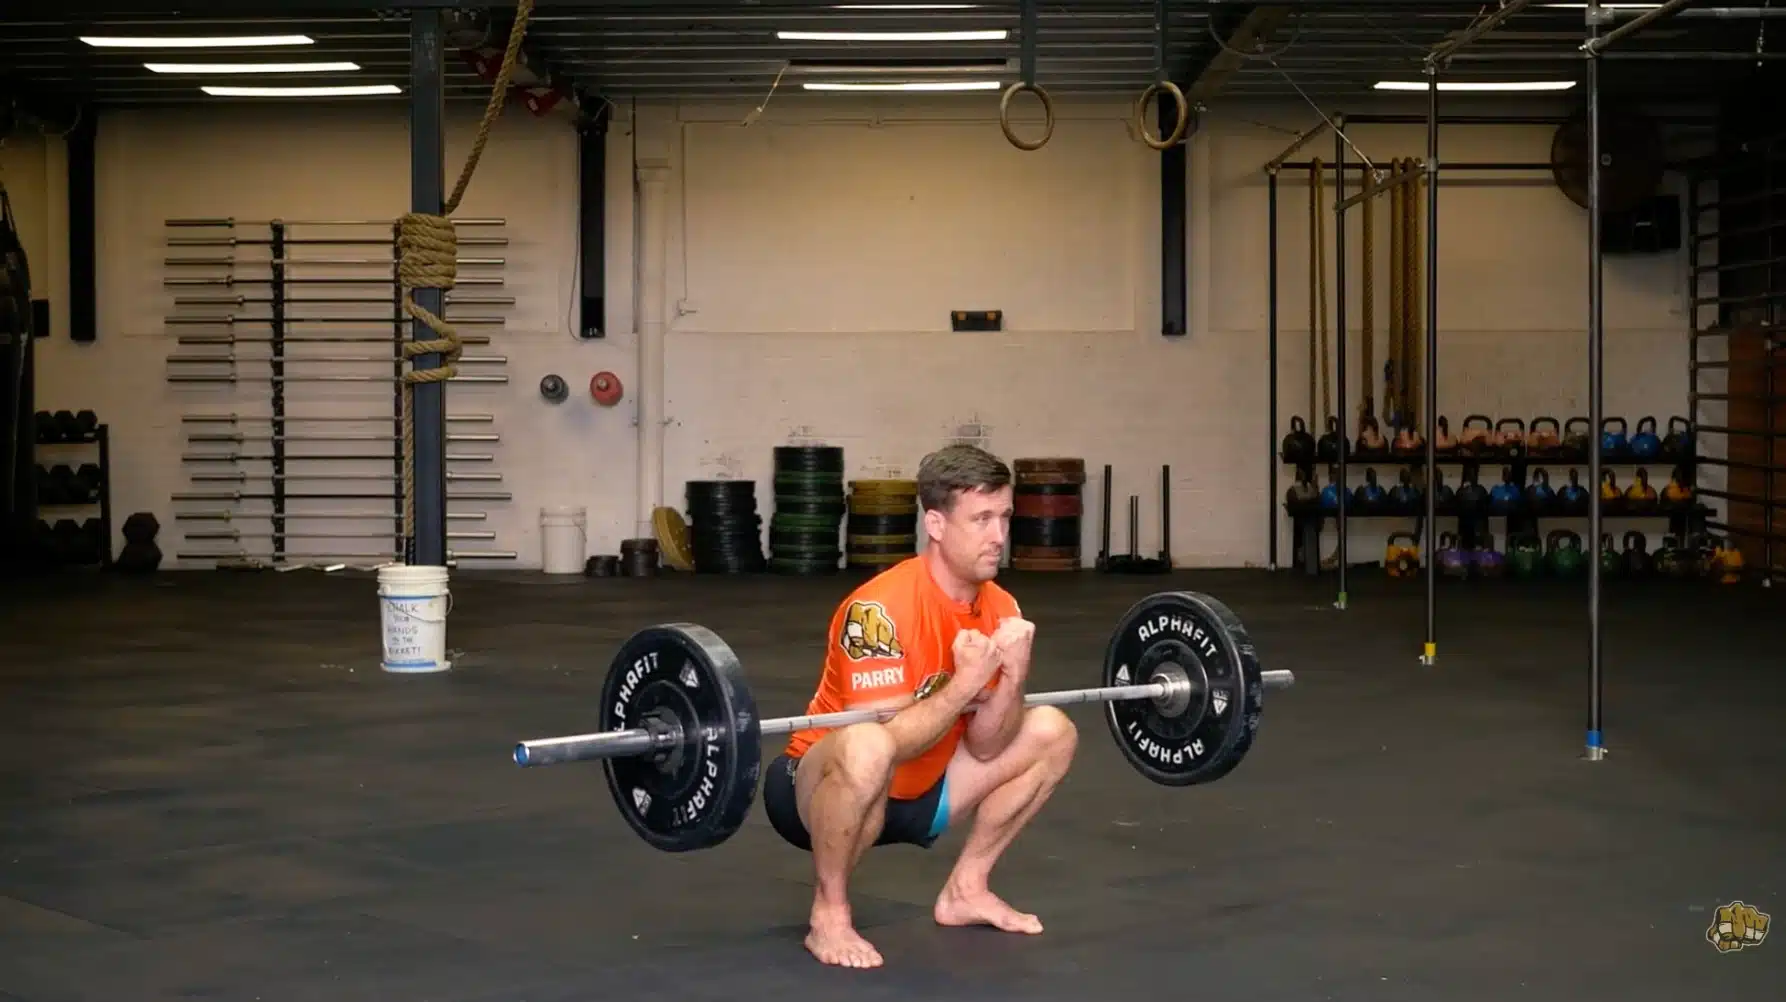
Descending with control is crucial to avoid injury and maintain form. Here’s how to lower yourself safely:
- Bend knees and push hips back
- Keep chest lifted and spine neutral
- Lower until elbows touch thighs
- Ensure knees track over toes
Control your descent to maintain tension and proper form. A controlled lower position helps strengthen muscles and joints.
Step 5: Drive Up to the Starting Position
The hardest part is pushing back up. Focus on using your whole body to complete the lift:
- Push through your heels to reverse the movement
- Keep your chest up and hips in line with your shoulders
- Squeeze glutes hard at the top
Stay strong as you rise. A steady drive ensures full extension and maintains your form throughout the rep.
For more details on the Zercher Squat, refer to the video below:
Muscles Worked in the Zercher Squat
Understanding which muscles handle the workload helps you focus on proper activation during each set.
Primary Muscles
Your quadriceps do the heavy lifting on the way up from the bottom position, with these four muscles on the front of your thigh extending your knee joint to generate standing power.
Your glutes drive hip extension, especially when you squeeze at the top of each rep, with the gluteus maximus activating strongly as you rise.
Your entire core, including your rectus abdominis, obliques, and transverse abdominis, works constantly to stabilize your spine against the forward pull of the weight, building serious trunk strength.
Secondary Muscles
Your upper back muscles, particularly the rhomboids and trapezius, prevent your shoulders from collapsing forward under the load through isometric contraction. Your biceps and forearms engage to hold the bar in position throughout the set, though you’re not actively curling the weight.
The erector spinae muscles along your spine help maintain your upright posture, while your hamstrings provide assistance during the ascent. Even your calves contribute to stability, especially when you squat deep with your knees traveling forward over your toes.
Variations of the Zercher Squat
Once you’re comfortable with the basic movement, these options let you switch things up and work on specific areas:
| Variation | How to Perform | Key Benefits |
| Zercher Squat from the Floor | Start with a bar on the ground, position the elbows, stand, then squat | Builds pulling strength, works the posterior chain, no rack needed |
| Zercher Split Squat | Staggered stance, lower until the back knee nearly touches the ground | Single-leg strength fixes imbalances and improves balance |
| Zercher Squat Holds | Lower into a squat and pause for 20-60 seconds | Builds endurance, strengthens bottom position, improves mobility |
I’ve found these variations keep training interesting while addressing weaknesses you might not hit with the standard version.
Common Mistakes to Avoid in the Zercher Squat
Recognizing these errors early helps you maintain safe form and get better results without setbacks:
- Letting Your Back Round: Rounding your back stresses spinal discs and raises injury risk; keep your chest up, lower the weight if needed, and brace your core to stay neutral
- Elbows Slipping: When your elbows drift from your ribs, the bar gets unstable; actively pull them tight to your sides, add bar padding if needed, and maintain constant arm tension
- Shallow Squats: Stopping too early limits benefits and glute work; improve your ankle and hip mobility, test depth with bodyweight first, and focus on quality over load
Fix these mistakes before they become ingrained habits that limit your progress and increase your risk of injury.
Final Thoughts
The Zercher squat is a practical way to build lower-body strength while developing your core and mobility. You’ve learned the proper setup, execution technique, and common mistakes to avoid.
These instructions give you a clear roadmap if you’re trying this for the first time or refining your form. Start with lighter weights to nail the movement pattern before loading heavier.
The variations offer options for continuing to progress once you’ve mastered the basics.
Pay attention to how your body responds, and adjust accordingly based on how you feel. Give the Zercher squat a few weeks in your routine and see how it improves your strength and stability. Drop a comment below with your experience or questions.