
I’ll admit, when I first heard about aerial yoga, I was skeptical. Hanging upside down in fabric while trying to find inner peace? It sounded more like circus training than mindful movement.
But after my first class, I understood why this practice has taken the wellness world by storm.
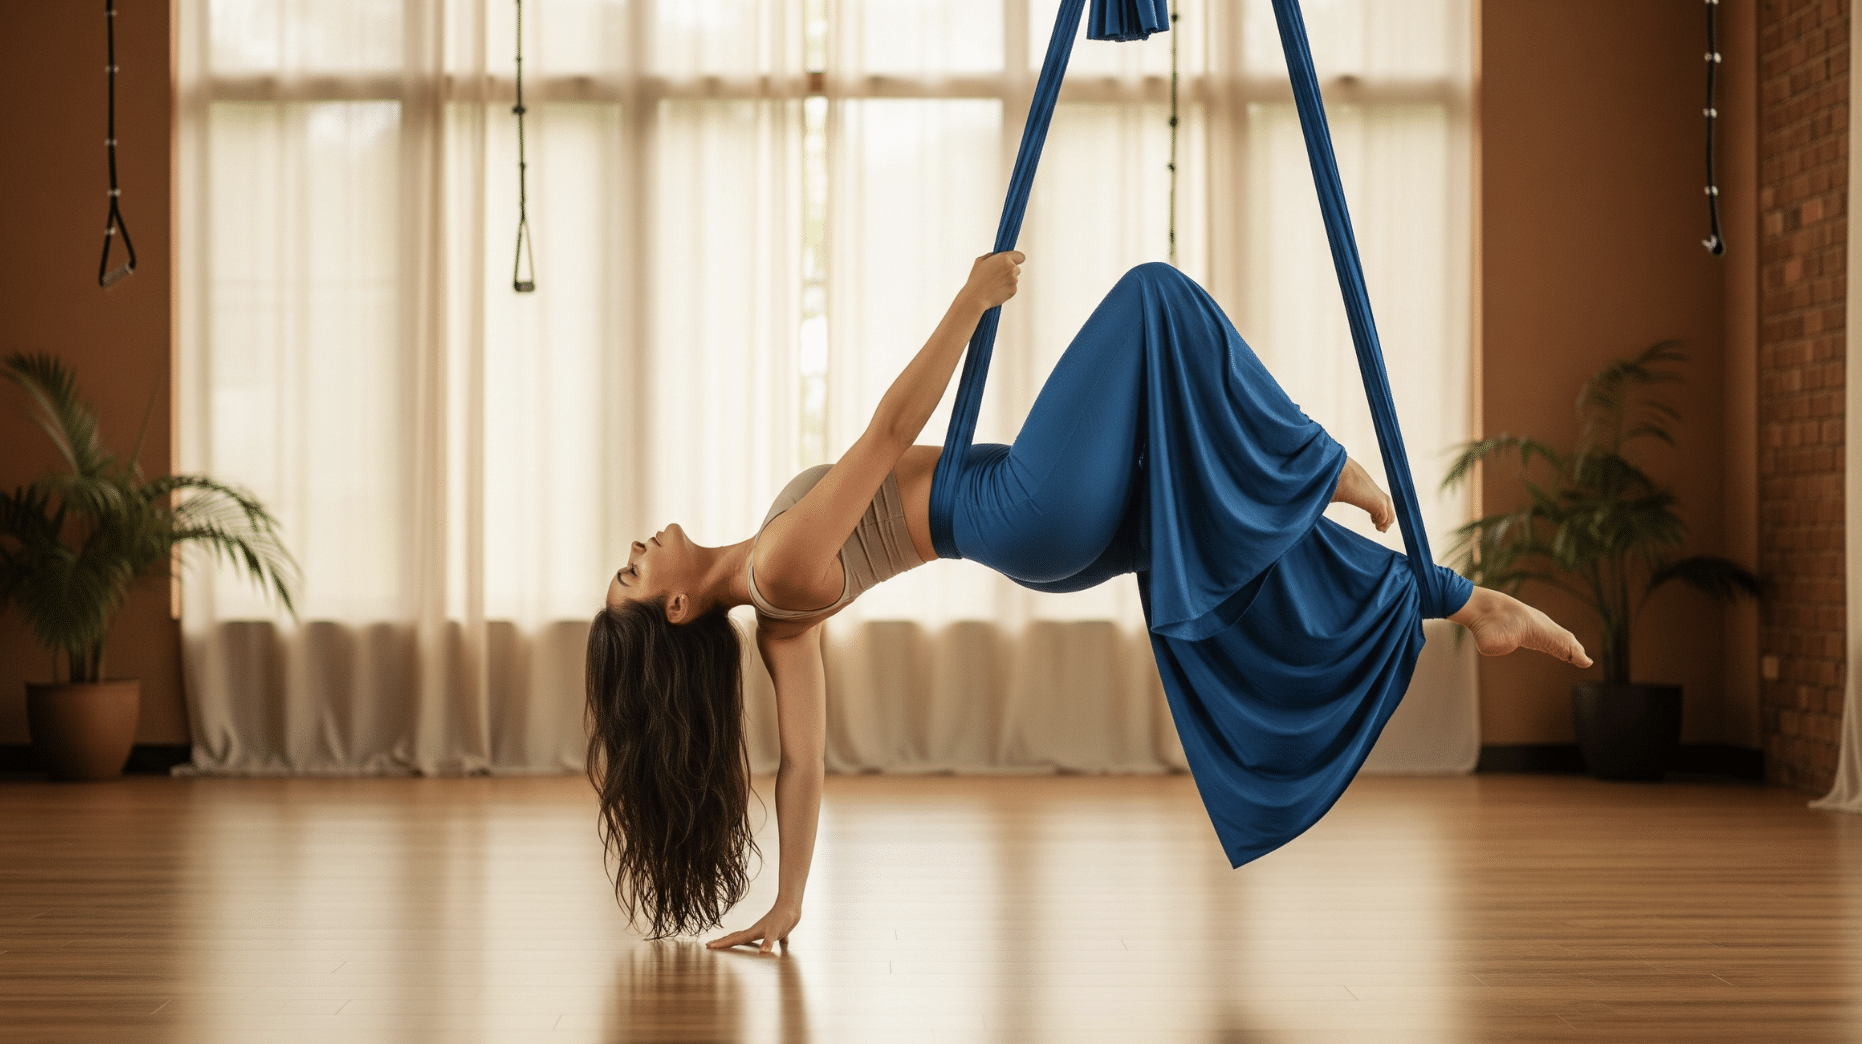
The silk hammocks cradle your body as you flow through poses, creating this sensation of weightlessness that turns traditional stretches into something almost magical: part workout, part meditation, and part pure joy.
Studios everywhere are adding aerial classes to their schedules, and social media is flooded with graceful practitioners floating through their flows.
If you’re curious about whether this gravity-defying practice is right for you, I’m breaking down everything you need to know about getting started and what to expect from your first session.
What is Aerial Yoga?
Aerial yoga traces back to Christopher Harrison, a former gymnast and Broadway choreographer who developed what he called “AntiGravity Yoga” in the early 2000s.
He basically asked: What if we could use hammocks to make yoga more accessible and fun?
The setup is surprisingly simple: silk fabric hammocks are anchored to the ceiling at a single or double point, creating a supportive swing that can hold several hundred pounds.
Unlike traditional yoga, where you’re grounded on your mat, air yoga lets the fabric support your body weight, making inversions feel effortless and allowing deeper stretches without strain.
You’ll also hear it called flying yoga, aerial hammock, or anti-gravity yoga, though they’re essentially variations on the same theme. The hammock becomes your yoga prop, teacher, and safety net all rolled into one flowing piece of fabric.
Physical and Mental Benefits of Aerial Yoga

The beauty of aerial yoga lies in how it works your body and mind simultaneously.
While the hammock supports you through challenging poses, you’re building strength, flexibility, and mental resilience in ways that ground-based yoga simply can’t match.
1. Improved Flexibility and Spinal Health
The hammock’s support allows for deeper stretches while the gentle traction helps decompress your spine, relieving pressure on joints and vertebrae.
According to research published in BMC Musculoskeletal Disorders, spinal decompression can significantly alleviate back pain and improve posture.
The inverted positions encourage blood flow and lymphatic drainage, promoting healing and reducing inflammation throughout your body.
Try this: Supported backbend in the hammock; hold for 30-60 seconds, repeat 3-5 times with deep breathing.
2. Core and Full-Body Strength
Aerial yoga engages your core constantly as you work to stabilize yourself in the fabric.
Research published in PMC shows that unstable surface training challenges your deep stabilizing muscles, building functional strength throughout your entire body.
Your upper body gets particularly worked as you pull yourself through transitions and hold suspended poses.
Try this: Aerial crunches; perform 10-15 repetitions, focusing on controlled movement and engaging your deep abdominals.
3. Better Balance and Body Awareness
The constantly shifting hammock forces your proprioceptive system into overdrive, dramatically improving your balance and spatial awareness.
This heightened body awareness translates to better coordination and reduced fall risk in daily activities. The challenge of maintaining poses while suspended develops both physical and mental stability.
Try this: Single-leg balances while lightly holding the hammock; hold each leg for 15-30 seconds, repeat 2-3 times per side.
4. Stress Relief and Mental Clarity
The gentle swaying motion and supported inversions activate your parasympathetic nervous system, naturally reducing stress hormones like cortisol.
Research from Harvard Health Publishing shows that exercise reduces stress hormones and stimulates endorphin production, creating natural mood enhancement and relaxation. The sensation of floating can be deeply calming and restorative.
Try this: Supported child’s pose in hammock; rest for 2-3 minutes, focusing on deep, rhythmic breathing.
5. Confidence and Fear Resilience
Learning to trust the hammock and embrace inversions builds tremendous confidence that extends beyond the studio.
Overcoming the initial fear of being suspended teaches you to move through discomfort and trust your abilities. This mental resilience often translates to greater confidence in other challenging life situations.
Try this: Gradual inversion progression; start with feet on ground, then lift one foot, then both, holding for 10-30 seconds as comfort increases.
Who Should / Shouldn’t Try Aerial Yoga?
Aerial yoga welcomes practitioners of all levels, but like any physical activity, it’s not suitable for everyone.
Understanding who benefits most and when to proceed with caution helps ensure a safe and enjoyable experience.
| Good Candidates | Should Avoid | Consult Doctor First |
|---|---|---|
| All Fitness Levels (Beginners Welcome) |
Pregnancy (Inversions risky after 1st trimester) |
Minor Back/Joint Issues |
| Back Pain Sufferers (Decompression Benefits) |
High Blood Pressure Inversions cause spikes |
Mild Heart Conditions |
| Joint Stiffness (Supported Stretching Helps) |
Vertigo/Ear Problems (Movement Triggers Symptoms) |
Previous Surgeries (6+ months old) |
| Low-Impact Seekers Gentle on Joints |
Recent Surgeries (Especially Spine/Abdomen) |
Anxiety About Heights |
| Flexibility Goals (Gravity Assists Stretches) |
Severe Neck/Shoulder Injuries (Weight-bearing Worsens) |
Osteoporosis (Mild Cases) |
| Yoga Experience Helpful (Not Necessary) |
Active Hernias (Pressure Increases Risk) |
Glaucoma (Inversion Concerns) |
Risk Mitigation Tips: Always inform your instructor about health conditions, start slowly with basic poses, ensure proper equipment inspection, and listen to your body’s signals throughout practice.
What to Expect in an Aerial Yoga Class?

A typical aerial yoga class begins with a gentle warm-up to prepare your body. You’ll then move into basic poses supported by the hammock, followed by traditional standing or floor poses to complement the aerial work.
Classes often include flowing sequences and optional inversions, depending on your comfort and skill level. The session usually ends with a cool-down and deep relaxation or savasana in the hammock for a calming finish.
Studios provide hammocks and mats, while participants should wear loose, comfortable clothing, and may bring grip gloves or anti-slip socks.
Classes vary in style, ranging from restorative and gentle to strength-building, flow-based, or advanced acrobatic sessions, catering to all levels and interests.
Learning Through Online Aerial Yoga Tutorials
While nothing replaces in-person instruction, online tutorials can be valuable supplements to your aerial yoga experience. They offer flexibility and the chance to practice familiar sequences at your own pace.
Benefits and What to Look For
Online tutorials let you practice on your schedule rather than fixed class times, and you can replay difficult transitions like cocoon entries or inversion exits multiple times.
At $20-30 per studio class, videos become cost-effective supplements, especially for mastering sequences between sessions.
Without keeping up with others, you can spend extra time on proper hammock positioning or breathing techniques that might feel rushed in group settings.
Essential Video Features:
- Safety Warnings: Clear contraindications and injury prevention
- Rigging Guidance: Proper hammock setup and anchor point safety
- Progressive Instruction: Step-by-step breakdowns with modifications
- Clear Verbal Cues: Detailed alignment and breathing instructions
- Equipment Specifications: Hammock type, ceiling height requirements
Recommended Video Tutorials
Here are quality online resources from certified aerial yoga instructors:
- Uplift Active – Aerial Yoga Basics: Over 20 free tutorials covering basics to advanced
- CamiyogAIR: Certified instructor with full-length classes and trick tutorials
- Aerial Yoga Girl TV: Over 400 tutorial videos for students and teachers
- SiRA Aerial Yoga: Step-by-step tutorials from certified instructor Lena Shur
- AIReal Yoga: Yoga Alliance-recognized content from master teacher Carmen Curtis
Important Note: Online tutorials should supplement, not replace, proper in-person instruction. Always prioritize safety and consider professional guidance for setup and advanced poses.
Joining Aerial Yoga Studio Classes
Studio classes offer the gold standard of aerial yoga instruction with professional oversight, proper equipment, and community connection. They provide the safest environment to learn this practice while building meaningful connections with fellow practitioners.
Benefits and What to Expect
Professional instructors provide real-time adjustments and spot safety issues that videos can’t catch. Studios use certified rigging systems with proper weight ratings; no guessing about anchor points.
The community creates accountability and motivation, while most studios maintain ideal temperatures, provide sanitized hammocks, and follow structured progressions from beginner foundations to advanced sequences.
Cost Range: Classes typically cost $20-35 per session, with package deals offering better value. Monthly unlimited memberships ($120-180) suit regular practitioners, while newcomer specials (4 classes for $100) let you locate affordably.
Top Studio Locations
United States:
- Om Factory (New York) – Union Square, circus integration
- Flying Buddha Studio (Maryland) – Teacher training programs
- The Aerial House (Los Angeles) – Beginner-friendly atmosphere
International:
- Repose Space (London) – Luxury Kensington studio with biohacking amenities
- Lab Studios (Singapore) – Multiple locations, from $21/class
- The Yoga Barn (Bali) – Retreat setting with training courses
Important Note: Always verify instructor certifications and studio insurance. Quality studios prioritize safety over flashy moves and maintain open communication about your comfort level throughout practice.
Online vs. Studio: A Direct Comparison
Choosing between online tutorials and studio classes depends on your priorities, experience level, and budget. Here’s a straightforward breakdown to help you decide which option aligns best.
| Factor | Online Tutorials | Studio Classes |
|---|---|---|
| Convenience | Practice anytime, replay sequences, no travel time | Fixed schedules, commute required, limited class times |
| Safety | No real-time correction, self-assessment of form | Professional supervision, immediate adjustments, emergency support |
| Cost | Low ongoing cost ($10-50/month), high equipment investment ($200-500) | Higher per-class cost ($20-35), no equipment needed |
| Learning Curve | Self-paced, can repeat difficult sections | Structured progression, peer learning, instructor guidance |
| Equipment | Must purchase hammock, rigging, and mats | All equipment is provided and maintained |
Experience Level Recommendations: Beginners need studio classes for safety and proper foundations, while experienced practitioners can effectively blend online tutorials with studio sessions for skill development.
Common Myths & Misconceptions Debunked
Many people hesitate to try aerial yoga due to misunderstandings. Clarifying these myths helps show that the practice is accessible, safe, and enjoyable for all.
- You Need to Be Super Flexible to Start: Aerial yoga is for all levels. Flexibility builds naturally over time with gentle, supported poses.
-
You’ll Injure Your Neck or Spine if You Invert: With proper instruction and safe rigging, inversions are not only safe but can also support spinal health.
-
You’ll Look Silly or Not Be Able to Do Anything: Classes are designed for all abilities, offering modifications so everyone can join in confidently.
-
Aerial Yoga is the Same as Circus Silks or Acrobatics: Aerial yoga mixes yoga and fitness with a focus on health and mindfulness, while circus arts focus on performance.
Sample Beginner Aerial Yoga Poses
Beginner aerial yoga poses focus on gentle, supported movements to help develop strength, balance, and comfort in the hammock. These poses encourage body awareness while minimizing strain.
Over a few classes, gradually increasing duration and confidence in these foundational postures helps build a strong base for exploring more advanced aerial flows.
1. Airplane Pose

This pose involves standing in the hammock with it supporting your pelvis. You lean forward slightly, extending one leg back and the opposite arm forward, engaging your core and improving balance.
Level: Beginner
Time: Hold 5 breaths per side
2. Supported Downward-Facing Dog

With a foot cradled by the hammock, you lift your other leg behind, mimicking a downward dog pose but with added support. This pose stretches the shoulders, spine, and hamstrings while decompressing the back safely.
The hammock reduces pressure on joints and helps maintain proper alignment, making it accessible to new practitioners aiming to relax yet strengthen.
Level: Beginner
Time: Hold 30 seconds
3. Floating Pigeon Pose

Seated in the hammock, one ankle crosses over the opposite knee, creating a figure-four shape. The hammock supports the hip and knee, allowing a gentle hip opener that relieves tension without deep strain.
Leaning forward slightly intensifies the stretch in the outer thigh safely. This pose helps ease tight hips, which is common among beginners and those sitting for long periods.
Level: Beginner
Time: Hold 5 breaths per side
Starting with these simple poses and gradually building endurance offers a strong foundation for confident aerial yoga practice.
Wrapping It Up
I’ve shared everything from the benefits to finding studios, and honestly, aerial yoga might be the missing piece in your fitness routine.
This practice helps with spine decompression, builds core strength, and melts away stress while giving you that floating sensation.
My advice? Start with a studio class to learn safely, then supplement with online tutorials once you know the basics. The combination of physical challenge and mental calm makes aerial yoga pretty unique.
What draws you to aerial yoga: the fitness benefits or just the fun factor? Drop a comment and let me know what you’re most curious about!