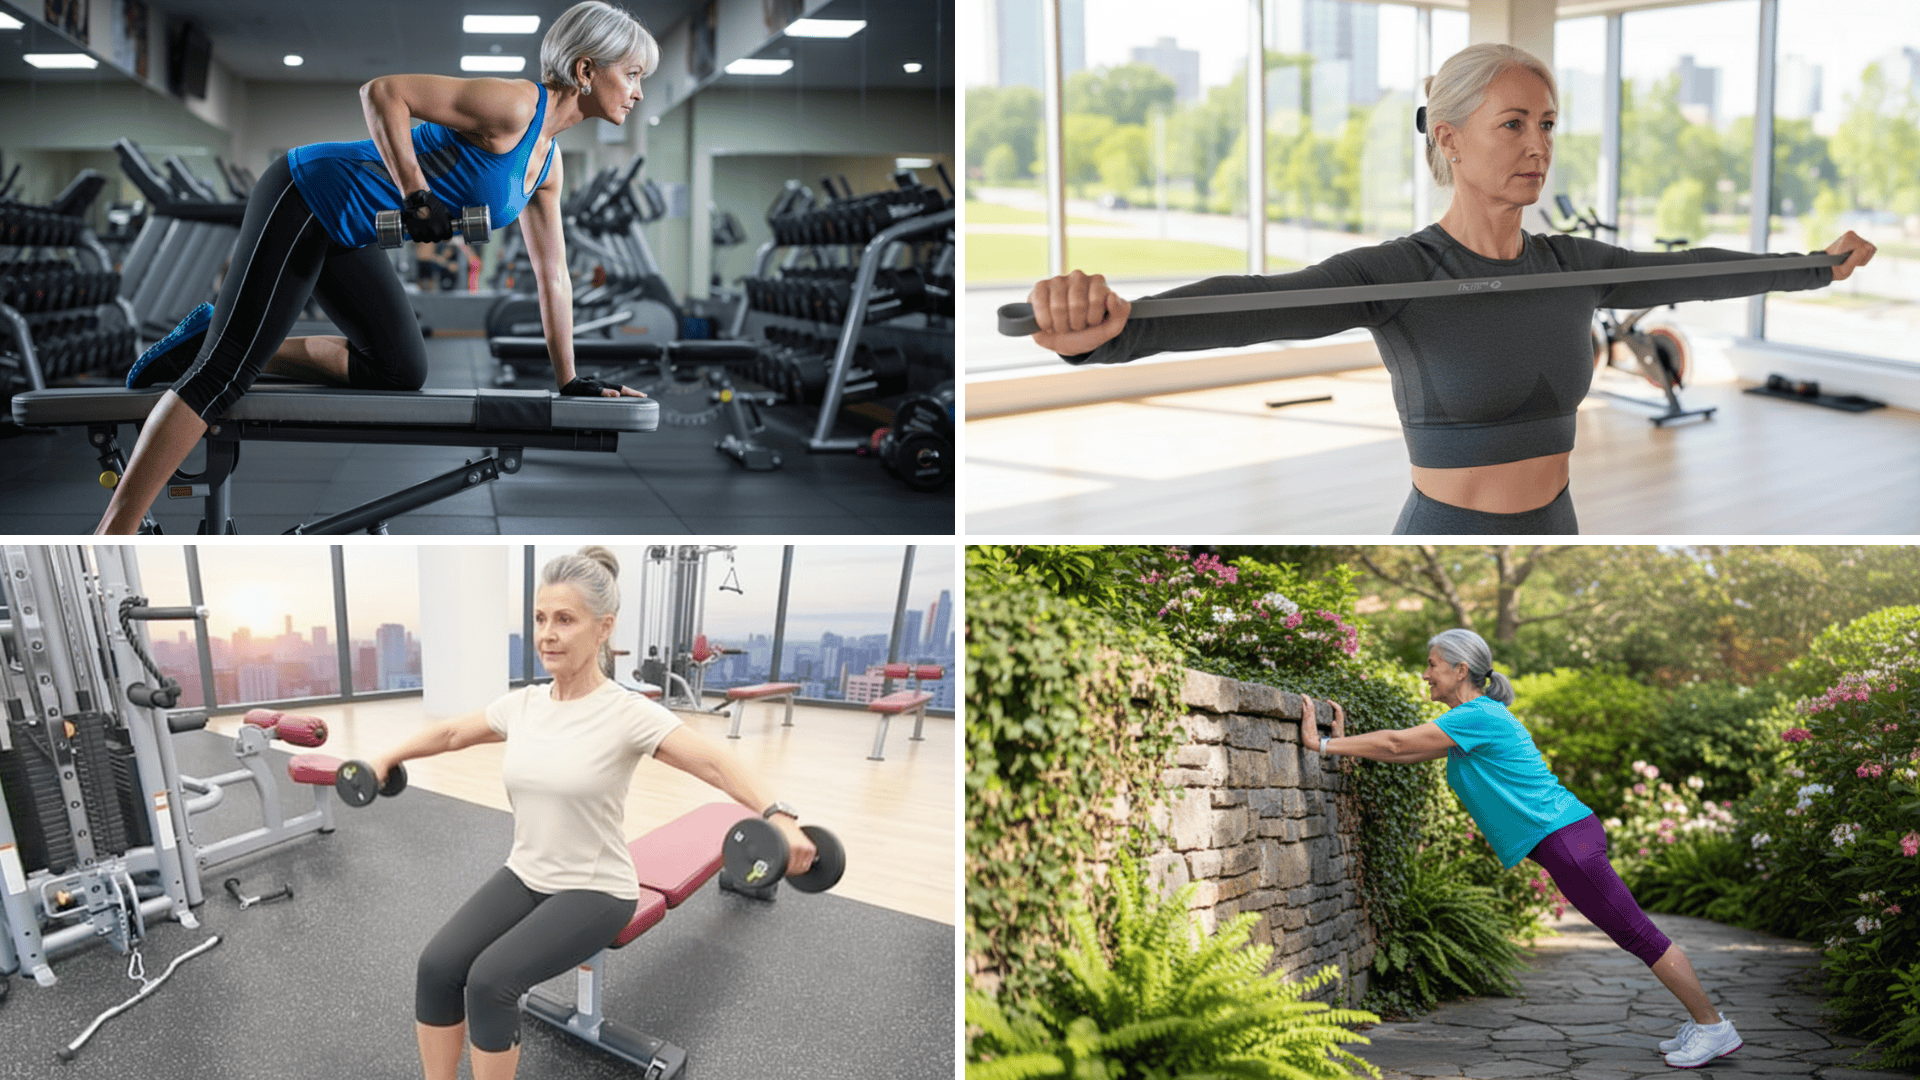
Have you ever noticed how your arms seem to have developed a mind of their own as the years have passed? I know I’ve heard from so many people who feel self-conscious about that extra softness that appears seemingly overnight.
Here’s what’s really happening: as we age, we naturally lose muscle mass while our skin becomes less elastic, creating that arm flabbiness that makes us want to keep our sleeves down.
But here’s the truth I want you to know: it’s not too late to make a real difference! Even if you’re well into your sixties or beyond, strength training combined with toning exercises can improve both the firmness and appearance of your arms.
I’m going to walk you through some exercises that work well for our bodies at this stage of life, complete with video demonstrations to guide you through each movement.
Why Arms Become Flabby After 60?
I remember rolling up my sleeves one day and thinking, “When did this happen?”
What I was seeing is something called sarcopenia; our bodies naturally start losing muscle mass after thirty, and it accelerates after sixty. Add reduced daily activity and a slower metabolism, and those arm muscles simply aren’t getting the work they once did.
For women, menopause brings another challenge. Declining estrogen levels make it even harder to maintain muscle tone.
But here’s what I’ve learned, and what I want you to know: resistance training isn’t just helpful at our age, it’s essential. Our muscles are incredibly responsive, even now, and they’re just waiting for the right kind of encouragement to bounce back.
Safety First: Exercise Tips for Seniors
Before we jump into the exercises, let’s talk about keeping you safe and comfortable throughout your workout:
- Always warm up with gentle arm circles and light stretching before starting.
- Begin with light weights or even water bottles; you can always progress later.
- Keep your shoulders back and core engaged for proper posture.
- Stop immediately if you feel pain; discomfort is normal, sharp pain is not.
- Cool down with slow stretches to help your muscles recover.
Remember, the goal is progress, not perfection. Your body will thank you for taking it slow and steady.
Best Arm-Toning Exercises for Seniors
Here are some arm-toning exercises that you can easily try at home:
1. Arm Circles
Arm circles are the perfect gentle warm-up to get your blood flowing and joints moving. This simple movement prepares your shoulders and arms for the workout ahead.
- Step 1: Stand tall with feet hip-width apart and extend both arms out to your sides at shoulder height.
- Step 2: Make small circles forward with your arms, keeping the movement controlled and smooth.
- Step 3: After 10 circles, reverse direction and make small circles backward.
- Step 4: Gradually increase the circle size for the last few repetitions in each direction.
Start with 10 circles in each direction and work up to 15 as you get comfortable. If shoulder mobility is limited, make smaller circles or do one arm at a time.
2. Bicep Curls
This classic exercise targets the front of your arms and is perfect for building strength you’ll use in daily activities like lifting groceries. Start light and focus on controlled movements.
- Step 1: Stand with feet hip-width apart, holding weights at your sides with palms facing forward.
- Step 2: Keep your elbows close to your body and slowly curl the weights up toward your shoulders.
- Step 3: Squeeze your biceps at the top, then slowly lower the weights back to starting position.
- Step 4: Maintain good posture throughout, avoiding swinging or using momentum.
Aim for 2 sets of 8-12 repetitions with light weights or water bottles. If standing is challenging, perform this exercise seated in a sturdy chair.
3. Tricep Extensions
This exercise strengthens the back of your arms, helping with everyday tasks like reaching overhead or pushing yourself up from a chair. Take your time with this movement.
- Step 1: Hold one weight with both hands and extend your arms straight up overhead.
- Step 2: Keep your upper arms still and slowly lower the weight behind your head by bending your elbows.
- Step 3: Lower until you feel a gentle stretch in your triceps, then press the weight back up.
- Step 4: Keep your core engaged and avoid arching your back throughout the movement.
Start with 2 sets of 6-10 repetitions using a light weight. You can also perform this seated for better stability and back support.
4. Seated Lateral Raises
Perfect for strengthening your shoulders while providing the stability of sitting, this exercise helps improve your ability to reach sideways and lift items to shoulder height.
- Step 1: Sit tall in a chair with feet flat on floor, holding light weights at your sides.
- Step 2: Keep a slight bend in your elbows and slowly raise your arms out to the sides.
- Step 3: Lift until your arms are parallel to the floor, creating a “T” shape with your body.
- Step 4: Hold briefly at the top, then slowly lower your arms back to starting position.
Begin with 2 sets of 8-10 repetitions using very light weights. If you experience shoulder discomfort, reduce the range of motion or use no weights at all.
5. Wall Push-Ups
A gentle introduction to push-up movements, this exercise strengthens your chest, shoulders, and triceps without the challenge of getting down on the floor.
- Step 1: Stand arm’s length from a wall with feet hip-width apart and palms flat against the wall at shoulder height.
- Step 2: Keep your body straight and slowly lean toward the wall by bending your elbows.
- Step 3: Push back to starting position by straightening your arms, keeping your core engaged.
- Step 4: Maintain a straight line from head to heels throughout the entire movement.
Start with 2 sets of 5-8 repetitions, focusing on form over speed. To make it easier, stand closer to the wall; to increase difficulty, step further back.
6. Tricep Kickbacks
This exercise specifically targets the tricep muscles and helps tone the back of your arms. The bent-over position also engages your core for added stability.
- Step 1: Hold light weights and hinge forward at your hips with knees slightly bent.
- Step 2: Keep your upper arms parallel to the floor and elbows bent at 90 degrees.
- Step 3: Straighten your arms behind you by extending at the elbows, squeezing your triceps.
- Step 4: Slowly return to the bent-elbow position with control.
Perform 2 sets of 8-12 repetitions with light weights. If balance is an issue, place one hand on a chair for support while working one arm at a time.
7. Front Shoulder Raises
This movement strengthens the front of your shoulders and improves your ability to lift items in front of you, like placing dishes in upper cabinets.
- Step 1: Stand with feet hip-width apart, holding weights at your sides with palms facing your body.
- Step 2: Keep a slight bend in your elbows and slowly raise one or both arms straight out in front.
- Step 3: Lift until your arms are parallel to the floor, then hold briefly.
- Step 4: Lower your arms slowly and with control back to starting position.
Begin with 2 sets of 8-10 repetitions using light weights. You can alternate arms or do both simultaneously, whichever feels more comfortable and controlled.
8. Resistance Band Pull-Aparts
This exercise strengthens your upper back and rear shoulders while improving posture. Resistance bands provide gentle, adjustable resistance that’s perfect for seniors.
- Step 1: Hold a resistance band with both hands at chest level, arms extended in front of you.
- Step 2: Keep your arms straight and pull the band apart by squeezing your shoulder blades together.
- Step 3: Stretch the band until your arms form a “T” shape, feeling the work in your upper back.
- Step 4: Slowly return to starting position with control, maintaining tension in the band.
Start with 2 sets of 10-15 repetitions using light resistance. Choose a band that allows you to complete all reps with good form while still feeling challenged.
9. Chair Dips
This exercise effectively targets your triceps using just a sturdy chair, helping build the strength needed for getting up from seated positions.
- Step 1: Sit on the edge of a sturdy chair with hands gripping the seat beside your hips.
- Step 2: Slide your bottom off the chair while keeping your hands on the seat for support.
- Step 3: Lower your body by bending your elbows until they reach about 90 degrees.
- Step 4: Push back up to starting position by straightening your arms, using your triceps.
Begin with 2 sets of 3-6 repetitions, focusing on control rather than speed. Keep your feet close to the chair to make it easier, or extend them further out to increase difficulty.
10. Hammer Curls
Similar to bicep curls but with a different grip, this variation works your biceps and forearms while being gentler on the wrists than traditional curls.
- Step 1: Stand with feet hip-width apart, holding weights at your sides with palms facing each other.
- Step 2: Keep your elbows close to your body and curl the weights up toward your shoulders.
- Step 3: Maintain the neutral grip throughout the movement, squeezing your biceps at the top.
- Step 4: Slowly lower the weights back to starting position with control.
Perform 2 sets of 8-12 repetitions with comfortable weights. This variation is often easier on the wrists and can be done seated if balance is a concern.
11. Overhead Punches (Low-Impact Cardio)
This fun, rhythmic movement gets your heart rate up while working your shoulders and arms. It’s a great way to add some cardio to your strength routine.
- Step 1: Stand with feet hip-width apart and fists at shoulder level, elbows bent.
- Step 2: Alternately punch one arm straight up overhead while keeping the other at shoulder level.
- Step 3: Keep the movement controlled and rhythmic, engaging your core with each punch.
- Step 4: Continue alternating arms at a comfortable pace that allows you to maintain good form.
Start with 30-60 seconds of continuous punching and work up to 2 minutes. Move at your own pace and take breaks as needed; this should feel energizing, not exhausting.
Weekly Arm Toning Routine for Seniors
Creating a consistent routine is key to seeing real improvements in your arm strength and tone.
Here’s a simple weekly schedule that gives your muscles time to recover while building steady progress.
| Day | Exercises | Sets X Reps | Notes |
|---|---|---|---|
| Monday | Bicep Curls, Wall Push-Ups, Seated Lateral Raises | 2 x 8-12 | Start with light weights |
| Tuesday | Rest Day | – | Light stretching or walking |
| Wednesday | Tricep Extensions, Hammer Curls, Resistance Band Pull-Aparts | 2 x 8-12 | Focus on controlled movements |
| Thursday | Rest Day | – | Active recovery |
| Friday | Chair Dips, Front Shoulder Raises, Overhead Punches | 2 x 8-12 | End with 1 minute of cardio |
| Saturday | Rest Day | – | Optional gentle stretching |
| Sunday | Full Routine (Pick 4-5 favorite exercises) | 2 x 8-12 | Mix and match based on how you feel |
Remember to increase resistance or reps gradually; adding just one extra rep per week is perfect progress. Always listen to your body and take extra rest days when needed.
Lifestyle Tips to Reduce Flabbiness
Your exercise routine is just one piece of the puzzle; these simple lifestyle habits will amplify your results and help you feel stronger overall:
- Eat Protein at Every Meal: Aim for lean meats, eggs, beans, or Greek yogurt to help your muscles rebuild and stay strong.
- Drink Plenty of Water Throughout the Day: Proper hydration keeps your skin supple and supports muscle recovery.
- Stick to Your Exercise Schedule: Consistency beats intensity every time, so show up even if it’s just for 10 minutes.
- Add Gentle Cardio Like Walking or Swimming: This helps reduce overall body fat while being easy on your joints.
- Get Adequate Sleep Each Night: Your muscles repair and grow stronger while you rest.
Small changes in your daily habits create big differences over time. Focus on one tip at a time until it becomes second nature.
Final Thoughts
You now have these powerful tools to change those arms and boost your confidence.
Remember, every rep counts, and every day you show up matters. Your arms have carried you through life’s beautiful moments; now it’s time to make them strong again.
Start with just 3-4 exercises today. Be patient with yourself, celebrate small wins, and trust the process. In a few weeks, you’ll be shocked at what you can do.
Ready to begin your transition? Grab those light weights and try your first workout right now. Then come back and tell me how it went in the comments below.


