
I like to think of functional strength training as the kind of workout that pays off outside the gym.
When I started focusing on it, carrying bags, climbing stairs, and even bending to tie my shoes felt easier. If you’re tired of workouts that don’t seem to help in real life, this style will change that for you, too.
In this blog, I’ll show you what functional strength training is, what to expect in your sessions, the core patterns you’ll practice, and the real benefits you’ll notice every day.
By the end, you’ll see why this approach makes your body stronger for the life you actually live.
What is Functional Strength Training and What to Expect
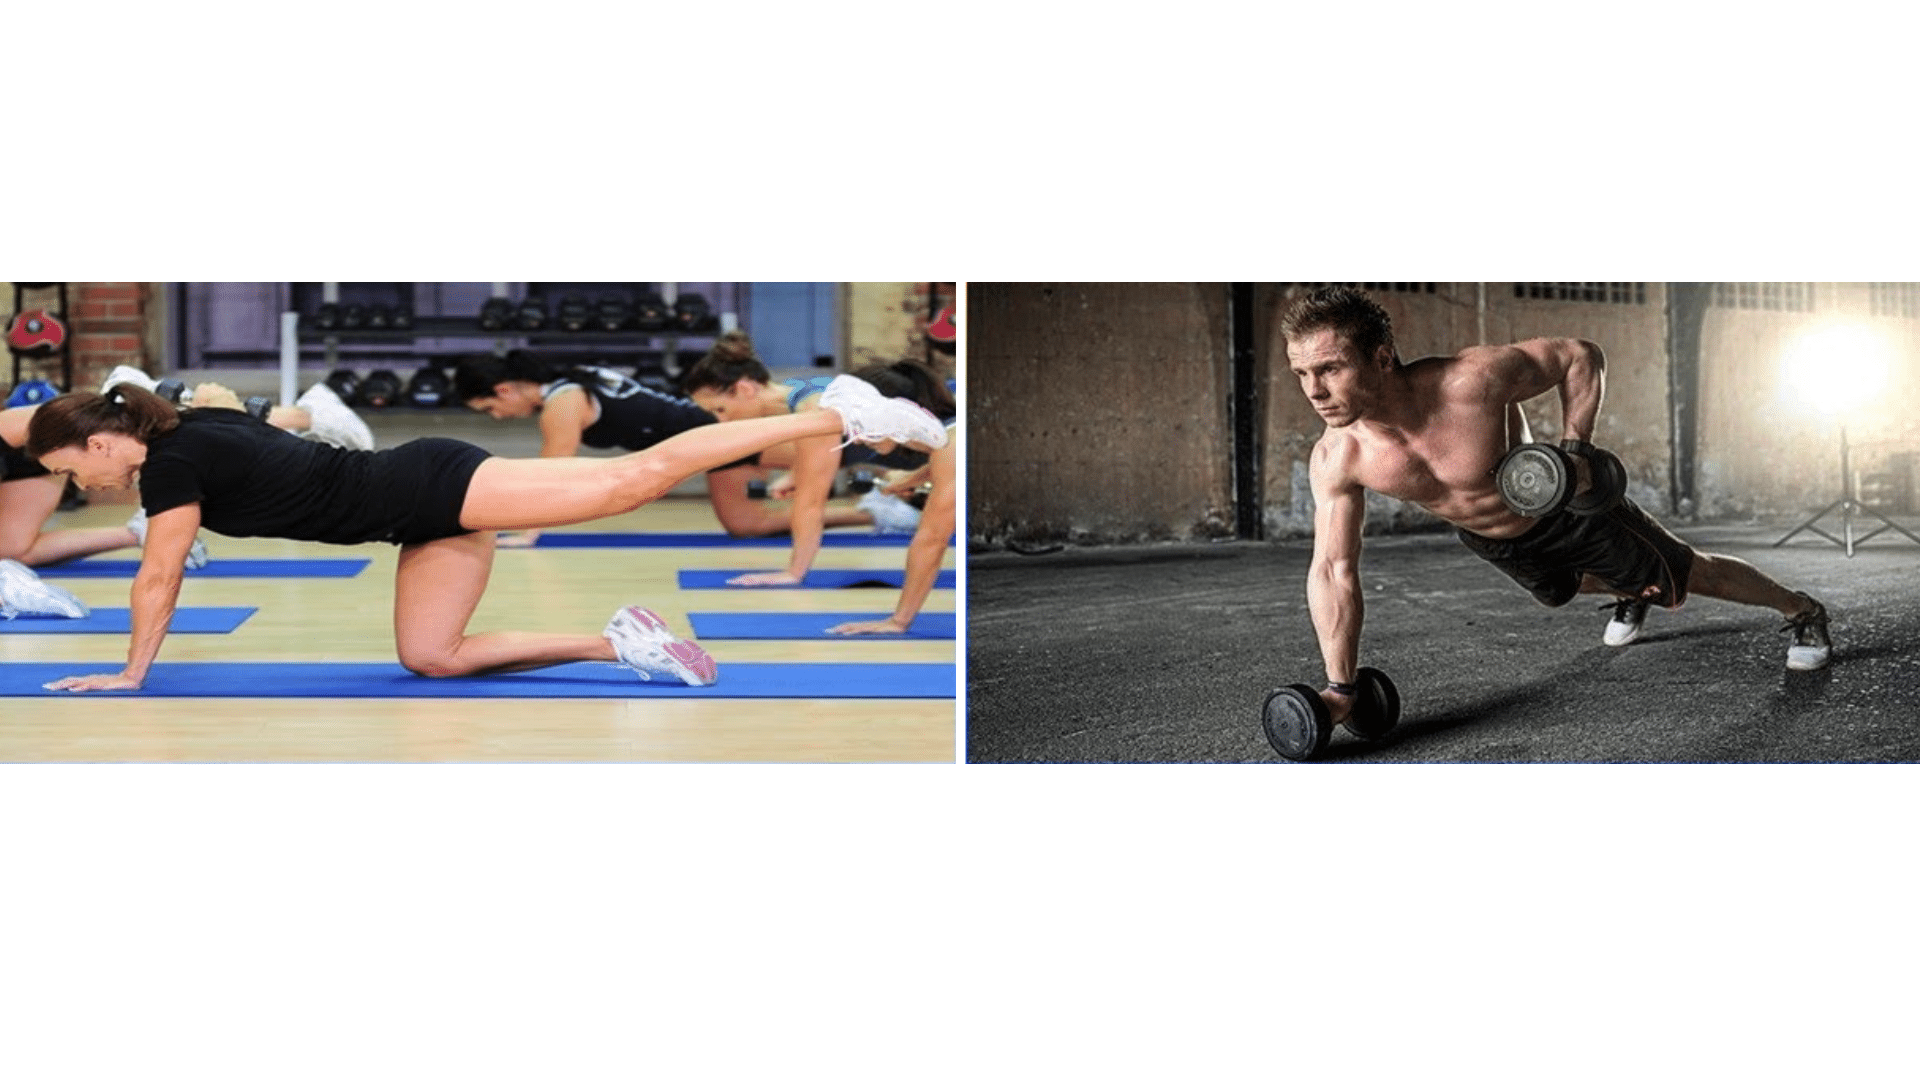
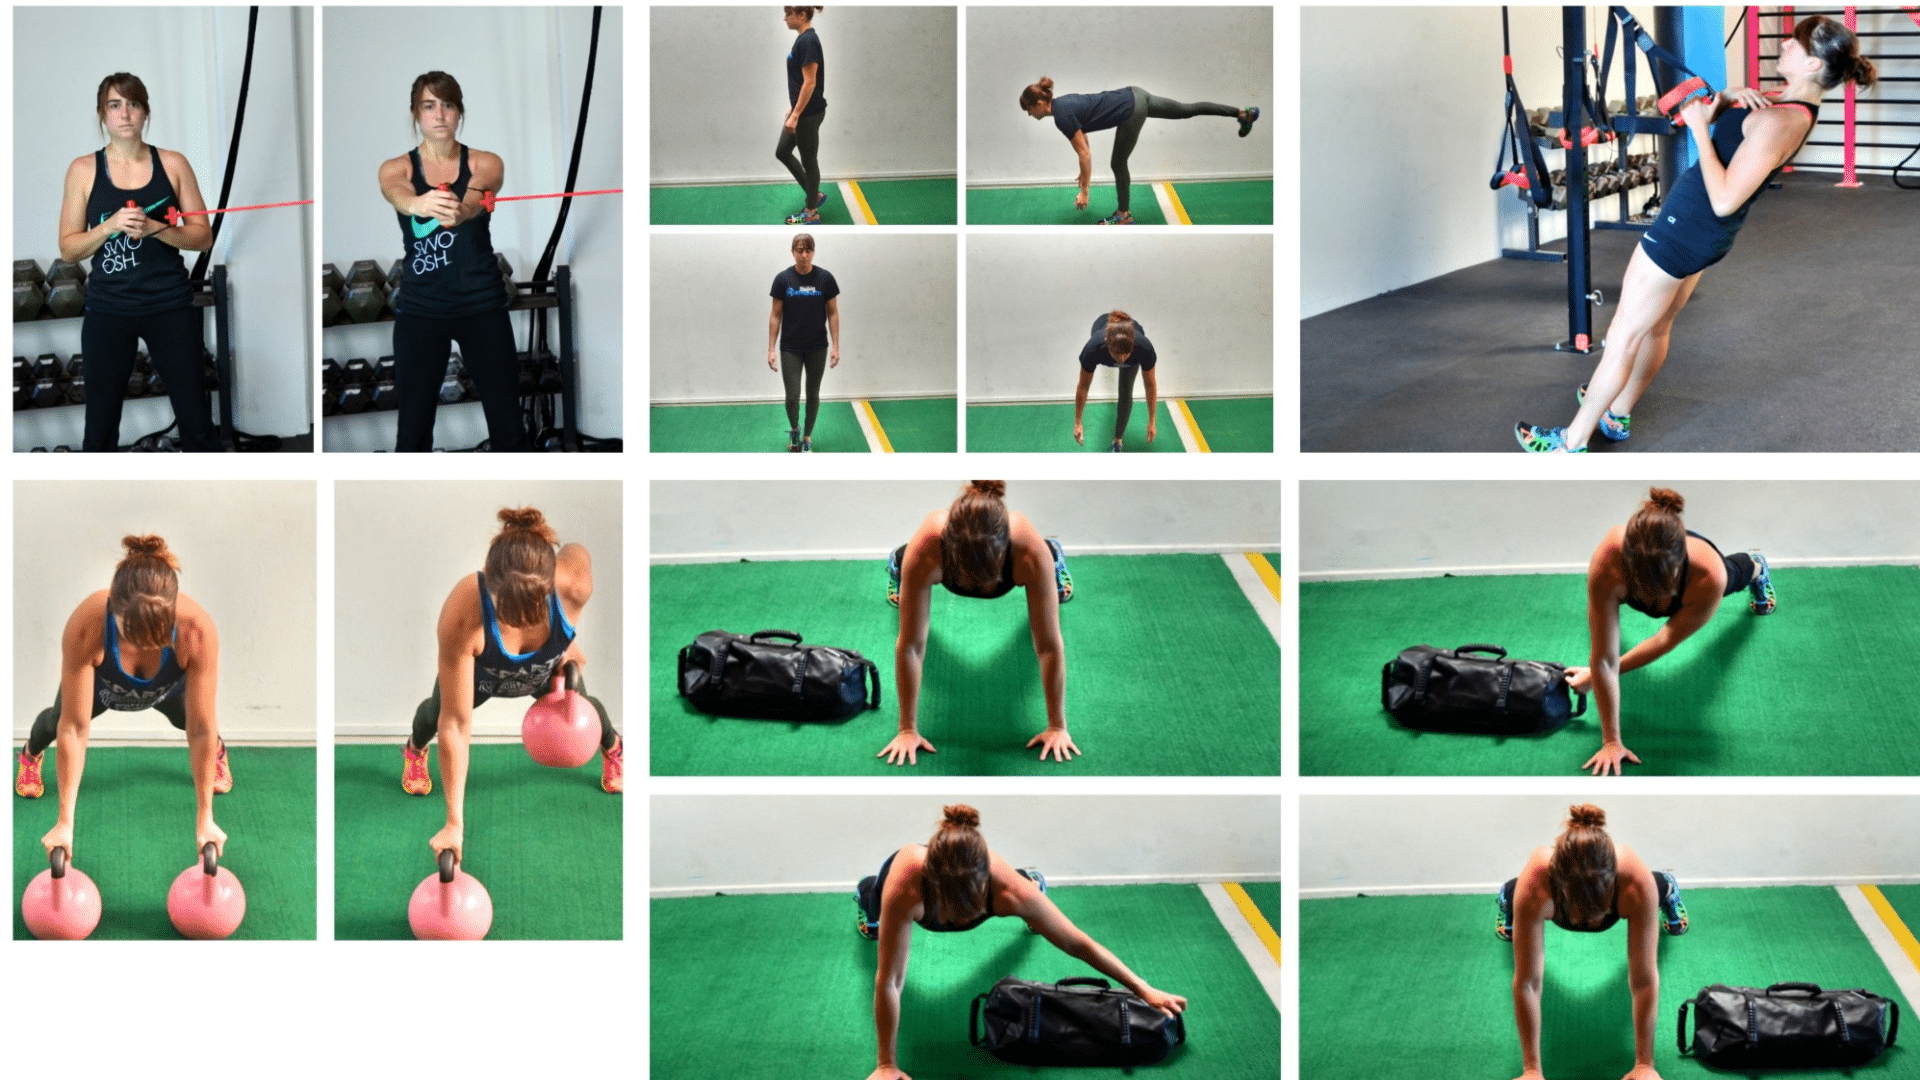
Functional strength training teaches you to move better by practicing real-world patterns: squat, hinge, push, pull, lunge, carry, and rotation. You use several joints and muscles together, including your core and stabilizers.
Expect two to three sessions per week, twenty to forty-five minutes each. Start with bodyweight, add simple gear if you have it, and keep ranges pain-free.
Focus on control, steady breathing, and clean reps. Progress by adding a little load, a rep, or slower lowering. The goal is easier daily tasks, fewer injuries, better balance, and solid strength that carries over beyond the gym, in daily life.
Functional vs. Traditional Lifting
Use this quick table to compare real-world pattern training with muscle-focused lifting and determine which approach best suits your current goal:
| Aspect | Functional Lifting | Traditional Lifting |
|---|---|---|
| Movement Patterns | Trains squat, hinge, push, pull, lunge, carry, and rotate; full-body control and stability. | Organizes by muscle groups; chest day, back day; limited movement carryover. |
| Isolation Work | Compound moves dominate; isolation is used as assistance when needed. | Isolates muscles with machines or dumbbells; easy to dose volume. |
| General Fitness | Strong for daily tasks, balance, coordination; efficient sessions; works with little gear. | Works, but functional gains may lag; often needs more equipment and time. |
| Hypertrophy Goals | Builds muscle if volume and tension are planned; add targeted accessories. | Excellent for size; high volume, focused tension, straightforward overload. |
Choose functional for daily carryover, balance, and simple full-body sessions. Choose traditional for muscle size with predictable progression. Combine both: anchor a pattern, then add one to two targeted accessories.
The Seven Movement Patterns
Before starting with exercises, it helps to know the seven movement patterns that make up most workouts. These patterns keep your training balanced and help you build strength in a safe and steady way:
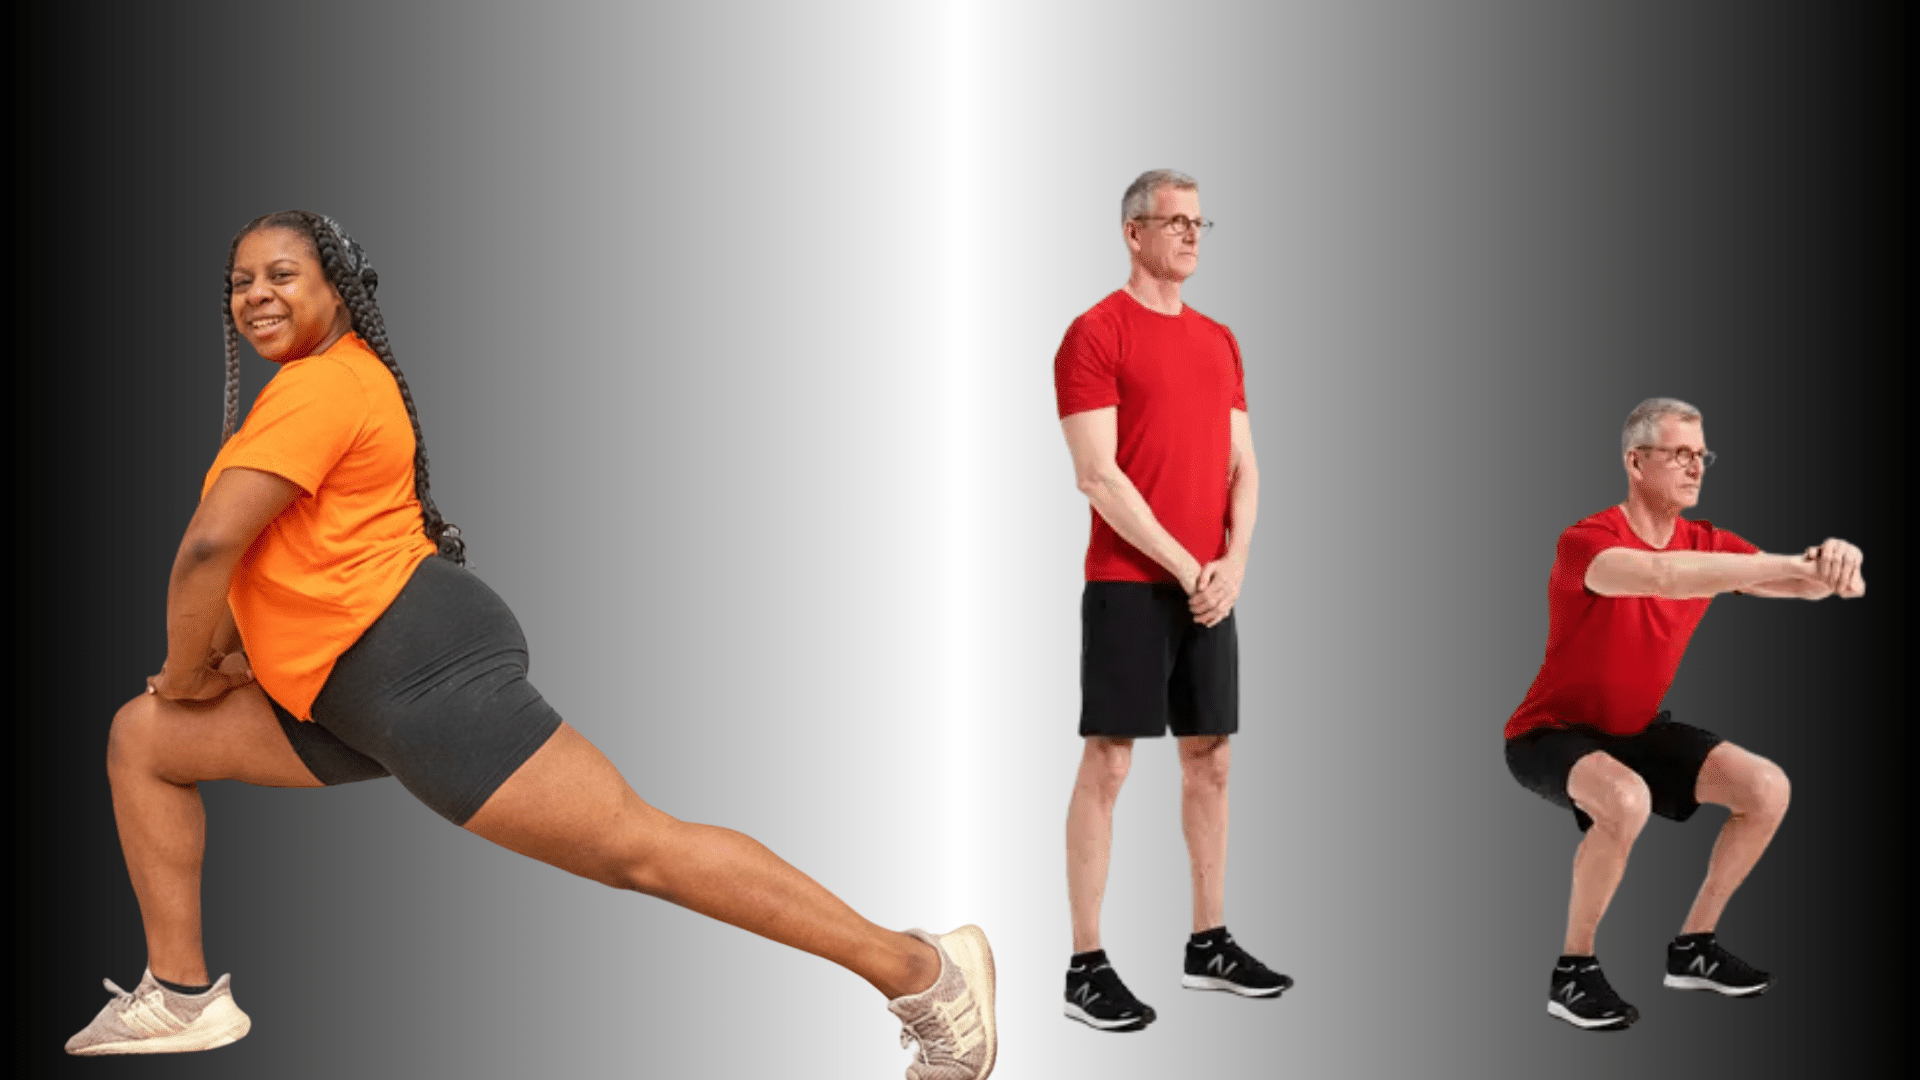
1. Squats

Think chairs, toilets, and picking up boxes. Set your feet shoulder-width apart, brace your core, and keep your knees tracking over your midfoot. Sit hips between heels, maintain a tall chest, and drive through the full foot.
Regression: box squat to a comfortable height with a pause.
Progression: goblet squat with controlled tempo before moving to front squat.
Aim for smooth depth without pain, even weight, and steady breathing on every repetition. Set stance consistently.
2. Hinge
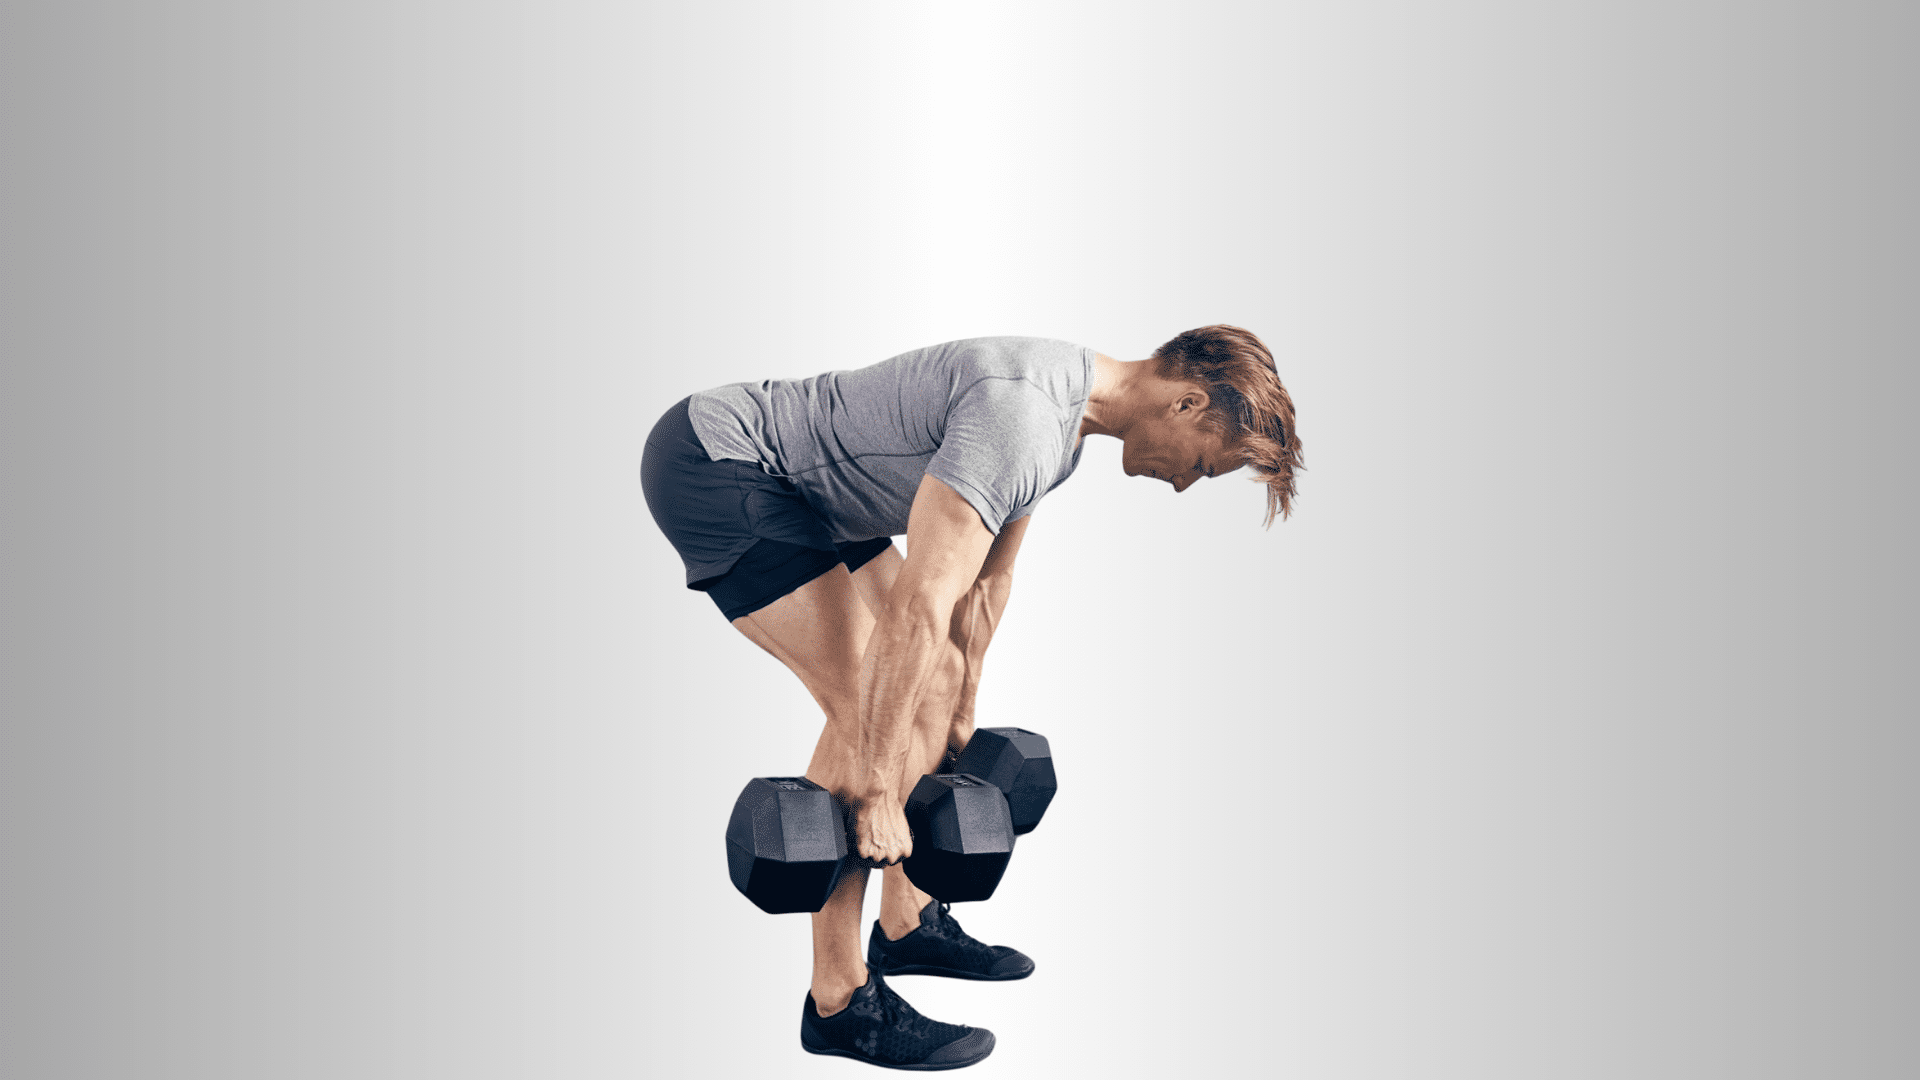
Think about picking up luggage or loading groceries. Push your hips back while keeping a neutral spine and ribs down. Soften knees, pack shoulders, and feel tension in hamstrings, not lower back.
Keep your shins near vertical and the barbell, kettlebell, or dumbbells close.
Regression: hip hinge drill against a wall, then kettlebell deadlift from blocks.
Progression: trap bar deadlift, then conventional from the floor. Move smoothly, brace before each rep, and lock out clean.
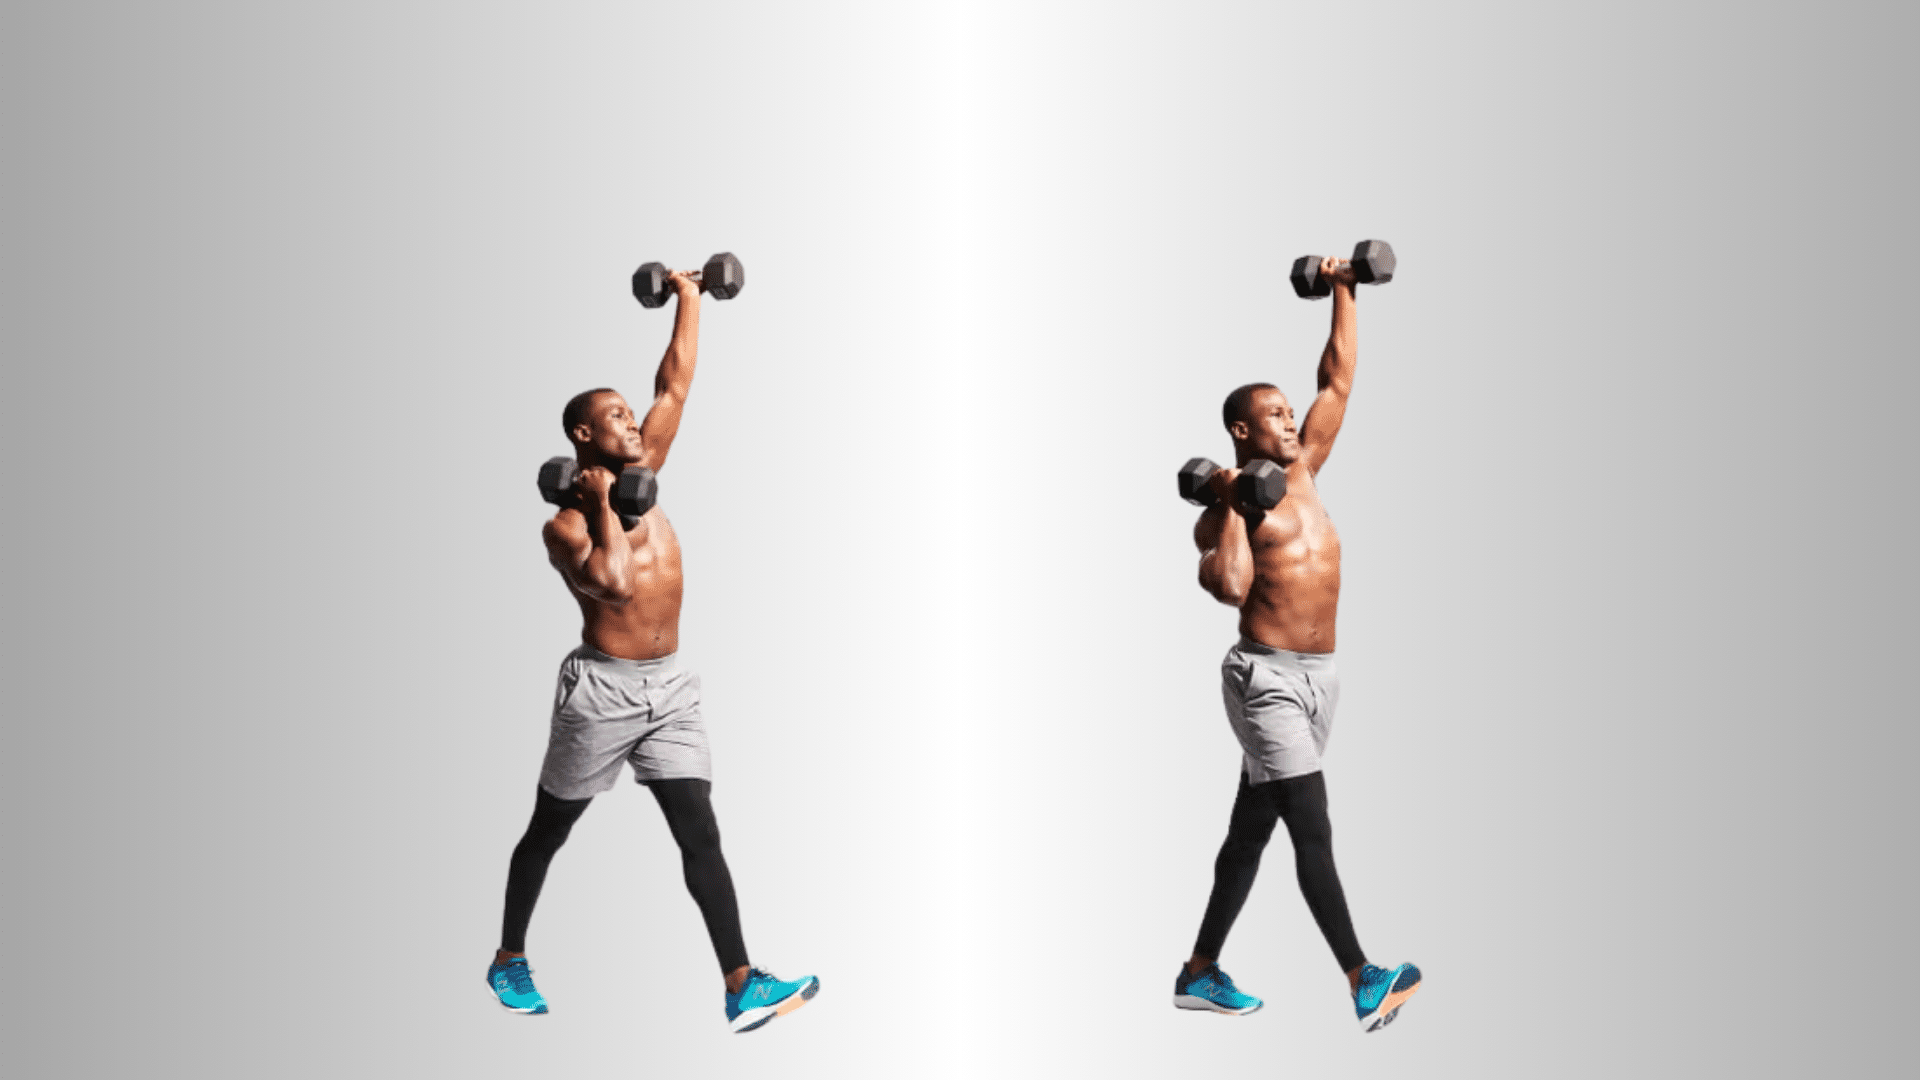
3. Push (Horizontal/Vertical)

Push covers push-ups, bench pressing, and presses overhead. Keep your wrists stacked over your hands, with elbows roughly forty to sixty degrees from the torso, when working on horizontal surfaces.
Maintain ribs down and glutes tight on vertical presses. Pack shoulders, reach at the top without shrugging.
Regression: wall or incline push-ups; half-kneeling landmine press for overhead.
Progression: floor push-ups to feet-elevated; standing dumbbell press to strict barbell press. Control lowering, pause, and press with intent.
4. Pull (Horizontal/Vertical)
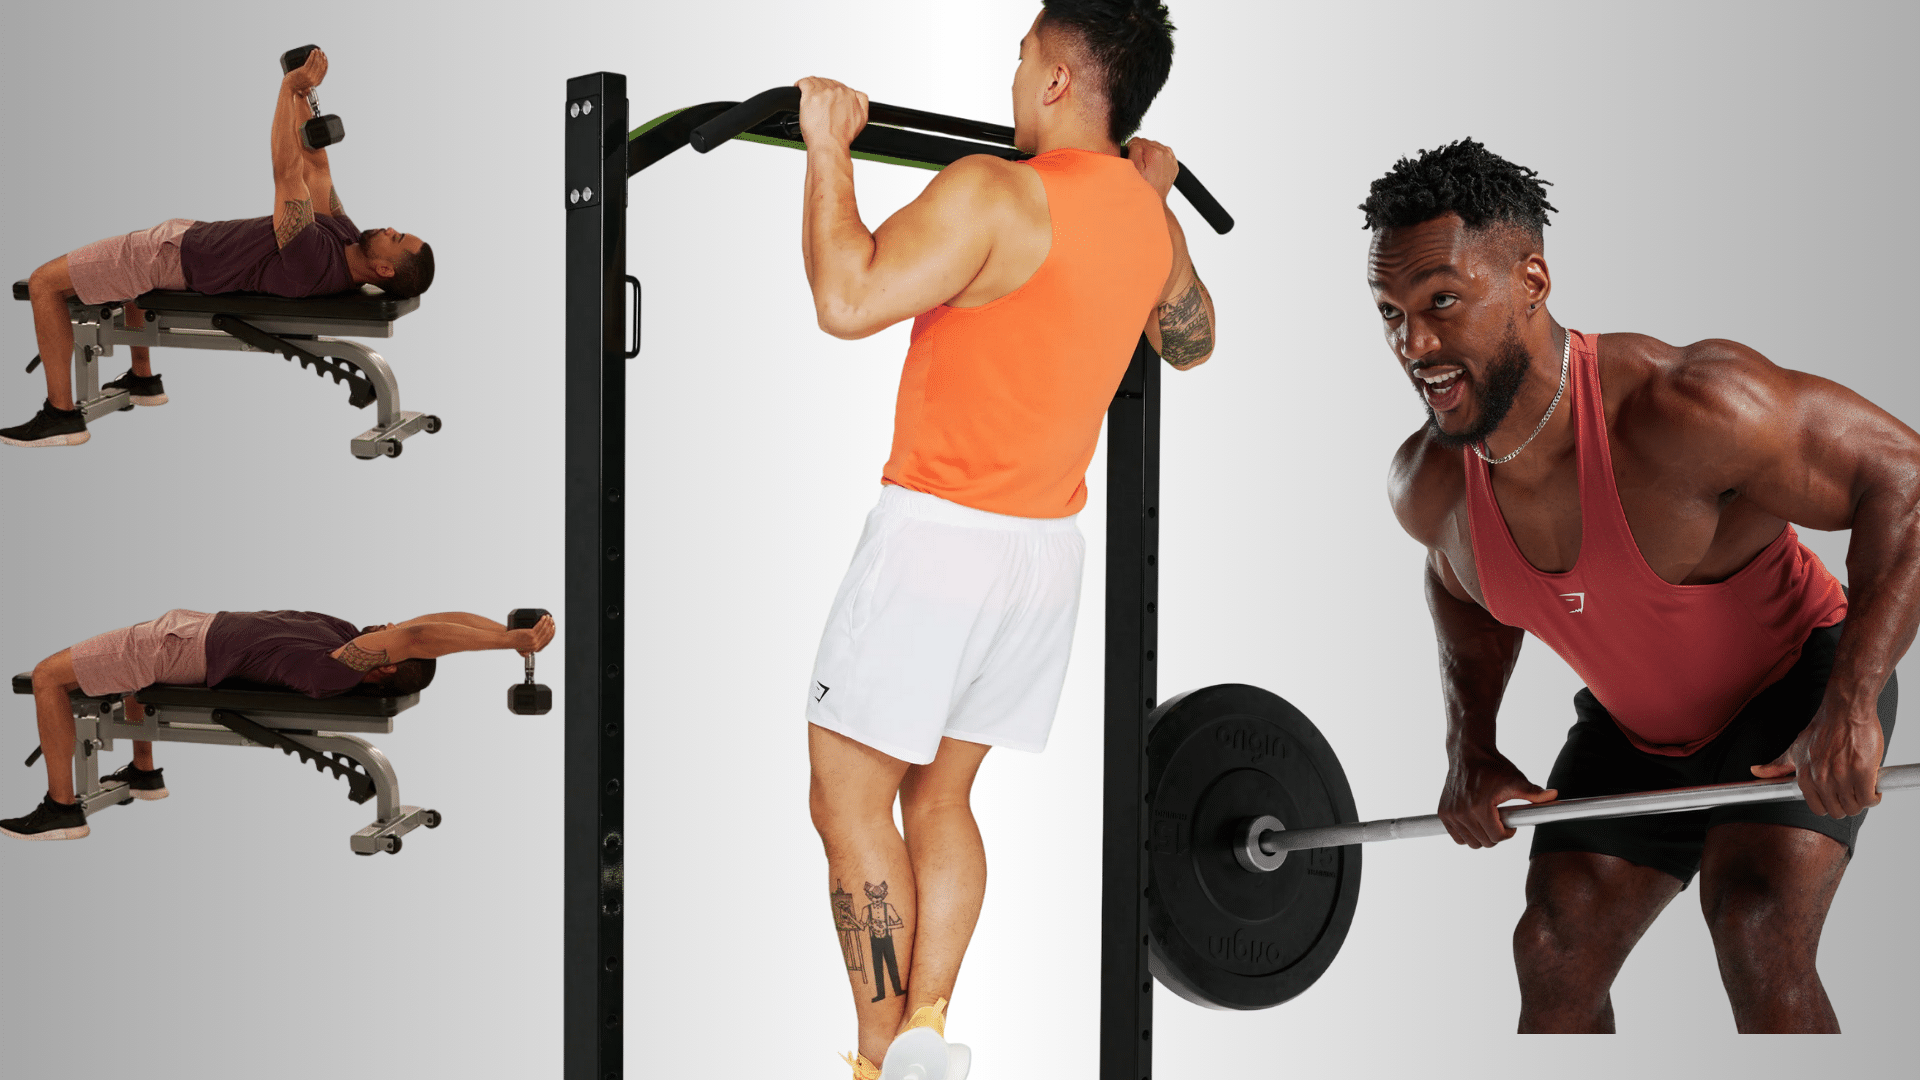
Pull covers, rows, and pull-ups. Set a neutral spine, brace lightly, and start each rep by drawing your shoulder blades toward your spine, then drive your elbows. Keep ribs down to avoid flaring.
Horizontal rows: pause with elbow near torso. Vertical pulls: think chest to bar path, not chin.
Regression: seated band row, chest-supported dumbbell row, or assisted pull-up.
Progression: inverted row, one-arm dumbbell row, bodyweight pull-up, then added weight. Control negatives.
5. Lunge/Step

Single-leg strength for stairs, hills, and getting off the floor. Keep torso tall, ribs down, and knees tracking over toes. Step or lunge with control, push the ground away, and balance through midfoot.
Regression: supported split squat holding a post or countertop; step-ups to a low box.
Progression: reverse lunge, then front-foot elevated split squat, then Bulgarian split squat.
Keep strides consistent, avoid wobbling hips, and own the bottom position.
6. Carry
Carrying builds grip, core, and posture for groceries, luggage, and toddlers. Stand tall, ribs down, chin neutral, and walk slowly with quiet feet.
Keep your shoulders packed and avoid leaning. Use even loads for the farmer, one-sided for the suitcase, and the front rack for the core challenge.
Regression: light dumbbells for short distances.
Progression: heavier farmer, longer distance, front rack, then overhead carry. Start with twenty to forty meters, turn safely, breathe through the nose.
7. Rotation/Anti-Rotation
Train your body to create and resist turning forces used in sports and daily life. Think chops, lifts, cable rotations, and the Pallof press. Square hips and ribs, brace, and move from the shoulders and hips, not the low back. Keep ranges pain-free.
Regression: tall-kneeling or half-kneeling Pallof press and cable chops.
Progression: standing chop, lift, cable rotation, then medicine ball throw. Control setup, exhale on effort, and avoid twisting knees.
Real-Life Benefits of These Movements
Training with these movement patterns doesn’t just build gym strength—it carries over into your daily life. Here are some of the changes you may start to feel as you practice them regularly:
- Daily Tasks Feel Easier: Chores, stairs, and carrying kids or groceries feel lighter as strength and coordination improve across common patterns.
- Balance and Coordination: Unstable surfaces and quick changes feel safer; single-leg work and carries train control that helps prevent stumbles.
- Posture and Mobility: Stronger hips, back, and shoulders support upright standing and freer joint motion within safe, pain-free ranges.
- Time Efficiency: Compound moves train many muscles at once, so shorter sessions still build the strength and fitness you can use.
- Weight and Metabolic Health: Bigger movements use more muscle and energy, helping manage body weight while maintaining lean tissue over time.
Who Should Take Precautions
People with current pain, recent injury or surgery, heart or blood pressure issues, pregnancy or early postpartum, dizziness, or balance problems should take extra care.
If you have joint replacements, hernias, disc symptoms, or uncontrolled diabetes, get medical clearance first.
Start with a quick screen, choose regressions, keep ranges pain-free, and stop for sharp pain, numbness, weakness, chest discomfort, or unusual breathlessness. Use stable bases, slow tempo, lighter loads, and longer rests.
Cap effort at a moderate RPE. Warm up, hydrate, and build volume. If symptoms flare after training, swelling, soreness, or sleep disruption, reduce load and seek advice from a clinician.
Equipment And Space Setup
Start where you are. A clear floor and a small area are enough for most sessions. Shoes with grip help. So does a mat. Keep water nearby. For bodyweight days, a wall, a chair, and the floor will do.
With minimal gear, store a kettlebell, a pair of dumbbells, and bands in a bin. In a full gym, use racks, benches, and cable stations when needed. Leave space to step, lunge, and carry.
Keep pathways open. Good light and airflow help you train safely and stay consistent. Use organized storage.
Prep and Quick Body Check
Before you jump into training, take a few minutes to get your body ready. A good warm-up boosts blood flow, loosens joints, and switches on the muscles you’ll need. Adding a quick check also helps you spot any tight spots or limits before starting your workout:
5-Minute Warm-Up Flow
Start with one minute of light cardio to raise heart rate and body temperature. Move through dynamic mobility: ankles, hips, thoracic spine, and shoulders.
Use controlled ranges, steady breathing, and no pain. Activate prime movers and stabilizers with simple drills: glute bridge, dead bug, band pull-apart, and scap push-up. Finish with two ramp-up sets of your first lift to dial in control.
90-Second Movement Screen
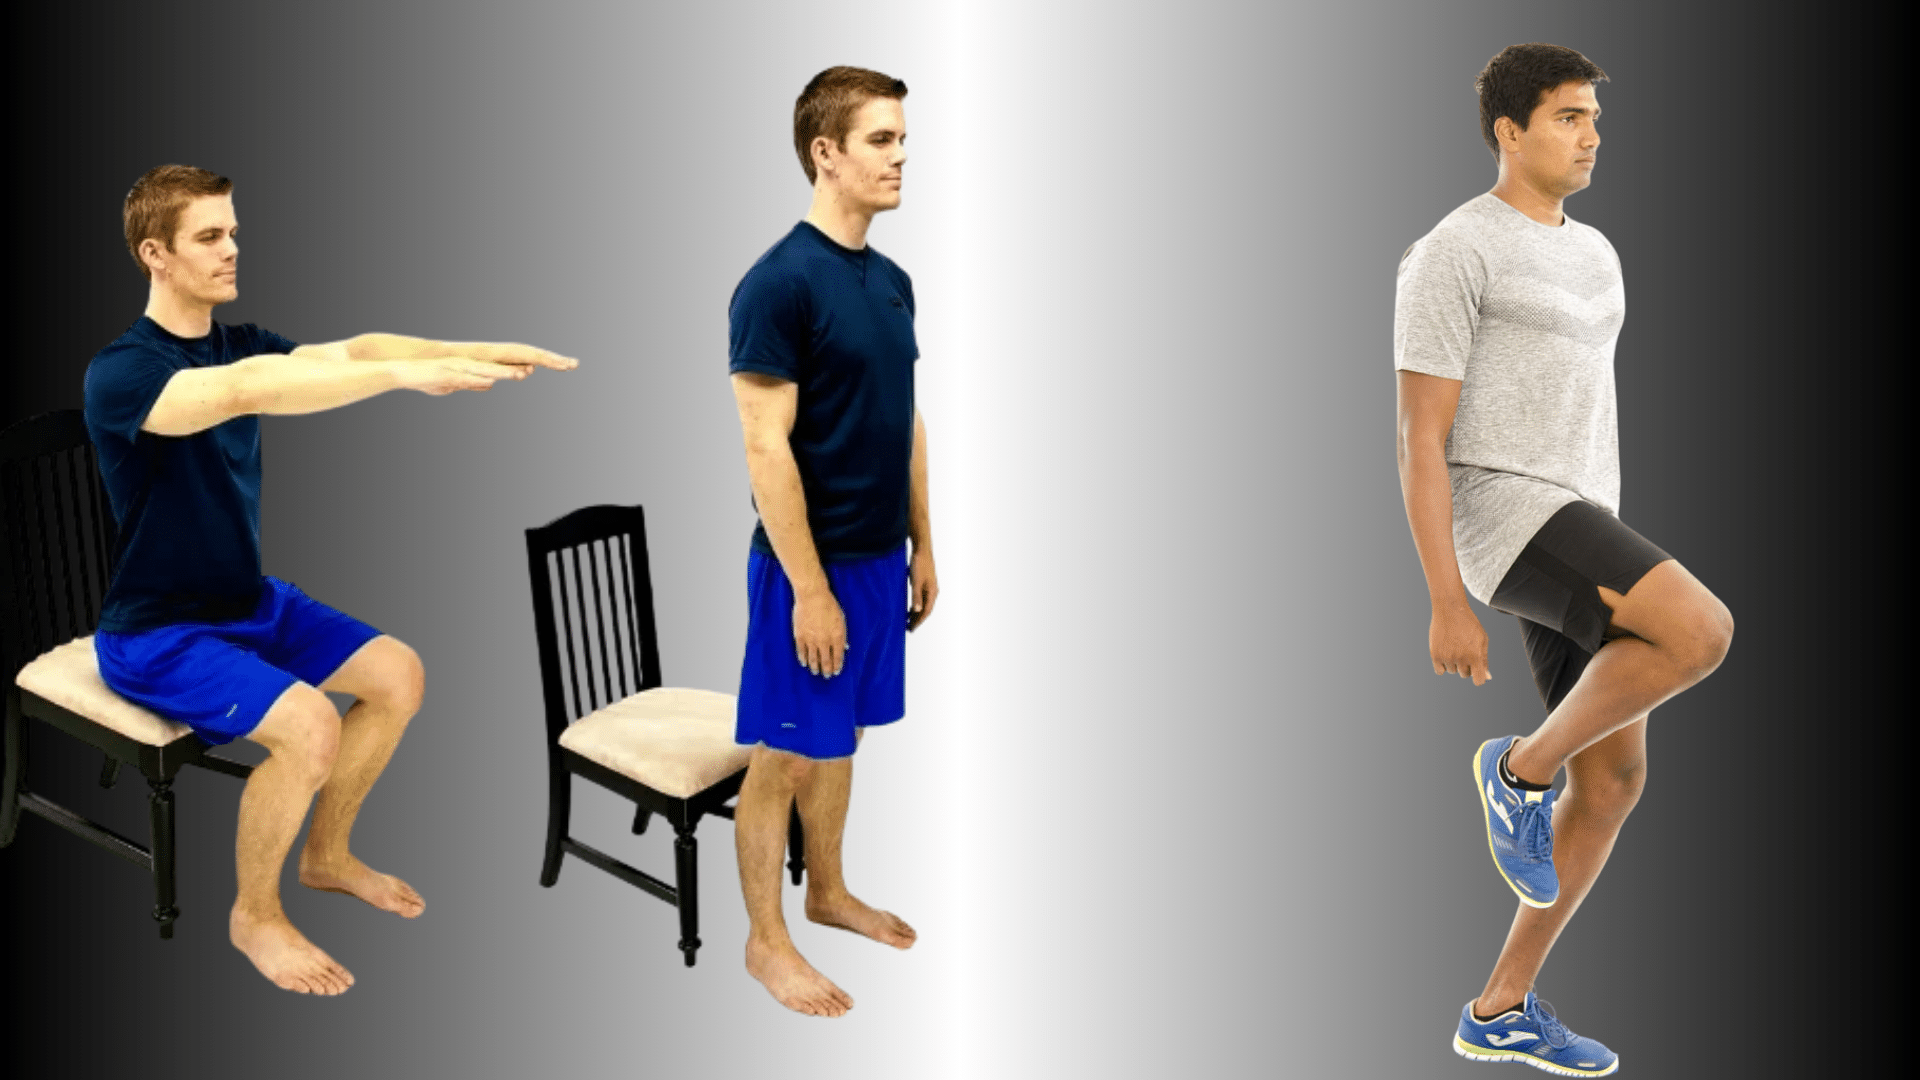
In ninety seconds, check three items. Squat to chair height: knees track over midfoot, heels down, spine neutral. Reach arms overhead: ribs stay down, no pinching.
Stand on one leg: hold for twenty seconds per side without wobbling. If a test fails, choose a regression, limit range, or add support today. Retest weekly and move up when positions feel solid.
Starter Plans (4 Weeks)
Getting started can feel tricky, but having a clear plan makes it simple. These four-week starter plans give you structure, help you build consistency, and make sure you cover the basics without feeling overwhelmed:
Beginner: 2 Days/Week
If you’re just starting out, two focused days each week is enough to build strength and learn the basics. It’s simple, manageable, and sets a strong foundation. Here is a plan you can follow:
| Day / Block | Template (Patterns → Exercise Examples) | Sets × Reps | Effort (RPE) | Week-to-Week Progress (1→4) |
|---|---|---|---|---|
| Day A Template | Squat → Goblet • Push → Incline Push-Up • Hinge → KB Deadlift • Pull → 1-Arm DB Row • Carry → Farmer • Core → Dead Bug | 3×8–10 (carries: 3×20–30 m) | 6–7 | Add 1–2 reps, then small load; extend carries by 5 m. |
| Day B Template | Hinge → KB Deadlift From Blocks • Squat → Box Squat • Vertical Push → Half-Kneel DB Press • Horizontal Pull → Band/Chest-Supported Row • Lunge → Reverse Lunge • Core → Side Plank | 3×8–10 (planks: 3×20–30 s) | 6–7 | Match Day A rules: lower box height when form stays clean. |
Intermediate: 3 Days/Week
Three days weekly for building strength: focused main lifts, supportive accessories, carries, and rotation, with planned progress and brief deload. Below is a plan that could be easy to achieve here:
| Day / Block | Template (Patterns → Exercise Examples) | Sets × Reps | Effort (RPE) | Week-to-Week Progress (1→4) |
|---|---|---|---|---|
| A/B/C Template |
Day A: Front Squat • Bench/Push-Up Variant • Inverted Row • Farmer Carry • Pallof Press Day B: Trap Bar Deadlift • Standing DB/BB Press • Pull-Up/Assisted • Split Squat • Suitcase Carry • Rotation Cable Day C: KB Swing • Goblet Squat (moderate) • Landmine/DB Press • 1-Arm Row • Step-Up • Overhead Carry |
Main lifts 4×5–8; accessories 3×8–12; carries 3×30–40 m | 7–8 mains; 6–7 accessories | W1 base → W2 +1 rep → W3 +2–5% load → W4 deload (-20% volume). |
Short On Time (20 Minutes)
If you don’t have much time, you can still fit in a quick routine. This short 20-minute plan is designed to give you the basics without feeling rushed:
| Block | Template (Patterns → Exercise Examples) | Sets × Reps / Time | Effort (RPE) | Week-to-Week Progress (1→4) |
|---|---|---|---|---|
| EMOM Option | 20-min EMOM: Min1 Push-Ups • Min2 KB Deadlift • Min3 Goblet Squat • Min4 Row • Min5 Carry (repeat 4 rounds) | 5 rounds of 1-minute blocks | 6–7 | Start manageable reps; add 1 rep each minute weekly. |
| AMRAP Option | 20-min circuit: 6 Push-Ups • 8 Goblet Squats • 10 KB Deadlifts • 12 Rows • 20 m Farmer Carry (repeat) | As many quality rounds as possible | 6–7 | Add one rep per move weekly or a small load increase. |
Progress by small, steady changes. Keep reps smooth, ranges pain-free, and form crisp. Deload in week four if fatigue builds.
Common Mistakes to Avoid
Avoid these common errors to keep progress steady, stay safe, and get results without aches, stalls, or wasted sessions consistently:
- Program hopping instead of following one plan.
- Skipping warm-up or quick screen.
- Loading fast before the form is clean.
- Skipping hinge or carry patterns.
- Training to failure every session.
- Rushing reps with no control.
- Pushing through pain to chase depth.
- Poor bracing or breath holding.
- Adding too many new moves at once.
- No deload week or recovery plan.
Avoiding these mistakes makes the process smoother and more effective. Keep it simple, listen to your body, and focus on making choices that support your overall well-being.
Conclusion
For me, what functional strength training is at the core has always been about making life feel lighter, smoother, and safer.
When you train these real-world movement patterns, you’ll notice your balance improves, your posture straightens, and your daily tasks feel less demanding. You don’t need endless hours or fancy gear, just steady practice and clean reps.
If you focus on small progress, you’ll build strength you can count on well beyond the gym. I hope this gave you clear steps to start your own plan.
If you’re ready to keep learning, check out my other blogs for more ways to train smarter and feel stronger.